Fuel Tank: Installation
- Install fuel tank insulators on top of fuel tank. Raise fuel tank while guiding fuel filler hose and vent hose into position. Reconnect EVAP and fuel lines to fuel tank. Reconnect electrical connections to fuel tank. Install fuel tank straps. Install fuel tank strap fasteners and alternately tighten to specification. See TORQUE SPECIFICATIONS .
- Reinstall fuel filler neck and vent hose at fuel tank. Tighten fuel filler neck hose clamp and vent hose clamp at fuel tank to specification. Reinstall left rear splash shield. Reinstall fuel tank shield and tighten retaining bolts to specification. See Figure. Lower vehicle.
- Reconnect negative battery cable. Add fuel as necessary. Reinstall fuel cap. Turn ignition switch to ON position for 2 seconds. Turn ignition switch to OFF position for 10 seconds. Turn ignition switch to ON position. Check for fuel leaks. Repair as necessary.
- Install fuel tank insulators on top of fuel tank. Raise fuel tank while guiding fuel filler hose and vent hose into position. Install fuel tank straps. Install fuel tank strap fasteners and alternately tighten to specification. See TORQUE SPECIFICATIONS . Reconnect EVAP and fuel lines to fuel tank. See FUEL LINE DISCONNECT FITTINGS .
- Reconnect electrical connections to fuel tank. Reconnect vent hose to rollover valve at front of fuel tank. Reconnect vent hoses to fuel limiter vent valve. Reinstall fuel filler neck and vent hose at fuel tank. Tighten all hose clamps to specification. Reinstall fuel tank shield and tighten retaining bolts to specification (if equipped). See Figure. Lower vehicle.
- Reconnect negative battery cable. Add fuel as necessary. Reinstall fuel cap. Turn ignition switch to ON position for 2 seconds. Turn ignition switch to OFF position for 10 seconds. Turn ignition switch to ON position. Check for fuel leaks. Repair as necessary.
- Install fuel tank insulators on top of fuel tank. Raise and support fuel tank to within 2" (50.8 mm) of final position. Reconnect EVAP and fuel lines to fuel tank at fuel sending unit. See FUEL LINE DISCONNECT FITTINGS .
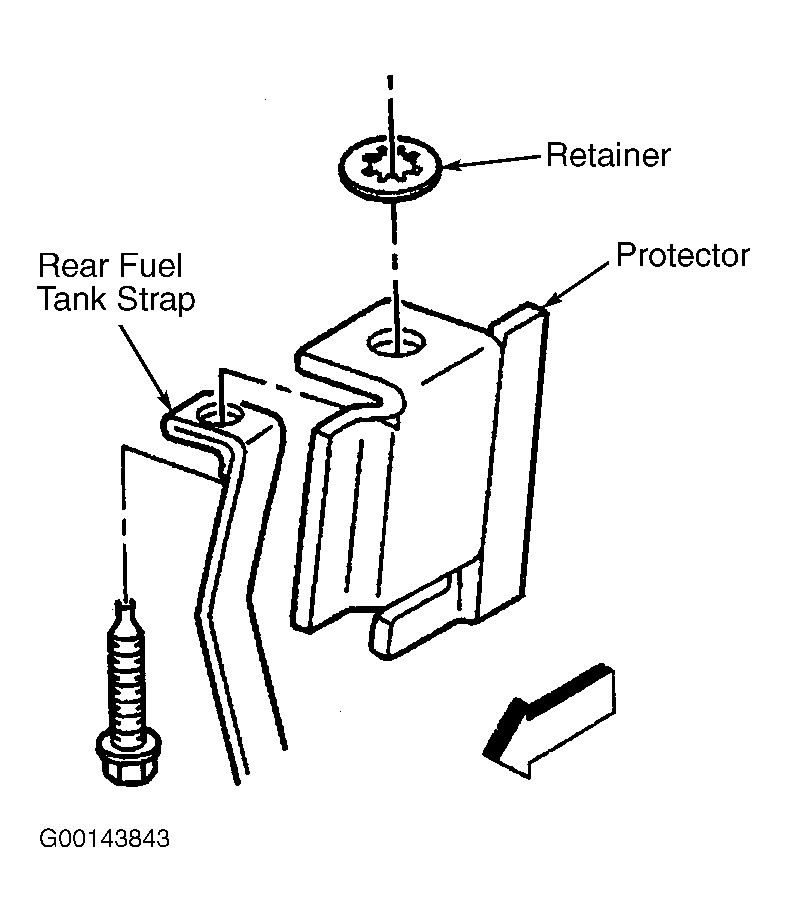
- Reconnect electrical connections to fuel tank. Reconnect EVAP pipe to rollover valve. Install rear fuel tank strap, protector, bolt and retainer to the crossmember. See Fig 1. Tighten rear fuel tank strap-to-crossmember bolt to specification. See TORQUE SPECIFICATIONS .
- Install rear fuel tank strap-to-frame bolt and tighten to specification. Push rear fuel tank shield onto horizontal flange of fuel tank (if equipped). Install front fuel tank shield, washer and nut and tighten to specification (if equipped). See Figure.
- On 4WD models equipped with underbody shield package, install the fuel tank shield to the fuel tank strap bolt, using the nut and washer. See Figure. Install the 2 fuel tank shield-to-frame bolts and tighten to specification. Install the fuel tank shield-to-crossmember bolts and nuts and tighten to specification.
- On all models, remove caps from openings of fuel tank. Connect fuel filler pipe hose and vent hose at fuel tank. Tighten fuel filler pipe hose clamp and vent hose clamp at fuel tank to specification. Connect fuel filler pipe ground strap to frame and tighten screw to specification.
- Lower vehicle. Install the 3 fuel filler pipe-to-truck bed screws and tighten to specification. Reconnect negative battery cable. Add fuel as necessary. Reinstall fuel cap. Turn ignition switch to ON position for 2 seconds. Turn ignition switch to OFF position for 10 seconds. Turn ignition switch to ON position. Check for fuel leaks. Repair as necessary.
 Courtesy of GENERAL MOTORS CORP.