Channel Plate Assembly: Reassembly
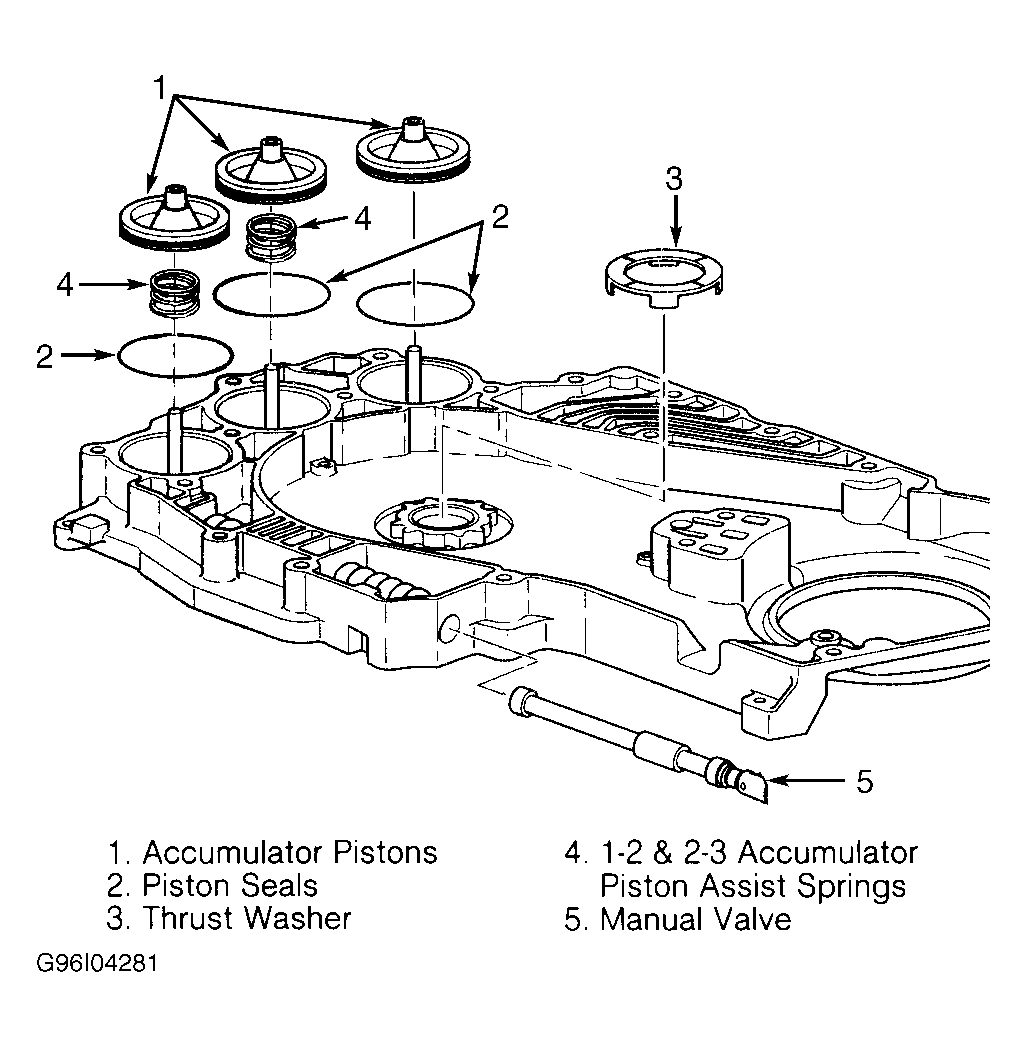
- Install 3 NEW accumulator piston seals. Install 1-2 and 2-3 accumulator assist springs. Coat piston seals with petroleum jelly. Install accumulator pistons into channel plate over guide pins. Pistons are identical and can be assembled in any of 3 accumulator bores.
- Install 3 accumulator springs into transaxle case accumulator bores. See Figure
. The 1-2 accumulator spring is slightly taller than other 2 springs and is installed in bore closest to electrical pass-thru connector.
- Coat channel plate thrust washer with petroleum jelly. Install channel plate-to-drive sprocket thrust washer onto channel plate. Install NEW channel plate-to-transaxle case gasket. Install channel plate assembly onto transaxle case. Channel plate should fit tightly over guide pins located on transaxle case.
- Install 8 channel plate-to-transaxle case bolts, and 2 channel plate-to-driven sprocket support bolts. Tighten 2 bolts located at 1 o'clock and 5 o'clock positions near axle shaft seal to 10.5 ft. lbs. (14 N.m). Tighten all other bolts to 106 INCH lbs. (12 N.m). See Figure
.
- Install manual valve into channel plate. Connect manual valve link to both manual valve and detent lever. Install manual valve clip onto manual valve. See Figure
.
 Courtesy of GENERAL MOTORS CORP.