Basic Function Test
- Lock and unlock door 3 times, using inside door lock switches. Stand about 3 feet from outside driver's door handle. Point remote transmitter toward vehicle. Press one remote transmitter button for about one second. If doors lock and unlock, system is okay. If doors do not lock and unlock, go to next step.
- Replace remote transmitter battery and repeat step 1. If keyless entry operates, system is okay at this time. If keyless entry does not operate, go to next step.
- Insert key in ignition switch and then remove. Insert key again and turn ignition switch to OFF, ON and OFF positions within 5 seconds. Within next 30 seconds, turn ignition switch to OFF, ON and OFF positions 9 times. System is now in self-diagnostic mode. If taillights flash for .2 seconds, pause, then flash for .5 seconds, go to step 6. If taillights do not flash, go to next step.
- Verify method used to enter into self-diagnostic mode was completed correctly. If method is not correct, repeat step 3. If method was completed correctly, check function of taillights. See EXTERIOR LIGHTS
article. If taillight operation is okay, use DVOM to check for voltage at wireless door control receiver terminal No. 5 (Red wire). If 10-14 volts are present, go to next step. If 10-14 volts are not present, check for blown MPX-B (7.5-amp) fuse or open circuit in Red wire between MPX-B fuse and wireless door control receiver. See WIRING DIAGRAMS .
- Check for continuity to ground on White/Black wire between wireless door control receiver terminal No. 1 and ground. If continuity exists, replace wireless door control receiver. If continuity does not exist, repair faulty circuit as necessary.
- Verify remote transmitter operation by pressing each button and watching taillights flash. LOCK switch should flash taillights for .2 seconds, off for .5 and on for .2 seconds. UNLOCK switch should flash taillights for .2 seconds, off for .2 seconds and on for .2 seconds. If remote transmitter is not recognizing a code or is out of synchronization, taillights will stay on the whole time while receiving data. If LOCK and UNLOCK functions operate correctly, go to next step. If taillights flash only while receiving data, go into add or rewrite mode. See VEHICLE ACCESS CODE PROGRAMMING under PROGRAMMING. If taillights are still not flashing, go to step 8.
- Press any switch on remote transmitter and hold for 20 seconds while walking around vehicle. Press button again. Verify range is a minimum of 3 feet from vehicle. If remote transmitter range is as specified, keyless door lock remote transmitter and receiver are normal. If remote transmitter range is not as specified, check range with another remote transmitter. If range is as specified, replace remote transmitter. If range is still not as specified, replace body control ECU. See BODY CONTROL ECU under REMOVAL & INSTALLATION.
- Press each switch of existing or replacement remote transmitter programmed for this vehicle. If one remote transmitter causes vehicle to properly respond, replace other faulty remote transmitter(s). If both remote transmitters fail to respond, go to next step.
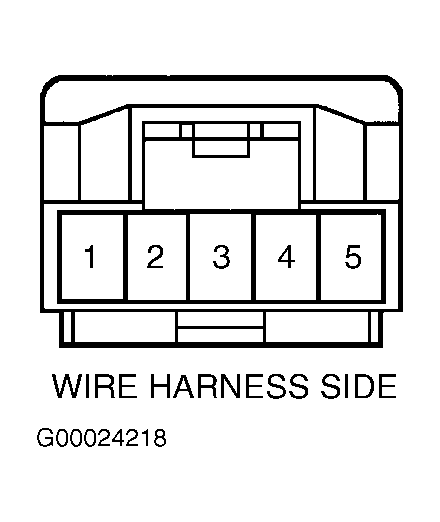
- Check continuity in Red/Black wire between body control ECU connector terminal B7-9 and terminal No. 3 at wireless door control receiver. Check continuity in Purple wire between body control ECU connector terminal B7-10 and terminal No. 2 at wireless door control receiver. See Fig 1-Fig 2
. If continuity does not exist on either circuit, repair open or short circuit as necessary. If continuity exists on both circuits, go to next step.
- Measure voltage between ground and terminal No. 9 (Red/Black wire) at body control ECU harness connector when activating remote transmitter. If 6-7 volts exists when transmitting, go to next step. If 6-7 volts does not exist while transmitting, repair open circuit in Purple wire between body control ECU connector terminal B7-10 and terminal No. 2 at wireless door control receiver. See WIRING DIAGRAMS .
- Check continuity between body ground and terminal No. 1 (White/Black wire) at wireless door control receiver harness connector. If continuity exists, replace wireless door control receiver located under rear of center console. See Figure. If continuity does not exist, repair open in White/Black wire between terminal No. 1 at wireless door control receiver and ground.
 Courtesy of © TOYOTA, LICENSE AGREEMENT TMS1002
 Courtesy of © TOYOTA, LICENSE AGREEMENT TMS1002