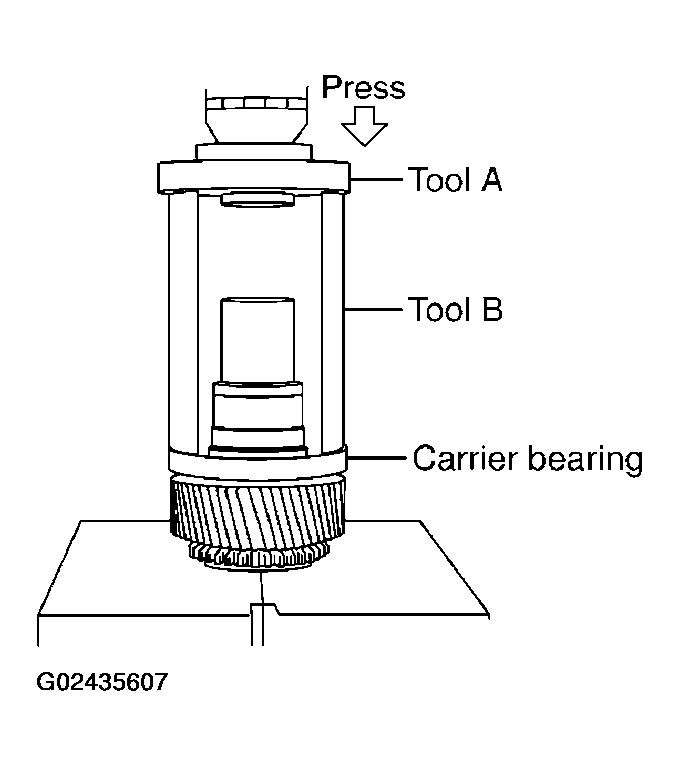
- Install the carrier bearing to the sun gear, using Tools.
- Tool number: A: ST30911000 (-)
- B: KV31103300 (-)
 Courtesy of NISSAN MOTOR CO., U.S.A.
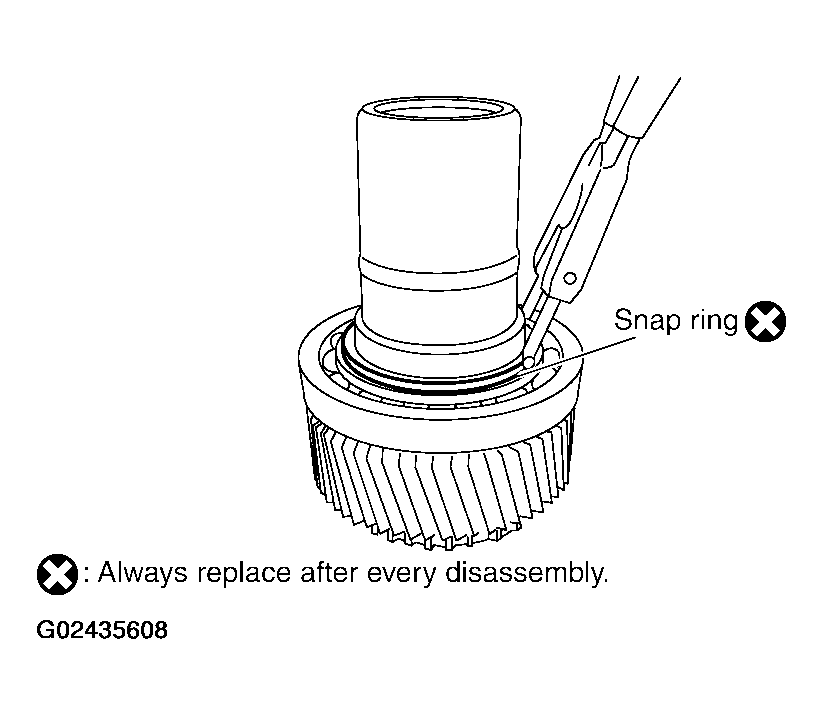
- Install the snap ring to the sun gear assembly, using suitable tool.
CAUTION:
Do not reuse snap ring.
 Courtesy of NISSAN MOTOR CO., U.S.A.
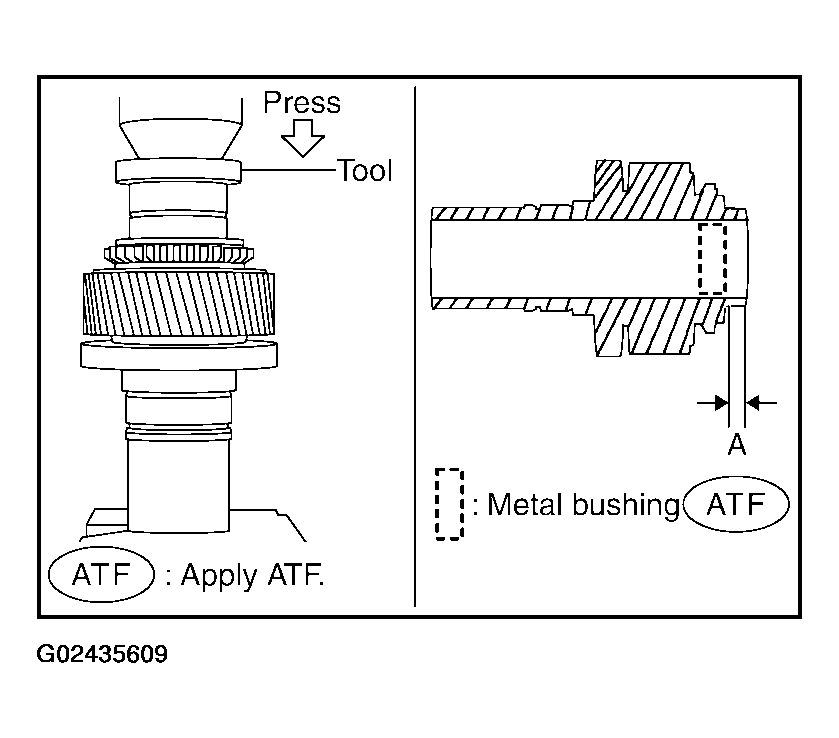
- Apply ATF to the circumference of the metal bushing and install it to the sun gear assembly, using Tool.
- Tool number: ST35300000 (-)
- Dimension A: 7.7 - 8.3 mm (0.303 - 0.327 in)
 Courtesy of NISSAN MOTOR CO., U.S.A.
CAUTION:
- Do not reuse metal bushing.
- Apply ATF to metal bushing before installing.
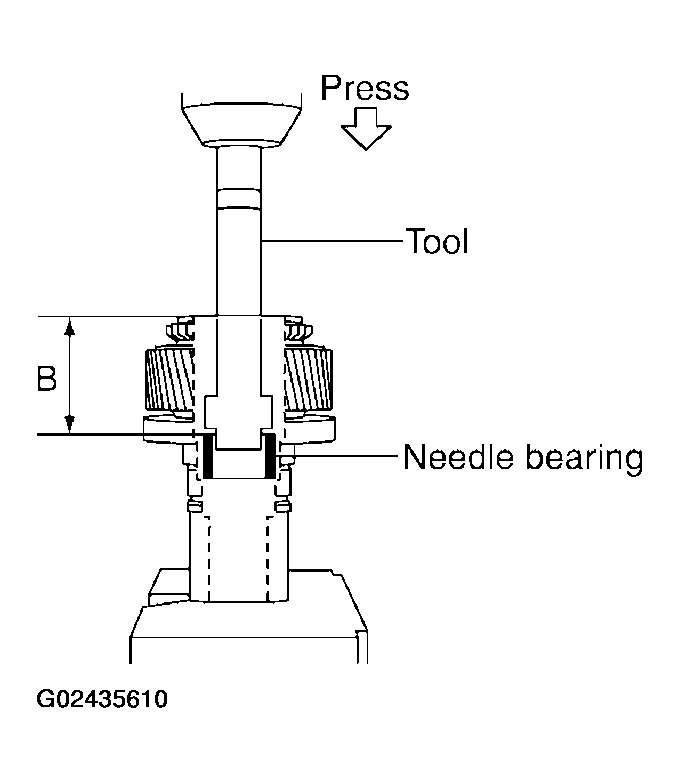
- Apply ATF to the needle bearing and install it to the sun gear assembly, using Tool.
- Tool number: ST33220000 (-)
- Dimension B: 62.5 - 63.1 mm (2.461 - 2.484 in)
 Courtesy of NISSAN MOTOR CO., U.S.A.
CAUTION:
- Do not reuse needle bearing.
- Apply ATF to needle bearing before installing.
- Install the sun gear assembly to the planetary carrier assembly.
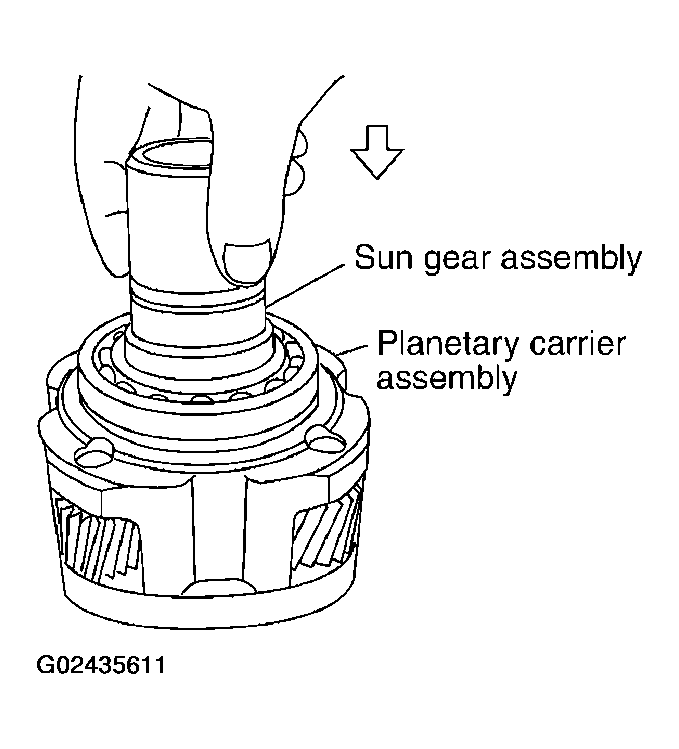 Courtesy of NISSAN MOTOR CO., U.S.A.
- Install the snap ring to the planetary carrier assembly.
CAUTION:
Do not reuse snap ring.
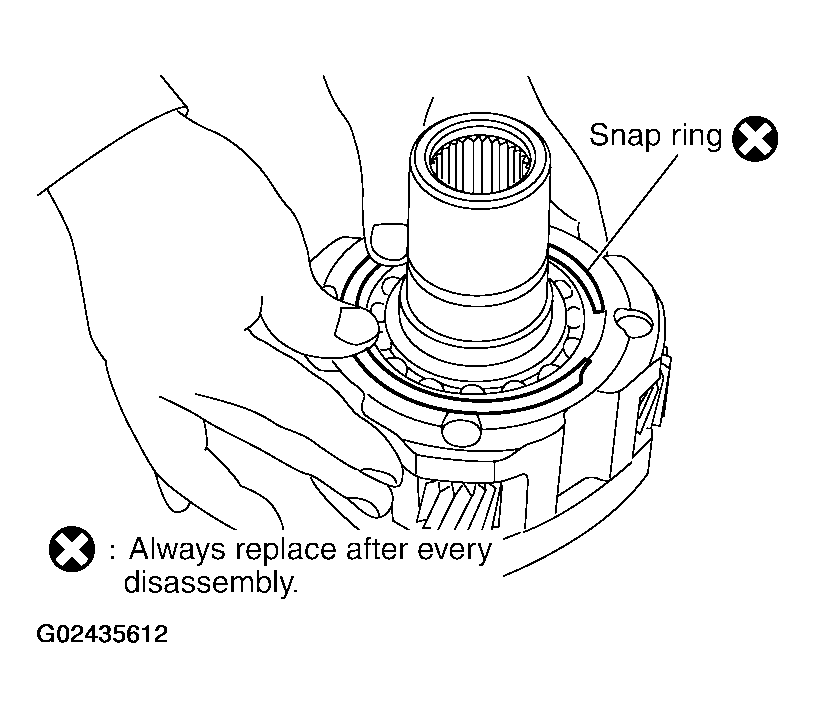 Courtesy of NISSAN MOTOR CO., U.S.A.
- Set the mainshaft front bearing into the front case and install, using Tool.
- Tool number: ST30720000 (J-25405)
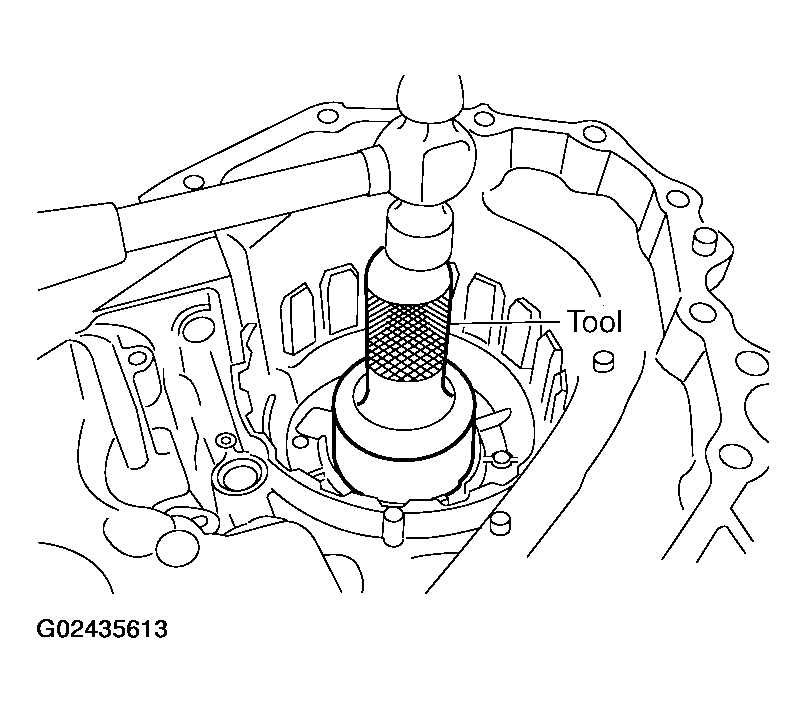 Courtesy of NISSAN MOTOR CO., U.S.A.
- Install the snap ring into the front case.
CAUTION:
Do not reuse snap ring.
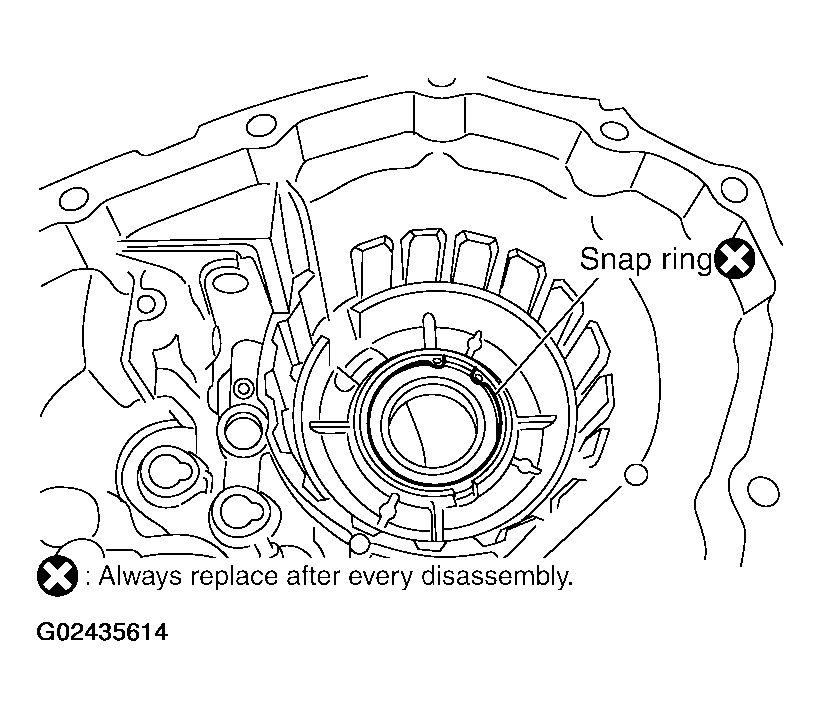 Courtesy of NISSAN MOTOR CO., U.S.A.
- Install the internal gear with its groove facing the snap ring into the front case. Then secure it with the snap ring.
CAUTION:
Do not reuse snap ring.
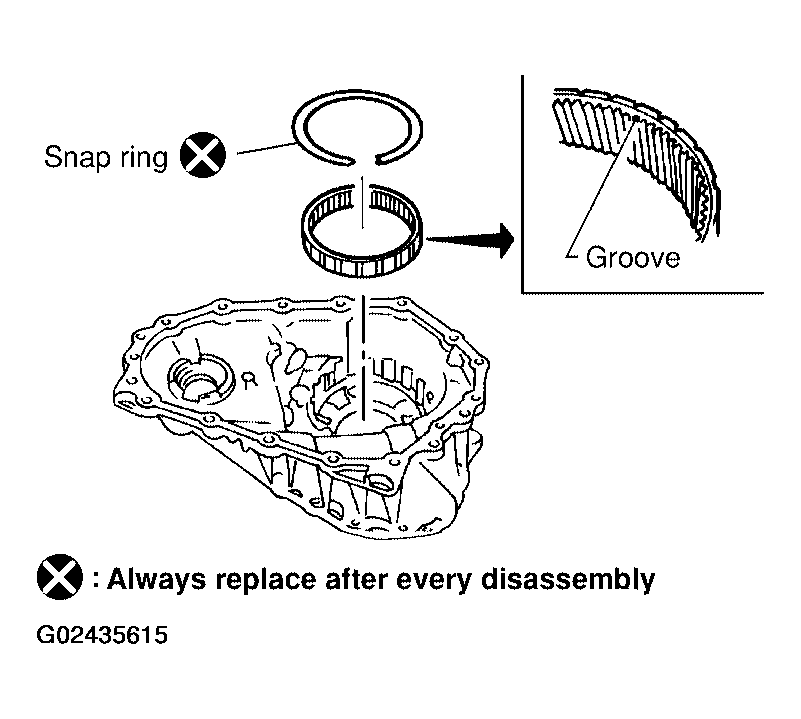 Courtesy of NISSAN MOTOR CO., U.S.A.
- Install the oil seal until it is seated flush with the end face of the front case, using Tool.
- Tool number: KV38100500 (-)
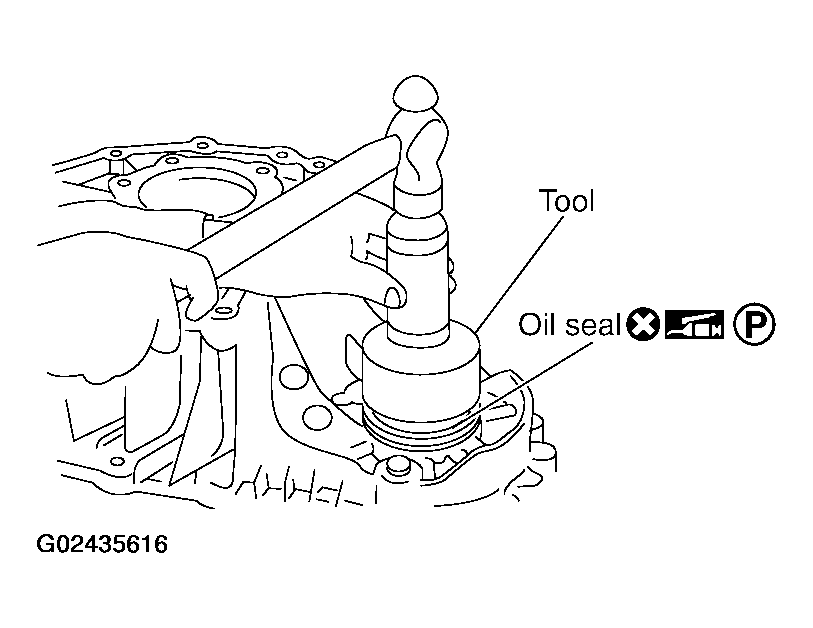 Courtesy of NISSAN MOTOR CO., U.S.A.
CAUTION:
- Do not reuse oil seal.
- Apply petroleum jelly to oil seal lip before installing.
- Install the planetary carrier assembly and sun gear assembly to the front case, using Tool.
- Tool number: ST33200000 (J-26082)
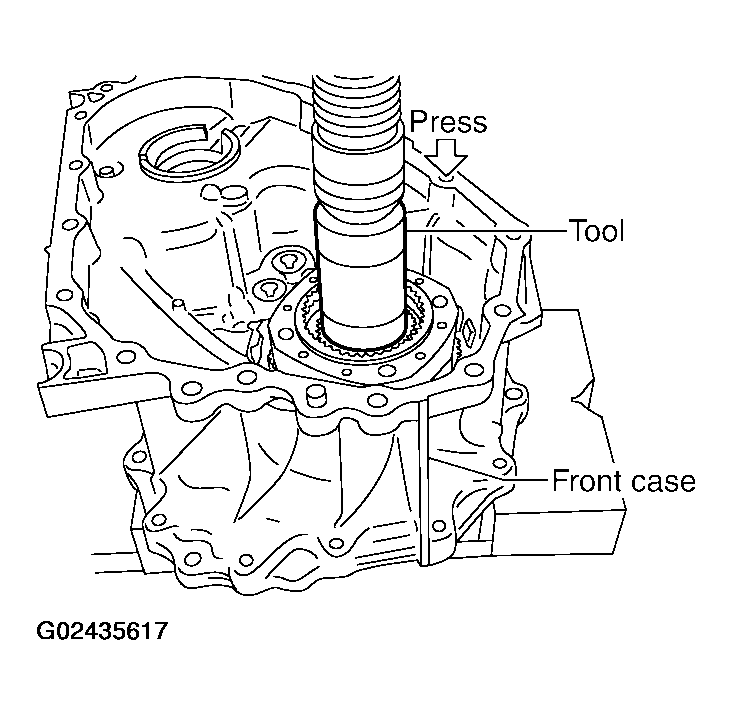 Courtesy of NISSAN MOTOR CO., U.S.A.
- Install the snap ring to the sun gear assembly.
CAUTION:
Do not reuse snap ring.
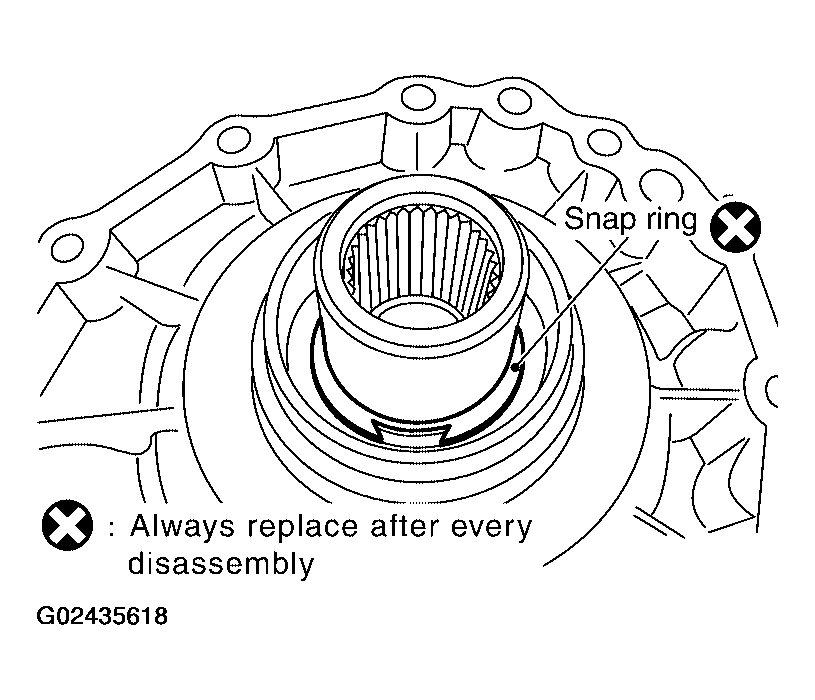 Courtesy of NISSAN MOTOR CO., U.S.A.
- Apply petroleum jelly to the circumference of the oil seal, and install it to the front case, using Tools.
- Tool number: A: ST30720000 (J-25405)
- B: ST33200000 (J-26082)
- Dimension: 4.0 - 4.6 mm (0.157 - 0.181 mm)
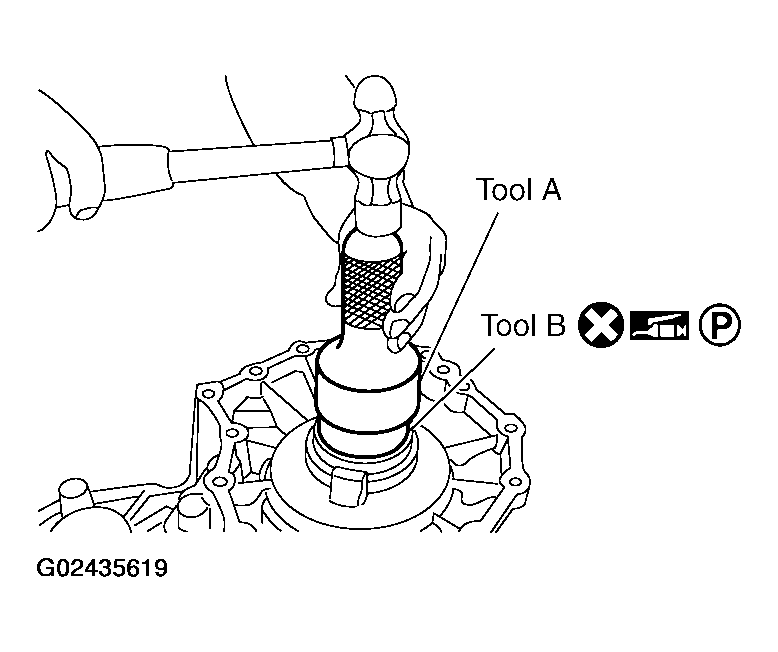 Courtesy of NISSAN MOTOR CO., U.S.A.
CAUTION:
- Do not reuse oil seal.
- Apply petroleum jelly to oil seal.
- Install the fork guide, shift fork spring, 2-4 fork, and L-H fork to the shift rod, and secure them with retaining pins.
CAUTION:
Do not reuse retaining pins.
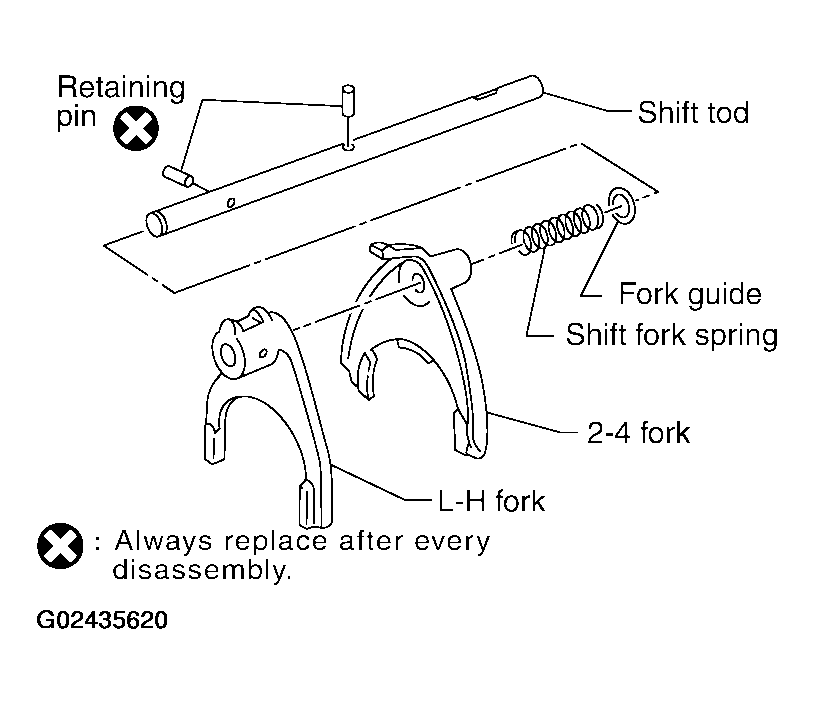 Courtesy of NISSAN MOTOR CO., U.S.A.
- Install the 2-4 sleeve and L-H sleeve to each fork.
- Install the shift cross to the front case.
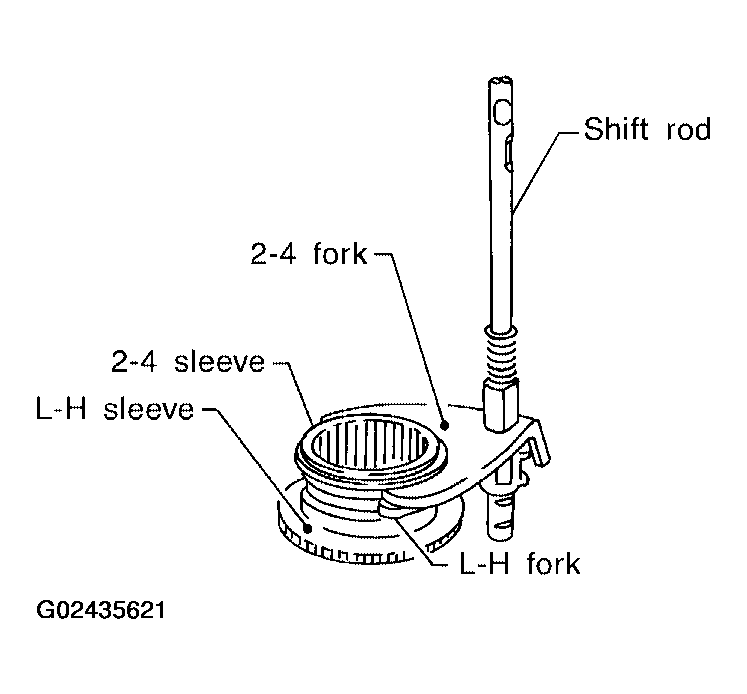 Courtesy of NISSAN MOTOR CO., U.S.A.
- While aligning the L-H sleeve with the planetary carrier, install the shift rod assembly to the front case.
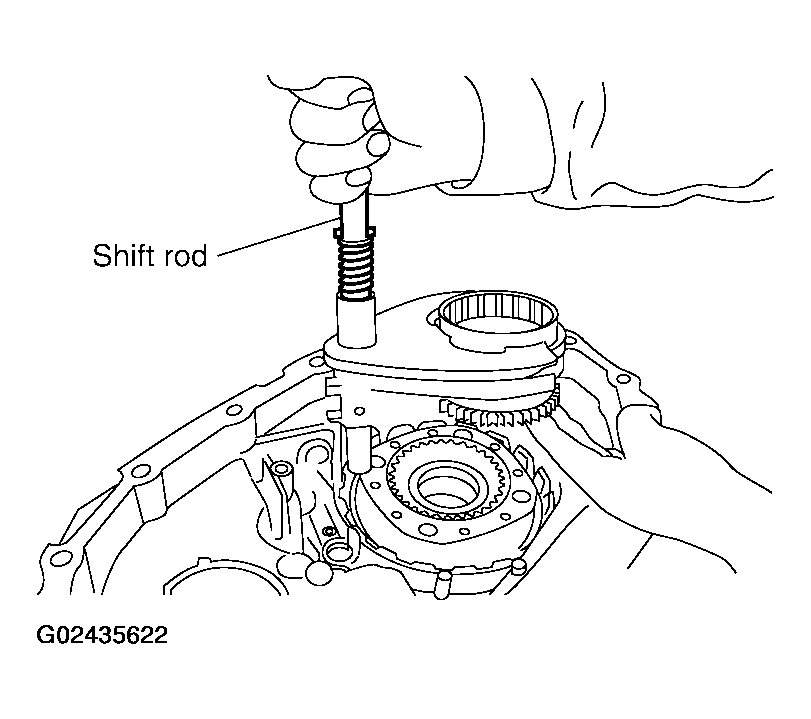 Courtesy of NISSAN MOTOR CO., U.S.A.
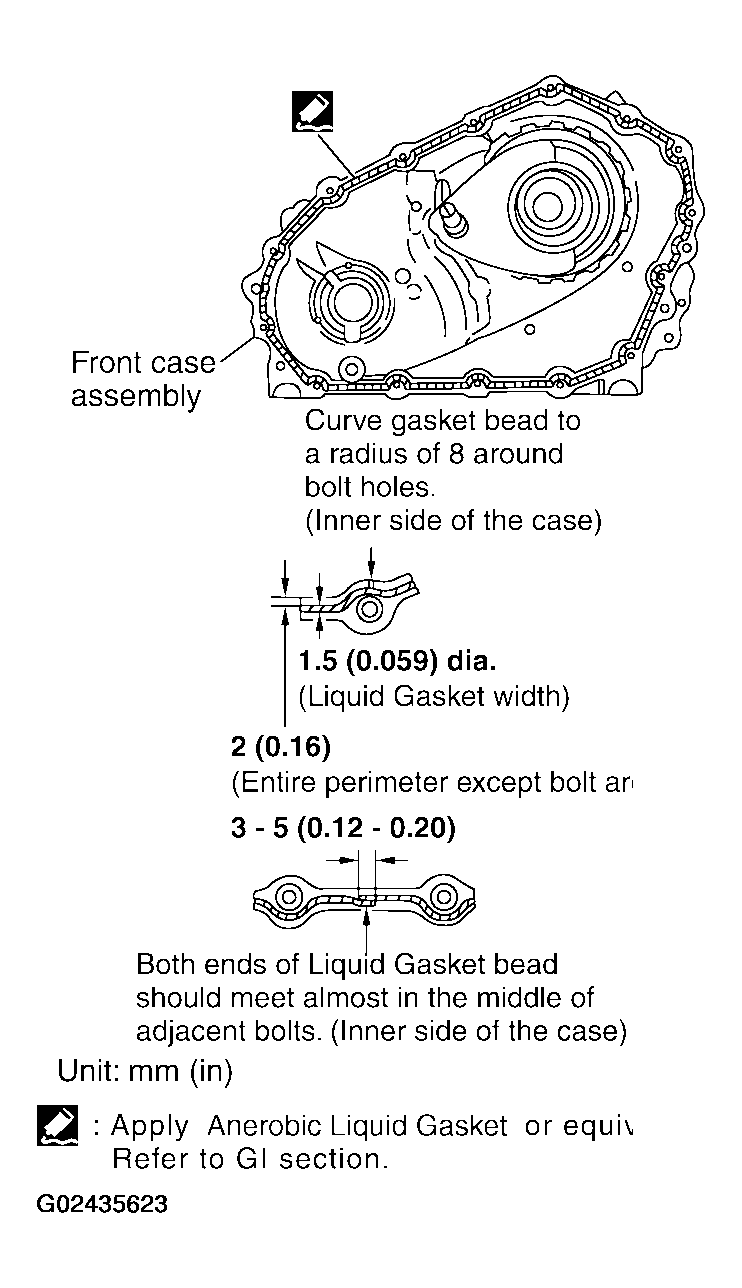
- Apply liquid gasket to the entire center case mounting surface of the front case assembly as shown in Fig 17.
 Courtesy of NISSAN MOTOR CO., U.S.A.
CAUTION:
Remove all foreign materials such as water, oil and grease from center case and front case mating surfaces.
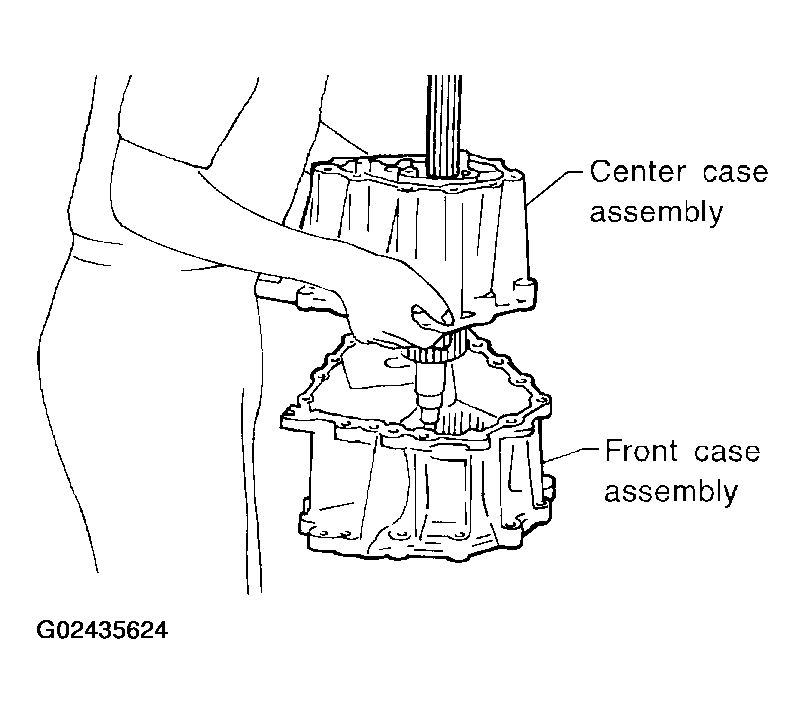
- Install the center case assembly to the front case assembly.
CAUTION:
Do not damage mainshaft end.
- Tap the center case lightly and press-fit the front drive shaft bearing into the front case.
 Courtesy of NISSAN MOTOR CO., U.S.A.
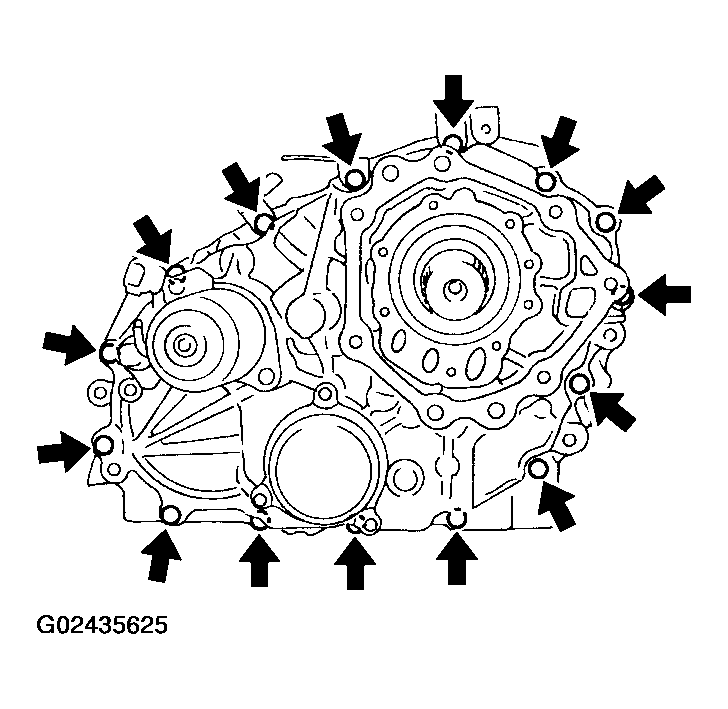
- Tighten the front case bolts to the specified torque. Refer to
, "COMPONENTS ".
CAUTION:
Be sure to install air breather hose clamp, connector bracket and harness clip.
 Courtesy of NISSAN MOTOR CO., U.S.A.
- Install the drain plug with a new gasket.
CAUTION:
Do not reuse gasket.
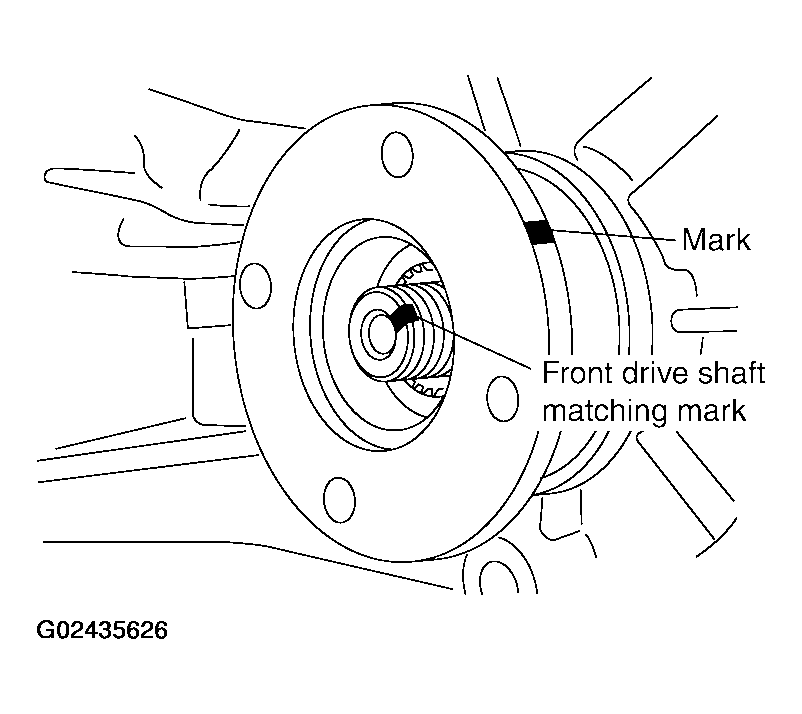
- Align the matching mark on the front drive shaft with the mark on the companion flange, then install the companion flange.
 Courtesy of NISSAN MOTOR CO., U.S.A.
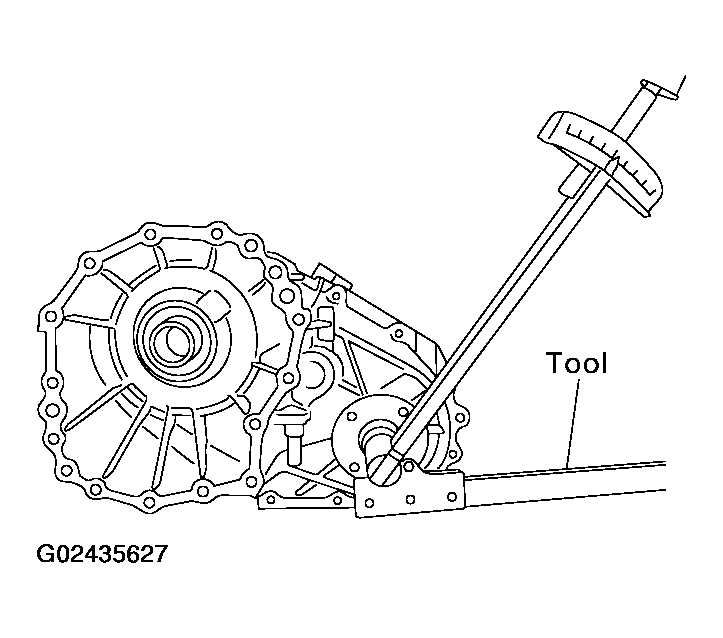
- Install the companion flange self-lock nut. Tighten to the specified torque, using Tool. Refer to
, "COMPONENTS ".
- Tool number: KV40104000 (-)
CAUTION:
Do not reuse self-lock nut.
 Courtesy of NISSAN MOTOR CO., U.S.A.
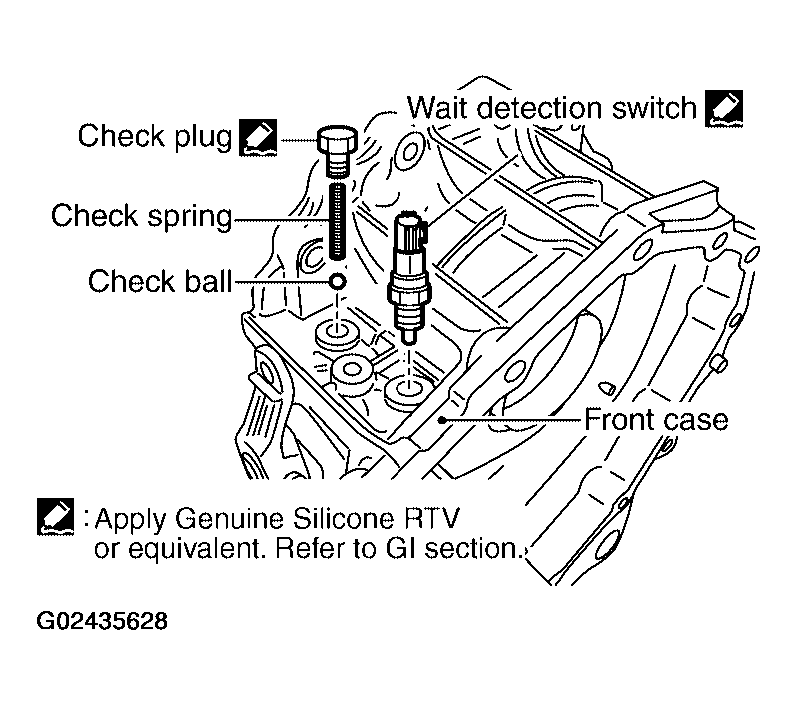
- Remove all the sealant from the check plug, switch mounting and front case.
CAUTION:
Remove old sealant adhering to mounting surfaces. Also remove any moisture, oil, or foreign material adhering to application and mounting surfaces.
- Install the check ball and check spring to the front case. Apply sealant to the check plug and wait detection switch and install them to the front case. Tighten to the specified torque. Refer to
, "COMPONENTS ".
NOTE:
Wait detection switch harness connector is black.
 Courtesy of NISSAN MOTOR CO., U.S.A.
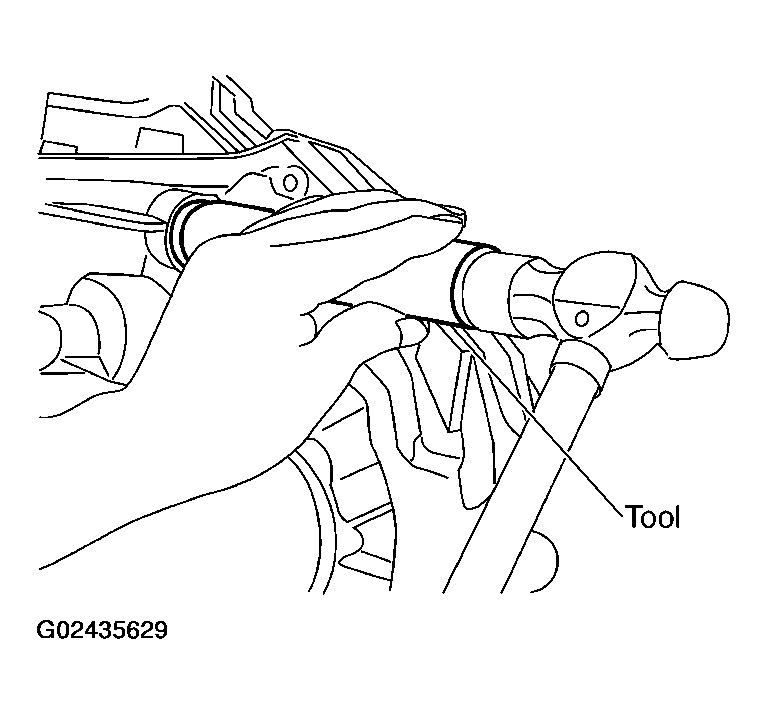
- Install the oil seal in the front case, using Tool.
- Tool number: ST22360002 (J-25679-01)
 Courtesy of NISSAN MOTOR CO., U.S.A.
CAUTION:
- Do not reuse oil seal.
- Apply petroleum jelly to seal lip before installing.
- Install the shift lever to the shift cross.
- Install the lock pin and lock pin nut. Tighten to the specified torque. Refer to
, "COMPONENTS ".