Assembly (2)
- Place transmission case into horizontal position.
- Install brake band and band strut.
- Install band strut on brake band.
- Apply petroleum jelly to band strut.
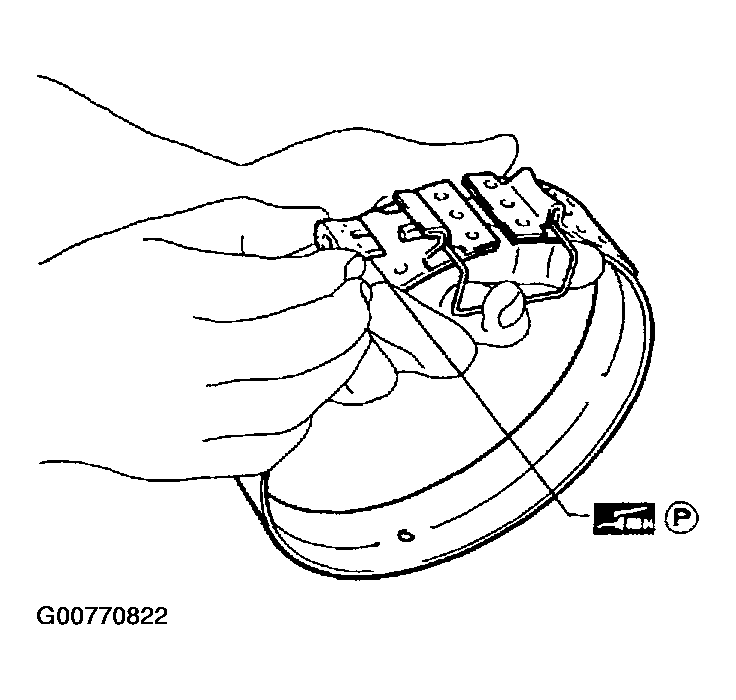 Courtesy of NISSAN MOTOR CO., U.S.A.
- Place brake band around reverse clutch drum, and insert band strut into end of band servo piston stem.
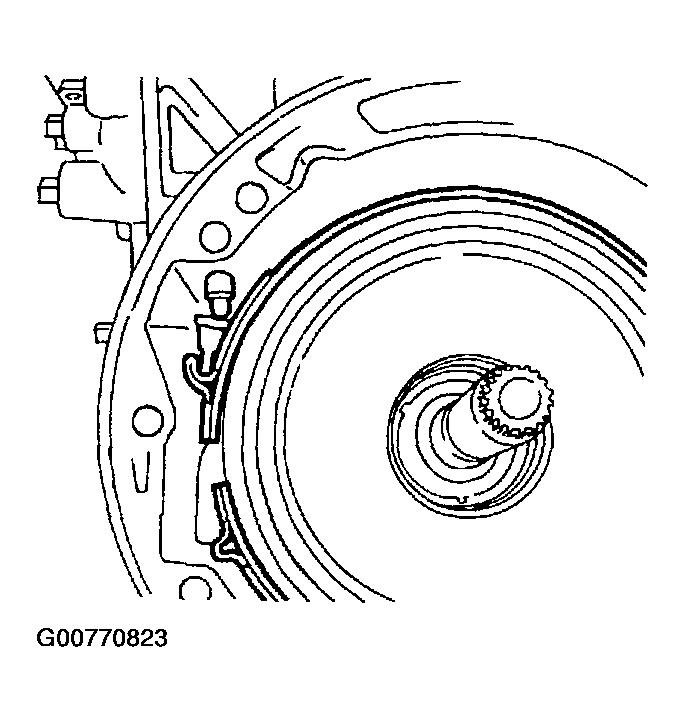 Courtesy of NISSAN MOTOR CO., U.S.A.
- Install anchor end pin on transmission case. Then, tighten anchor end pin just enough so that reverse clutch drum (clutch pack) will not tilt forward.
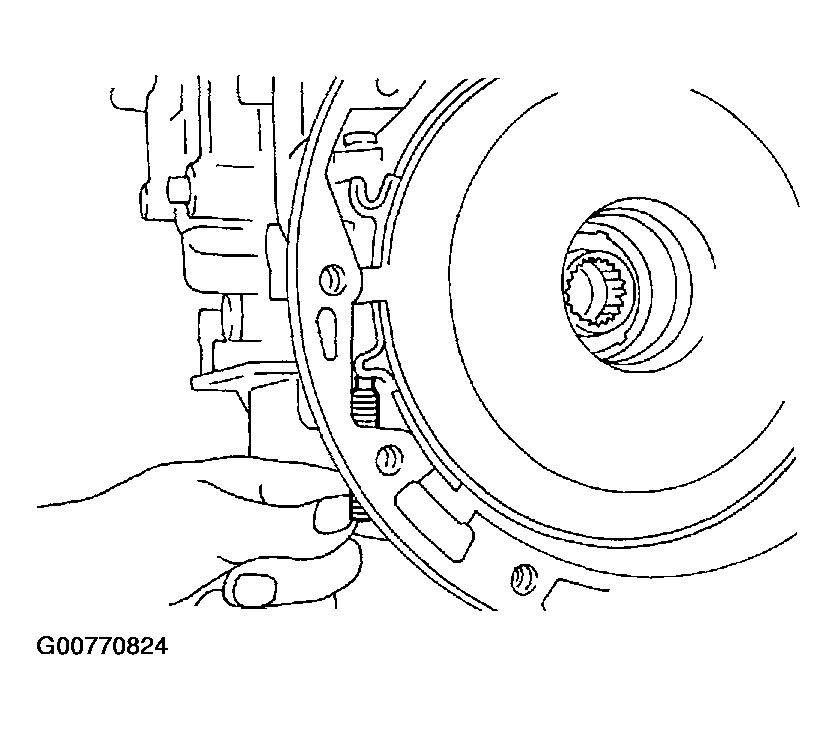 Courtesy of NISSAN MOTOR CO., U.S.A.
- Install input shaft on transmission case.
- Pay attention to its direction - O-ring groove side faces front.
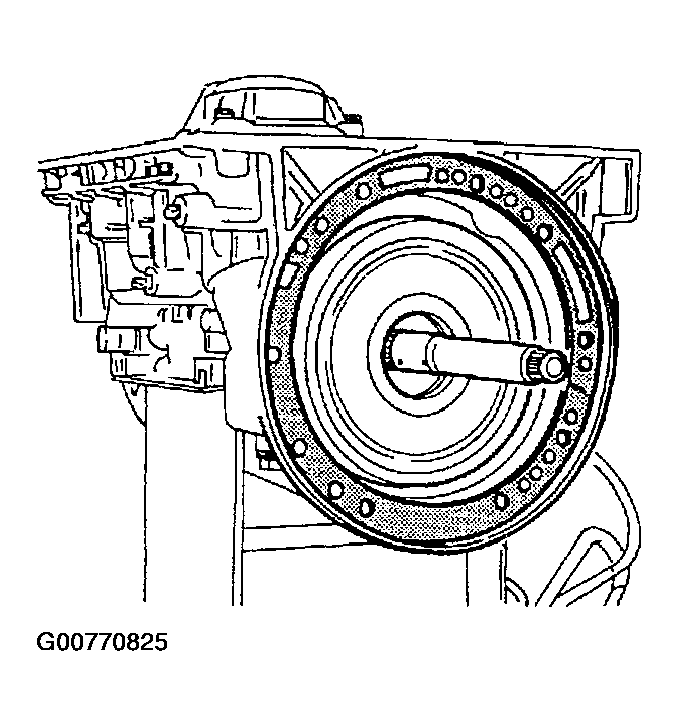 Courtesy of NISSAN MOTOR CO., U.S.A.
- Install gasket on transmission case.
- Install oil pump assembly.
- Install needle bearing on oil pump assembly.
- Apply petroleum jelly to the needle bearing.
- Install selected thrust washer on oil pump assembly.
- Apply petroleum jelly to thrust washer.
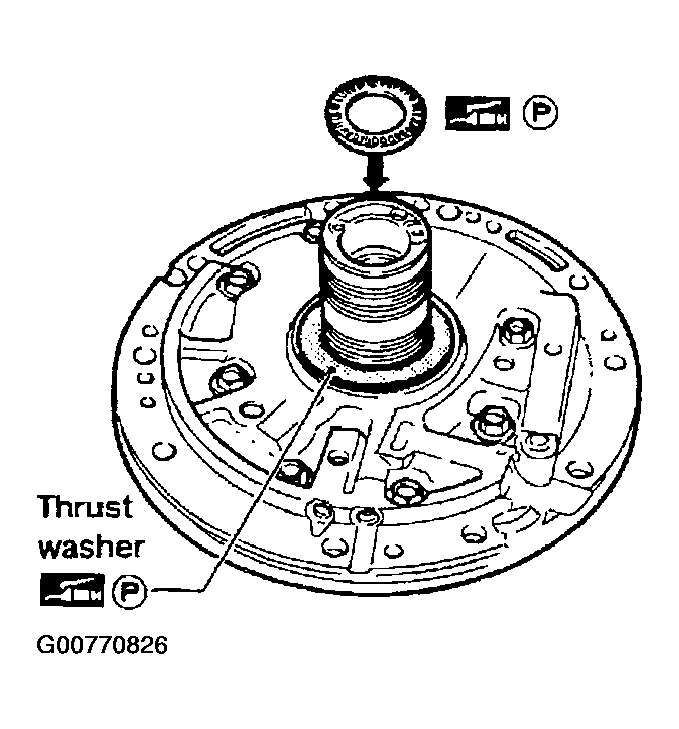 Courtesy of NISSAN MOTOR CO., U.S.A.
- Carefully install seal rings into grooves and press them into the petroleum jelly so that they are a tight fit.
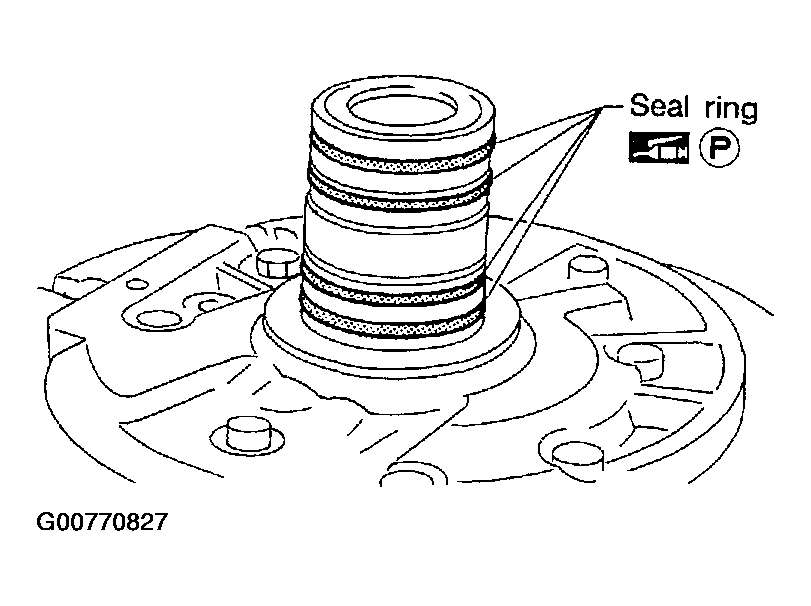 Courtesy of NISSAN MOTOR CO., U.S.A.
- Install O-ring on oil pump assembly.
- Apply petroleum jelly to O-ring.
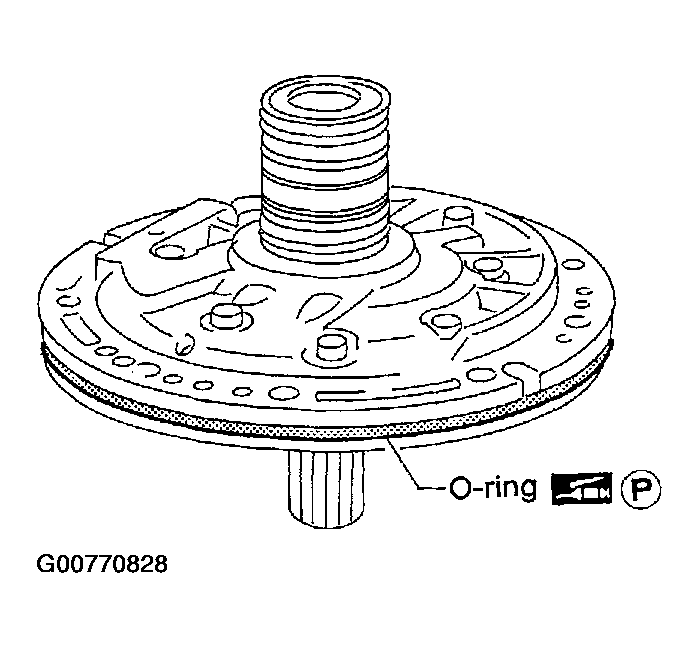 Courtesy of NISSAN MOTOR CO., U.S.A.
- Apply petroleum jelly to mating surface of transmission case and oil pump assembly.
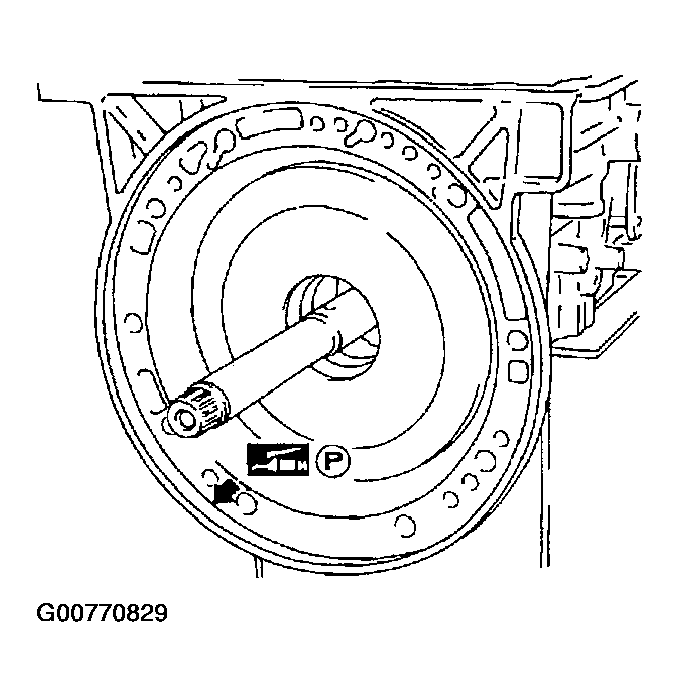 Courtesy of NISSAN MOTOR CO., U.S.A.
- Install oil pump assembly.
- Install two converter housing securing bolts in bolt holes in oil pump assembly as guides.
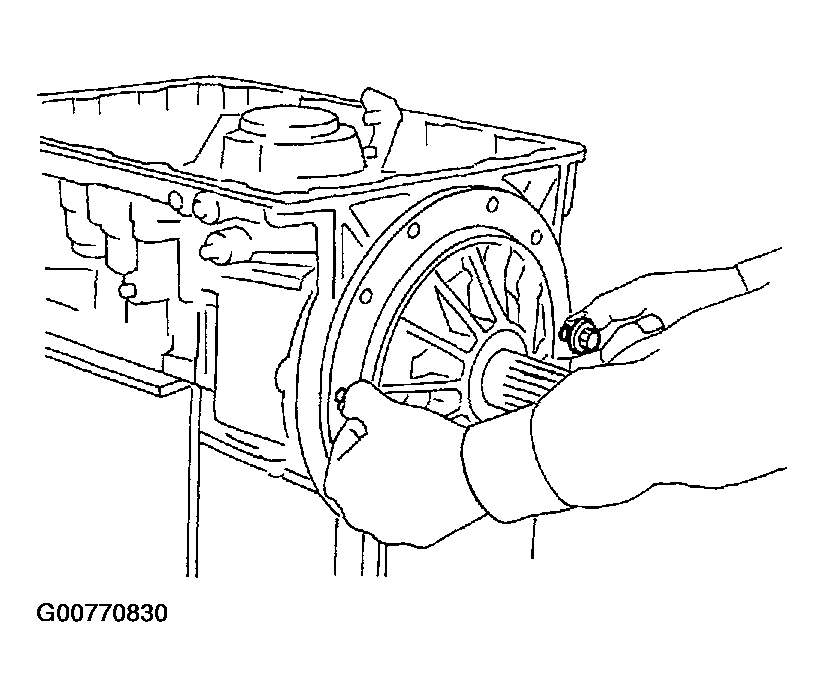 Courtesy of NISSAN MOTOR CO., U.S.A.
- Insert oil pump assembly to the specified position in transmission, as shown in Fig 10.
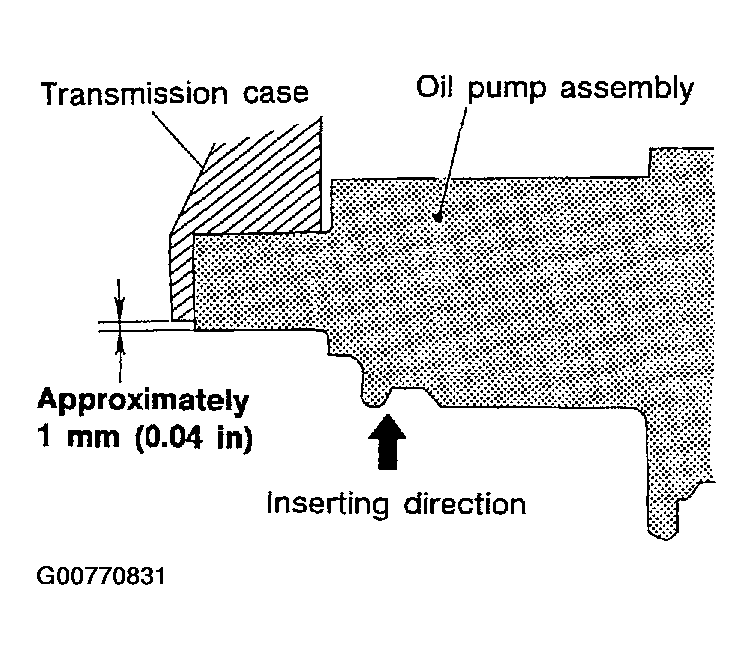 Courtesy of NISSAN MOTOR CO., U.S.A.
- Install O-ring on input shaft.
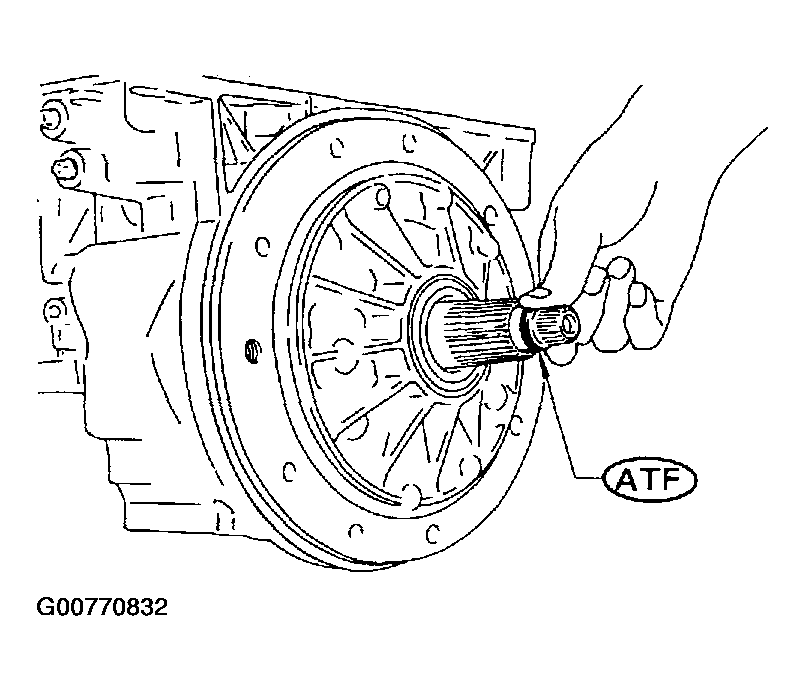 Courtesy of NISSAN MOTOR CO., U.S.A.
- Install converter housing.
- Apply Genuine Anaerobic Liquid Gasket or equivalent around bolt holes in converter housing. Refer to
RECOMMENDED CHEMICAL PRODUCTS AND SEALANTS
.
- Do not Apply too much sealant.
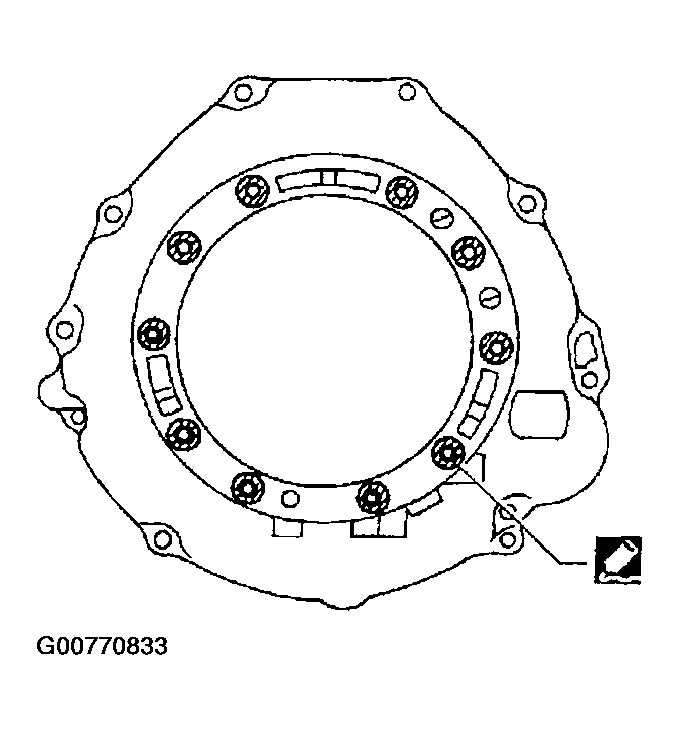 Courtesy of NISSAN MOTOR CO., U.S.A.
- Apply Genuine Anaerobic Liquid Gasket or equivalent to seating surfaces of bolts that secure front of converter housing. Refer to
RECOMMENDED CHEMICAL PRODUCTS AND SEALANTS
.
- Install converter housing on transmission case.
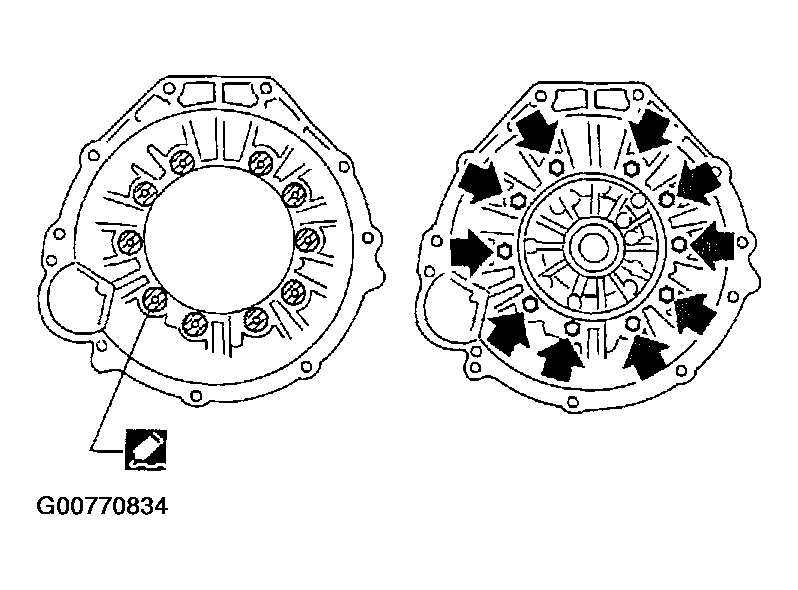 Courtesy of NISSAN MOTOR CO., U.S.A.
- Adjust brake band.
- Tighten anchor end pin to specified torque.
- Anchor end pin
- : 4 - 6 N.m (0.4 - 0.6 kg-m, 35 - 52 in-lb)
- Back off anchor end pin two and a half turns.
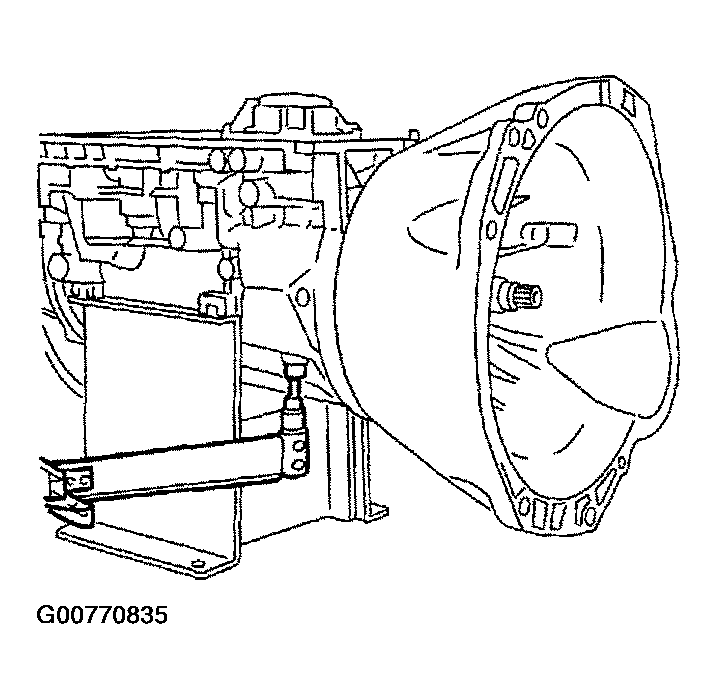 Courtesy of NISSAN MOTOR CO., U.S.A.
- While holding anchor end pin, tighten lock nut.
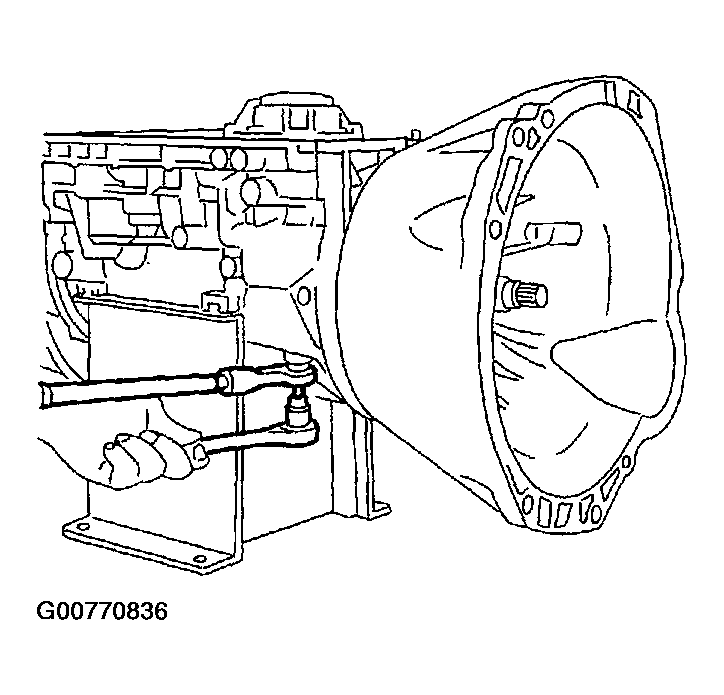 Courtesy of NISSAN MOTOR CO., U.S.A.
- Install terminal cord assembly.
- Install O-ring on terminal cord assembly.
- Apply petroleum jelly to O-ring.
- Compress terminal cord assembly stopper and install terminal cord assembly on transmission case.
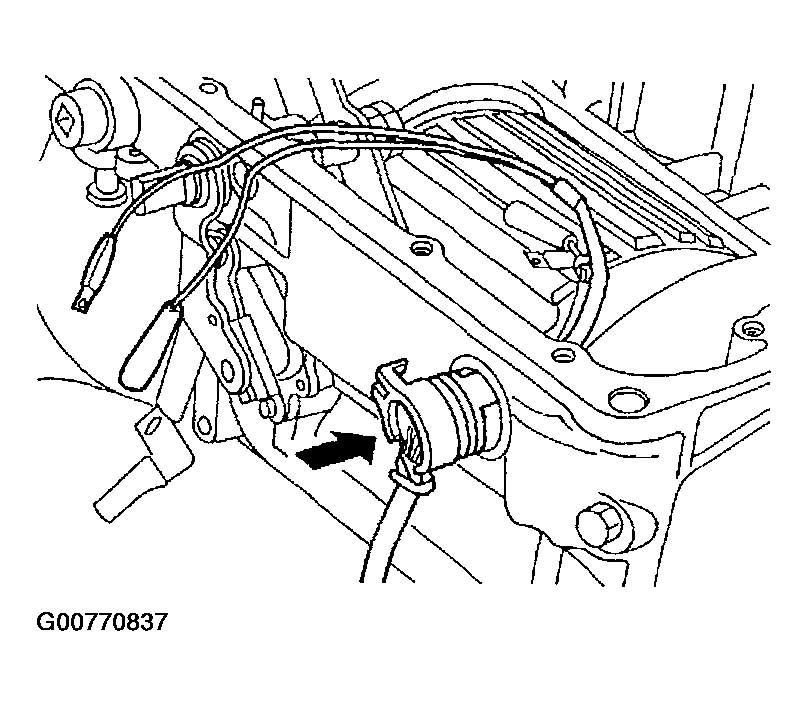 Courtesy of NISSAN MOTOR CO., U.S.A.
- Install control valve assembly.
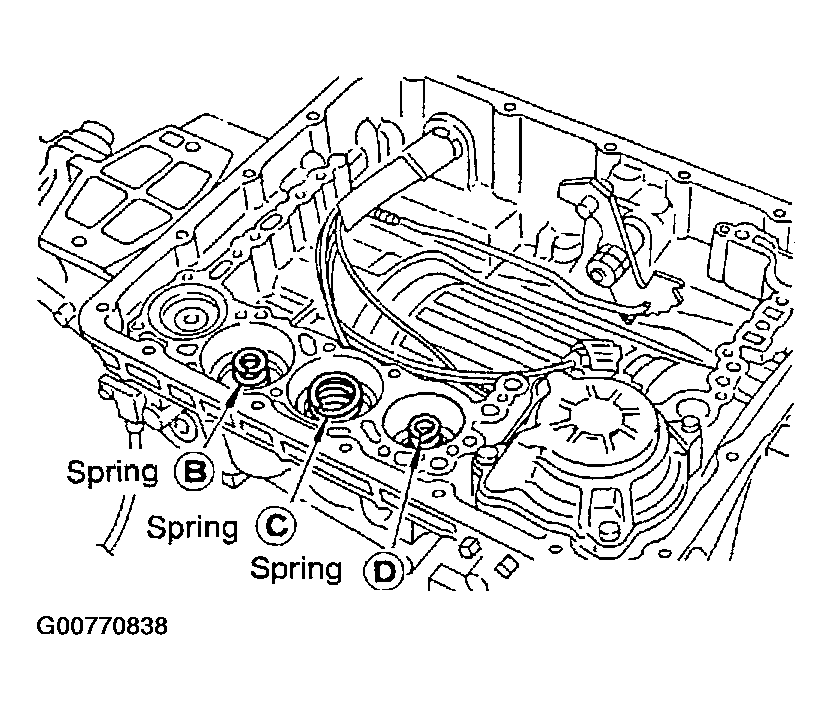
- Install accumulator piston return springs B, C
and D
.
- Free length of return springs :
Refer to
RETURN SPRINGS .
 Courtesy of NISSAN MOTOR CO., U.S.A.
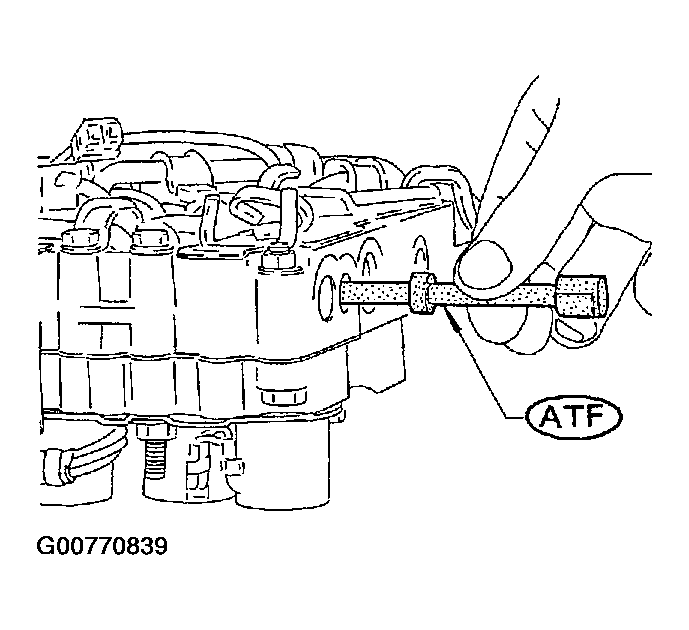
- Install manual valve on control valve.
- Apply ATF to manual valve.
 Courtesy of NISSAN MOTOR CO., U.S.A.
- Install control valve assembly on transmission case.
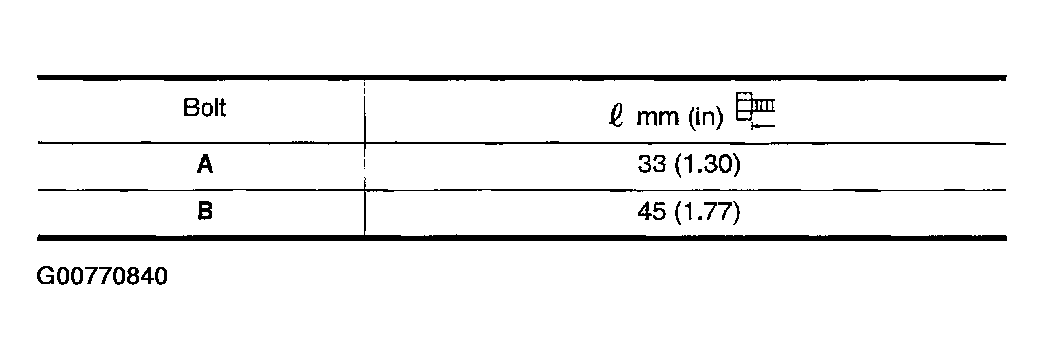
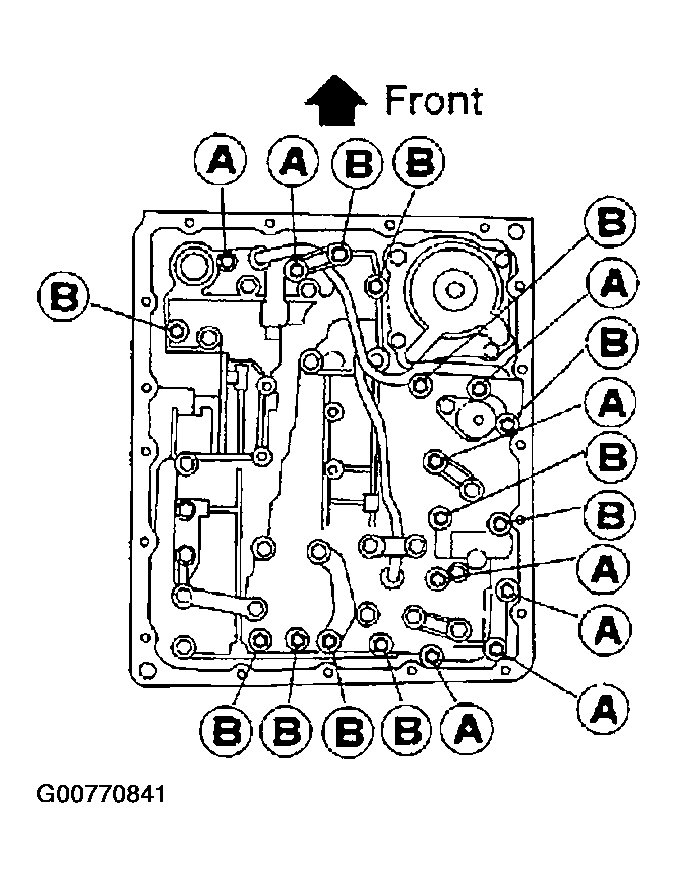
- Install connector tube brackets and tighten bolts A
and B.
- Check that terminal assembly harness does not catch.
 Courtesy of NISSAN MOTOR CO., U.S.A.
 Courtesy of NISSAN MOTOR CO., U.S.A.
- Install O-ring on oil strainer.
- Apply petroleum jelly to O-ring.
- Install oil strainer on control valve.
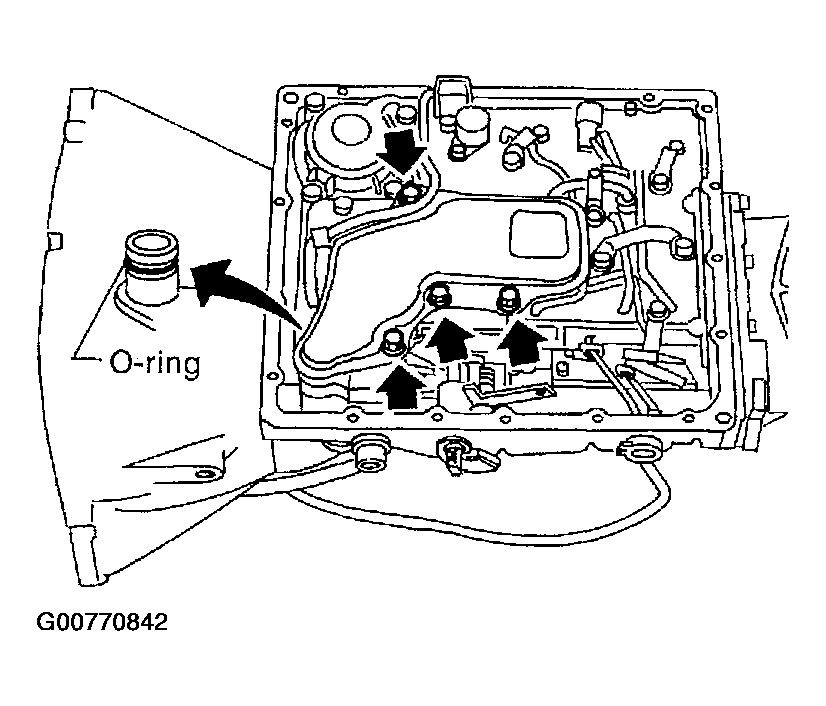 Courtesy of NISSAN MOTOR CO., U.S.A.
- Securely fasten terminal harness with clips.
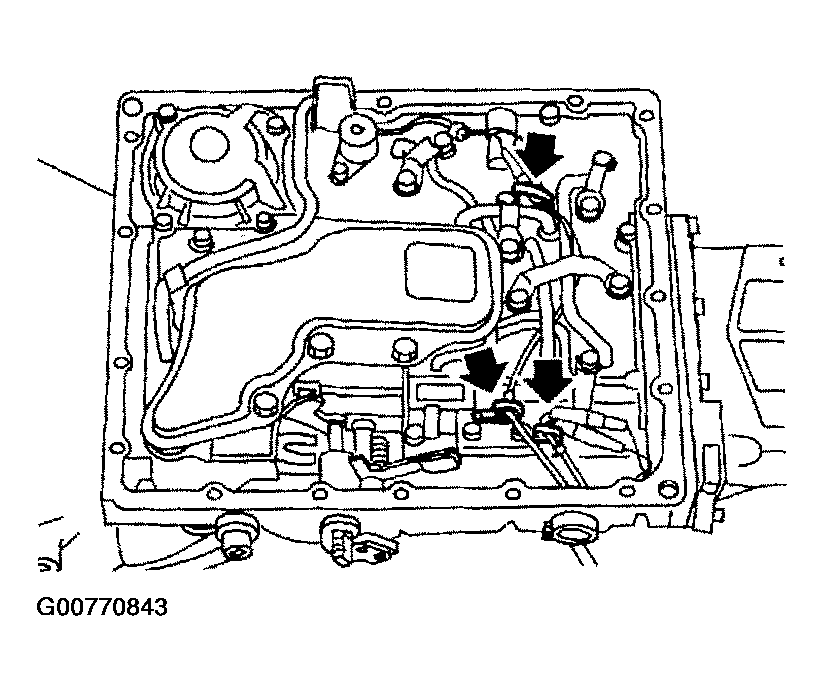 Courtesy of NISSAN MOTOR CO., U.S.A.
- Install oil pan.
- Attach a magnet to oil pan.
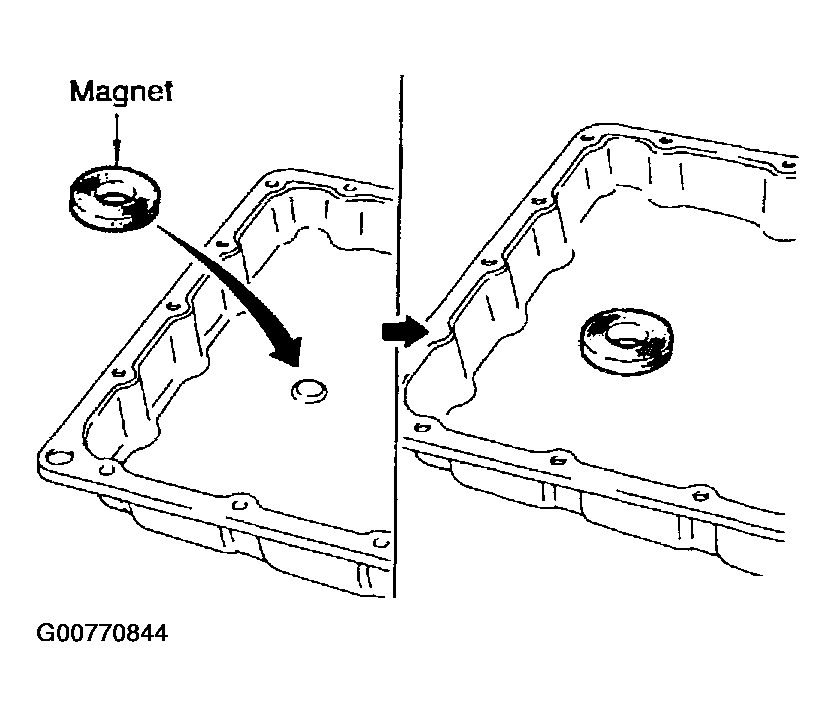 Courtesy of NISSAN MOTOR CO., U.S.A.
- Install new oil pan gasket on transmission case.
- Install oil pan and bracket on transmission case.
- Always replace oil pan bolts as they are self-sealing bolts.
- Before installing bolts, remove traces of sealant and oil from mating surface and thread holes.
- Tighten four bolts in a crisscross pattern to prevent dislocation of gasket.
- Tighten drain plug.
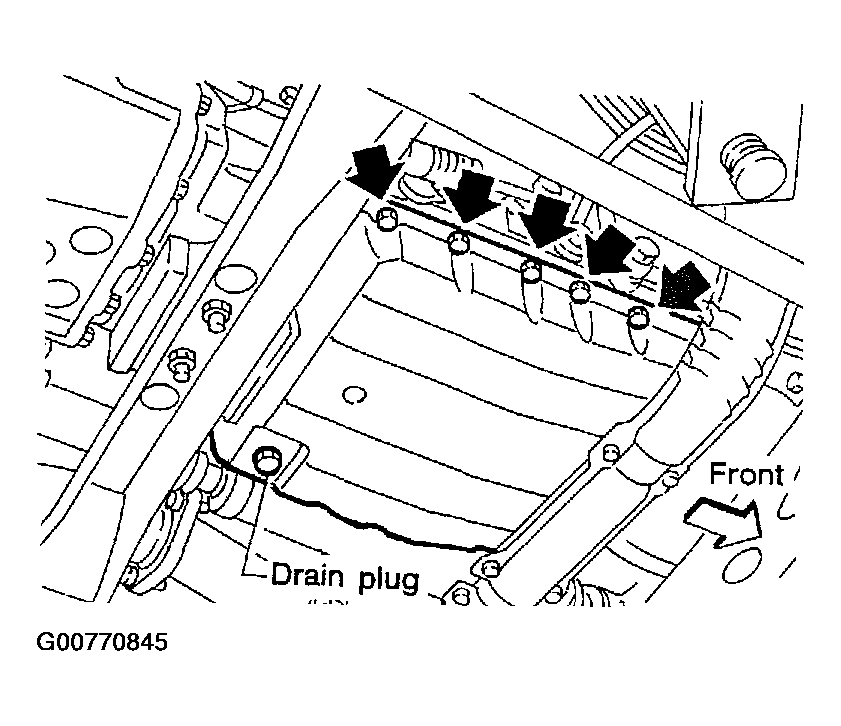 Courtesy of NISSAN MOTOR CO., U.S.A.
- Install park/neutral position (PNP) switch.
- Check that manual shaft is in 1 position.
- Temporarily install PNP switch on manual shaft.
- Move manual shaft to N.
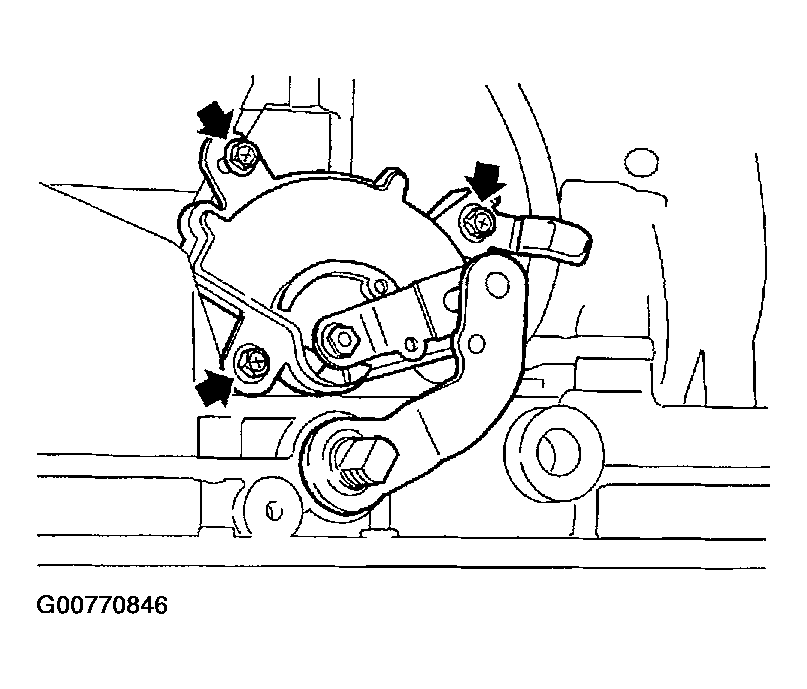 Courtesy of NISSAN MOTOR CO., U.S.A.
- Use a 4 mm (0.16 in) pin for this adjustment.
- Insert the pin straight into the manual shaft adjustment hole.
- Rotate PNP switch until the pin can also be inserted straight into hole in PNP switch.
- Tighten PNP switch fixing bolts.
- Remove pin from adjustment hole after adjusting PNP switch.
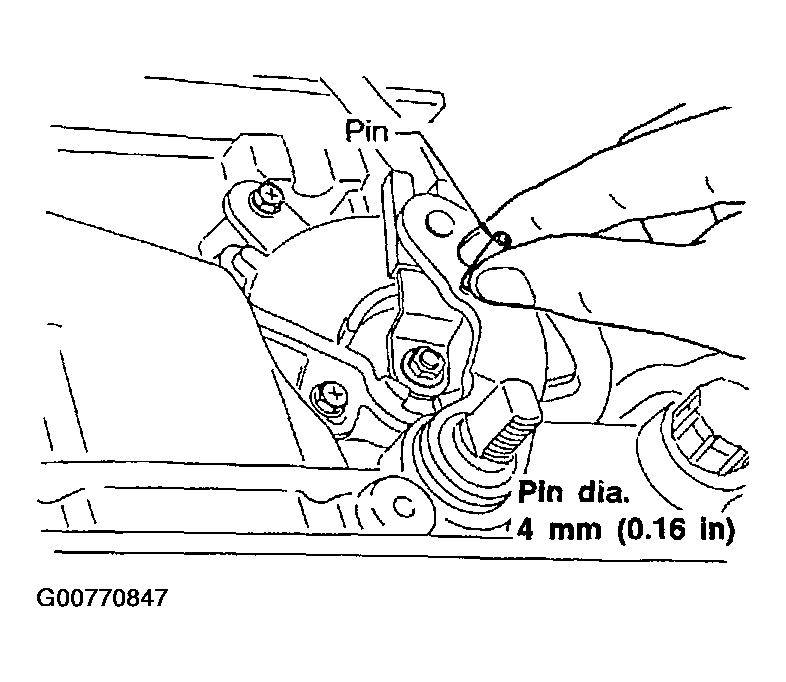 Courtesy of NISSAN MOTOR CO., U.S.A.
- Install torque converter.
- Pour ATF into torque converter.
- Approximately 2 liters (2-1/8 US qt, 1-3/4 lmp qt) of fluid are required for a new torque converter.
- When reusing old torque converter, add the same amount of fluid as was drained.
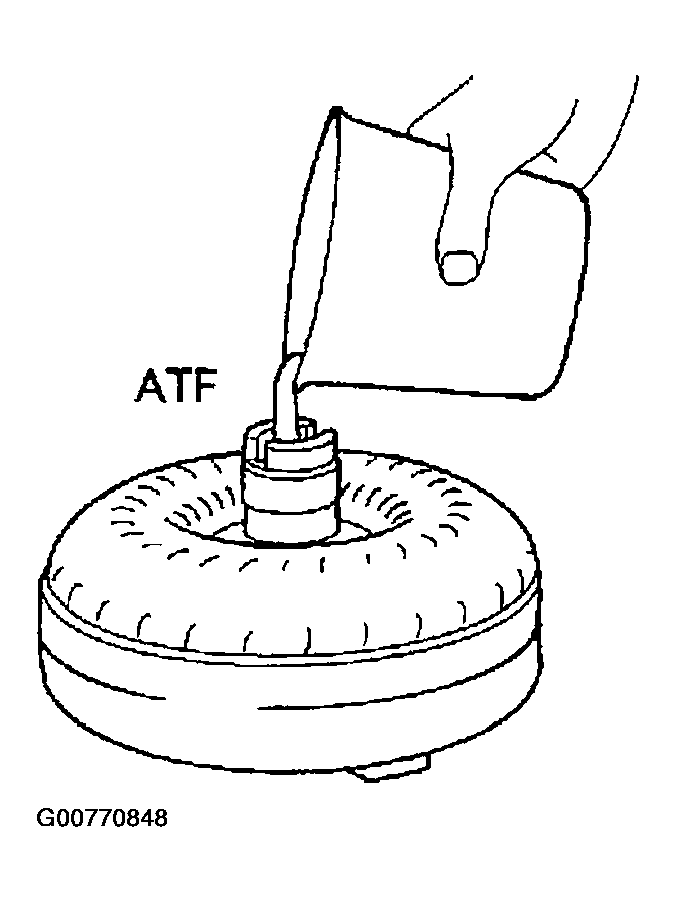 Courtesy of NISSAN MOTOR CO., U.S.A.
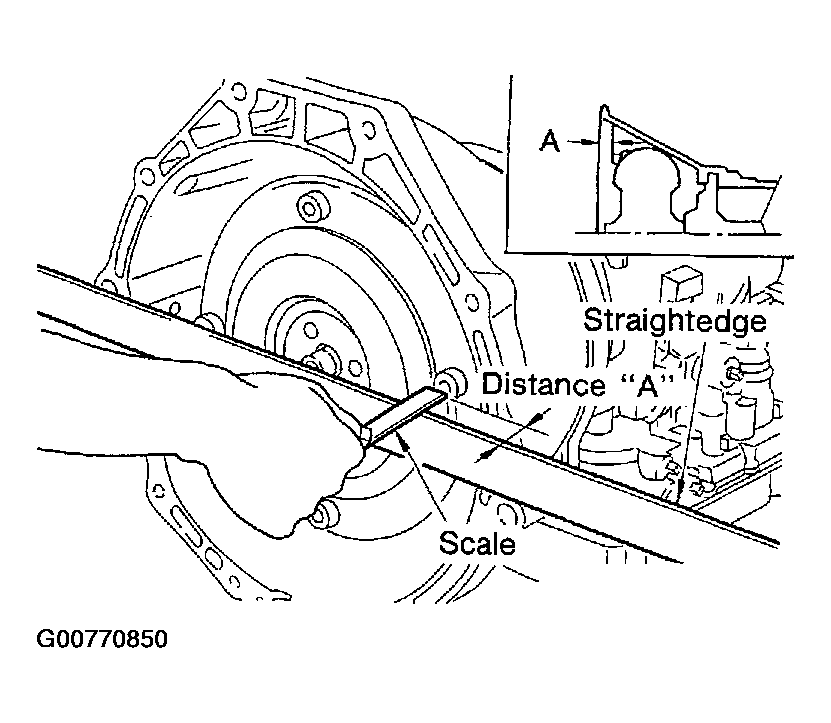
- Install torque converter while aligning notches and oil pump.
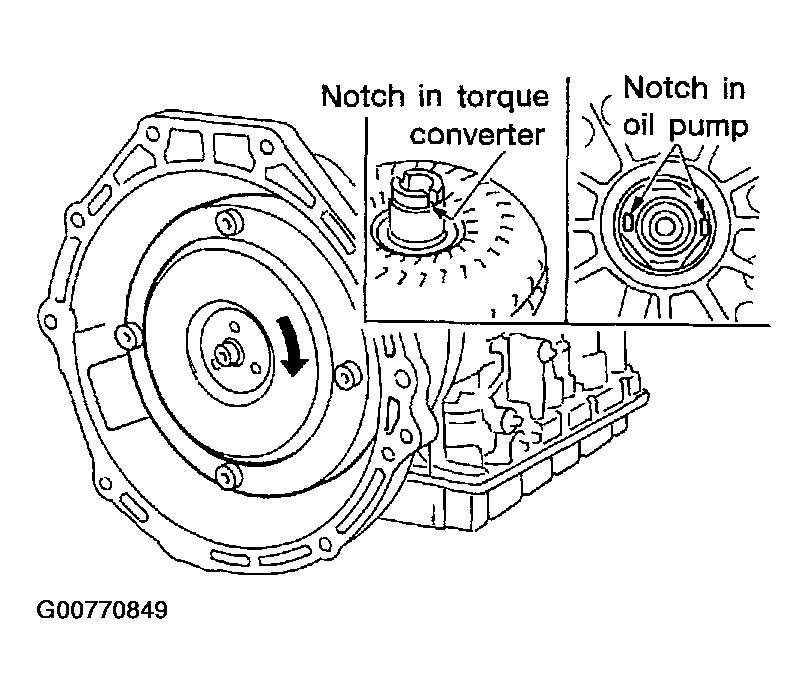 Courtesy of NISSAN MOTOR CO., U.S.A.
- Measure distance A to check that torque converter is in proper position.
- Distance "A" : 26.0 mm (1.024 in) or more
 Courtesy of NISSAN MOTOR CO., U.S.A.