Sliding Door Glass Removal/Installation
- Fully open the sliding door glass.
- Disconnect the negative battery cable.
- Remove the following parts:
- Side door garnish (See SIDE DOOR GARNISH REMOVAL/INSTALLATION
.)
- Rear side trim (See REAR SIDE TRIM REMOVAL/INSTALLATION
.)
- Sliding door trim (See SLIDING DOOR TRIM REMOVAL/INSTALLATION
.)
- Sliding door quarter glass (See SLIDING DOOR QUARTER GLASS REMOVAL/INSTALLATION .)
- Connect the power window subswitch connector.
- Connect the negative battery cable.
- Adjust the door glass position as shown below.
 Courtesy of MAZDA MOTORS CORP.
- Disconnect the negative battery cable.
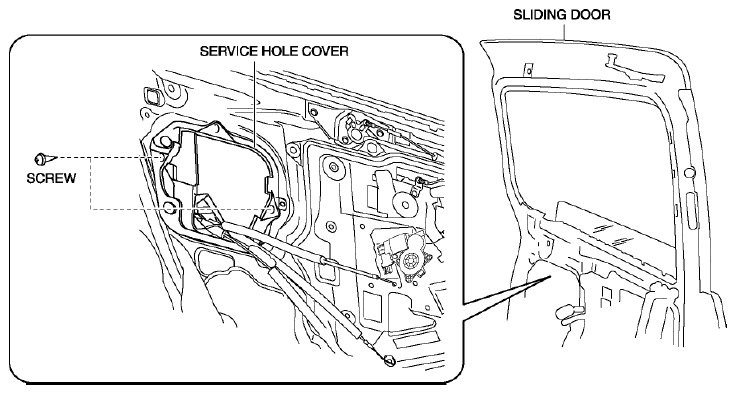
- Remove the screws.
 Courtesy of MAZDA MOTORS CORP.
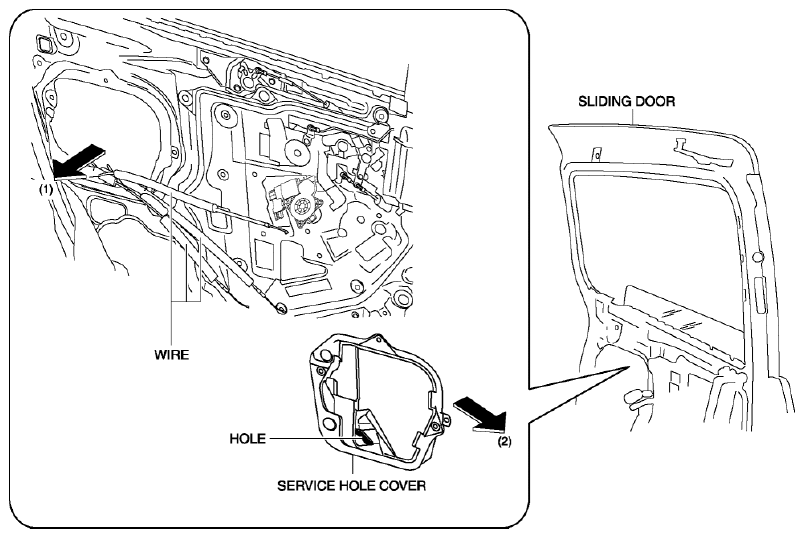
- Remove the service hole cover in the direction of the arrow (1), then remove the service hole cover in the direction of the arrow (2) while avoiding the wires.
 Courtesy of MAZDA MOTORS CORP.
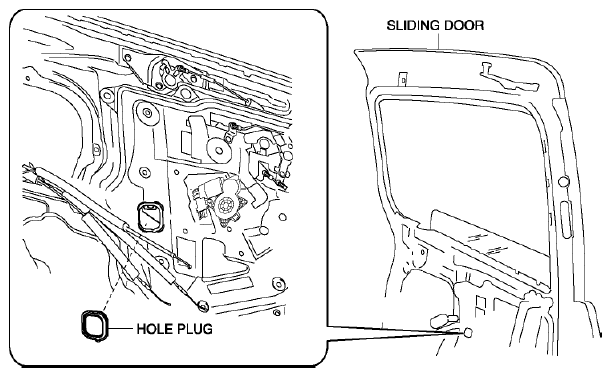
- Remove the hole plug.
 Courtesy of MAZDA MOTORS CORP.
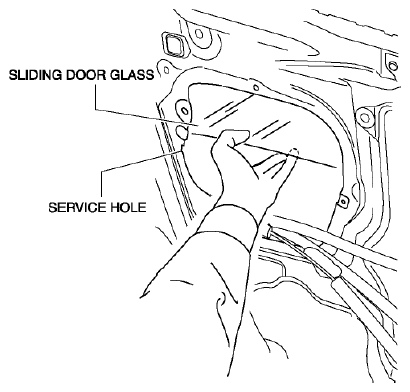
CAUTION:
 Courtesy of MAZDA MOTORS CORP.
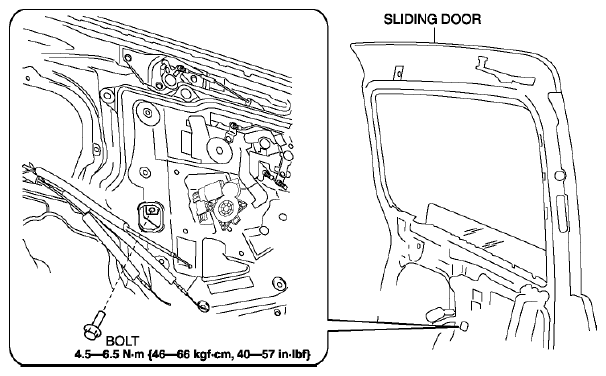
- If the bolts are removed without supporting the sliding door glass, the glass may fall off. Insert a hand through the service hole and lower the sliding door glass to the bottommost position while supporting the glass with your hand.
- Remove the bolt.
 Courtesy of MAZDA MOTORS CORP.
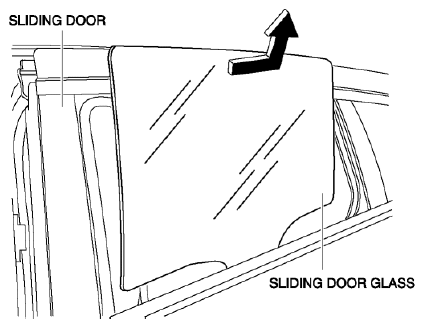
- Remove the sliding door glass in the direction of the arrow as shown below.
 Courtesy of MAZDA MOTORS CORP.
- Install in the reverse order of removal.