Liftgate Lower Trim Removal/Installation
- Remove the liftgate upper trim. (See
LIFTGATE UPPER TRIM REMOVAL/INSTALLATION
)
- Remove the liftgate side trim. (See
LIFTGATE SIDE TRIM REMOVAL/INSTALLATION
)
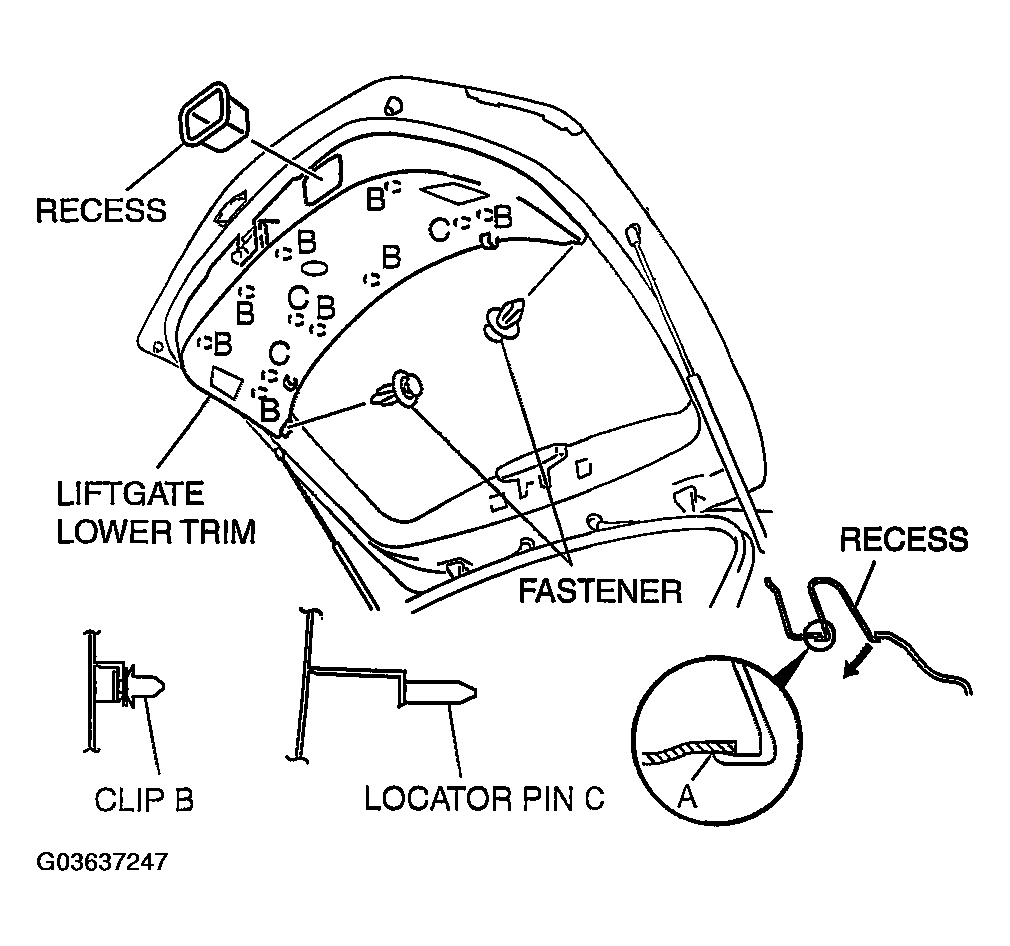
- While supporting at point A, pull the recess in the direction of the arrow and remove it.
- Remove the fasteners.
- Pull the liftgate lower trim outward, then detach clips B and locator pins C from the liftgate.
- Remove the liftgate lower trim.
- Install in the reverse order of removal.
 Courtesy of MAZDA MOTORS CORP.