Headliner Removal/Installation
- Disconnect the negative battery cable.
- Turn the seaming welt and weatherstrip over.
- Remove the A-pillar trims. (See
A-PILLAR TRIM REMOVAL/INSTALLATION
.)
- Remove the B-pillar upper trims. (See
B-PILLAR UPPER TRIM REMOVAL/INSTALLATION
.)
- Remove the C-pillar trims. (See
C-PILLAR TRIM REMOVAL/INSTALLATION
.)
- Remove the D-pillar trims. (See
D-PILLAR TRIM REMOVAL/INSTALLATION
.)
- Remove the map light. (See
MAP LIGHT REMOVAL/INSTALLATION
.)
- Remove the interior light. (See
INTERIOR LIGHT REMOVAL/INSTALLATION
.)
- Remove the screws, then remove the sunvisor and assist handle.
- Fold hooks A up if equipped with a sliding sunroof.
- Remove the fasteners.
- Remove the headliner from the vehicle through the liftgate opening.
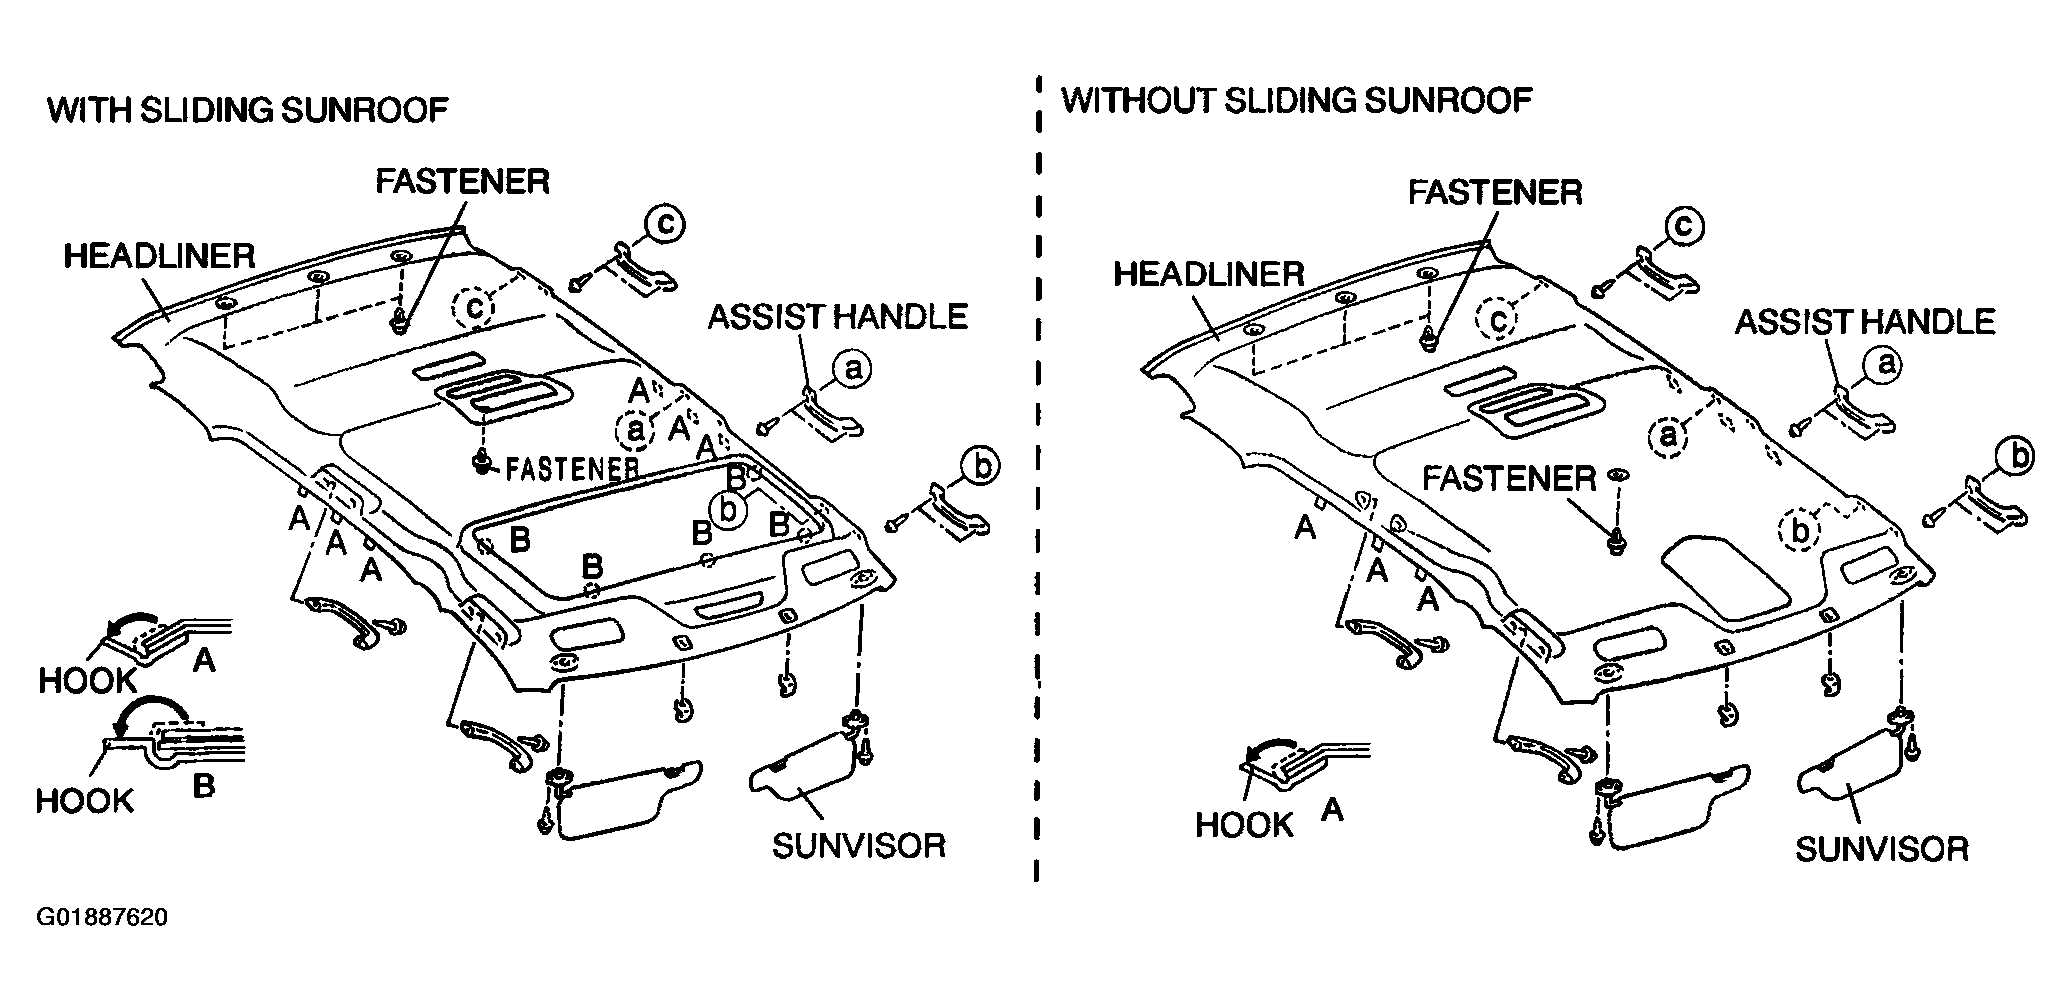 Courtesy of MAZDA MOTORS CORP.
- Install in the reverse order of removal.