A/T Gear Position Indicator Panel Replacement
- Remove the center console (see
CENTER CONSOLE REMOVAL/INSTALLATION
).
- Apply the parking brake, and move the shift lever to N.
- Remove the shift lever knob (see SHIFT LEVER KNOB REPLACEMENT
).
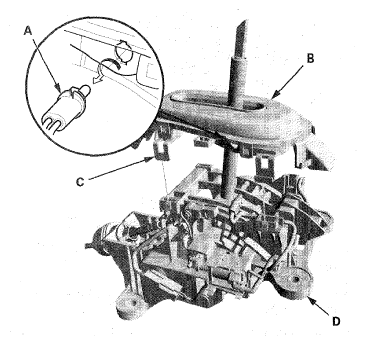
- Remove the A/T gear position indicator panel light socket (A).
 Courtesy of AMERICAN HONDA MOTOR CO., INC.
- Wrap the end of a thin blade screwdriver with tape, and pry up the A/T gear position indicator panel (B) by releasing the four locks (C) from the shift lever bracket base (D).
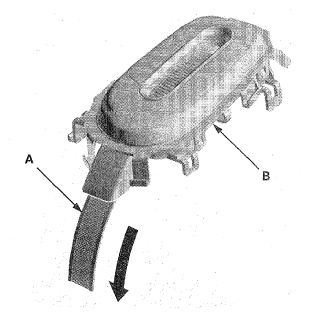
- Remove the lever cover (A) from the A/T gear position indicator panel (B).
 Courtesy of AMERICAN HONDA MOTOR CO., INC.
- Check the lever cover for wear and damage, and replace it if necessary.
- Install the lever cover to the new A/T gear position indicator panel.
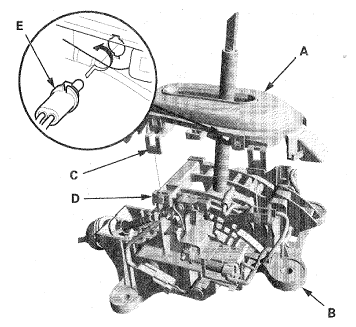
- Install the A/T gear position indicator panel (A) to the shift lever bracket base (B), and push the locks (C) to the hooks (D) securely.
 Courtesy of AMERICAN HONDA MOTOR CO., INC.
- Install the A/T gear position indicator panel light socket (E).
- Install the shift lever knob (see SHIFT LEVER KNOB REPLACEMENT
).
- Install the center console (see
CENTER CONSOLE REMOVAL/INSTALLATION
).
- Shift the shift lever to P.