Shift Lever Installation
- Cover around the opening of the console with tape to prevent damage to the console.
- Position the shift lever in the console.
- Install the shift lever mounting bolt (A) loosely.
 Courtesy of AMERICAN HONDA MOTOR CO., INC.
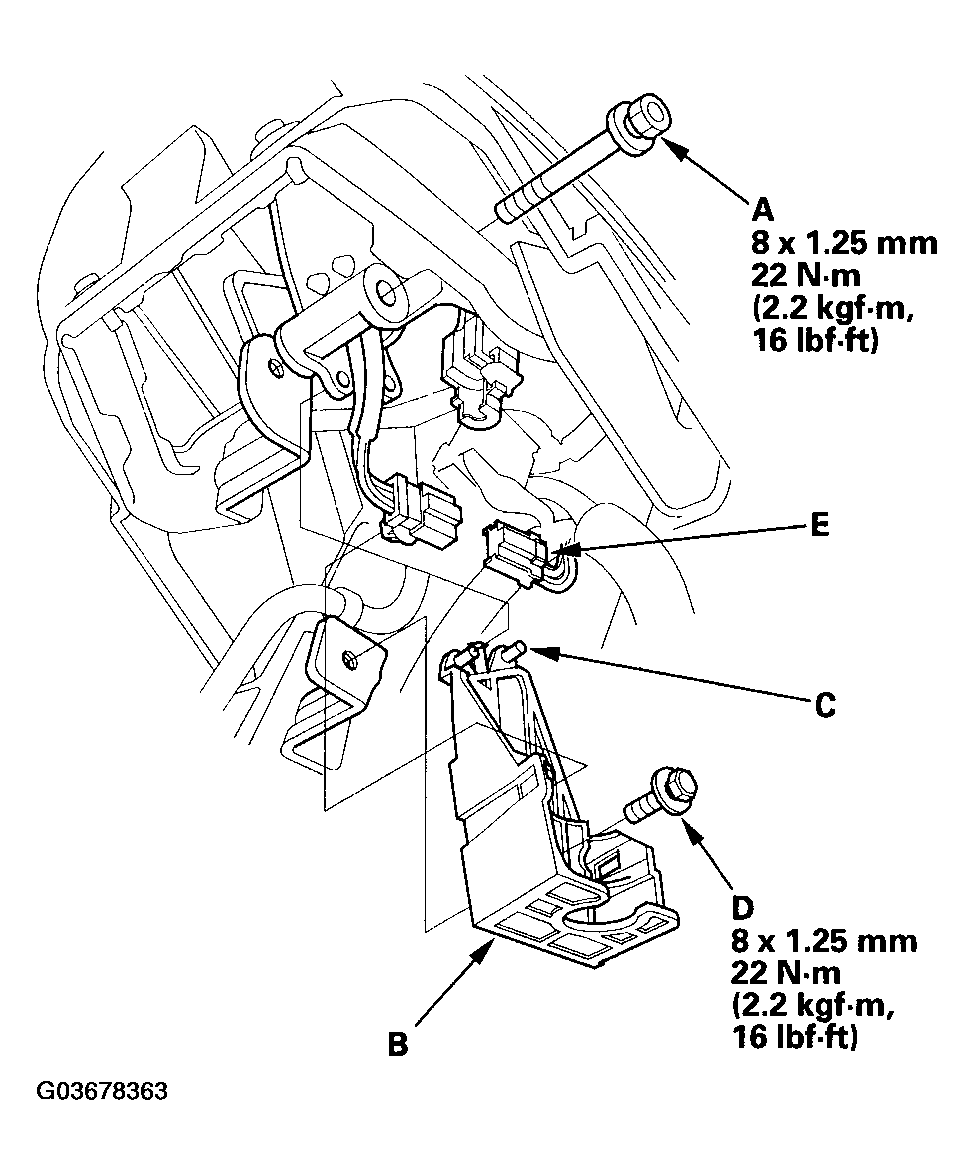
- Install the shift cable bracket (B) with aligning the projections (C) to the holes of the shift lever bracket, and install the mounting bolt (D).
- Connect the O/D switch/shift lock solenoid connector (E), and install it on the shift cable bracket.
- Secure the shift lever assembly with the mounting bolts.
 Courtesy of AMERICAN HONDA MOTOR CO., INC.
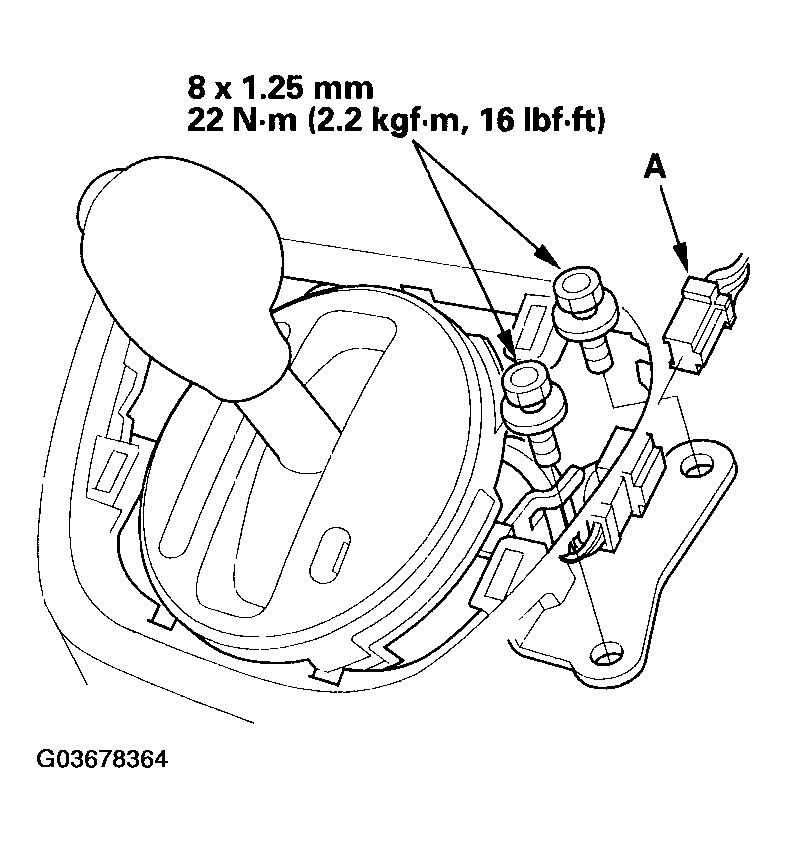
- Connect the park pin switch connector (A).
- Tighten the shift lever mounting bolt that was loosely installed in step 3.
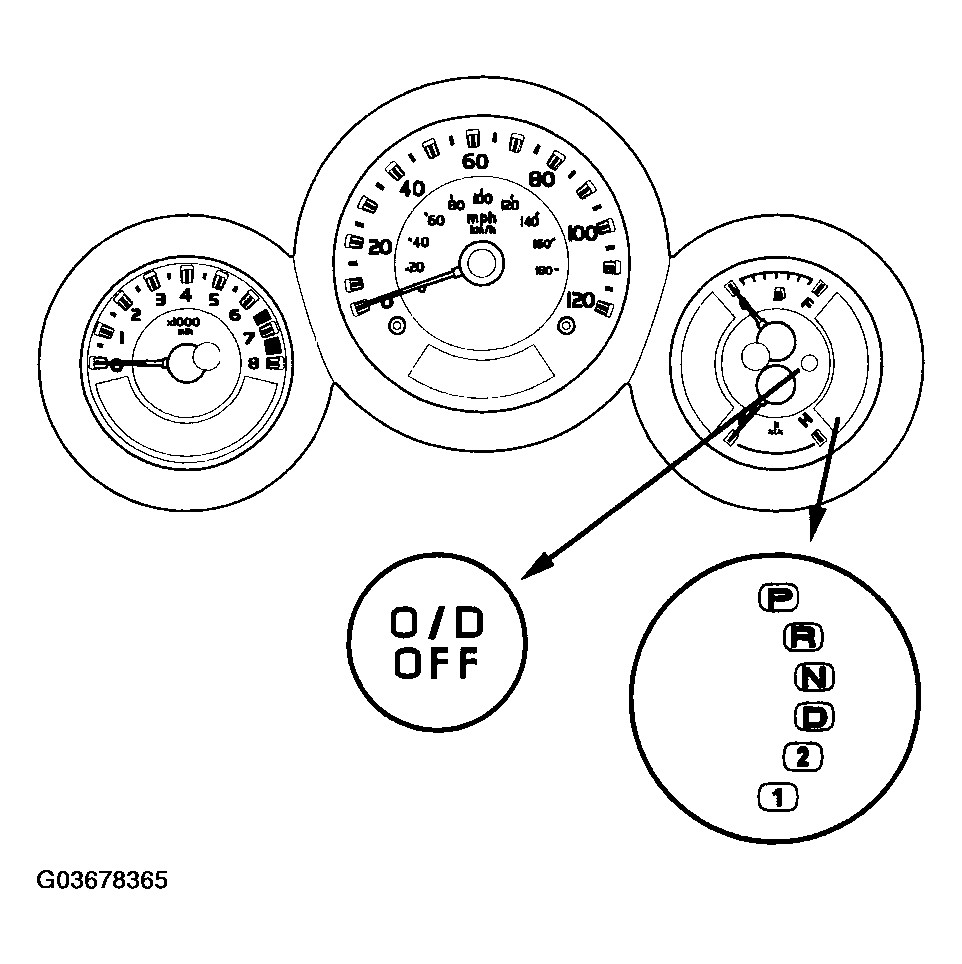
- Turn the ignition switch ON (II), and verify that the R position indicator comes on.
 Courtesy of AMERICAN HONDA MOTOR CO., INC.
- Turn the ignition switch OFF.
- Install the shift cable to the shift lever, refer to shift cable adjustment (see
SHIFT CABLE ADJUSTMENT ).