Side Engine Mount Replacement
- Support the engine with a jack and wood block under the oil pan.
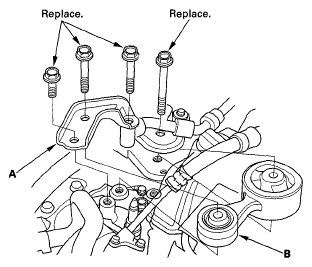
- Remove the torque rod stiffener (A) and upper torque rod (B).
 Courtesy of AMERICAN HONDA MOTOR CO., INC.
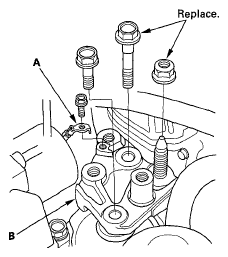
- Remove the ground cable (A), then remove the side engine mount bracket (B).
 Courtesy of AMERICAN HONDA MOTOR CO., INC.
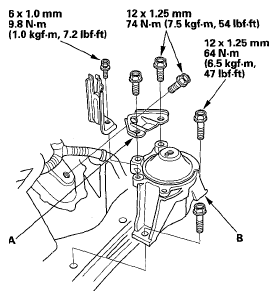
- Remove the side engine mount stiffener (A), then remove the side engine mount (B).
 Courtesy of AMERICAN HONDA MOTOR CO., INC.
- Install the side engine mount, then install the side engine mount stiffener.
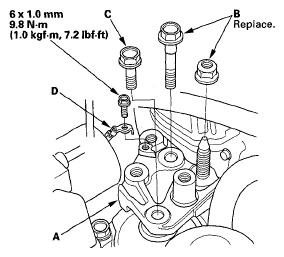
- Install the side engine mount bracket (A), then loosely tighten the new bolt and nut (B), and loosely tighten the bolt (C).
 Courtesy of AMERICAN HONDA MOTOR CO., INC.
- Install the ground cable (D).
- Remove the air cleaner housing assembly (see
AIR CLEANER REMOVAL/INSTALLATION
).
- Loosen the transmission mounting bolt and nuts (A).
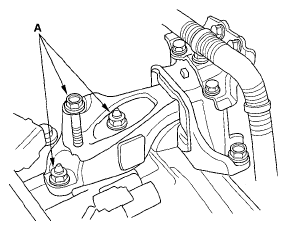 Courtesy of AMERICAN HONDA MOTOR CO., INC.
- Raise the lift to full height.
- Loosen the lower torque rod mounting bolt (A).
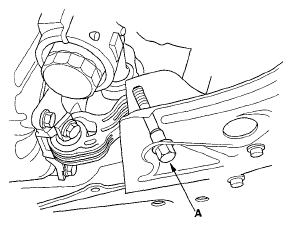 Courtesy of AMERICAN HONDA MOTOR CO., INC.
- Lower the vehicle on the lift.
- Tighten the side engine mount mounting bolts and nut.
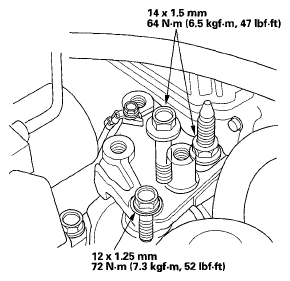 Courtesy of AMERICAN HONDA MOTOR CO., INC.
- Tighten the transmission mounting bolt and nuts.
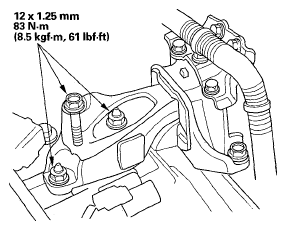 Courtesy of AMERICAN HONDA MOTOR CO., INC.
- Raise the lift to full height.
- Tighten the lower torque rod mounting bolt.
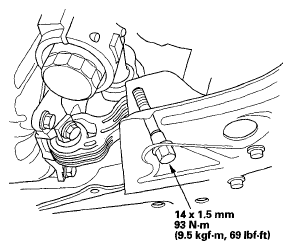 Courtesy of AMERICAN HONDA MOTOR CO., INC.
- Lower the vehicle on the lift.
- Install the air cleaner housing assembly (see
AIR CLEANER REMOVAL/INSTALLATION
).
- Install the upper torque rod (A) and torque rod stiffener (B), and tighten the new stiffener mounting bolts (C), then tighten the new upper torque rod mounting bolts in the numbered sequence shown.
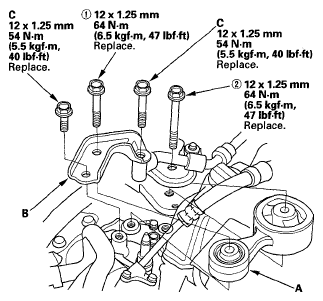 Courtesy of AMERICAN HONDA MOTOR CO., INC.