Throttle Body: Installation
- To install, reverse removal procedure. DO NOT adjust throttle stop screw. Start engine. Hold engine at 3,000 RPM until radiator fan comes on. Allow engine to idle.
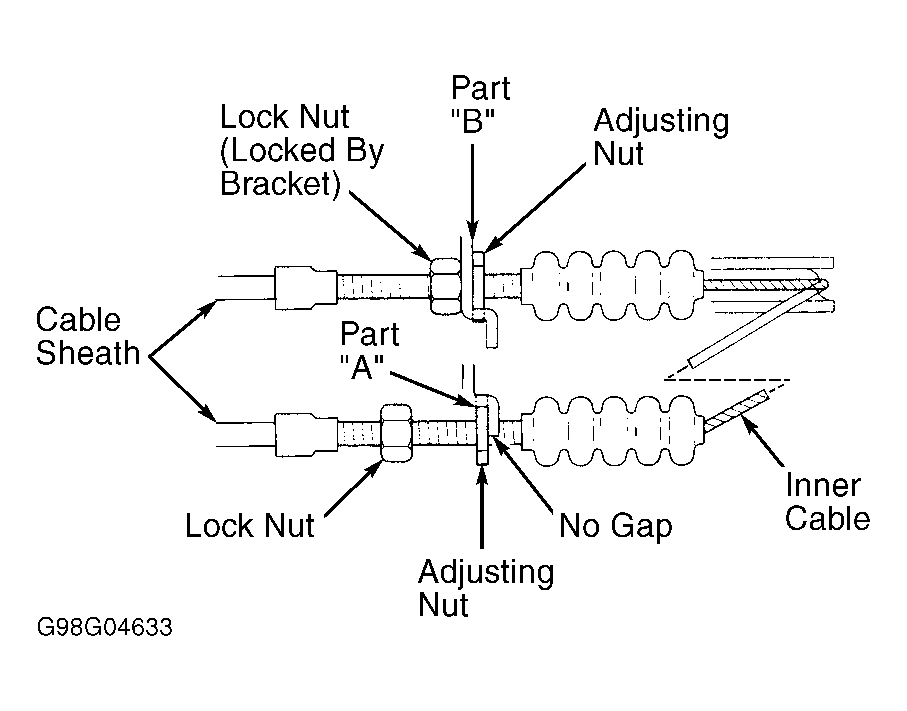
- Ensure throttle cable is not binding or sticking. Move both nuts toward cable sheath. Place throttle cable in to part "A" of cable bracket. See Fig 1. Hold throttle cable sheath, removing all slack from throttle cable. Turn throttle cable adjusting nut until it just touches part "A" of throttle cable bracket.
- Remove throttle cable from part "A" of throttle bracket. Reinstall throttle cable in to part "B" of throttle bracket, so that bracket is now between adjusting nut and lock nut. See Fig 1. Tighten lock nut. Throttle cable deflection should be 0.39-0.47" (10-12 mm) when measured between throttle link and cable bracket. See Figure.
- Loosen lock nut, and turn adjusting nut until deflection is as specified. After adjustment is completed, ensure throttle valve fully opens when accelerator pedal is pushed to floor.
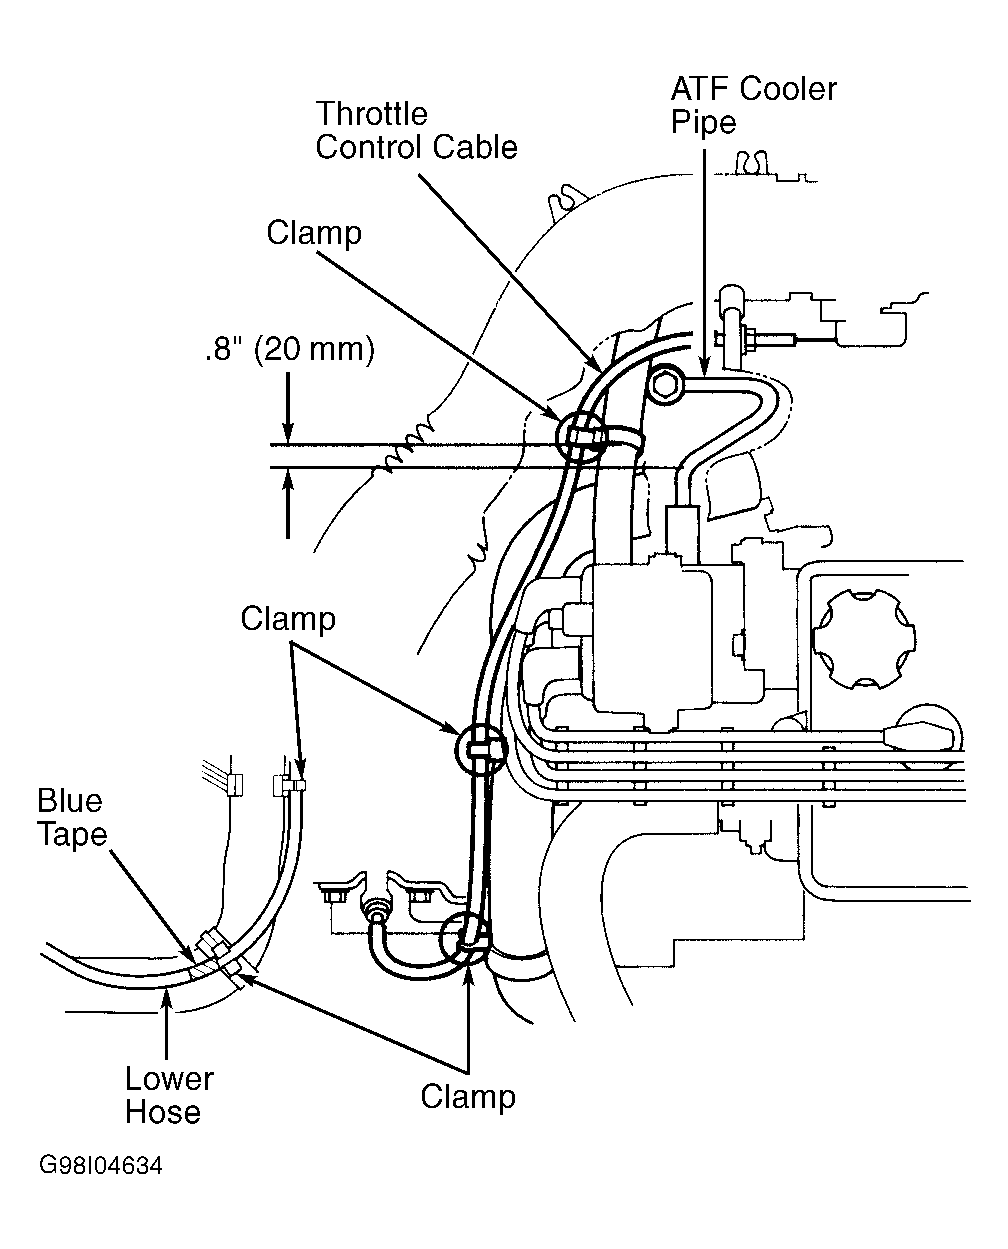
- On A/T models, ensure idle speed is correct. Ensure throttle control cable is clamped correctly in three position. See Fig 2. Ensure throttle linkage is in fully-closed position.
- Loosen throttle control cable lock nut. Using lock nut, remove throttle control cable free play, while pushing throttle control drum to full-closed position. Tighten lock nut. Inspect synchronization and throttle control drum movement.
 Courtesy of AMERICAN HONDA MOTOR CO., INC.
 Courtesy of AMERICAN HONDA MOTOR CO., INC.
- To install, reverse removal procedure. DO NOT adjust throttle stop screw. Start engine. Hold engine at 3,000 RPM until radiator fan comes on. Allow engine to idle.
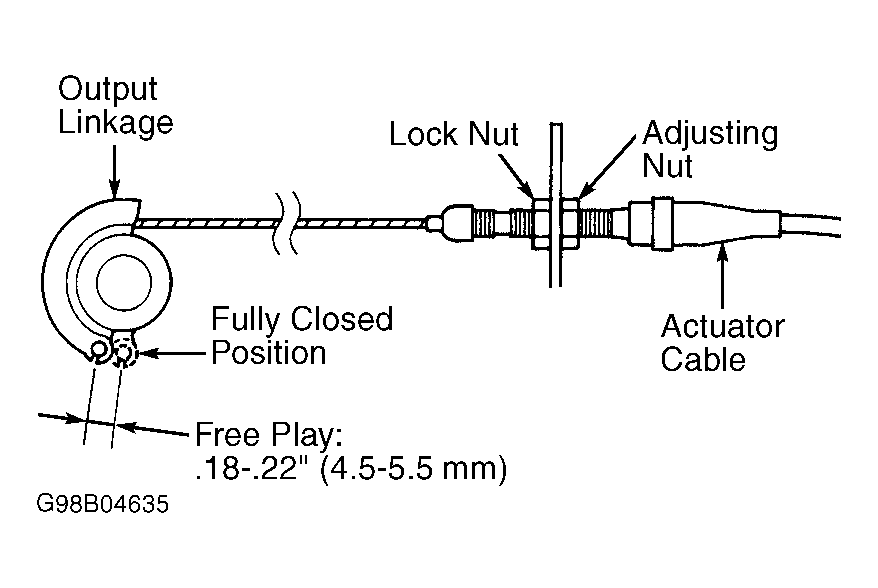
- Ensure cruise control cable is not binding or sticking. Check cruise control cable free play at throttle linkage. Cruise control cable is correctly adjusted when throttle linkage free play is 0.18-0.22" (4.5-5.5 mm) measured at cruise control cable end. See Fig 1.
- If free play is not as specified, loosen lock nut and turn adjusting nut until engine speed starts to increase, and tighten lock nut and adjusting nut. Turn adjusting nut until it is 0.18-0.22" (4.5-5.5 mm) away from bracket. Pull cable so that adjusting nut touches bracket, and tighten lock nut.
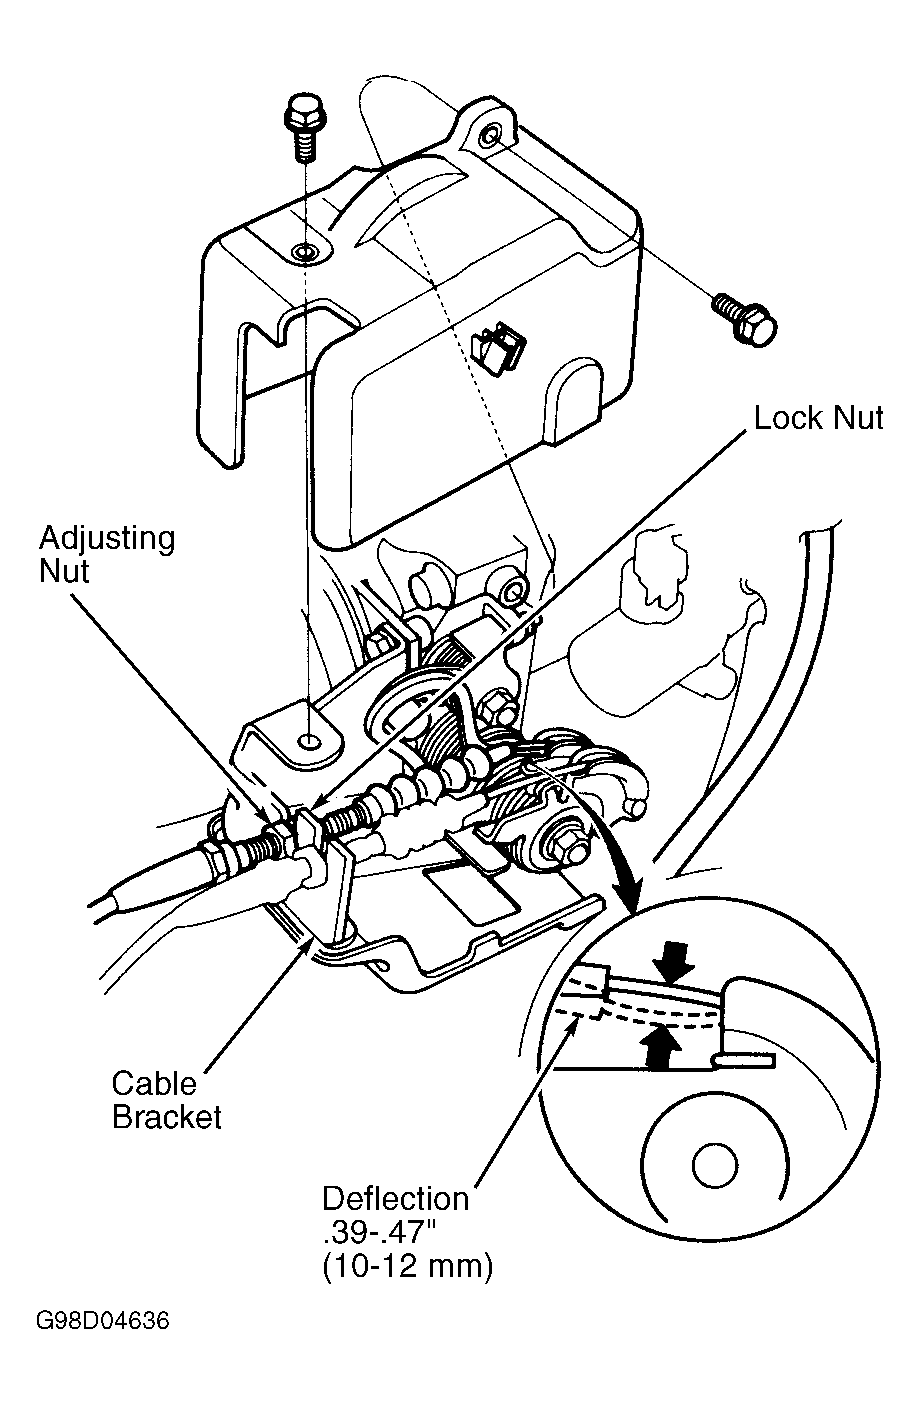
- When throttle link is held to throttle lever, no clearance should exist. Hold throttle cable sheath, removing all slack from throttle cable. Turn throttle cable adjusting nut until it is.01" (3 mm) away from cable bracket.
- Tighten lock nut. Throttle cable deflection should be 0.39-0.47" (10-12 mm) when measured between throttle link and cable bracket. See Fig 2.
- Ensure throttle cable is not binding or sticking. Loosen lock nut, and turn adjusting nut until deflection is as specified. After adjustment is completed, ensure throttle valve fully opens when accelerator pedal is pushed to floor.
 Courtesy of AMERICAN HONDA MOTOR CO., INC.
 Courtesy of AMERICAN HONDA MOTOR CO., INC.
- To install, reverse removal procedure. DO NOT adjust throttle stop screw. Start engine. Hold engine speed at 3,000 RPM until radiator fan comes on. Allow engine to idle. Hold throttle cable sheath, removing all slack from throttle cable.
- Turn throttle cable adjusting nut until it is.01" (3 mm) away from cable bracket. Tighten lock nut. Throttle cable deflection should be 0.39-0.47" (10-12 mm) when measured between throttle link and cable bracket. See Figure. If deflection is not as specified go to next step. If deflection is as specified, go to step 4.
- Ensure throttle cable or cruise control cable (if equipped) is not binding or sticking. Loosen lock nut, and turn adjusting nut until deflection is as specified. After adjustment is completed, ensure throttle valve fully opens when accelerator pedal is pushed to floor.
- Check cruise control cable free play at throttle linkage. Cruise control cable is correctly adjusted when throttle linkage free play is 0.18-0.22" (4.5-5.5 mm) measured at cruise control cable end. See Figure.
- If free play is not as specified, loosen lock nut and turn adjusting nut until engine speed starts to increase, and tighten lock nut and adjusting nut. Turn adjusting nut until it is 0.18-0.22" (4.5-5.5 mm) away from bracket. Pull cable so that adjusting nut touches bracket, and tighten lock nut.