Removal & Installation
- Disconnect negative battery terminal. See BATTERY DISCONNECT/RECONNECT PRECAUTIONS . Disconnect inlet hose between air cleaner and throttle body. Disconnect brake servo vacuum line from throttle body terminal by pressing plastic ring down and pulling hose upward. Release fuel pressure. See FUEL SYSTEM PRESSURE RELEASE under FUEL SYSTEMS. Disconnect fuel line and wiring from clips at rear edge of cylinder head.
- Remove harness cover and rear camshaft cover. Remove camshaft position sensor housing and trigger wheel. See CAMSHAFT POSITION SENSOR under SENSORS & SWITCHES. Remove right engine cover and accessory belts. See Fig 1. Remove upper and front timing covers. See Fig 2.
 Courtesy of VOLVO CARS OF NORTH AMERICA.
 Courtesy of VOLVO CARS OF NORTH AMERICA.
- Remove bracket for servo hose from accessory belt protector. Position Lifting Beam (999-5006) or equivalent lifting beam slightly in front engine lift eye. Position Lifting Arm (999-5383) and Lifting Hook (999-5460) or equivalent tools to lift engine upward at timing belt side. Lift engine high enough to disconnect upper right-side engine mount. Remove servo fasteners. Remove engine mount bolts and disconnect mount from engine. Remove engine mount from vehicle body. Remove lower timing cover. See Fig 3.
- Raise and support vehicle. Remove right front wheel. Position upper timing cover on engine and turn crankshaft until timing marks on crankshaft and camshafts correspond. See Fig 4. When timing marks are aligned, turn crankshaft one quarter turn clockwise and then back again. Remove upper timing cover.
 Courtesy of VOLVO CARS OF NORTH AMERICA.
 Courtesy of VOLVO CARS OF NORTH AMERICA.
- Loosen belt tensioner center bolt. Hold center bolt and turn eccentric to 10 o'clock. Remove timing belt from camshaft pulleys and then from crankshaft pulley. See Fig 5.
 Courtesy of VOLVO CARS OF NORTH AMERICA.
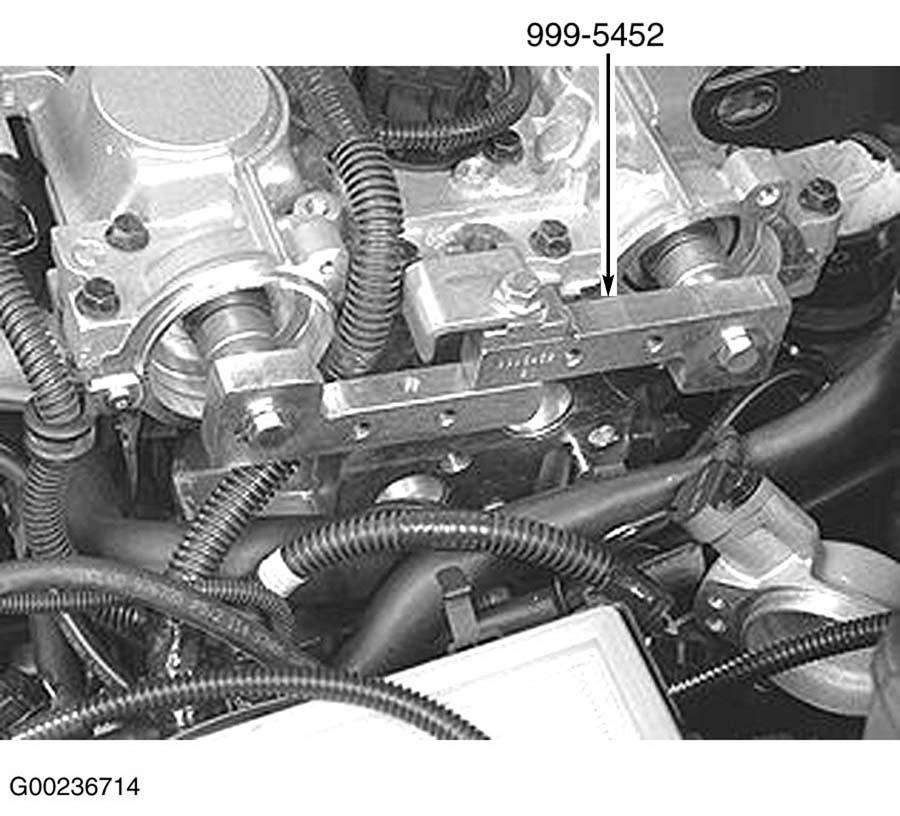
- Install Camshaft Adjustment Tool (999-5452) or equivalent tool at rear of camshafts. See Fig 6.
- Remove plug at front edge of Variable valve timing (VVT) unit. Remove center screw behind plug using a Torx No. 55 tool. Place towel under VVT pulley and carefully pull timing gear with VVT unit straight out of cylinder head. Catch any spilled oil. See Fig 7.
 Courtesy of VOLVO CARS OF NORTH AMERICA.
 Courtesy of VOLVO CARS OF NORTH AMERICA.