Headlight Assembly: Disassembly
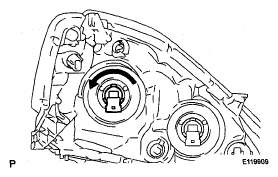
- REMOVE NO. 1 HEADLIGHT BULB (HALOGEN HEADLIGHT)
- Turn in the direction indicated by the arrow and remove the No. 1 headlight bulb.
 Courtesy of © TOYOTA, LICENSE AGREEMENT TMS1002
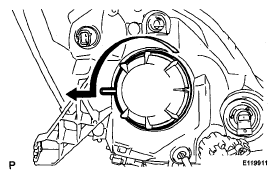
- REMOVE DISCHARGE HEADLIGHT BULB (DISCHARGE HEADLIGHT)
- Turn in the direction indicated by the arrow and remove the headlight socket cover.
 Courtesy of © TOYOTA, LICENSE AGREEMENT TMS1002
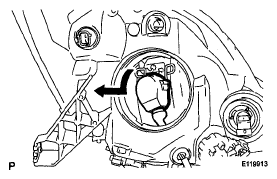
- Turn in the direction indicated by the arrow and disconnect the socket.
 Courtesy of © TOYOTA, LICENSE AGREEMENT TMS1002
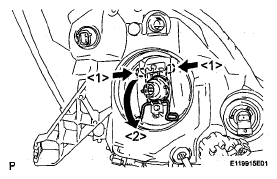
- Release the lock of the set spring and remove the discharge headlight bulb as shown in the illustration.
 Courtesy of © TOYOTA, LICENSE AGREEMENT TMS1002
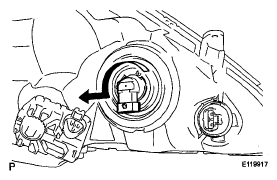
- REMOVE NO. 2 HEADLIGHT BULB
- Turn in the direction indicated by the arrow and remove the No. 2 headlight bulb.
 Courtesy of © TOYOTA, LICENSE AGREEMENT TMS1002
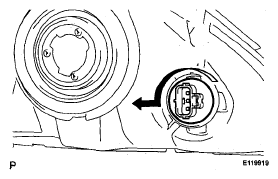
- REMOVE FRONT TURN SIGNAL LIGHT BULB
- Turn in the direction indicated by the arrow and remove the front turn signal light bulb and front turn signal light socket as a unit.
- Remove the front turn signal light bulb from the front turn signal light socket.
 Courtesy of © TOYOTA, LICENSE AGREEMENT TMS1002
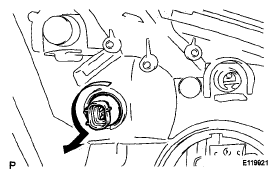
- REMOVE FRONT SIDE MARKER LIGHT BULB
- Turn in the direction indicated by the arrow and remove the side marker light bulb and side marker light socket as a unit.
- Remove the side marker light bulb from the side marker light socket.
 Courtesy of © TOYOTA, LICENSE AGREEMENT TMS1002
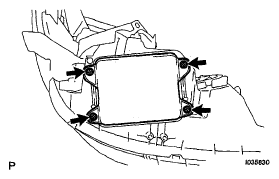
- REMOVE LIGHT CONTROL ECU (DISCHARGE HEADLIGHT)
- Remove the 4 screws and headlight cover.
- Remove the headlight gasket.
 Courtesy of © TOYOTA, LICENSE AGREEMENT TMS1002
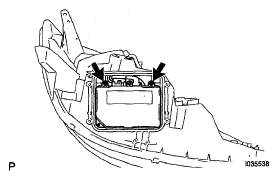
- Remove the 2 screws.
 Courtesy of © TOYOTA, LICENSE AGREEMENT TMS1002
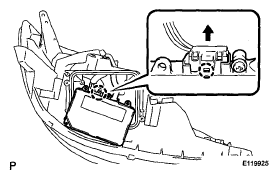
- Disengage the claw.
- Disconnect the connector and remove the light control ECU.
 Courtesy of © TOYOTA, LICENSE AGREEMENT TMS1002
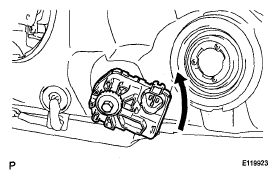
- Remove the headlight leveling motor assembly as shown in the illustration.
- Remove the headlight leveling motor base packing.
 Courtesy of © TOYOTA, LICENSE AGREEMENT TMS1002