Valve Body Assembly: Disassembly
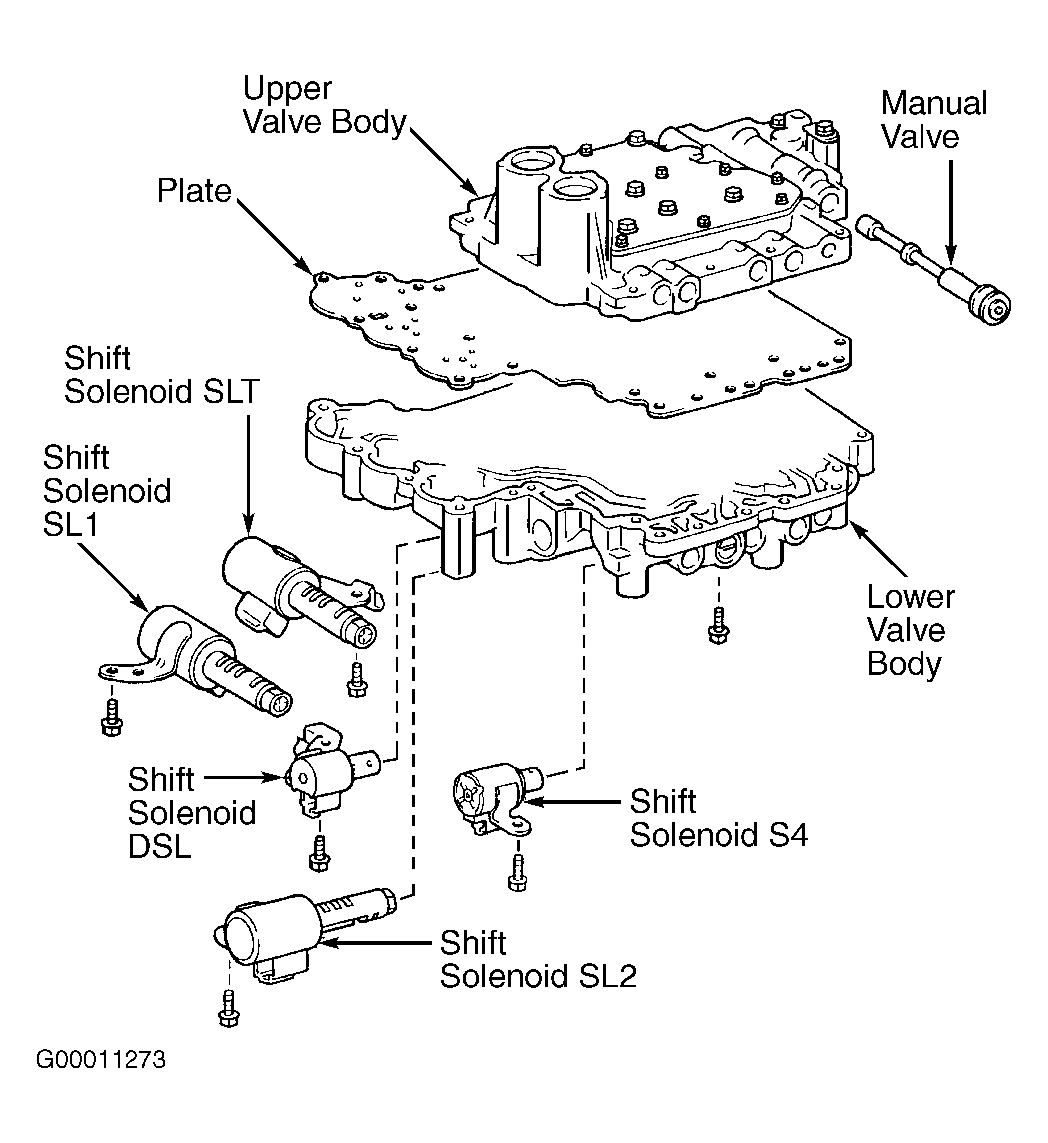
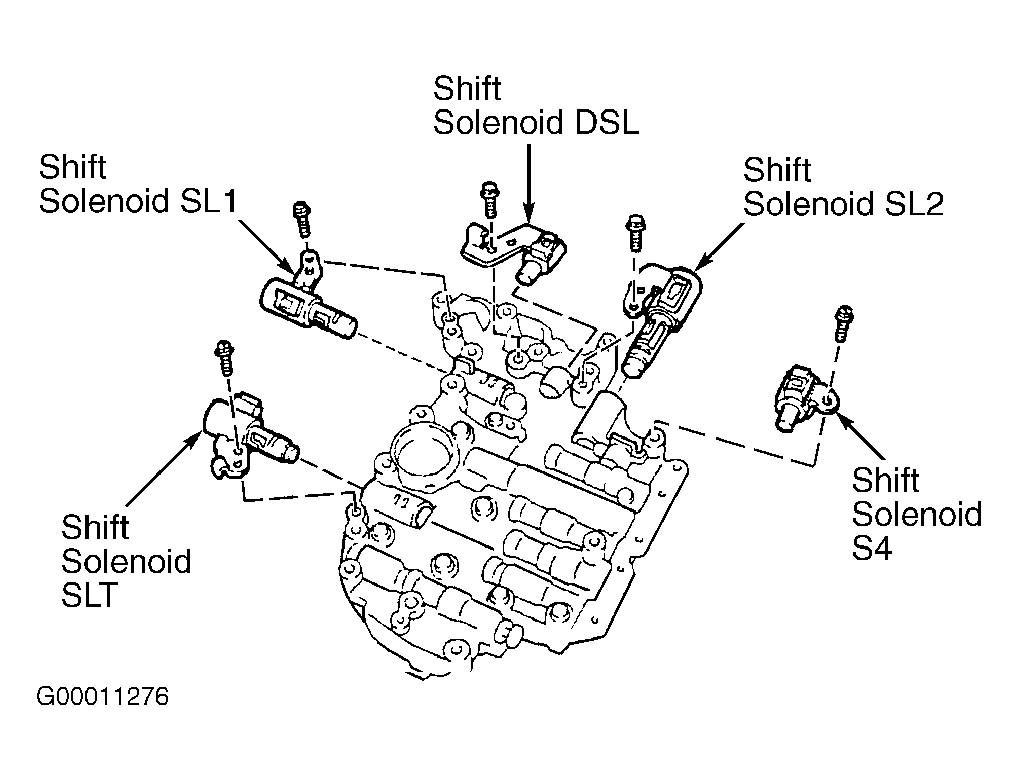
- Remove 5 bolts and 5 shift solenoids. See Fig 1 and Fig 4
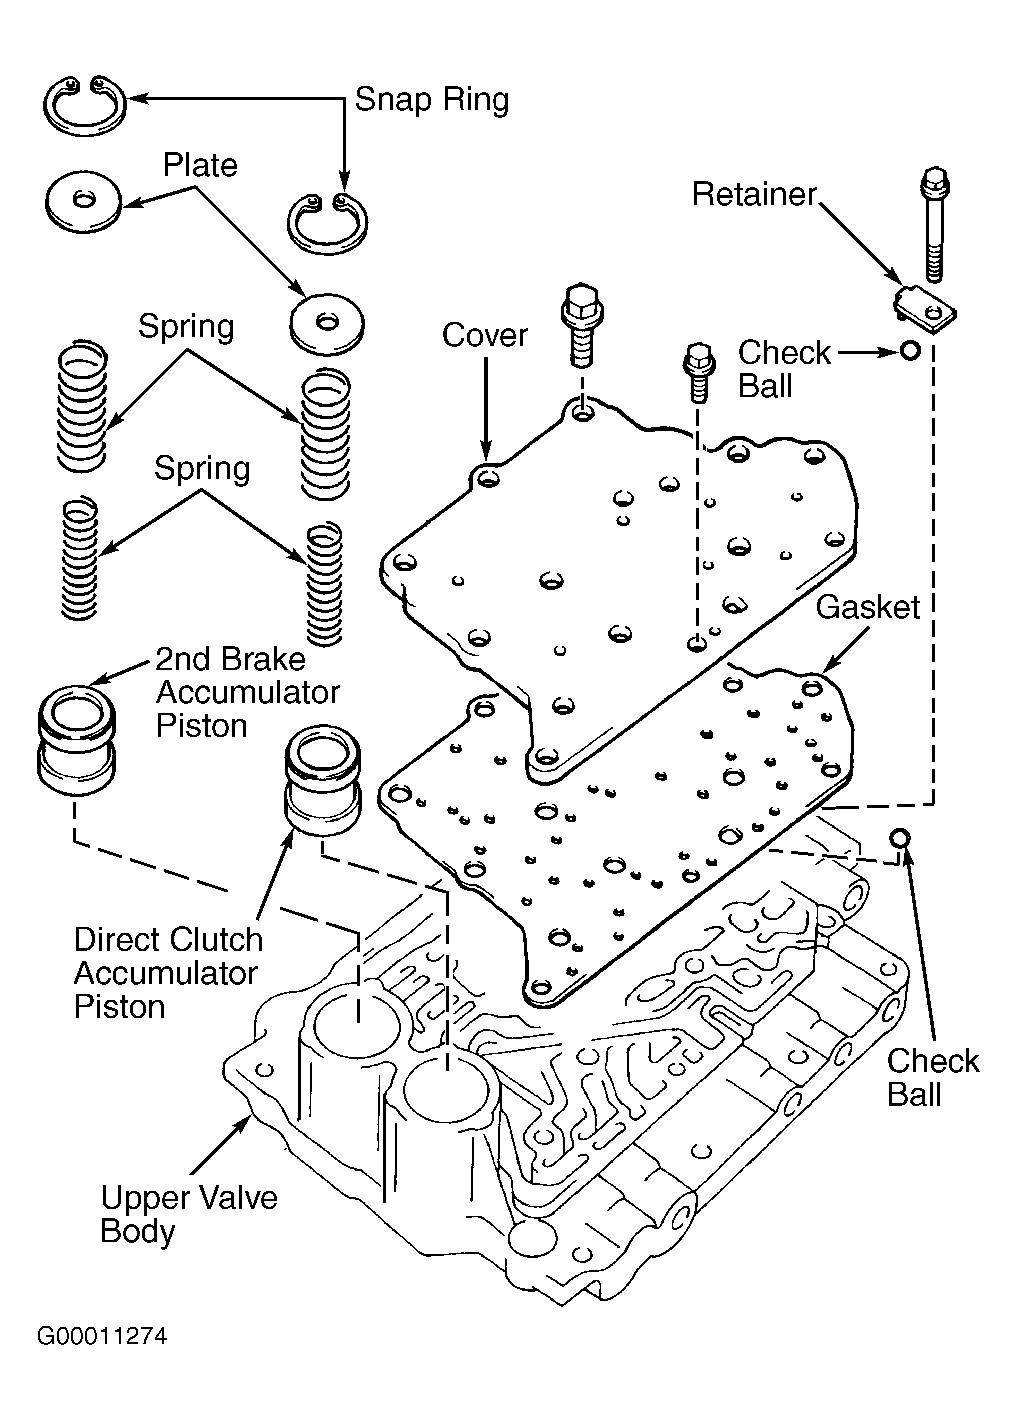
. Using snap ring pliers, remove 2 snap rings securing accumulator assemblies. Remove 2 washers, 4 springs and 2 pistons from upper valve body. See Fig 2.
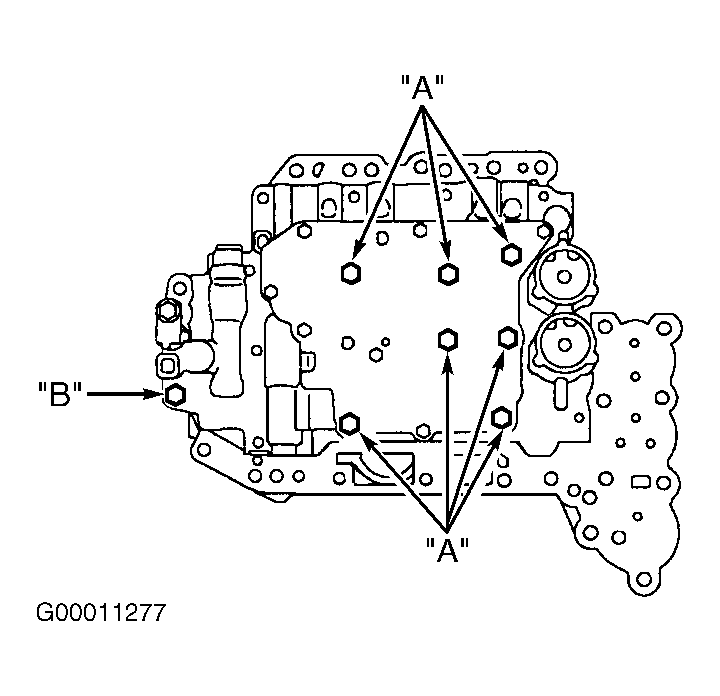
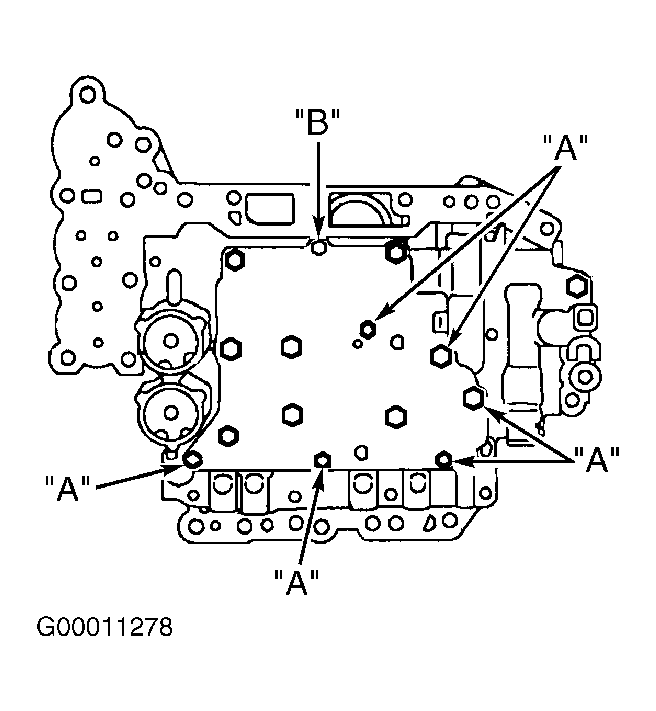
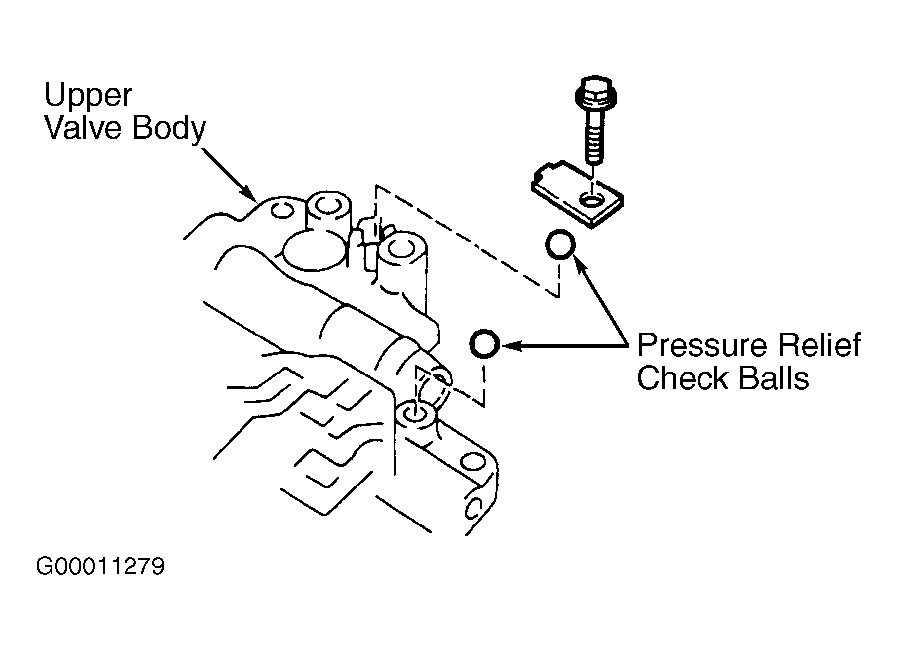
- Remove 8 upper valve body bolts. See Fig 5. Remove 7 upper valve body cover bolts. See Fig 6. Remove bolt, cover and 2 pressure relief check balls. See Fig 7.
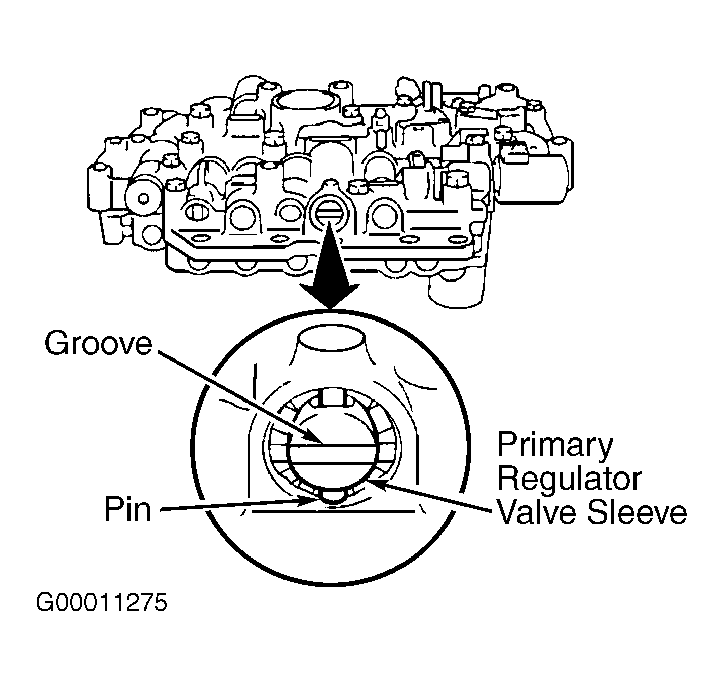
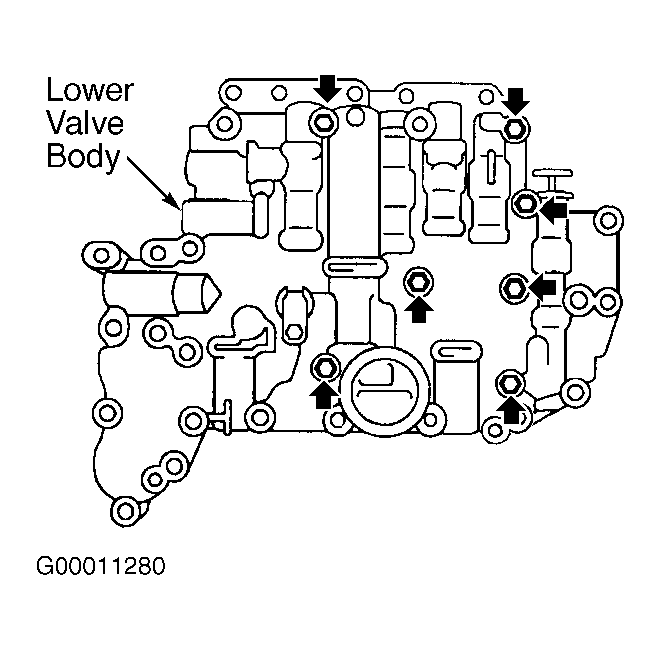
- Remove 7 lower valve body bolts. See Fig 8. Hold plate against lower valve body and carefully remove lower valve body from upper valve body. Remove plate from lower valve body. DO NOT lose check balls. Note location of check balls, keys, plugs and pins in valve body. See Figure-Figure
.
 Courtesy of © TOYOTA, LICENSE AGREEMENT TMS1002
 Courtesy of © TOYOTA, LICENSE AGREEMENT TMS1002
 Courtesy of © TOYOTA, LICENSE AGREEMENT TMS1002
 Courtesy of © TOYOTA, LICENSE AGREEMENT TMS1002
 Courtesy of © TOYOTA, LICENSE AGREEMENT TMS1002
 Courtesy of © TOYOTA, LICENSE AGREEMENT TMS1002
 Courtesy of © TOYOTA, LICENSE AGREEMENT TMS1002
 Courtesy of © TOYOTA, LICENSE AGREEMENT TMS1002