- Record the serial number of the replacement car computer.
NOTE:
This is a provisioned and fused car computer that has been prepared specifically for use by Service for production cars
 Courtesy of TESLA, INC. Courtesy of TESLA, INC.
|
- Open the LH front door and lower all windows.
- Connect a laptop with Toolbox 3 to the vehicle. See TOOLBOX 3 - CONNECT AND DISCONNECT
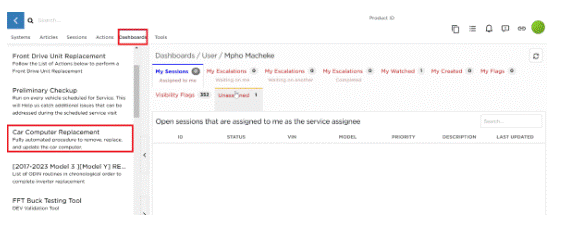
- Click on Dashboards > Car Computer Replacement and on the "Getting Started" page, click on Next Step.
 Courtesy of TESLA, INC. Courtesy of TESLA, INC.
|
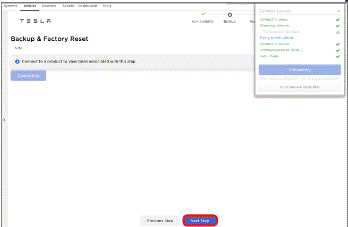
- On the "Backup & Factory Reset" page, click Next Step and follow the prompts to perform a profile backup and factory reset on the car computer.
NOTE:
The car computer will reboot several times during this step.
 Courtesy of TESLA, INC. Courtesy of TESLA, INC.
|
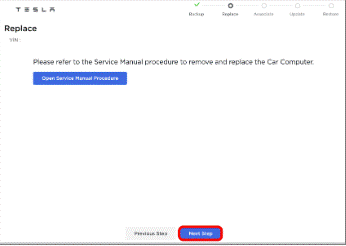
- Once the "Replace" page appears, the car computer can be replaced. Use the instructions in Car Computer, LHD - Remove And Install Car Computer (LHD) to perform the following:
- Remove the current car computer.
- Fasten the replacement car computer to the vehicle and connect all harnesses and hoses to the computer.
- Connect the electrical harness to the front passenger air bag.
- Prepare the vehicle for a Coolant Air Purge.
- Install the front passenger knee airbag (if equipped) and any air ducts that were removed.
- Install the glove box and front passenger footwell cover.
- Reconnect LV power.
- Perform the Coolant Air Purge routine.
- Reestablish the Toolbox laptop connection, and in the "Replace" page, click Next Step to go to the "Associate" page.
 Courtesy of TESLA, INC. Courtesy of TESLA, INC.
|
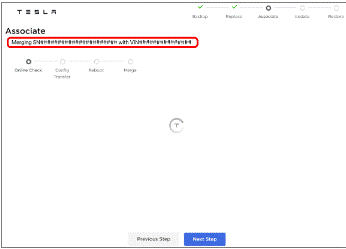
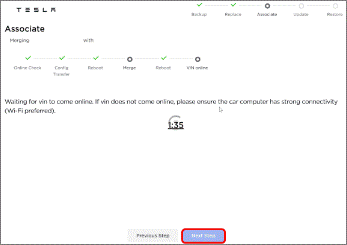
- In the "Associate" page, make sure that the onscreen computer serial number matches the actual serial number of the replacement car computer that was recorded earlier.
 Courtesy of TESLA, INC. Courtesy of TESLA, INC.
|
- Follow the prompts to transfer configs and associate the replacement car computer. The car computer will reboot several times.
- When association is complete and the VIN is confirmed online, click Next Step to go to the "Update" page.
NOTE:
If necessary, Reconnect the Toolbox connection.
 Courtesy of TESLA, INC. Courtesy of TESLA, INC.
|
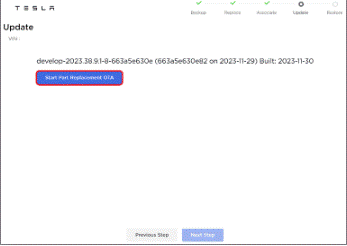
- Click Start Part Replacement OTA to deploy a software update to the vehicle.
NOTE:
If necessary, Reconnect the Toolbox connection.
 Courtesy of TESLA, INC. Courtesy of TESLA, INC.
|
- Use the vehicle touchscreen to install the software package. See Software Reinstall - Touchscreen
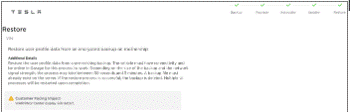
- In Toolbox, click Next Page to go to the "Restore" page, and then follow the prompts to restore the vehicle profile.
 Courtesy of TESLA, INC. Courtesy of TESLA, INC.
|
- Disconnect the laptop from the vehicle.
- Install the remaining components that were removed for access. See Car Computer, LHD - Remove And Install .