- Put the vehicle on a 2-post lift.
- Open the LH front door and lower the LH front window.
- Remove the LH and RH wheel caps.
NOTE:
Pull the inner side of the adjacent 2 claws of the wheel cap to remove the wheel cap from the wheel.
NOTE:
LH Shown, RH Similar
 Courtesy of TESLA, INC. Courtesy of TESLA, INC.
|
- Remove the underhood storage unit. See EXTERIOR FITTINGS - LUGGAGE COMPARTMENT TRIM - FRONT LUGGAGE STORAGE COMPARTMENT - FRUNK ASSEMBLY - REMOVE AND REPLACE
.
- Disconnect LV power. See LV BATTERY - LI-LON - DISCONNECT AND CONNECT
.
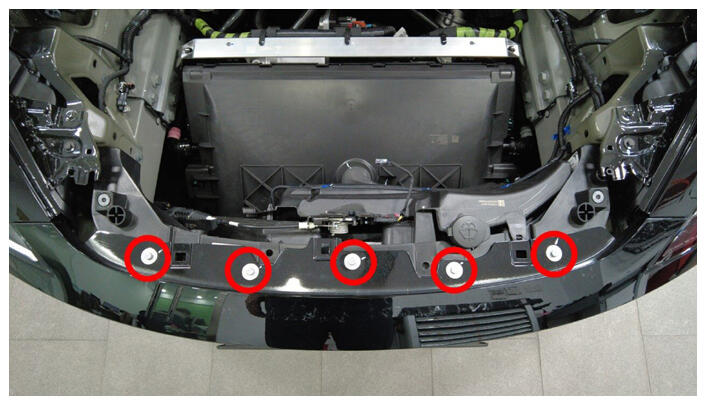
- Remove fasteners holding upper portion of front fascia to vehicle
NOTE:
5x bolts, 10 mm, 2.5 N.m
 Courtesy of TESLA, INC. Courtesy of TESLA, INC.
|
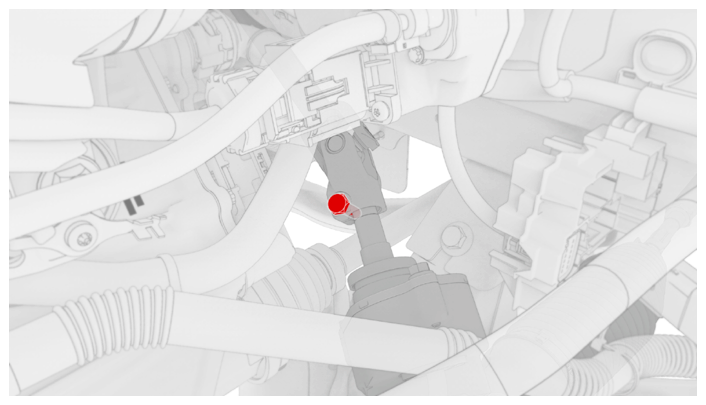
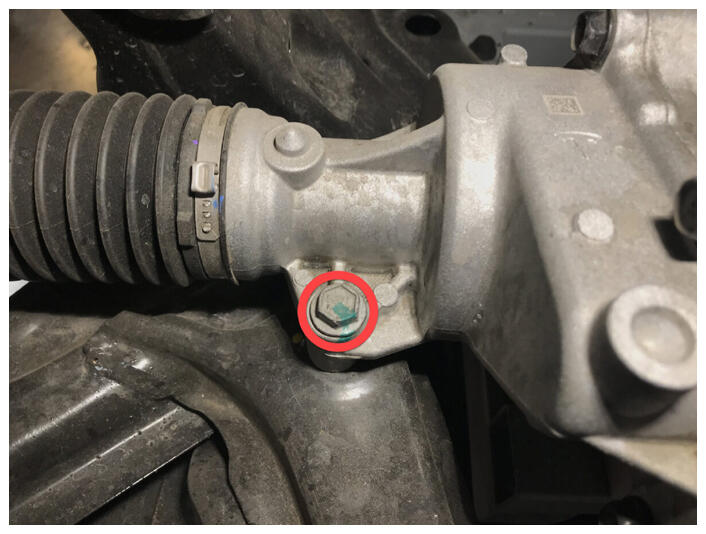
- Remove bolt securing the steering gear assembly to electric steering column
NOTE:
1x bolt, 13 mm, 18 N.m
 Courtesy of TESLA, INC. Courtesy of TESLA, INC.
|
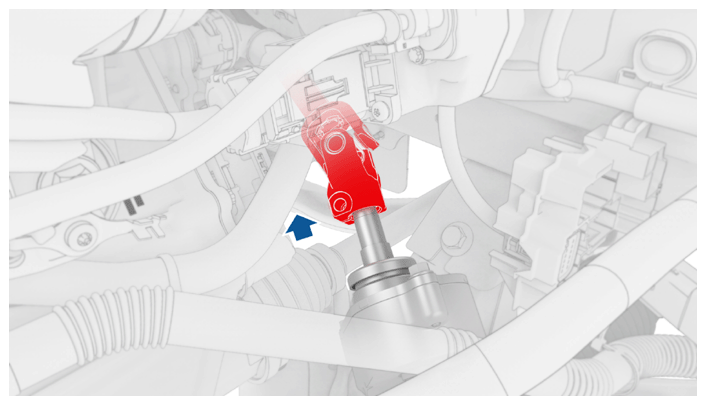
- Slide the electric steering column upward to remove it from the steering gear assembly
NOTE:
May need to wiggle or use dead blow to help separate
 Courtesy of TESLA, INC. Courtesy of TESLA, INC.
|
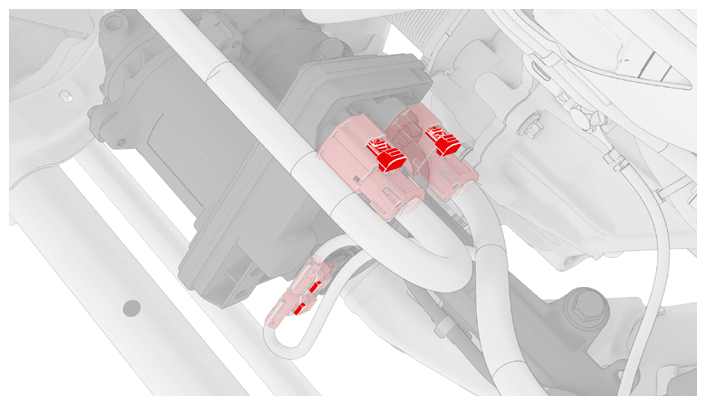
- Disconnect the steering gear assembly connectors
NOTE:
4x connectors
 Courtesy of TESLA, INC. Courtesy of TESLA, INC.
|
- Remove the LH and RH front wheels. See WHEEL ASSEMBLY - REMOVE AND INSTALL
.
- Remove the front fascia. See FRONT BUMPER FASCIA - FASCIA ASSEMBLY - FRONT - REMOVE AND REPLACE
.
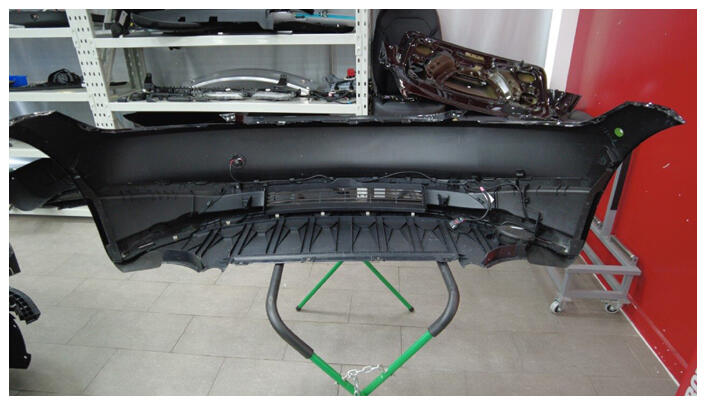 Courtesy of TESLA, INC. Courtesy of TESLA, INC.
|
- Remove the bolts (x2) that attach the front end carrier to the LH front subframe crash can assembly, then repeat this step on the RH side of the vehicle.
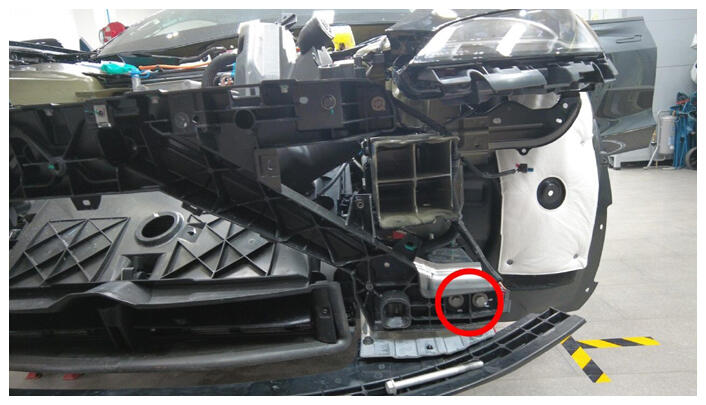 Courtesy of TESLA, INC. Courtesy of TESLA, INC.
|
- Raise the vehicle. See RAISE VEHICLE - 2 STANDS
.
- Remove and discard the nut that attaches the LH front tie rod end to the LH front knuckle.
 Courtesy of TESLA, INC. Courtesy of TESLA, INC.
|
- Remove the LH front tie rod end from the LH front knuckle.
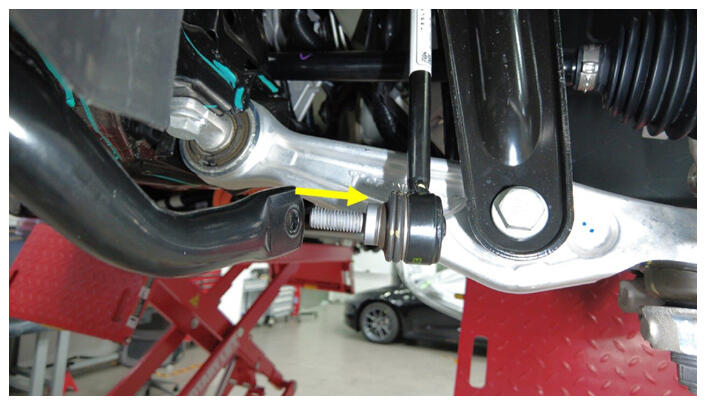
- Remove and discard the nut that attaches the stabilizer bar link to the LH front stabilizer bar.
 Courtesy of TESLA, INC. Courtesy of TESLA, INC.
|
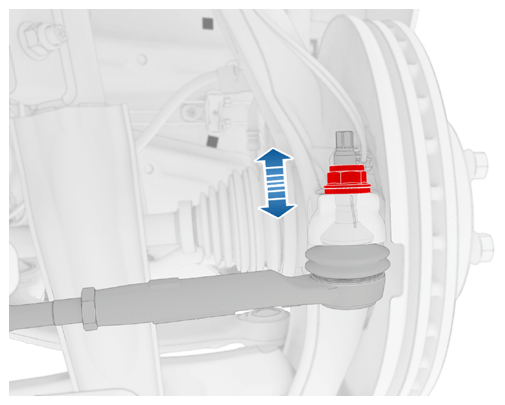
- Move the LH front stabilizer bar link aside.
NOTE:
Move the stabilizer bar up/down to get the correct angle to remove the end link.
 Courtesy of TESLA, INC. Courtesy of TESLA, INC.
|
- Repeat step 14 through step 17 on the RH side of the vehicle.
- Release the clip that attaches the front drive unit bypass hose to the front subframe.
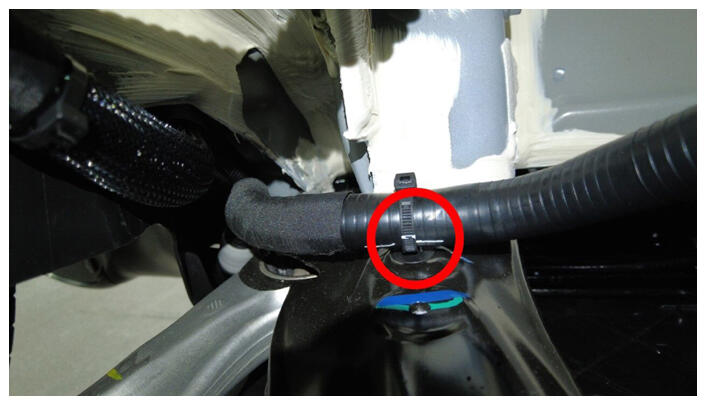 Courtesy of TESLA, INC. Courtesy of TESLA, INC.
|
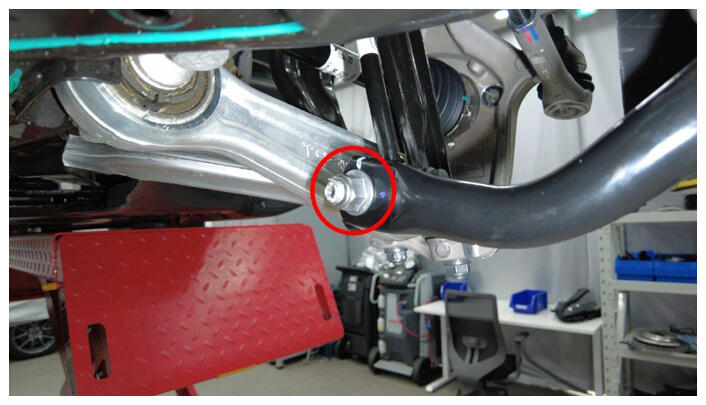
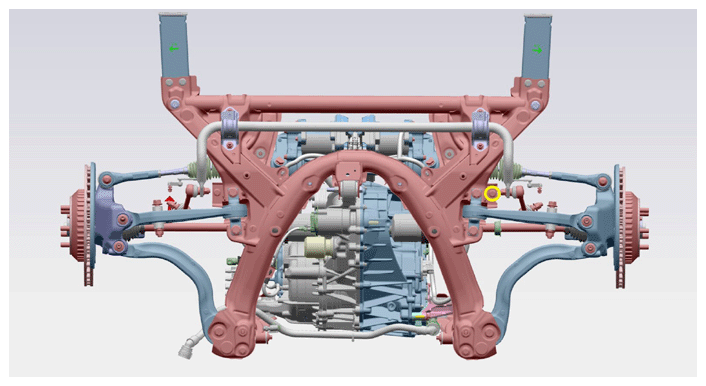
- Remove the bolt and nut that attach the LH front lower compliance link to the front subframe.
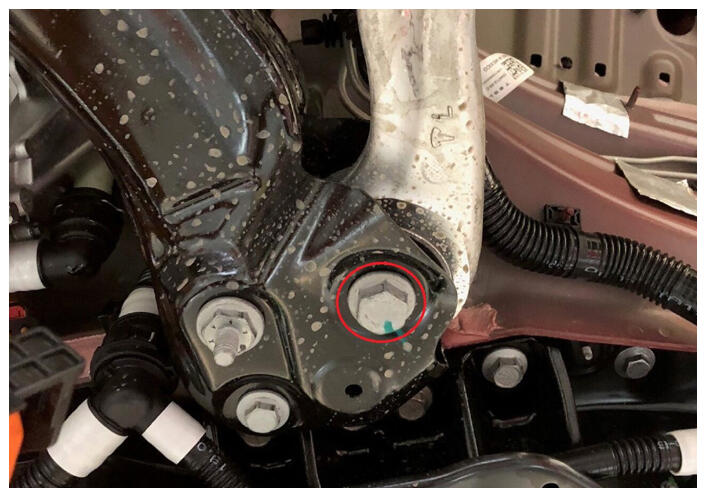 Courtesy of TESLA, INC. Courtesy of TESLA, INC.
|
 Courtesy of TESLA, INC. Courtesy of TESLA, INC.
|
- Remove and discard the bolts (x2) that attach the LH front lower lateral link to the front subframe.
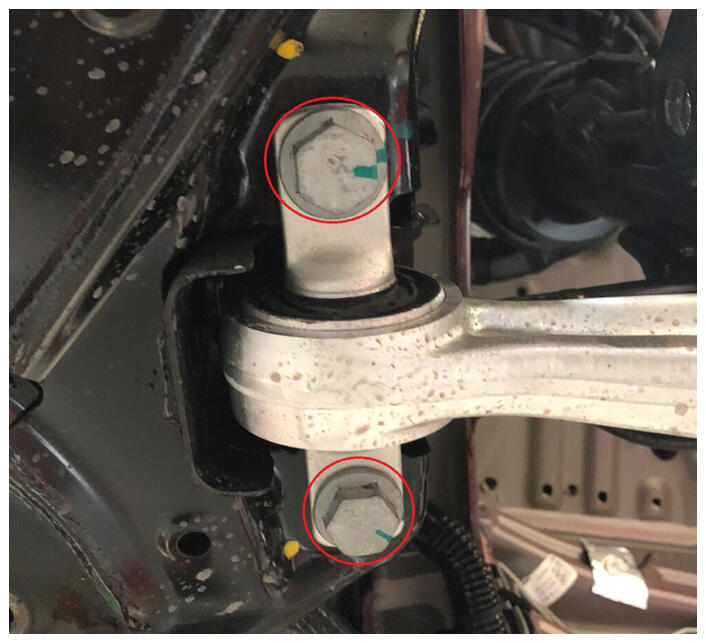 Courtesy of TESLA, INC. Courtesy of TESLA, INC.
|
- Remove the nut and bolt that attach the LH strut to the LH front lower lateral link.
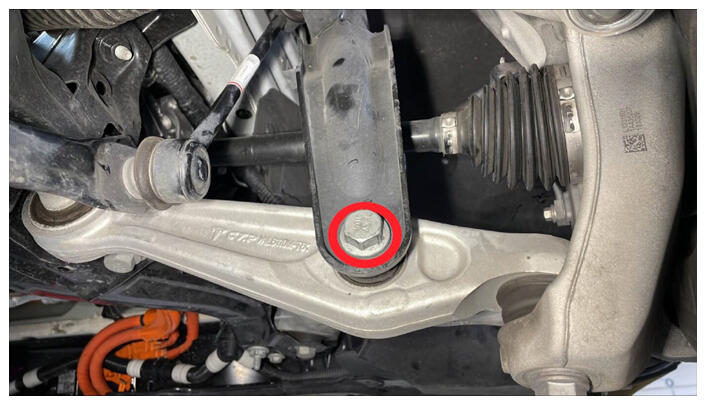 Courtesy of TESLA, INC. Courtesy of TESLA, INC.
|
- Repeat step 20 through step 22 on the RH side of the vehicle.
- Position the front subframe lifting tool beneath the front subframe.
- Attach an air hose to the front subframe lifting tool.
- With an assistant, raise the front subframe lifting tool to support the front subframe.
- Loop the straps over the front subframe, hook the ends of the straps to the metal rings, and then pull the straps tight to restrain the subframe to the front subframe lifting tool.
NOTE:
Lower the vehicle to give more slack to connect the straps to the rings, if necessary.
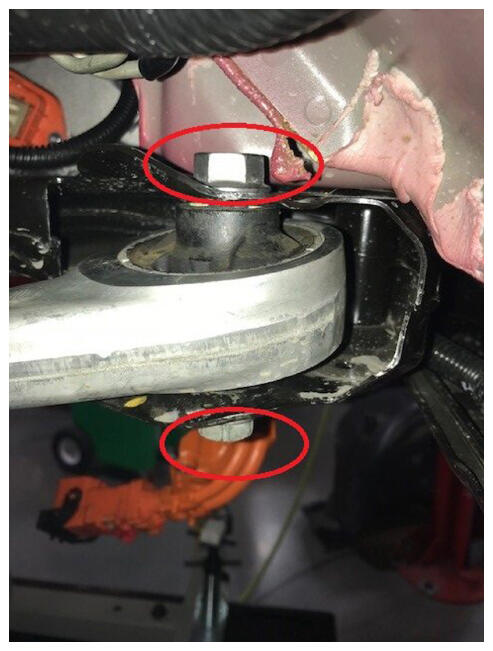
- Remove and discard the bolt that attaches the LH mid mount to the body, then repeat this step on the RH side.
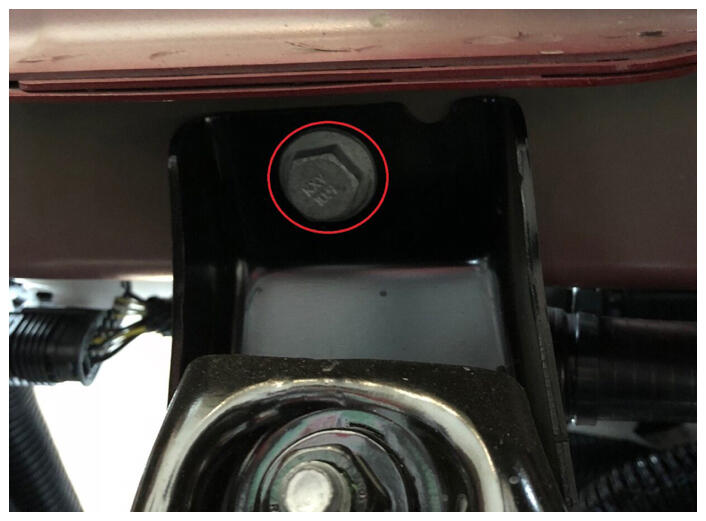 Courtesy of TESLA, INC. Courtesy of TESLA, INC.
|
 Courtesy of TESLA, INC. Courtesy of TESLA, INC.
|
- Remove and discard the bolts (x2) that attach the front portion of the front subframe to the body.
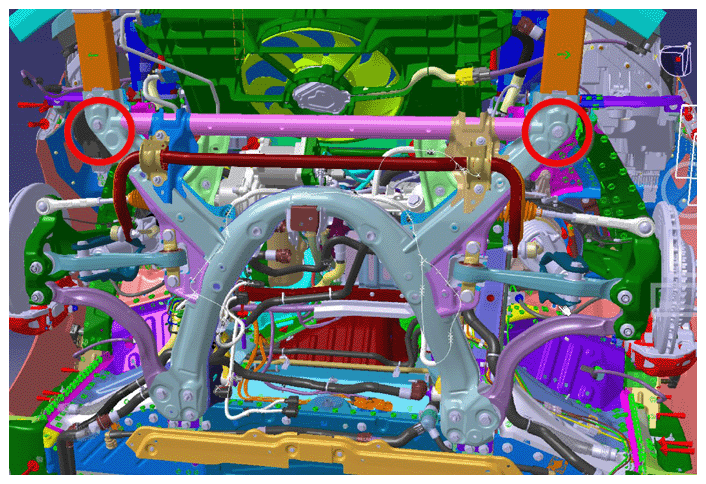 Courtesy of TESLA, INC. Courtesy of TESLA, INC.
|
- Remove and discard the smaller bolts (x2) that attach the rear portion of the front subframe to the body.
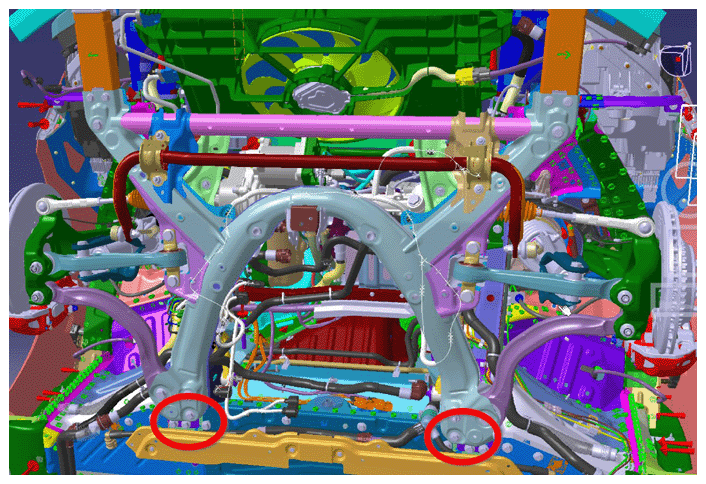 Courtesy of TESLA, INC. Courtesy of TESLA, INC.
|
- Remove and discard the larger bolts (x2) that attach the rear portion of the front subframe to the body.
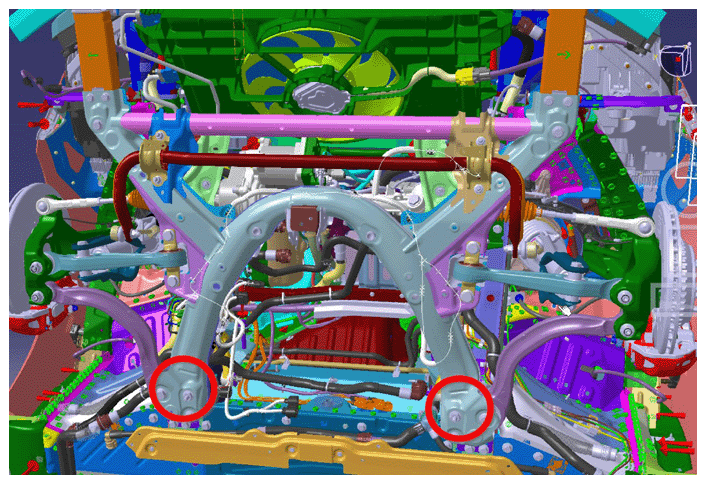 Courtesy of TESLA, INC. Courtesy of TESLA, INC.
|
- Lower the front subframe assembly from the vehicle.
- Disconnect the air hose from the front subframe lifting tool.
- Move the front subframe lifting tool from under the vehicle.
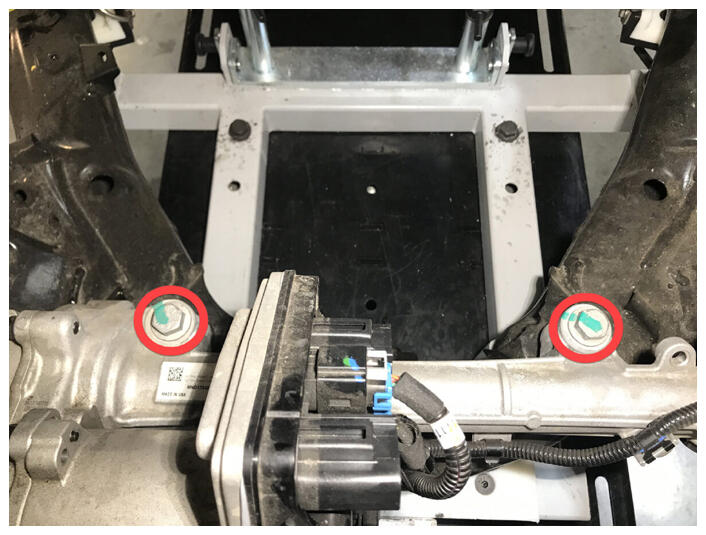
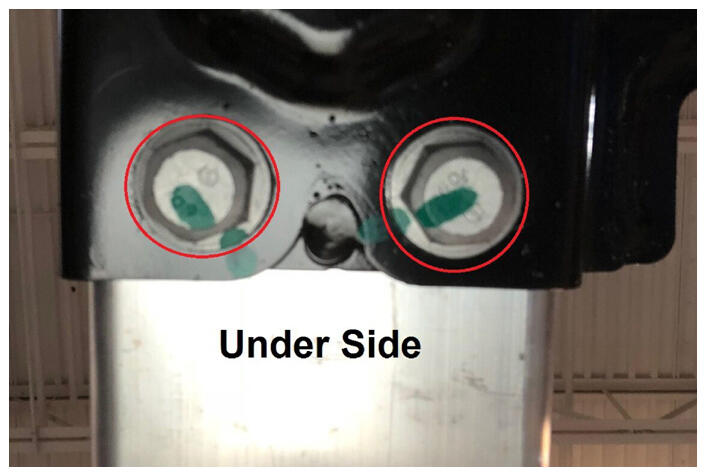
- Remove the front bolts (x2) that attach the steering gear assembly to the front subframe.
NOTE:
LH Shown, RH Similar
 Courtesy of TESLA, INC. Courtesy of TESLA, INC.
|
- Remove that the rear bolts (x2) that attach the steering gear assembly to the front subframe.
 Courtesy of TESLA, INC. Courtesy of TESLA, INC.
|
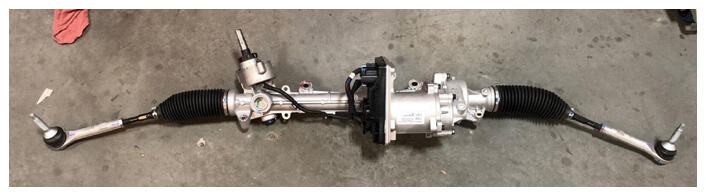
- Remove the steering gear assembly from the front subframe.
 Courtesy of TESLA, INC. Courtesy of TESLA, INC.
|
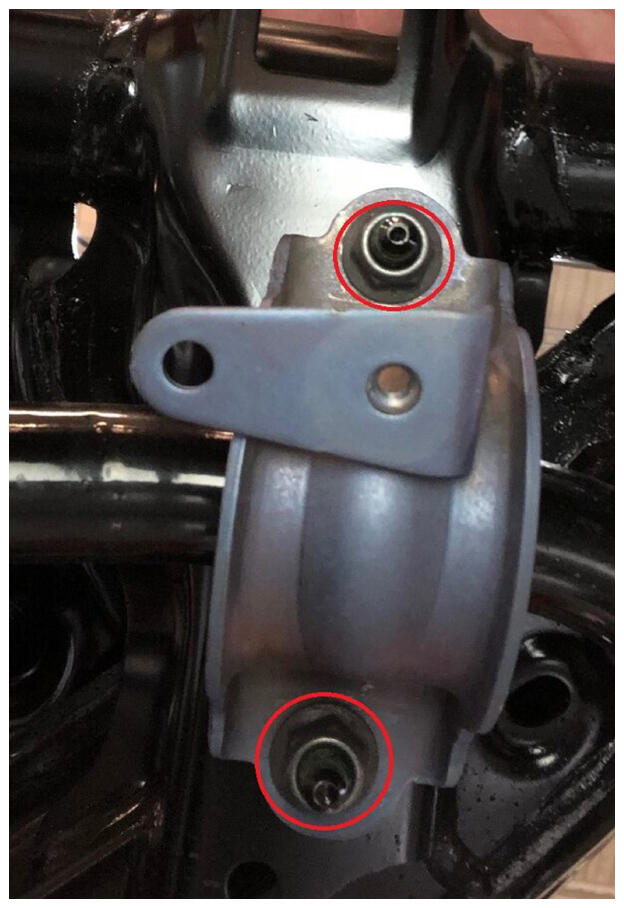
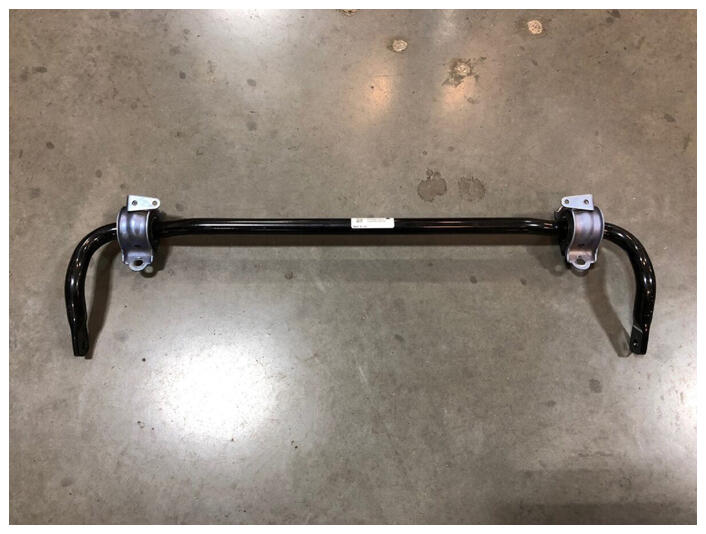
- With an assistant, remove and discard the LH nuts (x2) that attach the front stabilizer bar to the front subframe, then repeat this step on the RH side.
NOTE:
LH Shown, RH Similar
 Courtesy of TESLA, INC. Courtesy of TESLA, INC.
|
 Courtesy of TESLA, INC. Courtesy of TESLA, INC.
|
- Remove the bolts (x2) that attach the front subframe to the LH front subframe crush can assembly, then repeat this step on the RH side.
NOTE:
LH Shown, RH Similar
 Courtesy of TESLA, INC. Courtesy of TESLA, INC.
|
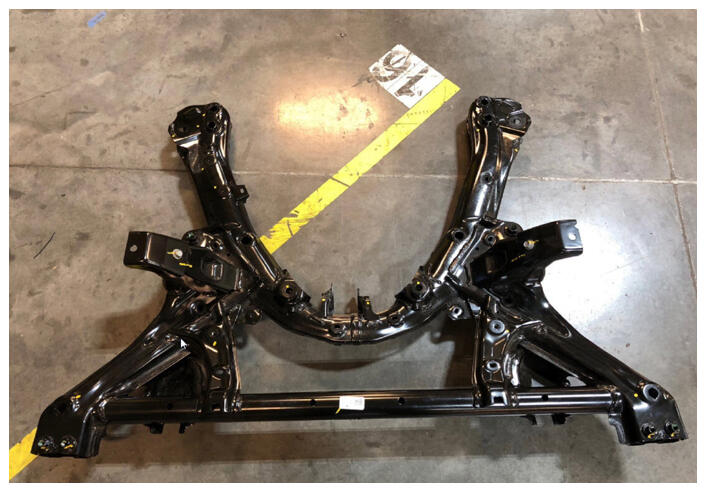
- With an assistant, remove the front subframe from the front subframe lifting tool.
 Courtesy of TESLA, INC. Courtesy of TESLA, INC.
|
 Courtesy of TESLA, INC. Courtesy of TESLA, INC.
|