- Open all four doors
NOTE:
If vehicle is being powered down, Latch rear doors to prevent accidental closure
- Lower all four windows
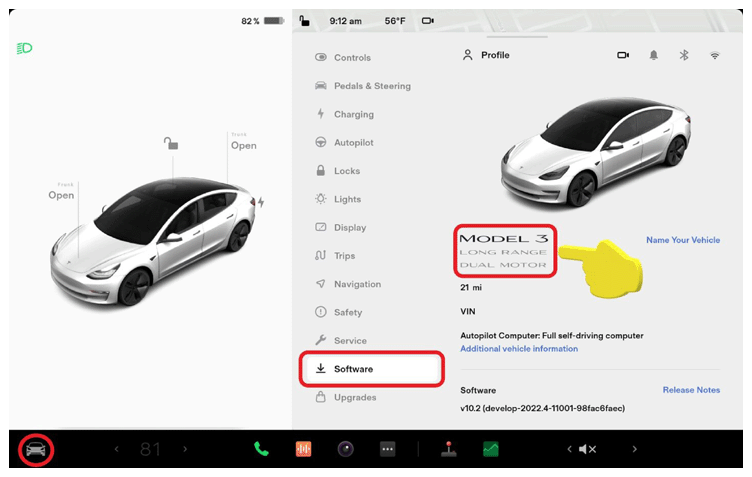
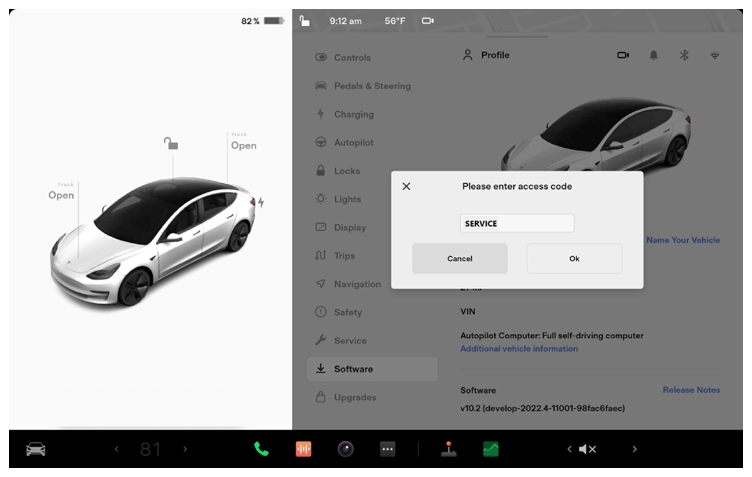
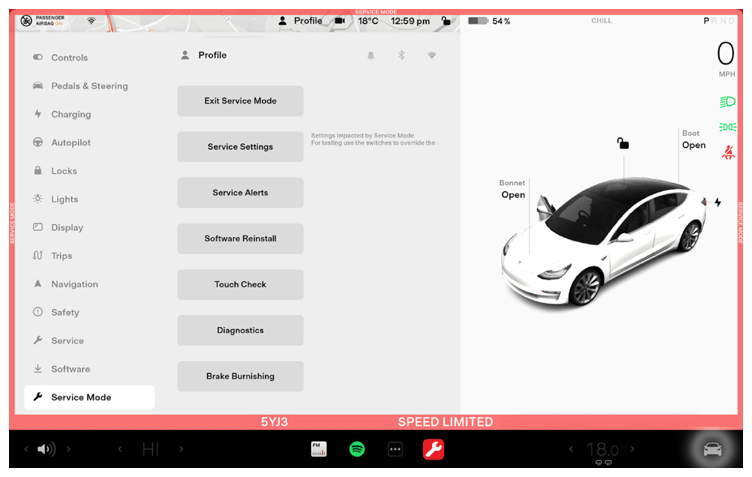
- Place vehicle in service mode through UI
NOTE:
Select vehicle's badge icon in Controls > Software for four seconds and then type "service" into dialog box
 Courtesy of TESLA, INC. Courtesy of TESLA, INC.
|
 Courtesy of TESLA, INC. Courtesy of TESLA, INC.
|
 Courtesy of TESLA, INC. Courtesy of TESLA, INC.
|
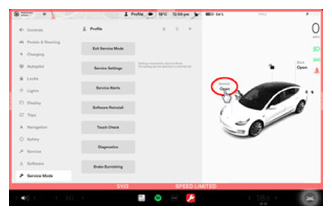
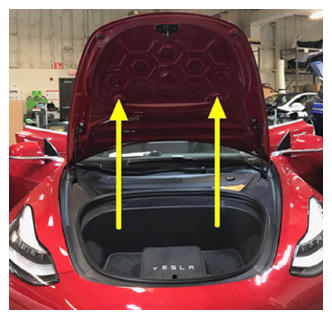
- Open hood
NOTE:
Press "Open" button on the touchscreen to release the latch, Lift the lid manually
 Courtesy of TESLA, INC. Courtesy of TESLA, INC.
|
 Courtesy of TESLA, INC. Courtesy of TESLA, INC.
|
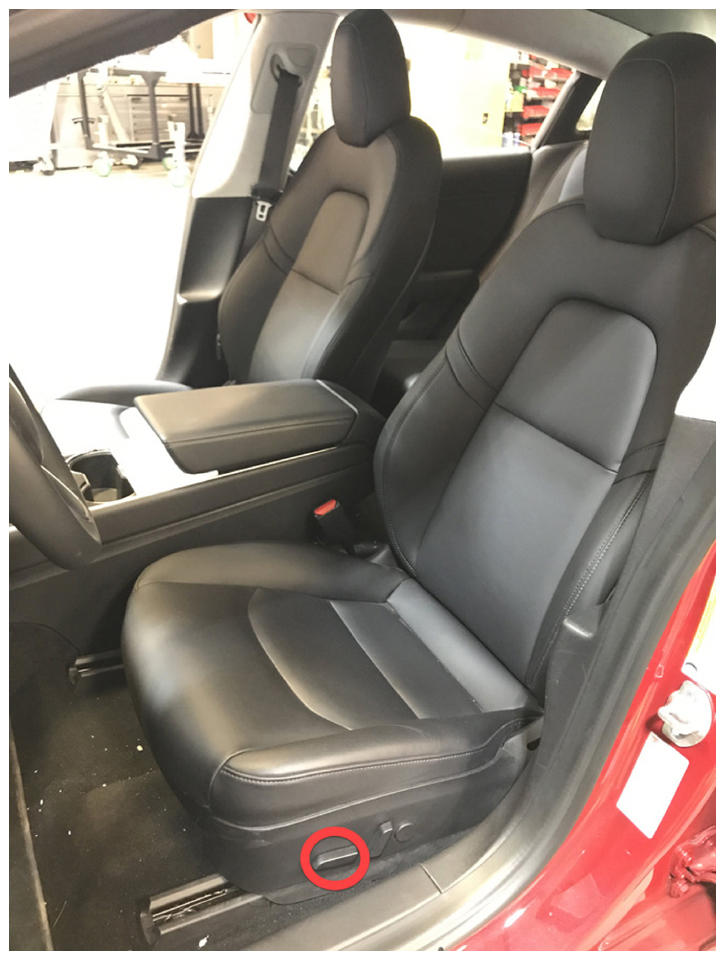
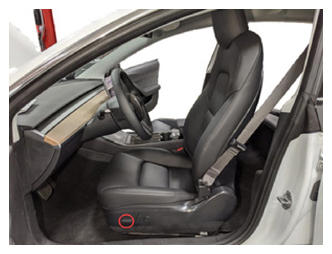
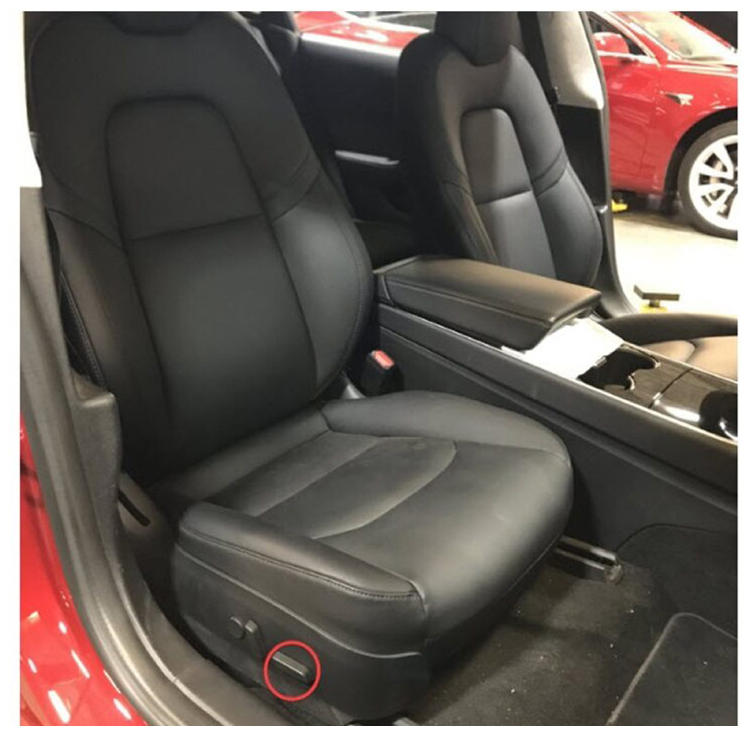
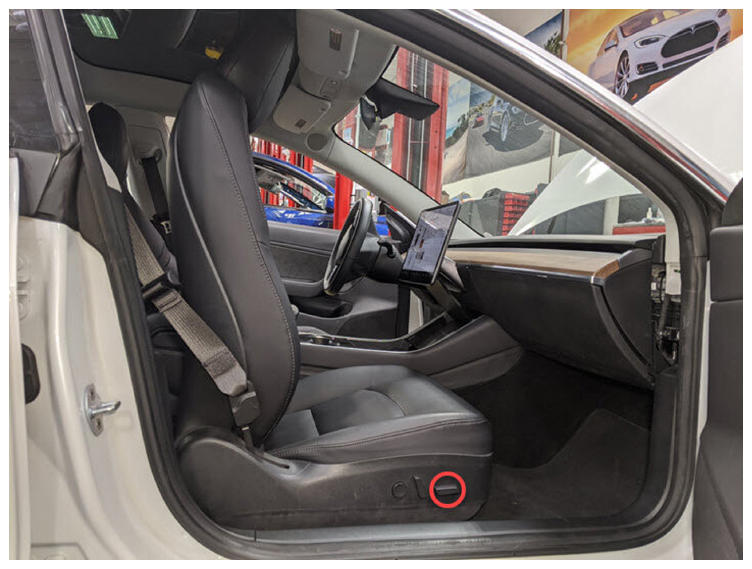
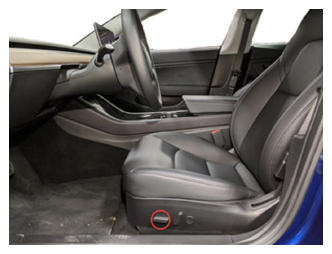
- Move LH front seat backward
 Courtesy of TESLA, INC. Courtesy of TESLA, INC.
|
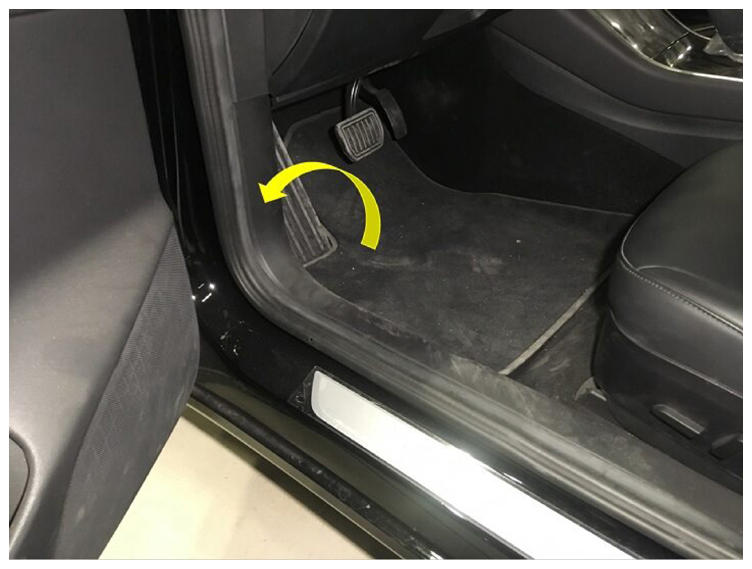
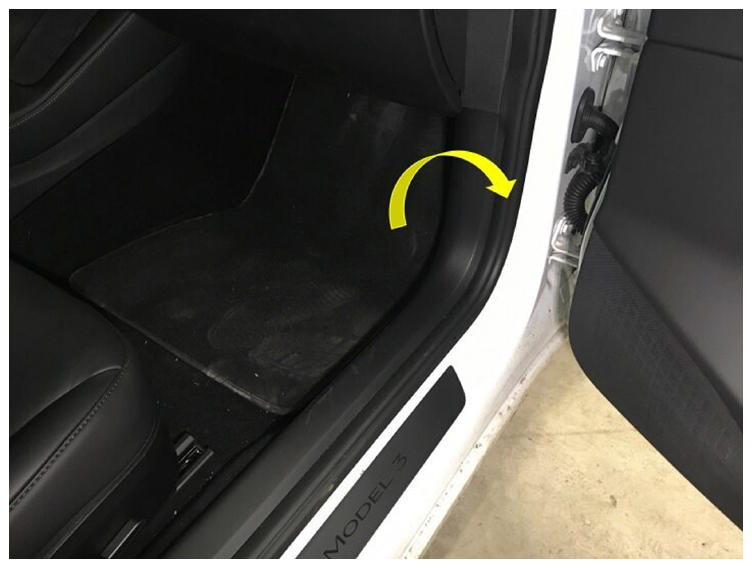
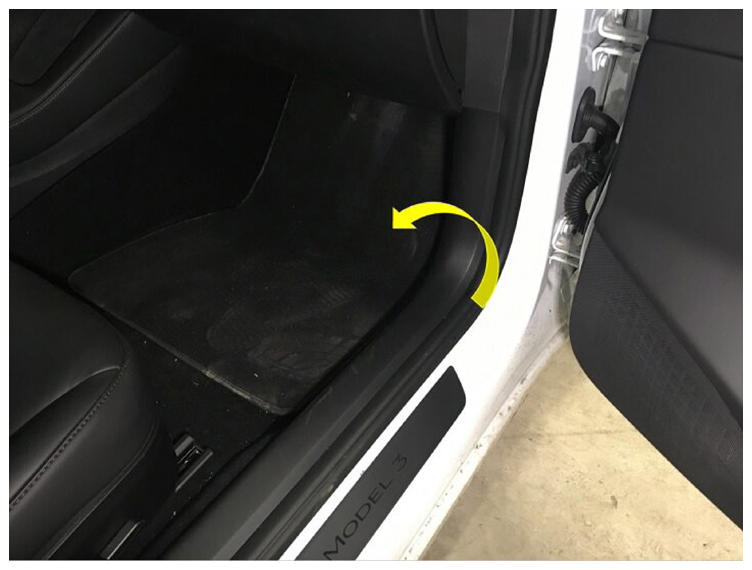
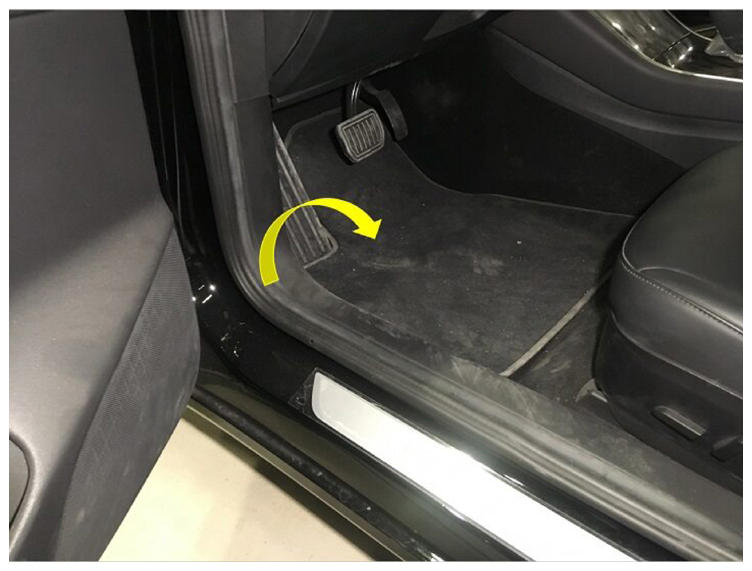
- Remove LH front floor mat
 Courtesy of TESLA, INC. Courtesy of TESLA, INC.
|
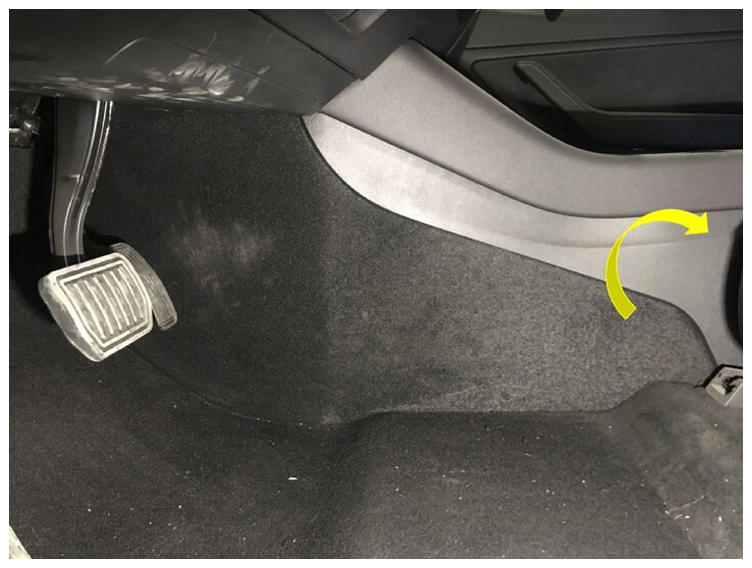
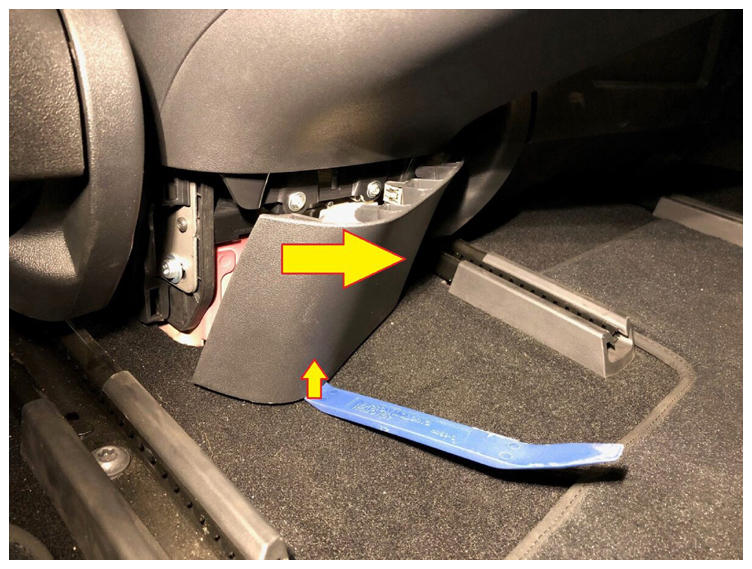
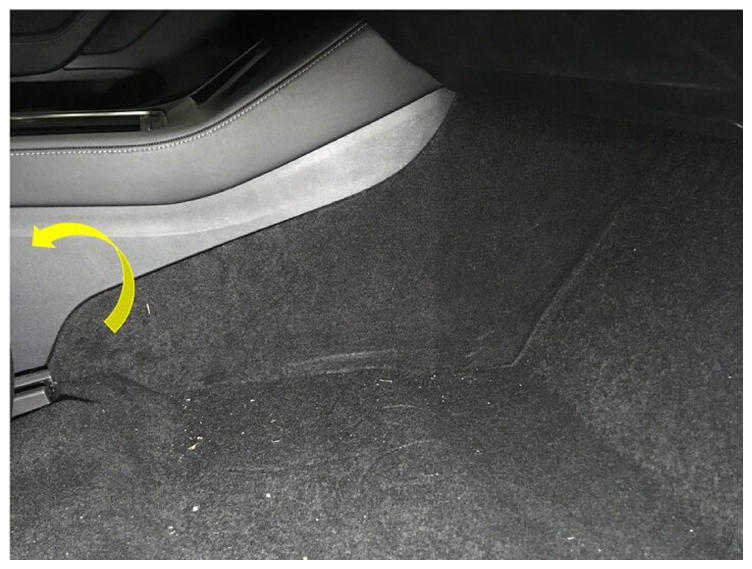
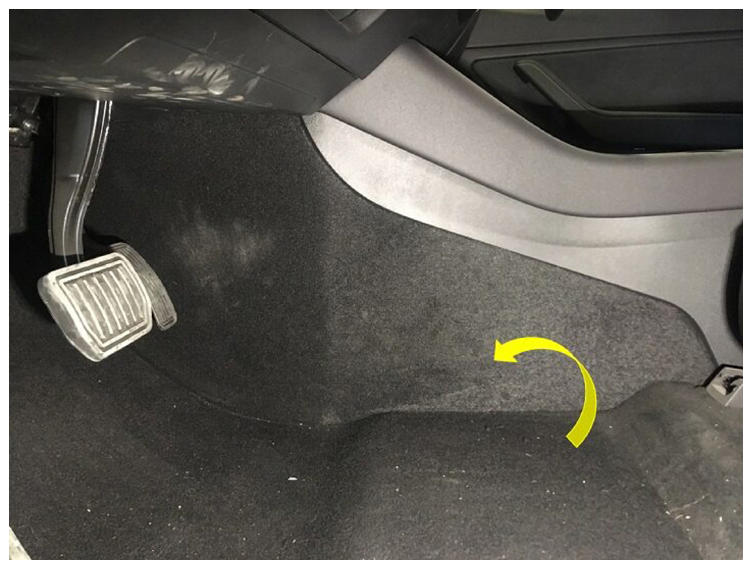
- Remove LH console side panel carpet
NOTE:
12x clips, Use trim tool starting at rear edge to release upper clips, then pull bottom to release remaining clips
 Courtesy of TESLA, INC. Courtesy of TESLA, INC.
|
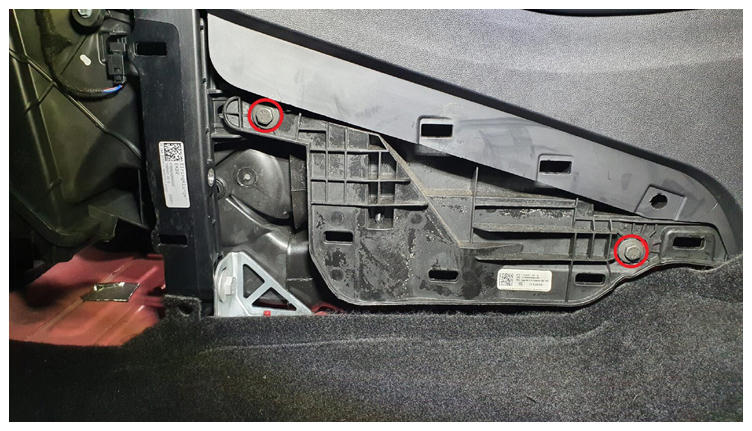
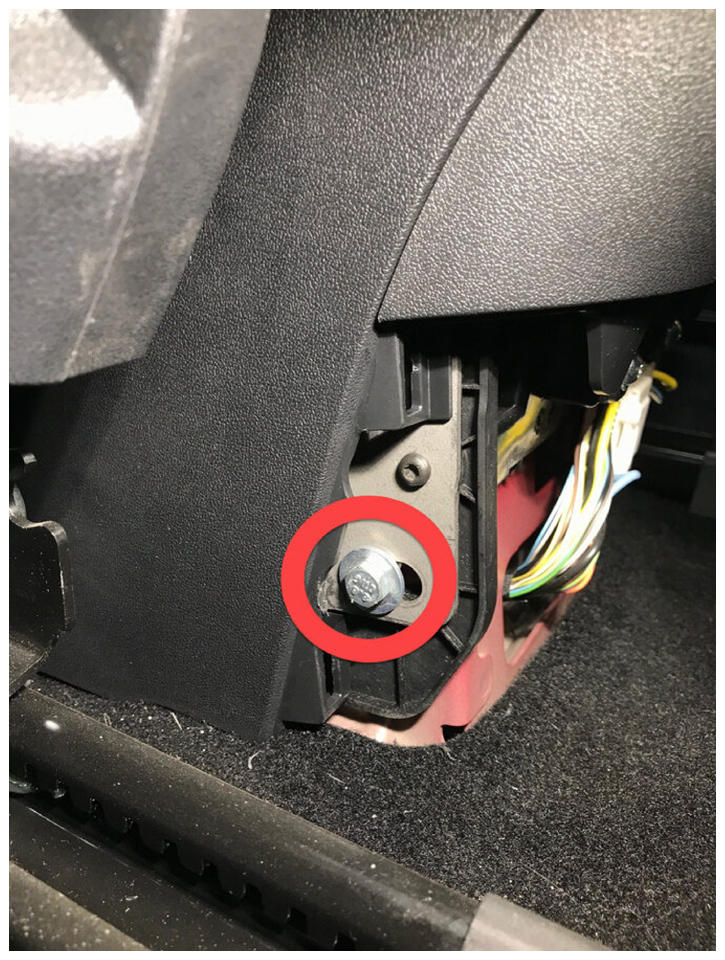
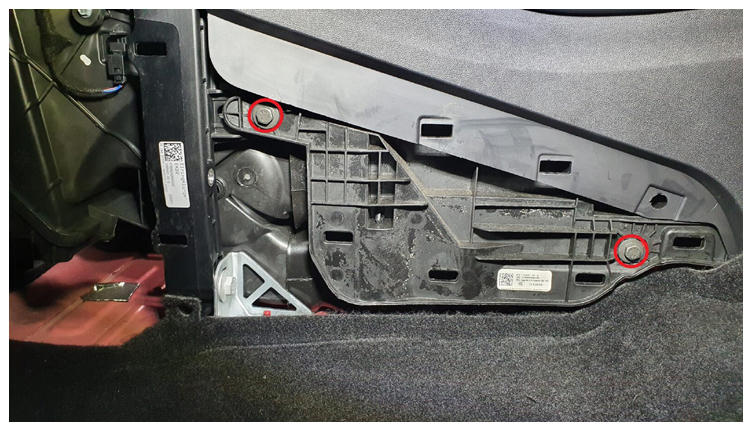
- Remove LH front exterior hardware from center console
NOTE:
2x bolts, 10 mm, 7 N.m
 Courtesy of TESLA, INC. Courtesy of TESLA, INC.
|
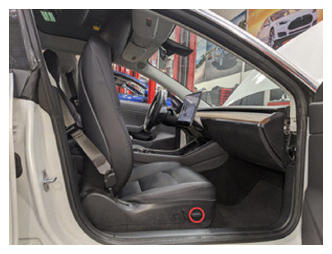
- Move LH front seat forward
 Courtesy of TESLA, INC. Courtesy of TESLA, INC.
|
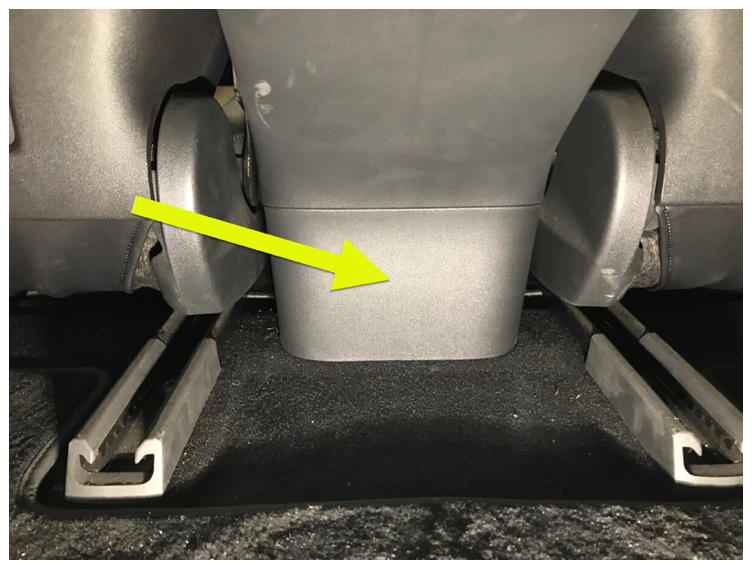
- Remove console lower rear panel
NOTE:
5x clips, Insert the plastic trim tool with a 90 degree bend at the bottom of the cover and pull straight out to release
 Courtesy of TESLA, INC. Courtesy of TESLA, INC.
|
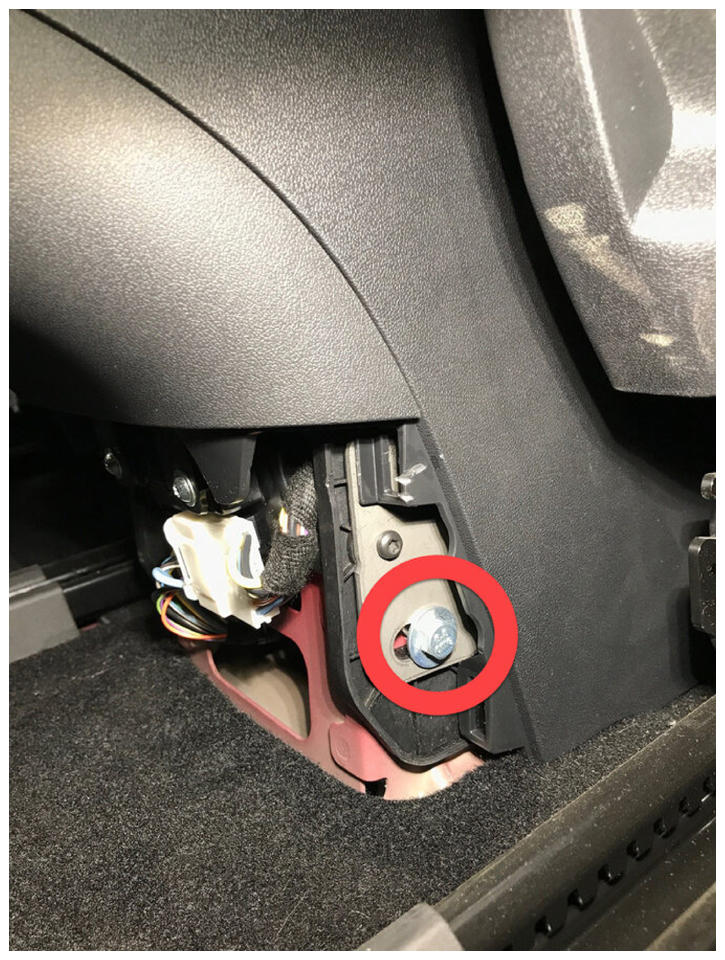
- Remove LH rear exterior bolt from center console
NOTE:
1x bolt, 10 mm, 7 N.m
 Courtesy of TESLA, INC. Courtesy of TESLA, INC.
|
- Move RH front seat forward
 Courtesy of TESLA, INC. Courtesy of TESLA, INC.
|
- Remove RH rear exterior bolt from center console
NOTE:
1x bolt, 10 mm, 7 N.m
 Courtesy of TESLA, INC. Courtesy of TESLA, INC.
|
- Move RH front seat backward and seat back downward
 Courtesy of TESLA, INC. Courtesy of TESLA, INC.
|
- Remove RH front floor mat
 Courtesy of TESLA, INC. Courtesy of TESLA, INC.
|
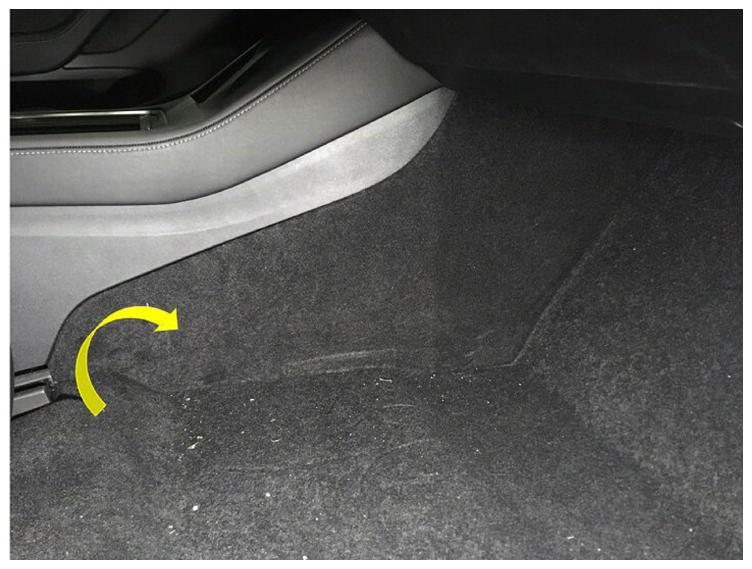
- Remove RH console side panel carpet
NOTE:
12x clips, Use trim tool starting at rear edge to release upper clips, Pull bottom to release remaining clips
 Courtesy of TESLA, INC. Courtesy of TESLA, INC.
|
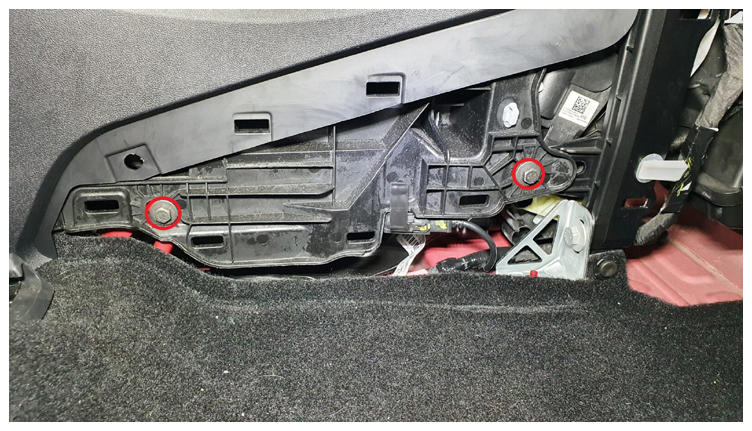
- Remove RH front exterior hardware from center console
NOTE:
2x bolts, 10 mm, 7 N.m
 Courtesy of TESLA, INC. Courtesy of TESLA, INC.
|
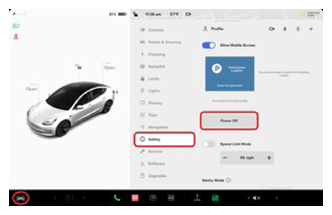
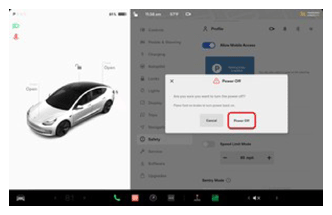
- Power off vehicle from center display
NOTE:
Via Controls > Safety & Security > Vehicle Power > Power Off, Confirm power off at warning dialogue box
 Courtesy of TESLA, INC. Courtesy of TESLA, INC.
|
 Courtesy of TESLA, INC. Courtesy of TESLA, INC.
|
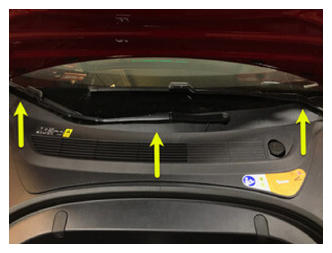
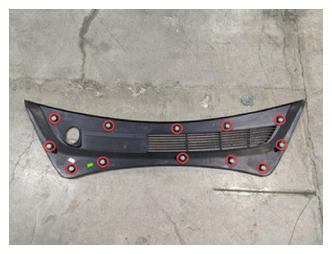
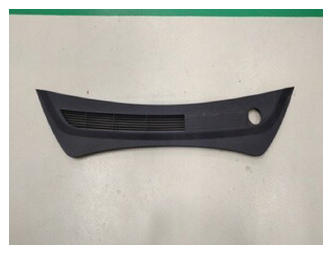
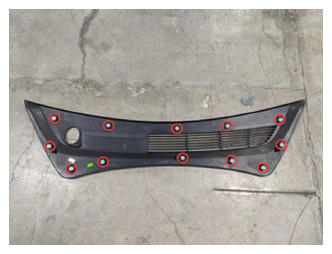
- Remove rear apron
NOTE:
12x clips, Only store rear apron visible face upwards
 Courtesy of TESLA, INC. Courtesy of TESLA, INC.
|
 Courtesy of TESLA, INC. Courtesy of TESLA, INC.
|
 Courtesy of TESLA, INC. Courtesy of TESLA, INC.
|
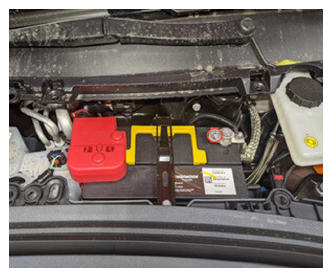
- Disconnect 12V negative terminal
NOTE:
1x nut, 10 mm, 6 N.m, Ensure the vehicle is in park, climate control system is off, and vehicle is not charging before disconnecting 12V
 Courtesy of TESLA, INC. Courtesy of TESLA, INC.
|
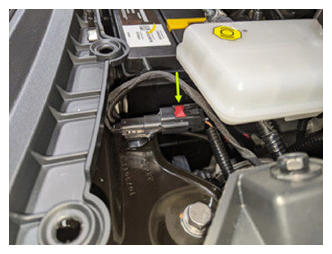
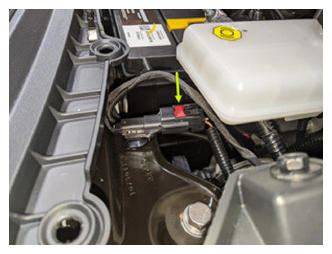
- Disconnect first responder loop
NOTE:
1x connector, Release locking tab
 Courtesy of TESLA, INC. Courtesy of TESLA, INC.
|
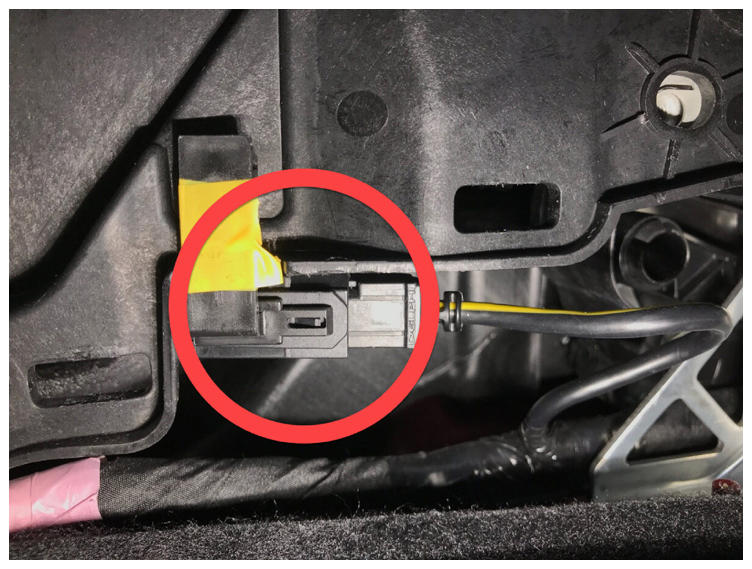
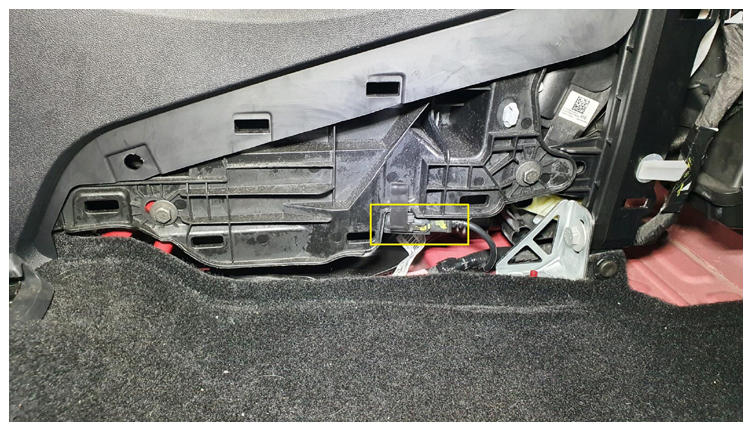
- Disconnect harness from rear of center console
NOTE:
1x connector
 Courtesy of TESLA, INC. Courtesy of TESLA, INC.
|
- Disconnect USB harness at right front of center console
NOTE:
1x USB connector
 Courtesy of TESLA, INC. Courtesy of TESLA, INC.
|
 Courtesy of TESLA, INC. Courtesy of TESLA, INC.
|
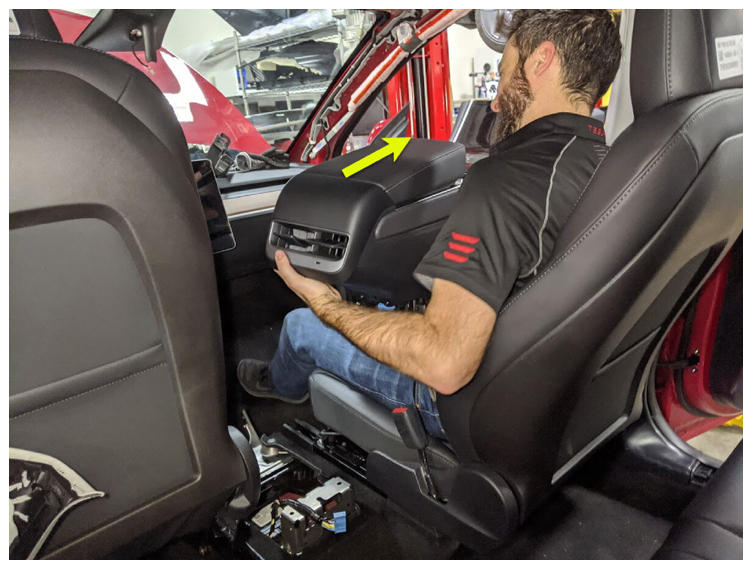
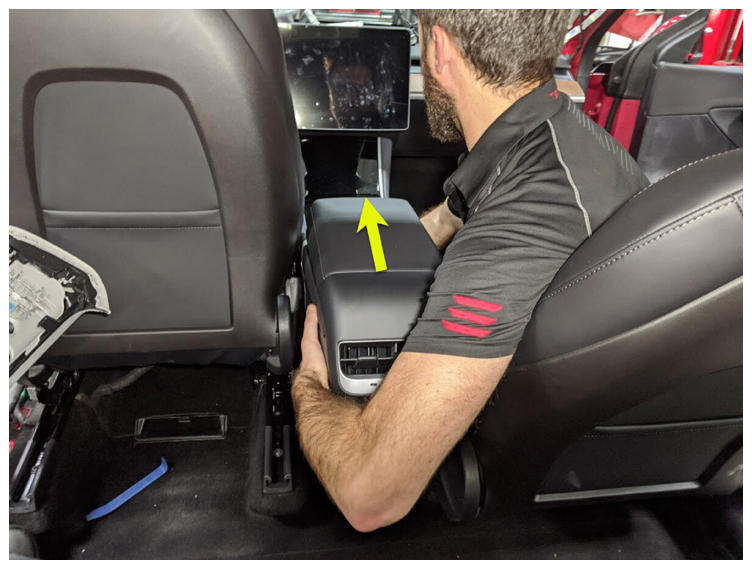
- Remove center console from vehicle
NOTE:
Recommend assistance, Tilt rear of console upward, pull assembly towards rear of vehicle, then tilt front of console upward and remove through passenger side
 Courtesy of TESLA, INC. Courtesy of TESLA, INC.
|
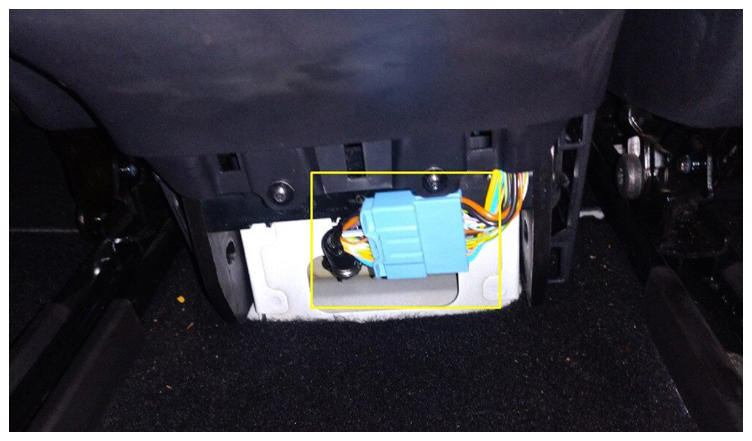
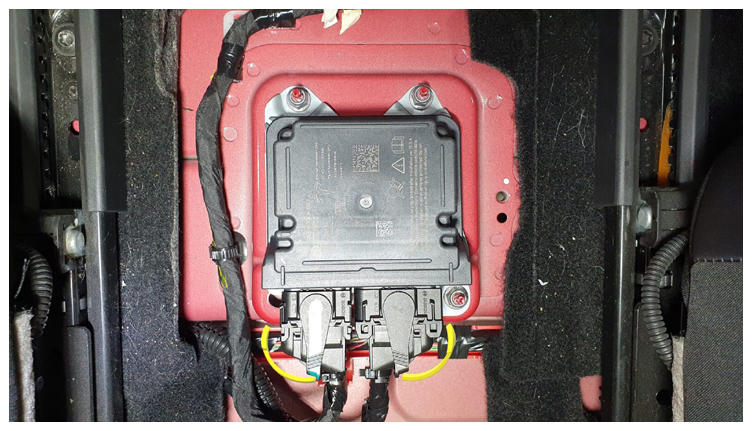
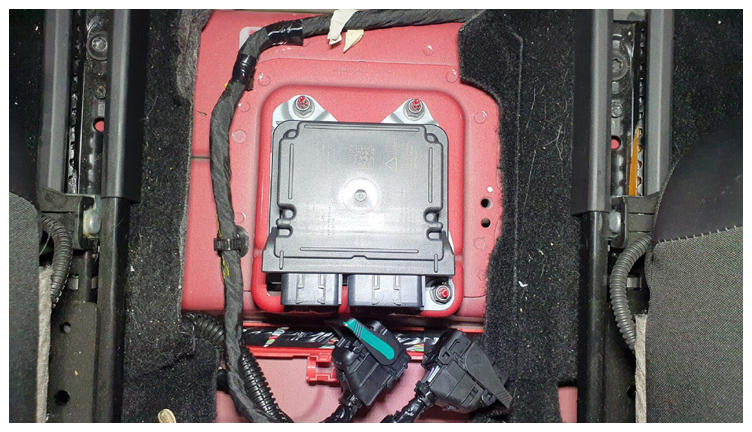
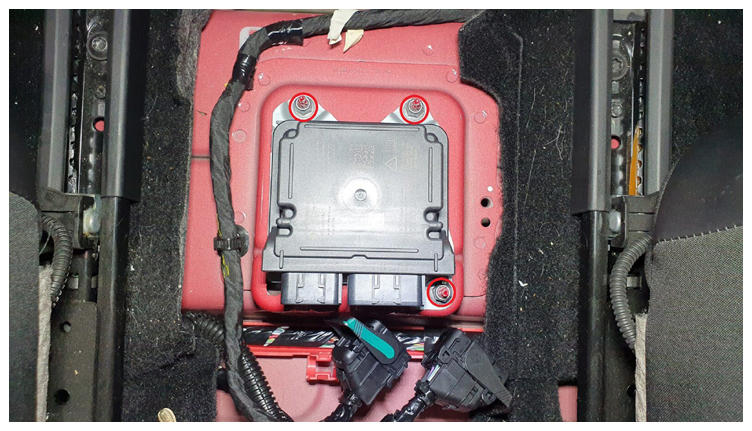
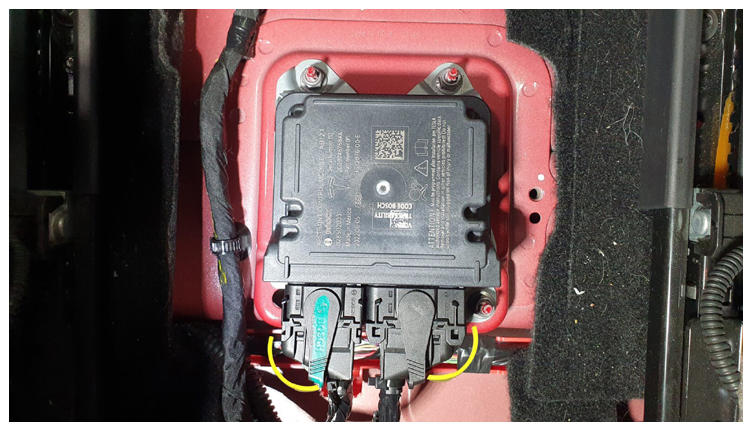
- Disconnect universal restraint control module
NOTE:
2x connectors, Disengage locking tab to release levers
 Courtesy of TESLA, INC. Courtesy of TESLA, INC.
|
 Courtesy of TESLA, INC. Courtesy of TESLA, INC.
|
- Remove universal restraint control module from vehicle
NOTE:
3x nuts, 10 mm, 8 N.m, Discard patch nuts after removal
 Courtesy of TESLA, INC. Courtesy of TESLA, INC.
|
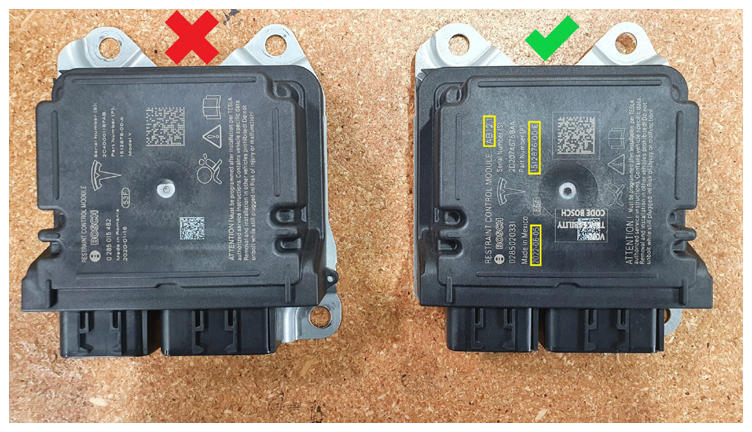
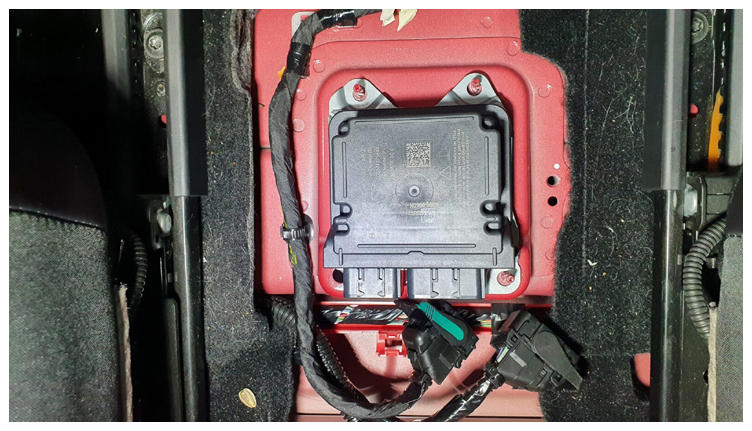
- Install universal restraint control module onto vehicle
NOTE:
3x nuts, 10 mm, 8 N.m, Install new patch nuts, Verify part number on new module is correct
 Courtesy of TESLA, INC. Courtesy of TESLA, INC.
|
 Courtesy of TESLA, INC. Courtesy of TESLA, INC.
|
 Courtesy of TESLA, INC. Courtesy of TESLA, INC.
|
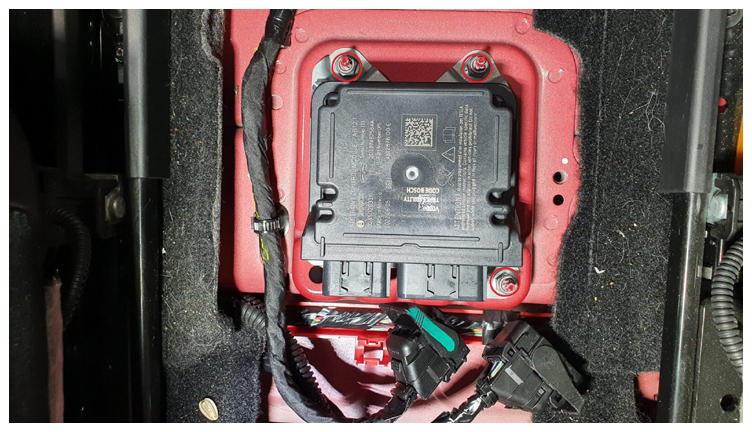
- Connect universal restraint control module
NOTE:
2x connectors, Engage locking levers
 Courtesy of TESLA, INC. Courtesy of TESLA, INC.
|
- Install center console into vehicle
NOTE:
Recommend assistance, Tilt front of console downward, Slide assembly towards front of vehicle and tilt rear of console down into place
 Courtesy of TESLA, INC. Courtesy of TESLA, INC.
|
- Connect USB harness at right front of center console
NOTE:
1x USB connector
 Courtesy of TESLA, INC. Courtesy of TESLA, INC.
|
- Connect harness to rear of center console
NOTE:
1x connector
 Courtesy of TESLA, INC. Courtesy of TESLA, INC.
|
- Install RH front exterior bolts to center console
NOTE:
2x bolts, 10 mm, 7 N.m
 Courtesy of TESLA, INC. Courtesy of TESLA, INC.
|
- Install RH console side panel carpet
NOTE:
1 tab, 12x clips, Position side panel and align the front tab. Push the console panel from the front towards the rear
 Courtesy of TESLA, INC. Courtesy of TESLA, INC.
|
- Install RH front floor mat
 Courtesy of TESLA, INC. Courtesy of TESLA, INC.
|
- Connect first responder loop
NOTE:
1x connector, Engage locking tab, Connect FRL before connecting 12V to avoid damage to car computer
 Courtesy of TESLA, INC. Courtesy of TESLA, INC.
|
- Connect 12V negative terminal
NOTE:
1x nut, 10 mm, 6 N.m
 Courtesy of TESLA, INC. Courtesy of TESLA, INC.
|
- Install rear apron
NOTE:
12x clips
 Courtesy of TESLA, INC. Courtesy of TESLA, INC.
|
 Courtesy of TESLA, INC. Courtesy of TESLA, INC.
|
- Close hood
 Courtesy of TESLA, INC. Courtesy of TESLA, INC.
|
- Move RH front seat forward
 Courtesy of TESLA, INC. Courtesy of TESLA, INC.
|
- Install RH rear exterior bolt to center console
NOTE:
1x bolt, 10 mm, 7 N.m
 Courtesy of TESLA, INC. Courtesy of TESLA, INC.
|
- Install LH rear exterior bolt to center console
NOTE:
1x bolt, 10 mm, 7 N.m
 Courtesy of TESLA, INC. Courtesy of TESLA, INC.
|
- Install console lower rear panel
NOTE:
5x clips
 Courtesy of TESLA, INC. Courtesy of TESLA, INC.
|
- Move LH front seat backward
 Courtesy of TESLA, INC. Courtesy of TESLA, INC.
|
- Install LH front exterior bolts to center console
NOTE:
2x bolts, 10 mm, 7 N.m
 Courtesy of TESLA, INC. Courtesy of TESLA, INC.
|
- Install LH console side panel carpet
NOTE:
1 tab, 12x clips, Position side panel and align the front tab. Push the console panel from the front towards the rear
 Courtesy of TESLA, INC. Courtesy of TESLA, INC.
|
- Install LH front floor mat
 Courtesy of TESLA, INC. Courtesy of TESLA, INC.
|
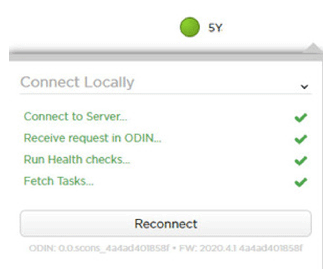
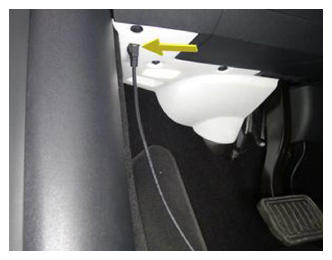
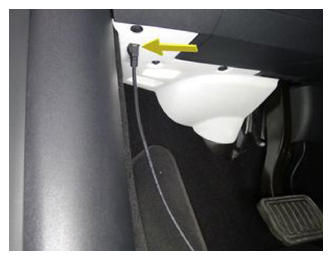
- Connect to vehicle using Toolbox 3.0
NOTE:
Vehicle connection is integrated into drivers footwell cover, Open Toolbox 3 website and establish connection to the vehicle, https://toolbox.teslamotors.com, Select connection status icon at top right corner, and select connect locally (icon will turn green when vehicle is connected) If RJ45 ethernet diagnostic connector present connect directly from laptop using an RJ45 Ethernet cable
 Courtesy of TESLA, INC. Courtesy of TESLA, INC.
|
 Courtesy of TESLA, INC. Courtesy of TESLA, INC.
|
 Courtesy of TESLA, INC. Courtesy of TESLA, INC.
|
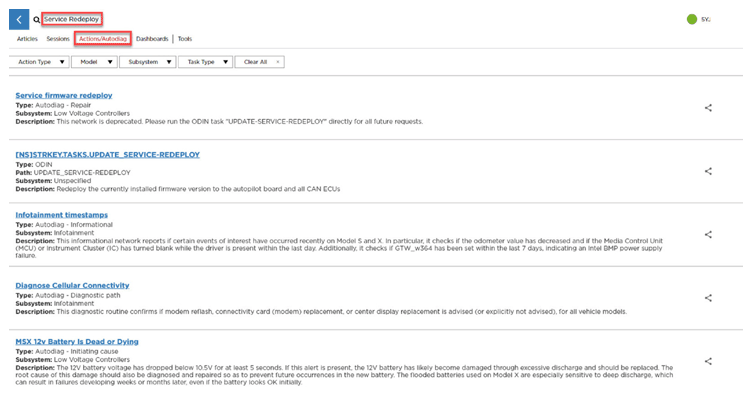
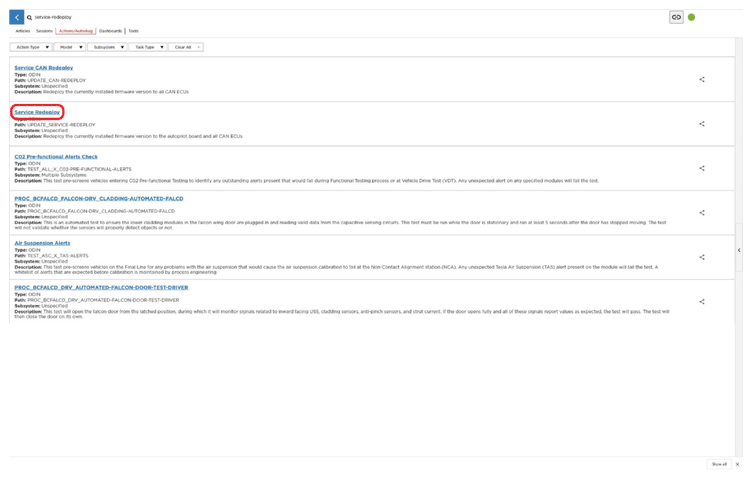
- Select 'Actions/Autodiag' and search for 'Service_Redeploy'
 Courtesy of TESLA, INC. Courtesy of TESLA, INC.
|
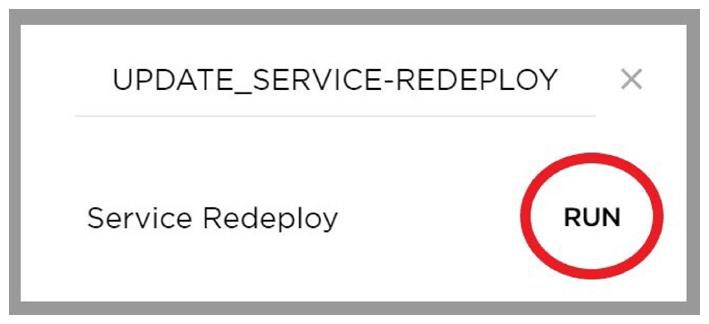
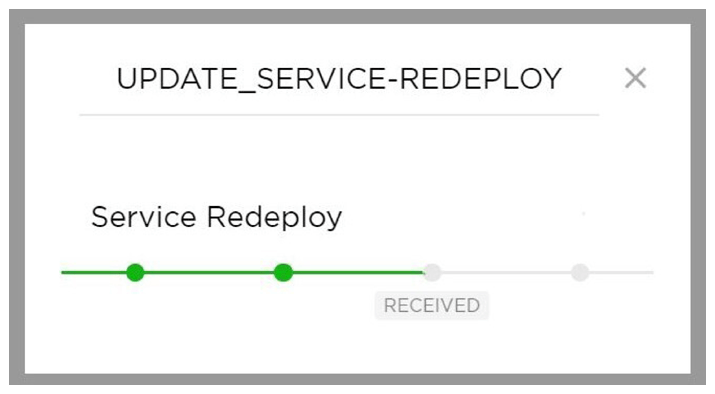
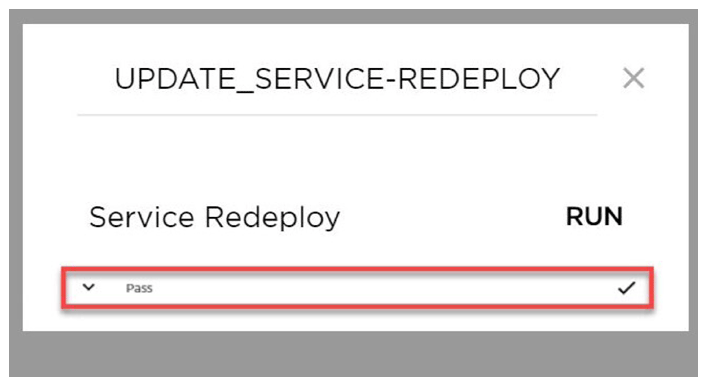
- Select 'UPDATE_SERVICE-REDEPLOY', click 'Run', and allow routine to complete
NOTE:
Select 'X' at top right of window to close once complete
 Courtesy of TESLA, INC. Courtesy of TESLA, INC.
|
 Courtesy of TESLA, INC. Courtesy of TESLA, INC.
|
 Courtesy of TESLA, INC. Courtesy of TESLA, INC.
|
 Courtesy of TESLA, INC. Courtesy of TESLA, INC.
|
- Once firmware redeploy is complete, Verify release notes are present on center display
NOTE:
If the redeploy fails you may receive an error message on UI
 Courtesy of TESLA, INC. Courtesy of TESLA, INC.
|
- Re-establish vehicle connection to Toolbox 3.0
 Courtesy of TESLA, INC. Courtesy of TESLA, INC.
|
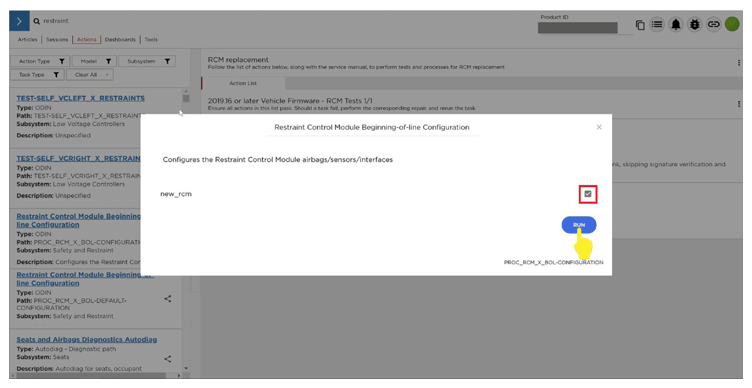
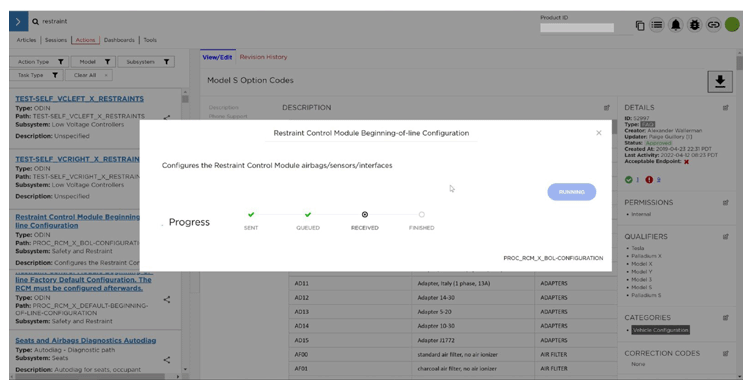
- Run "Restraint Control Module Beginning-of-line Configuration" 'PROC_RCM_X_BOL-CONFIGURATION' routine
NOTE:
This routine will only appear on FW 2022.16.1 and newer, Routine only required when upgrading from 12.0 to 12.1 RCM
 Courtesy of TESLA, INC. Courtesy of TESLA, INC.
|
 Courtesy of TESLA, INC. Courtesy of TESLA, INC.
|
 Courtesy of TESLA, INC. Courtesy of TESLA, INC.
|
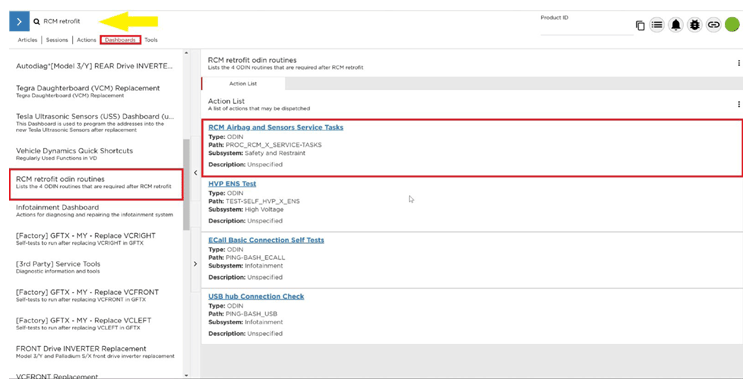
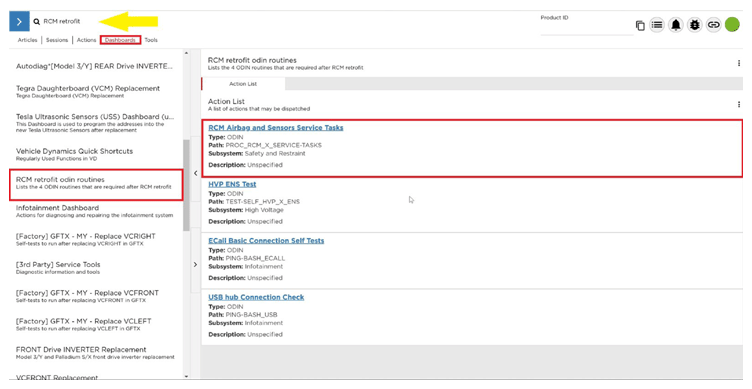
- Select 'Dashboards', and search for 'RCM retrofit'
 Courtesy of TESLA, INC. Courtesy of TESLA, INC.
|
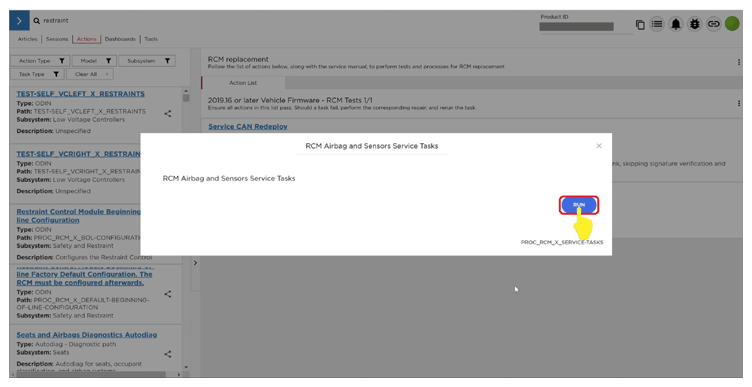
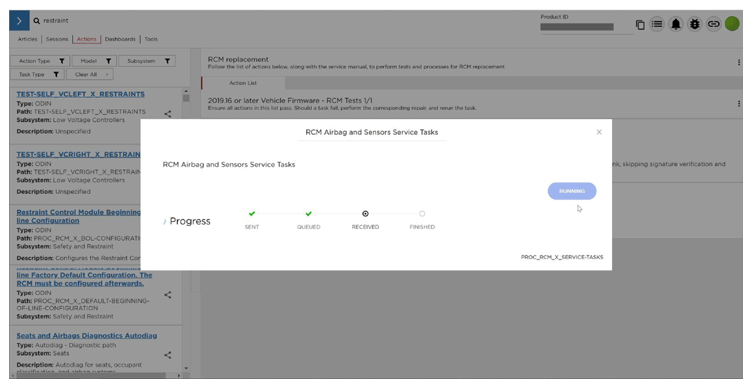
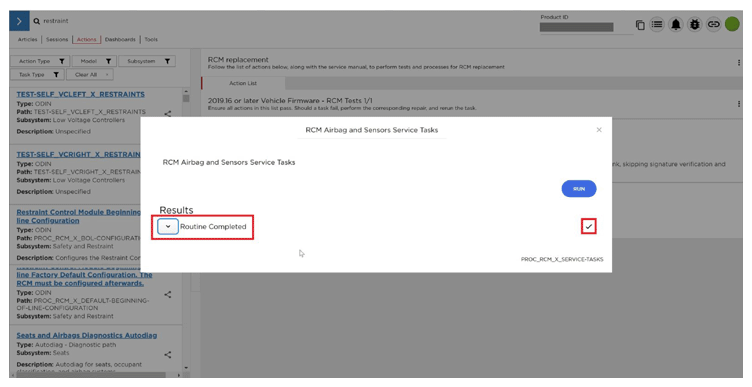
- Select 'Service Tasks', click 'Run', and allow routine to complete
NOTE:
Select 'X' at top right of window to close once complete
 Courtesy of TESLA, INC. Courtesy of TESLA, INC.
|
 Courtesy of TESLA, INC. Courtesy of TESLA, INC.
|
 Courtesy of TESLA, INC. Courtesy of TESLA, INC.
|
 Courtesy of TESLA, INC. Courtesy of TESLA, INC.
|
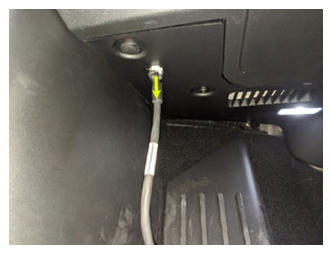
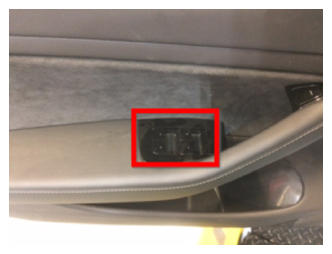
- Remove HSD or RJ45 cable from Ethernet port to disconnect Toolbox 3.0 from vehicle
 Courtesy of TESLA, INC. Courtesy of TESLA, INC.
|
 Courtesy of TESLA, INC. Courtesy of TESLA, INC.
|
- Move LH front seat to original position
 Courtesy of TESLA, INC. Courtesy of TESLA, INC.
|
- Move RH front seat to original position
 Courtesy of TESLA, INC. Courtesy of TESLA, INC.
|
- Raise all windows
 Courtesy of TESLA, INC. Courtesy of TESLA, INC.
|
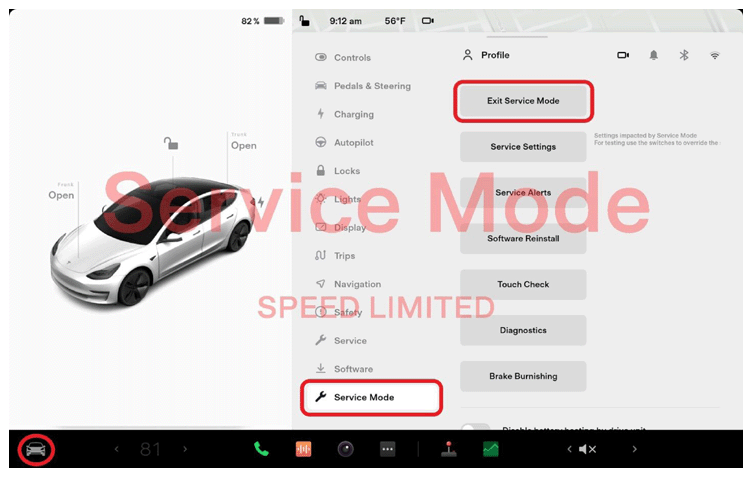
- Exit Service Mode through UI
NOTE:
Controls > Service Mode > Exit Service Mode
 Courtesy of TESLA, INC. Courtesy of TESLA, INC.
|
- Close all four doors
NOTE:
Unlatch rear doors before closing