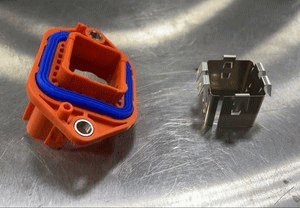
- Secure retainer onto HV header.
NOTE:
6x clips.
 Courtesy of TESLA, INC. Courtesy of TESLA, INC.
|
 Courtesy of TESLA, INC. Courtesy of TESLA, INC.
|
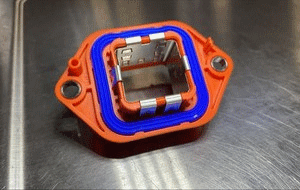
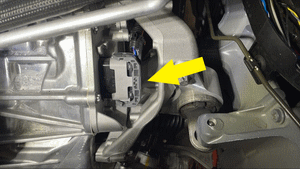
- Secure HV header on FDU inverter.
NOTE:
2x datums, Seat header with retainer and press in, Audible click should be heard, Perform push pull push test and verify it is properly seated before installing bolts.
 Courtesy of TESLA, INC. Courtesy of TESLA, INC.
|
 Courtesy of TESLA, INC. Courtesy of TESLA, INC.
|
 Courtesy of TESLA, INC. Courtesy of TESLA, INC.
|
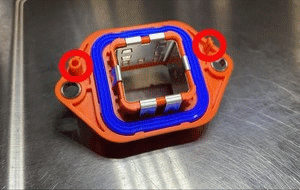
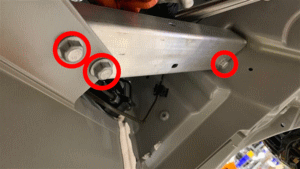
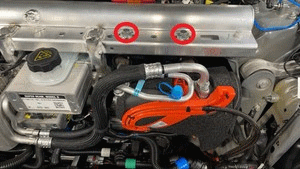
- Install bolts securing header to inverter.
NOTE:
2x bolts, T25, 6 N.m, Install new fasteners.
 Courtesy of TESLA, INC. Courtesy of TESLA, INC.
|
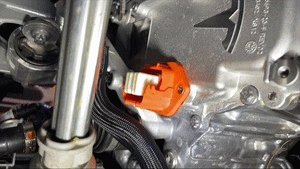
- Install leak test adapter to FDU HV connector.
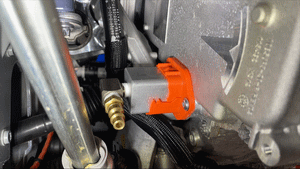 Courtesy of TESLA, INC. Courtesy of TESLA, INC.
|
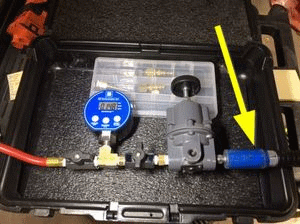
- Connect regulator to leak test adapter.
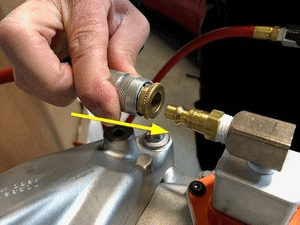 Courtesy of TESLA, INC. Courtesy of TESLA, INC.
|
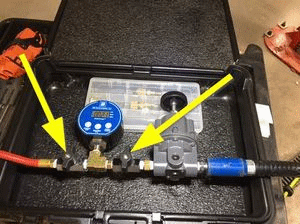
- Close both valves on the regulator test tool.
NOTE:
Verify valves are closed.
 Courtesy of TESLA, INC. Courtesy of TESLA, INC.
|
- Connect regulator to air supply.
 Courtesy of TESLA, INC. Courtesy of TESLA, INC.
|
- Turn on regulator and open valve closest to regulator.
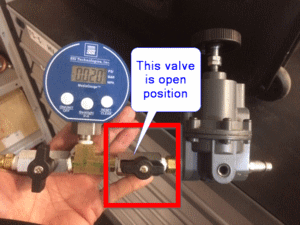 Courtesy of TESLA, INC. Courtesy of TESLA, INC.
|
- Set regulator to 1 psi.
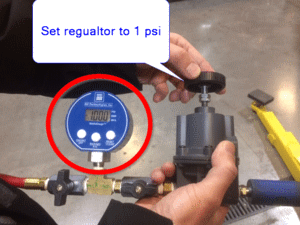 Courtesy of TESLA, INC. Courtesy of TESLA, INC.
|
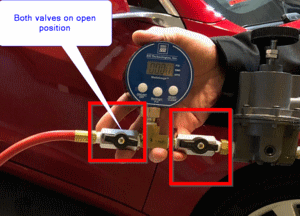
- Open the 2nd valve to inject air into the inverter.
NOTE:
Close valve when pressure reaches 1 psi and stable.
 Courtesy of TESLA, INC. Courtesy of TESLA, INC.
|
- Wait 45 seconds for pressure to settle.
 Courtesy of TESLA, INC. Courtesy of TESLA, INC.
|
- Record start pressure valve.
 Courtesy of TESLA, INC. Courtesy of TESLA, INC.
|
- Wait 60 seconds for test.
Courtesy of TESLA, INC.
|
- Record end pressure valve.
NOTE:
If pressure did not drop more than 0.04 psi, continue to next step. If pressure dropped more than 0.04 psi, then inspect for leaks.
Courtesy of TESLA, INC.
|
- Disconnect air supply from regulator tool.
 Courtesy of TESLA, INC. Courtesy of TESLA, INC.
|
- Disconnect regulator from leak test adapter.
 Courtesy of TESLA, INC. Courtesy of TESLA, INC.
|
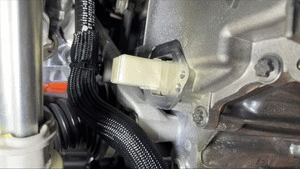
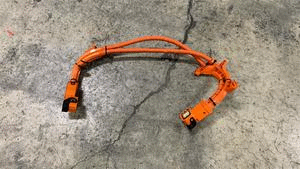
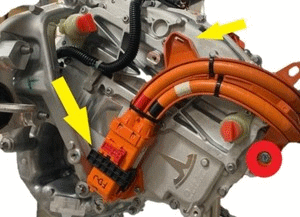
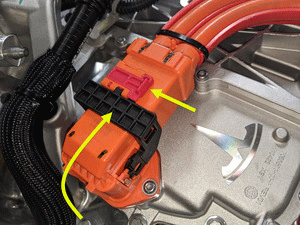
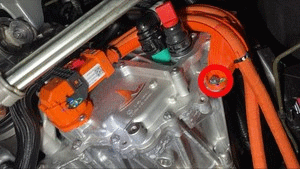
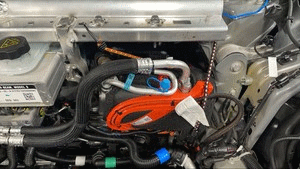
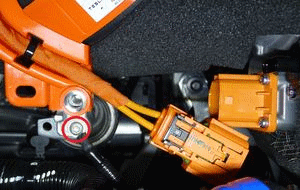
- Install FDU HV harness.
NOTE:
1x bolt, EP10, 10 N.m, 1x connector, 1x tab, Verify lever is in the upright and open position, Carefully seat connector and allow lever to engage, Fully secure lever and verify red tab is locked, Do not damage any pins, Engage clip on drive unit.
 Courtesy of TESLA, INC. Courtesy of TESLA, INC.
|
 Courtesy of TESLA, INC. Courtesy of TESLA, INC.
|
 Courtesy of TESLA, INC. Courtesy of TESLA, INC.
|
 Courtesy of TESLA, INC. Courtesy of TESLA, INC.
|
 Courtesy of TESLA, INC. Courtesy of TESLA, INC.
|
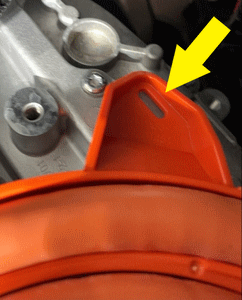
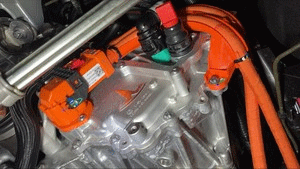
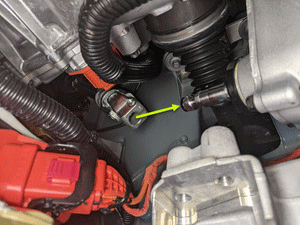
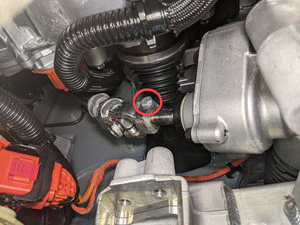
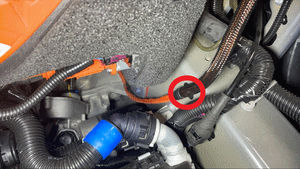
- Secure rear PT hose to FDU inverter.
NOTE:
1x hose clips, Perform push-pull-push test, Remove any plugs.
 Courtesy of TESLA, INC. Courtesy of TESLA, INC.
|
 Courtesy of TESLA, INC. Courtesy of TESLA, INC.
|
- Remove coolant drain container from underneath vehicle.
 Courtesy of TESLA, INC. Courtesy of TESLA, INC.
|
- Install LH toeboard brace.
NOTE:
3x bolts, 15 mm, 30 N.m.
 Courtesy of TESLA, INC. Courtesy of TESLA, INC.
|
- Slide lower electric steering column onto steering gear and install bolt.
NOTE:
1x bolt, 13 mm, 30 N.m.
 Courtesy of TESLA, INC. Courtesy of TESLA, INC.
|
 Courtesy of TESLA, INC. Courtesy of TESLA, INC.
|
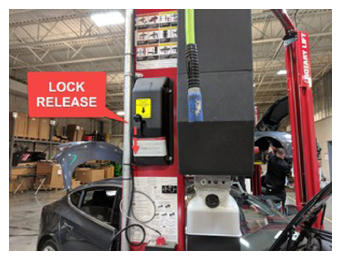
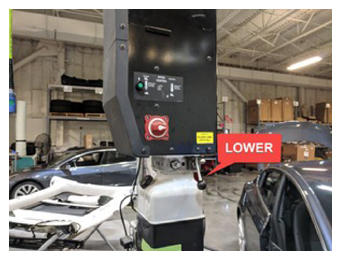
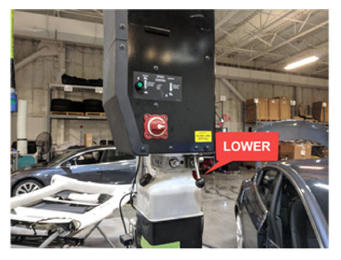
- Lower vehicle until tires are touching the ground.
NOTE:
Raise lift off locks, then hold lock release lever to keep locks free while vehicle is lowered.
 Courtesy of TESLA, INC. Courtesy of TESLA, INC.
|
 Courtesy of TESLA, INC. Courtesy of TESLA, INC.
|
 Courtesy of TESLA, INC. Courtesy of TESLA, INC.
|
- Remove leak test adapter plug from 12V connector at inverter.
NOTE:
Carefully remove leak test adapter.
 Courtesy of TESLA, INC. Courtesy of TESLA, INC.
|
 Courtesy of TESLA, INC. Courtesy of TESLA, INC.
|
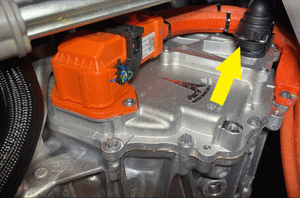
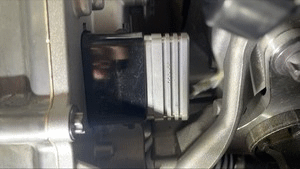
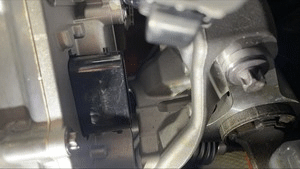
- Secure FDU logic connector.
NOTE:
1x locking connector, Secure connector and engage locking tab.
 Courtesy of TESLA, INC. Courtesy of TESLA, INC.
|
 Courtesy of TESLA, INC. Courtesy of TESLA, INC.
|
- Install bolts securing AC compressor bracket to multi system beam.
NOTE:
2x bolts, 15 mm, 31 N.m, Recommend assistance, Carefully support the AC compressor assembly and secure assembly, Prevent damage to any components, Remove any bungee cords.
 Courtesy of TESLA, INC. Courtesy of TESLA, INC.
|
 Courtesy of TESLA, INC. Courtesy of TESLA, INC.
|
- Secure AC compressor HV harness clip from body.
NOTE:
1x clip.
 Courtesy of TESLA, INC. Courtesy of TESLA, INC.
|
- Install AC compressor ground strap.
NOTE:
1x bolt, T25, 7 N.m.
 Courtesy of TESLA, INC. Courtesy of TESLA, INC.
|
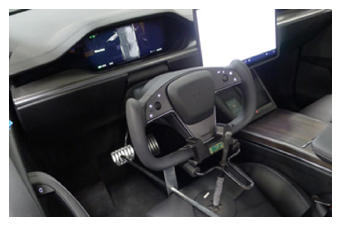
- Remove steering wheel holder from vehicle.
 Courtesy of TESLA, INC. Courtesy of TESLA, INC.
|
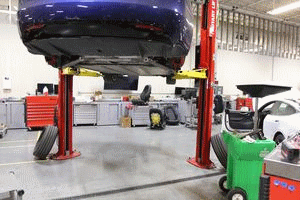
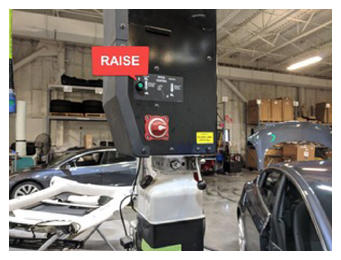
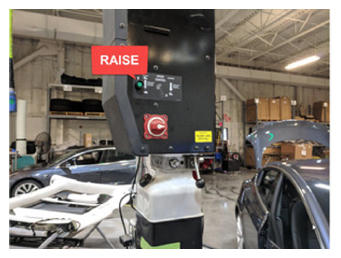
- Raise vehicle fully and lower lift onto locks.
NOTE:
Set vehicle to comfortable working height, Make sure there's an audible click of the locks on both sides before lowering, otherwise vehicle may tilt to the side.
 Courtesy of TESLA, INC. Courtesy of TESLA, INC.
|
 Courtesy of TESLA, INC. Courtesy of TESLA, INC.
|
- Install the HV battery. See HV Battery (AWD) (Remove and Install)
.