- Start Toolbox 2 on a laptop configured with Toolbox 2, and sign in if necessary.
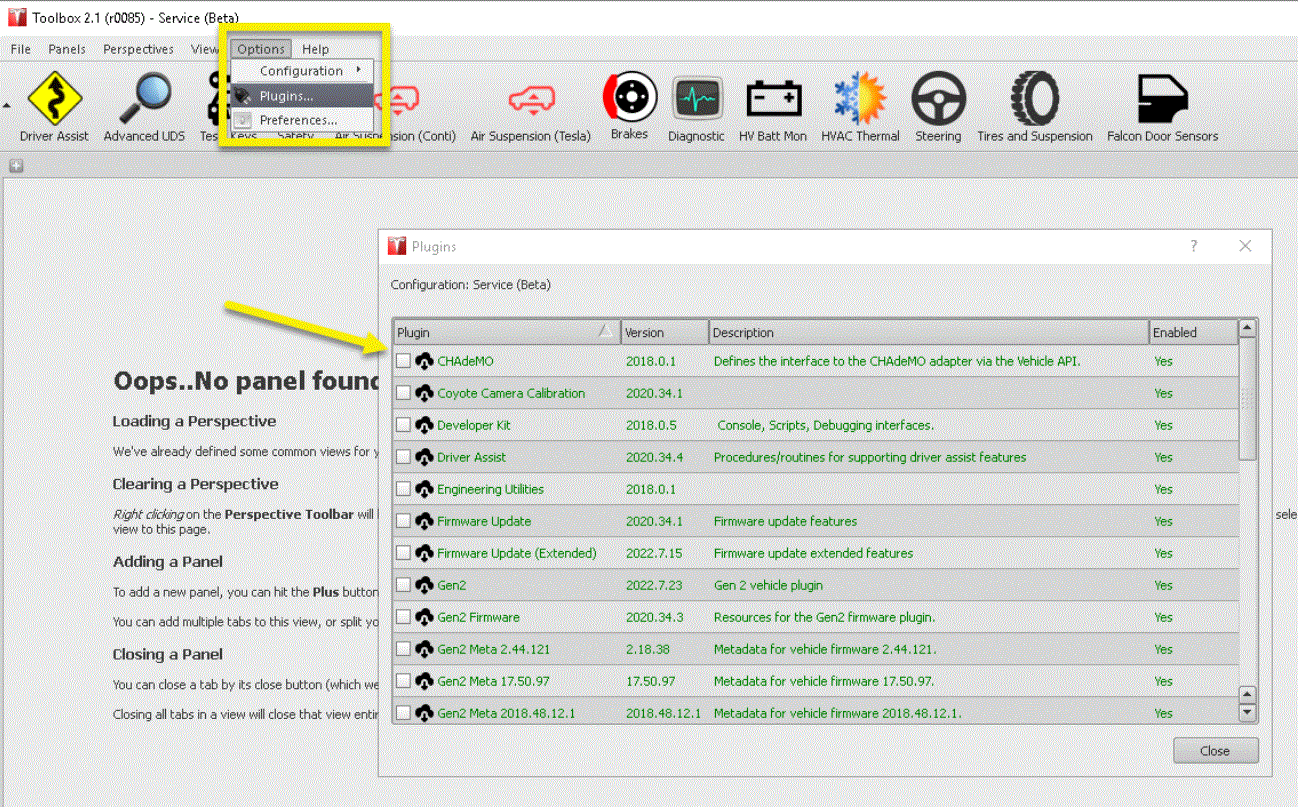
- In Toolbox 2, click Options > Plugins, and then confirm that the CHAdeMO plugin is available and green.
 Courtesy of TESLA INC Courtesy of TESLA INC
|
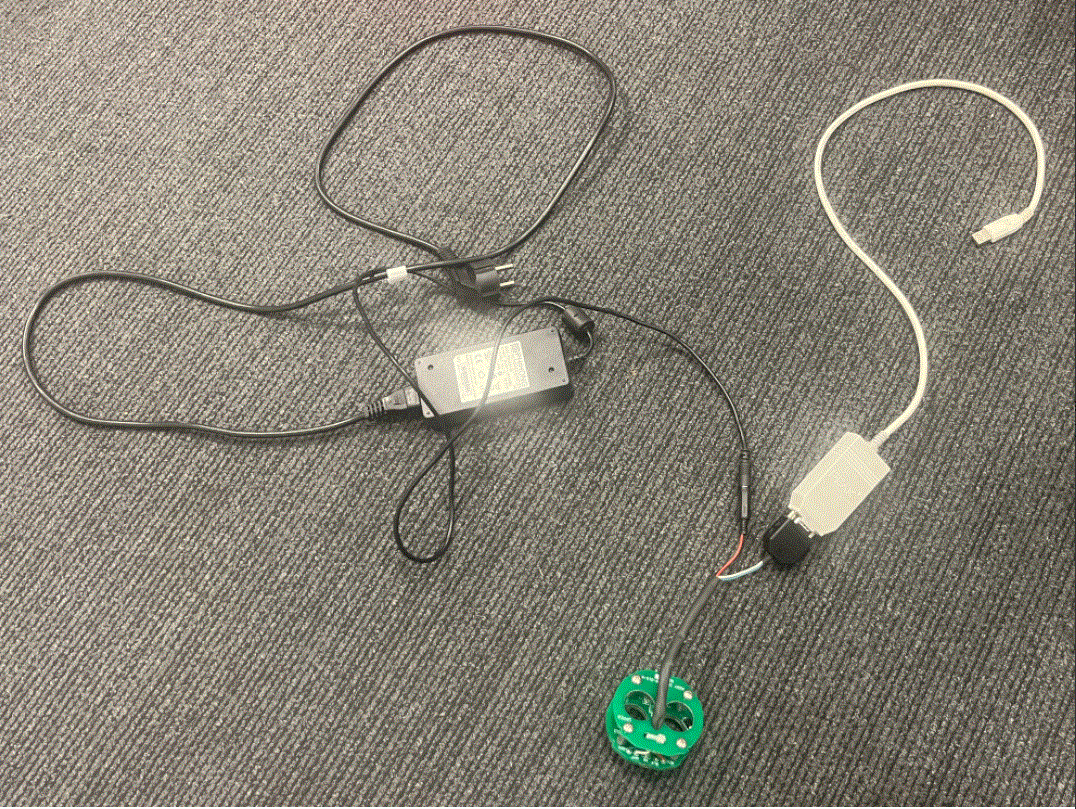
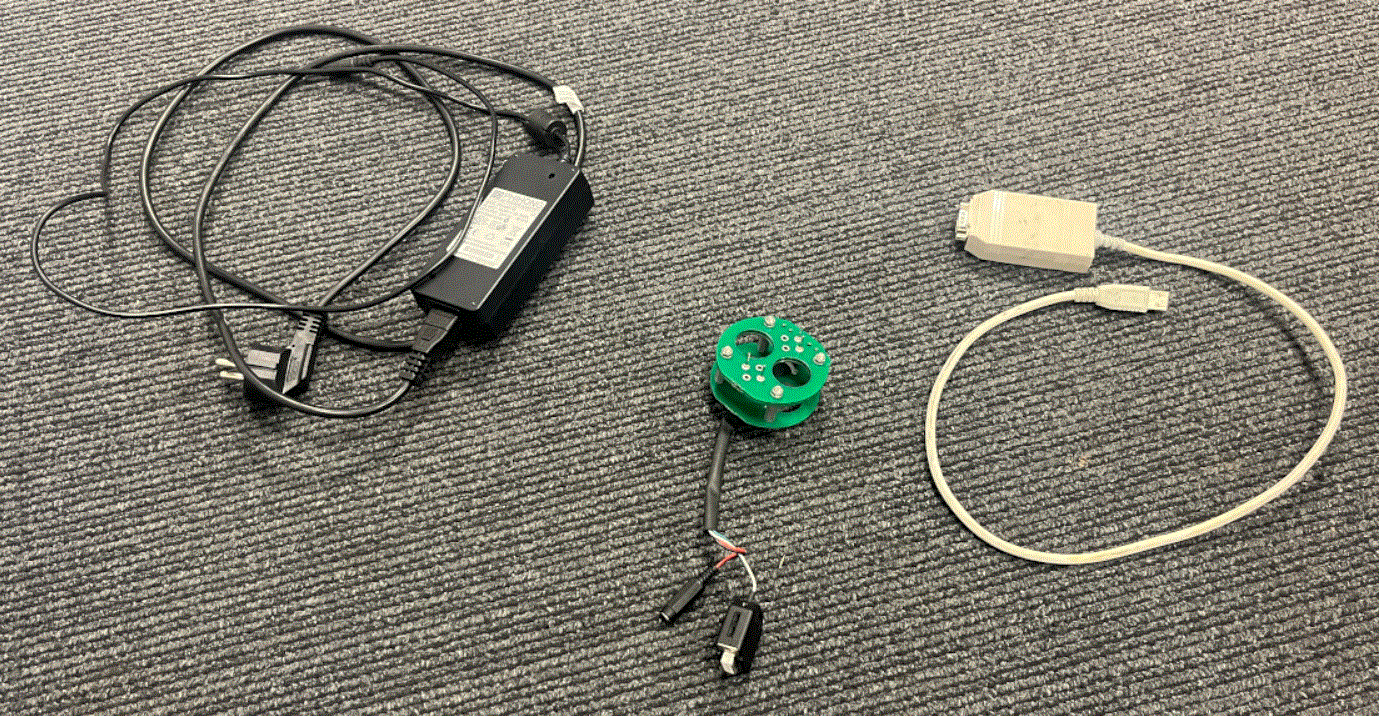
- Connect the CHAdeMO programming tool CAN connector to the USB to CAN adapter, and then connect the tool power connector to the 12V DC power supply.
NOTE:
Do not plug in the power supply at this time.
 Courtesy of TESLA INC Courtesy of TESLA INC
|
- Connect the USB to CAN adapter to the laptop, and then plug in the 12V DC power supply.
NOTE:
If the laptop requests that a driver be downloaded and/or installed, do this now. The driver can be manually downloaded from http://www.peak-system.com/fileadmin/media/files/usb.zip.
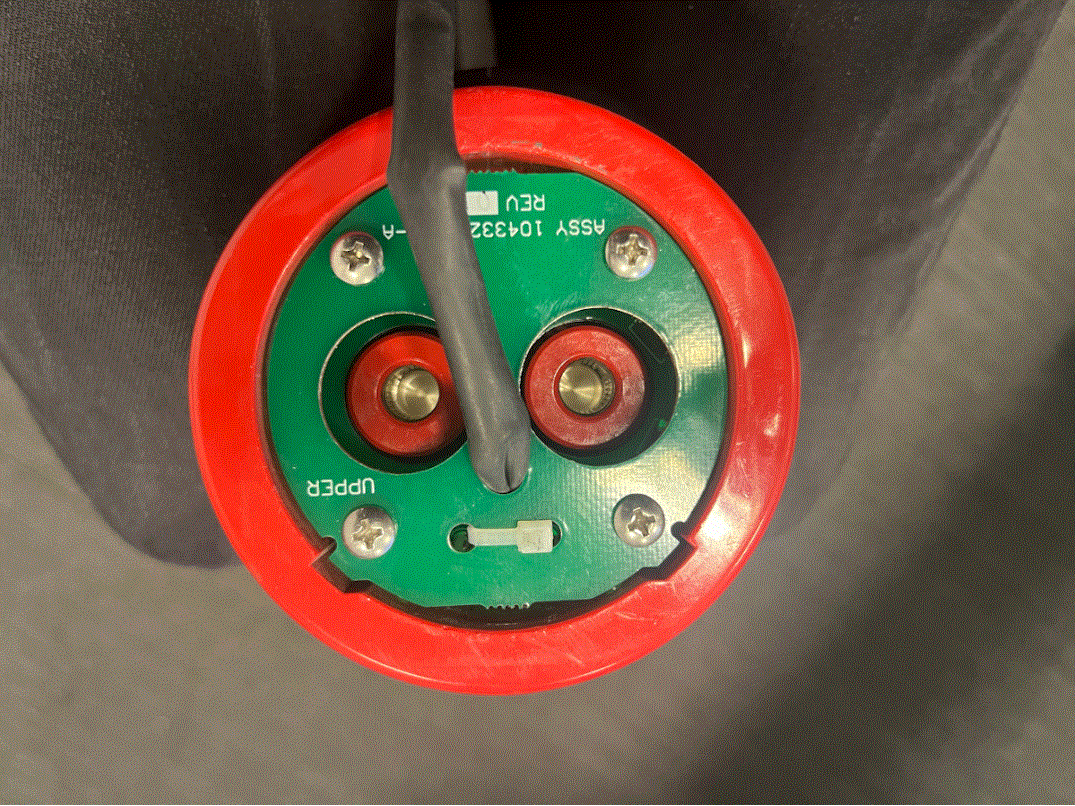
- Connect the CHAdeMO programming tool to the CHAdeMO adapter.
NOTE:
Make sure that the tabs of the tool align with the slots in the adapter.
 Courtesy of TESLA INC Courtesy of TESLA INC
|
- In the lower left corner of Toolbox 2 are two grey buttons, click the button on the right.
 Courtesy of TESLA INC Courtesy of TESLA INC
|
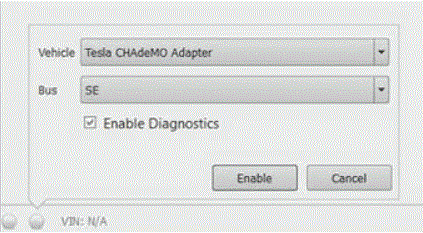
- In the window that opens, from the Vehicle drop-down menu, select Tesla CHAdeMO Adapter, from the Bus drop-down menu, select SE, select Enable Diagnostics, and then click Enable.
NOTE:
Make sure that the RH button turns green. If not, check all connections.
 Courtesy of TESLA INC Courtesy of TESLA INC
|
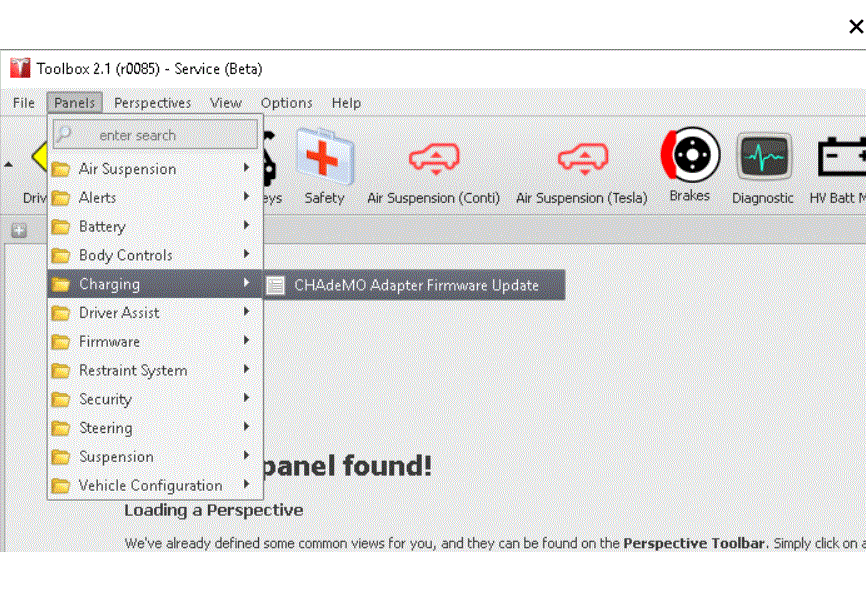
- In Toolbox 2, click Panels > Charging > CHAdeMO Adapter Firmware Update.
 Courtesy of TESLA INC Courtesy of TESLA INC
|
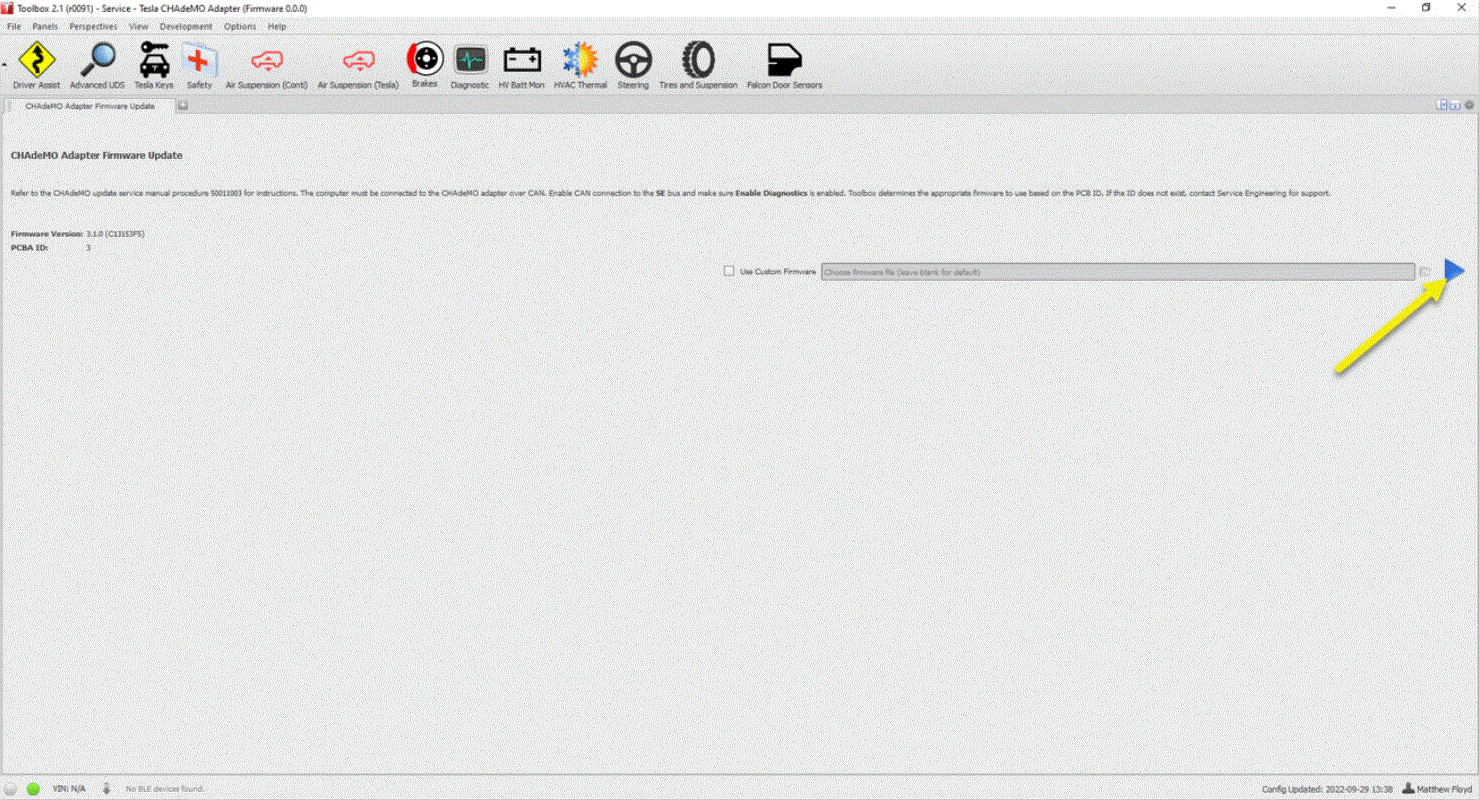
- In the window that opens, read the text, and then click Play.
 Courtesy of TESLA INC Courtesy of TESLA INC
|
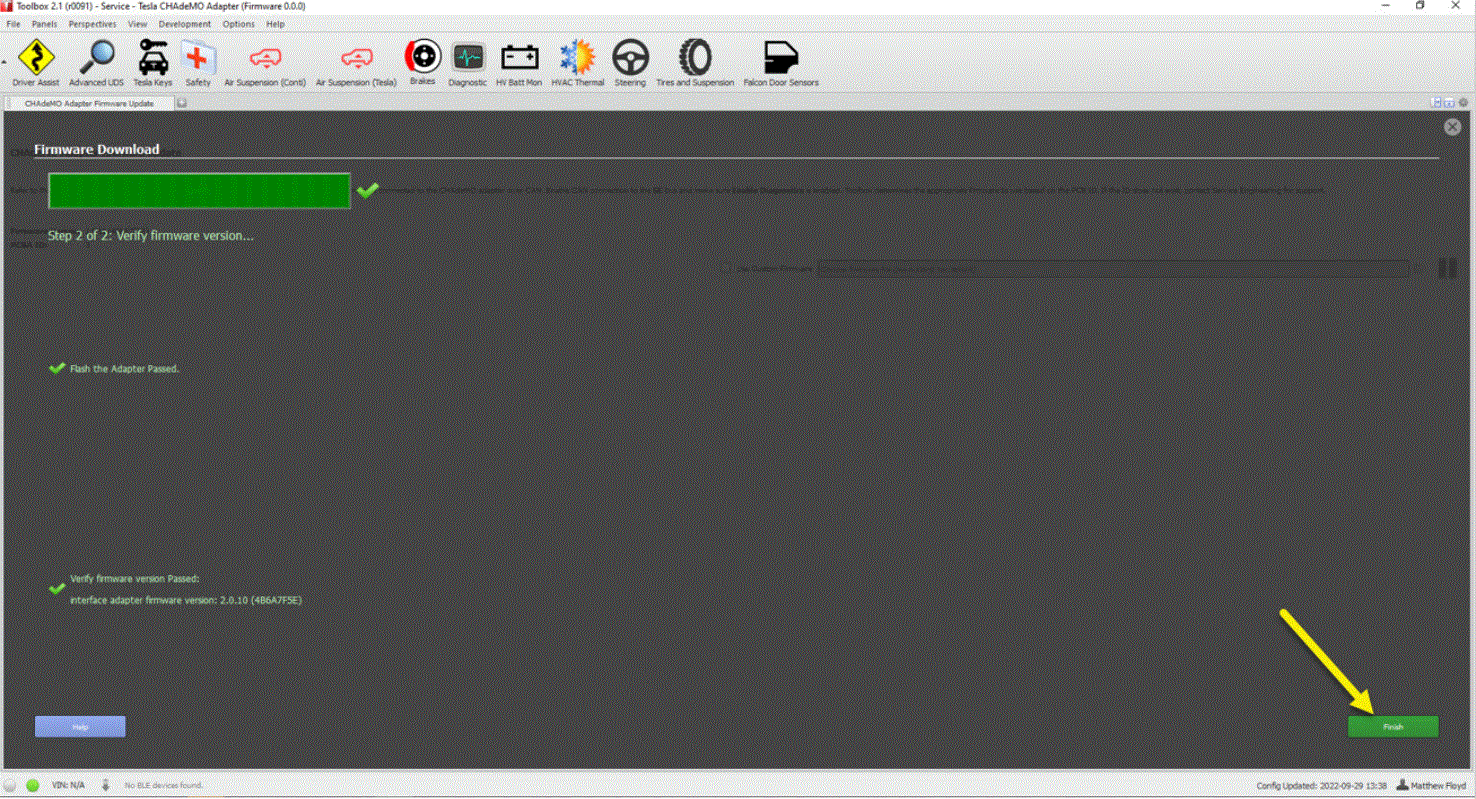
- After the update has completed, note the new firmware version into the service visit, and then click Finish.
 Courtesy of TESLA INC Courtesy of TESLA INC
|
- Disconnect the CHAdeMO programming tool from the CHAdeMO adapter.
 Courtesy of TESLA INC Courtesy of TESLA INC
|
- Unplug the 12V DC power supply, and then disconnect the USB to CAN adapter from the laptop .
- Disconnect the CHAdeMO programming tool power connector from the 12V DC power supply, and then disconnect the tool CAN connector from the USB to CAN adapter.
 Courtesy of TESLA INC Courtesy of TESLA INC
|
- If no further use, close Toolbox 2.