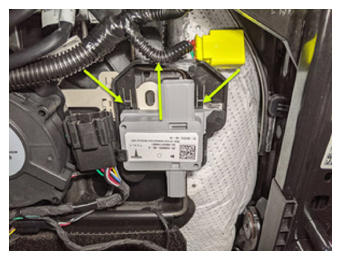
- Position the front passenger seat OCS ECU module onto the seat assembly, and then slide the module downward until the tabs are fully engaged.
 Courtesy of TESLA, INC. Courtesy of TESLA, INC.
|
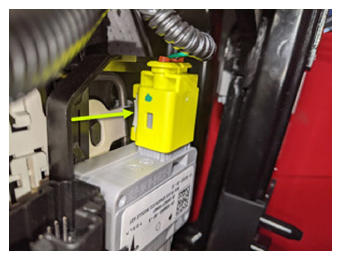
- Connect the airbag electrical connector to the front passenger seat OCS ECU module.
NOTE:
The locking tab will engage once the connector is fully seated.
 Courtesy of TESLA, INC. Courtesy of TESLA, INC.
|
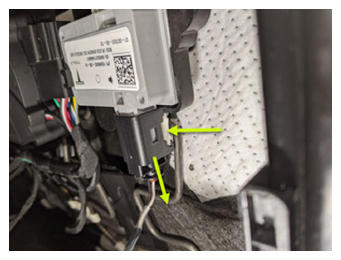
- Connect the OCS sensor mat electrical connector to the front passenger seat OCS ECU module.
NOTE:
The locking tab will engage once the connector is fully seated.
 Courtesy of TESLA, INC. Courtesy of TESLA, INC.
|
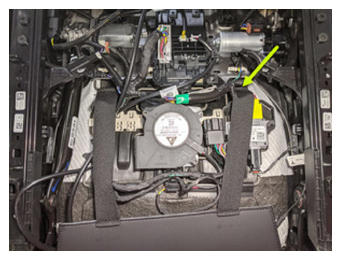
- Fasten the LH seat back elastic strap to the seat frame.
 Courtesy of TESLA, INC. Courtesy of TESLA, INC.
|
- Position the seat upright.
- Install the front passenger seat. See Seat Assembly - 1st Row - LH (Remove And Replace) .
- Move front passenger seat to its original position.
- Raise the RH front window and close the RH front door.
- Open the LH front door.
- Connect a laptop with Toolbox 3 to the vehicle.
- In Toolbox, click the Actions
tab, and then search for "Service_Redeploy".
- Click UPDATE_SERVICE-REDEPLOY
, and then click Run
and allow the routine to complete.
NOTE:
Click the "X" at top right of the window to close once complete.
- On the touchscreen, touch the clock, and then touch INSTALL NOW
to start the firmware update.
NOTE:
Tap the count down timer until clock runs down to 0. Check the touchscreen and ensure the firmware package was successfully installed.
- Once firmware redeploy is complete, verify on the touchscreen that the release notes are present.
NOTE:
If the redeploy fails you may receive an error message on the UI.
- Re-establish vehicle connection to Toolbox.
- In Toolbox, click the Actions/Autodiag
tab, and then search for "Calibration".
- Click PROC_VCSEATD_SEAT-CALIBRATE
, and then click Run
and allow the routine to complete.
NOTE:
Verify there are no items on seat during this routine.
NOTE:
Click the "X" at top right of the window to close once complete.
- Disconnect Toolbox and remove the laptop from the vehicle.