- Move the vehicle to a 2 post lift. See Raise Vehicle - 2 Post Lift
.
- On the touchscreen, enable Service Mode. See SERVICE MODE ENABLE AND DISABLE
.
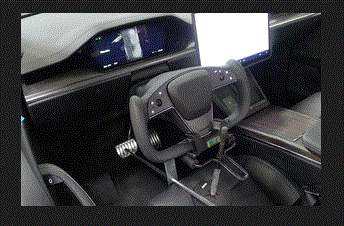
- Set the steering wheel straight ahead, place a protector sheet onto the driver seat, and then install the steering wheel lock.
 Courtesy of TESLA, INC. Courtesy of TESLA, INC.
|
- Remove the rear underhood apron. See Underhood Apron - Rear (Remove and Replace)
.
- Remove the underhood storage unit. See Underhood Storage Unit (Remove and Replace)
.
- Disconnect LV power. See LV Power (Disconnect and Connect)
.
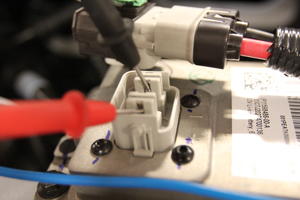
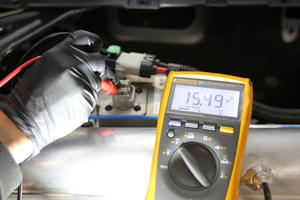
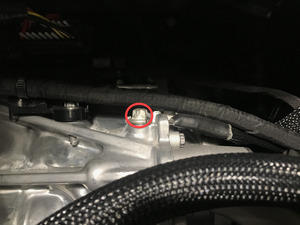
- Set the high voltage multimeter to DC voltage, lightly touch the probes to the auxiliary battery connector contacts, and verify that the multimeter displays a voltage.
NOTE:
Battery voltage is typically 14.5 to 15.5 volts.
 Courtesy of TESLA, INC. Courtesy of TESLA, INC.
|
 Courtesy of TESLA, INC. Courtesy of TESLA, INC.
|
- Remove the mid aero shield panel. See Panel - Aero Shield - Mid (Remove and Replace)
.
- Perform the vehicle electrical isolation procedure. See Vehicle Electrical Isolation Procedure
.
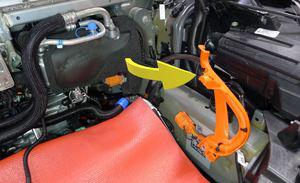
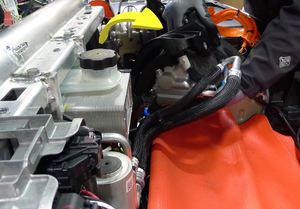
- Remove the leather glove protectors and the HV insulating gloves
 Courtesy of TESLA, INC. Courtesy of TESLA, INC.
|
- Remove the front aero shield panel. See Panel - Aero Shield - Front (Remove and Replace)
.
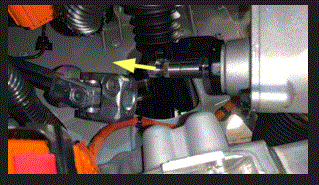
- Remove the bolt that attaches the steering column intermediate shaft to the steering rack input shaft.
 Courtesy of TESLA, INC. Courtesy of TESLA, INC.
|
- Slide the steering column intermediate shaft up and off of the steering rack input shaft.
 Courtesy of TESLA, INC. Courtesy of TESLA, INC.
|
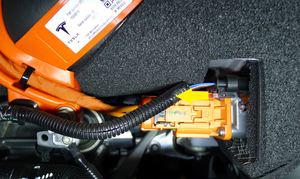
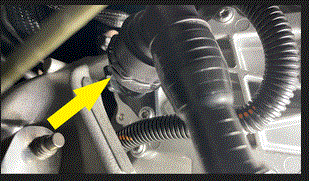
- Pull the red tab, and then pull the red tab again to disconnect the electrical harness from the A/C compressor logic connector.
 Courtesy of TESLA, INC. Courtesy of TESLA, INC.
|
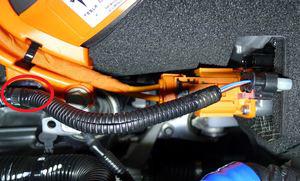
- Release the clip that attaches the electrical harness to the A/C compressor HV harness bracket.
 Courtesy of TESLA, INC. Courtesy of TESLA, INC.
|
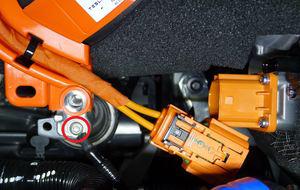
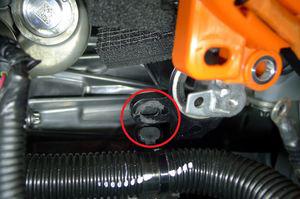
- Remove the bolt that attaches the ground strap to the A/C compressor, and then remove the ground strap from the compressor.
 Courtesy of TESLA, INC. Courtesy of TESLA, INC.
|
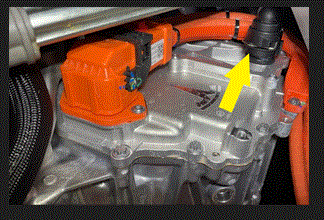
- Remove the bolt that attaches the A/C compressor HV harness bracket to the A/C compressor.
 Courtesy of TESLA, INC. Courtesy of TESLA, INC.
|
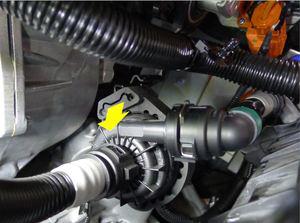
- Slide the black locking tab, press the release, and disconnect the HV harness from the A/C compressor HV header.
 Courtesy of TESLA, INC. Courtesy of TESLA, INC.
|
- Release the HV heat pump bracket tab, rotate the HV heat pump bracket rearward and upward to release the bracket from the A/C compressor eyelet.
 Courtesy of TESLA, INC. Courtesy of TESLA, INC.
|
 Courtesy of TESLA, INC. Courtesy of TESLA, INC.
|
- Move the HV heat pump bracket out from under the A/C compressor discharge pipe, and then move to the LH side.
 Courtesy of TESLA, INC. Courtesy of TESLA, INC.
|
 Courtesy of TESLA, INC. Courtesy of TESLA, INC.
|
- Release the clip that attaches the coolant hose to the A/C compressor bracket.
 Courtesy of TESLA, INC. Courtesy of TESLA, INC.
|
- Slide the powertrain coolant pump away from the A/C compressor, and off of the A/C compressor lower bracket.
 Courtesy of TESLA, INC. Courtesy of TESLA, INC.
|
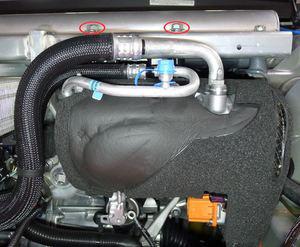
- With the help of an assistant, remove the bolts (x2) that attach the A/C compressor bracket to the multi-system beam, and then move the A/C compressor out from under the multi-system beam.
 Courtesy of TESLA, INC. Courtesy of TESLA, INC.
|
 Courtesy of TESLA, INC. Courtesy of TESLA, INC.
|
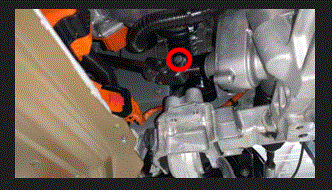
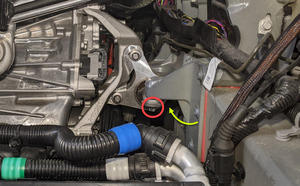
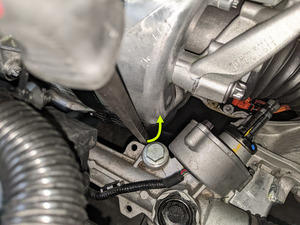
- Remove the bolt that attaches the front drive unit ground strap to the front drive unit.
 Courtesy of TESLA, INC. Courtesy of TESLA, INC.
|
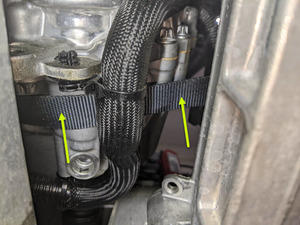
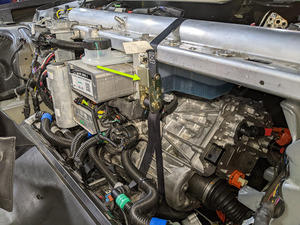
- Setup and tighten ratchet straps so that the multi-system beam supports the LH side of the front drive unit.
CAUTION:
Make sure that the straps do not route over air suspension lines, coolant hoses, or electrical harnesses.
 Courtesy of TESLA, INC. Courtesy of TESLA, INC.
|
 Courtesy of TESLA, INC. Courtesy of TESLA, INC.
|
 Courtesy of TESLA, INC. Courtesy of TESLA, INC.
|
 Courtesy of TESLA, INC. Courtesy of TESLA, INC.
|
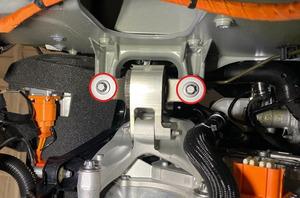
- Remove the bolts (x2) that attach the LH clevis mount to the LH frame rail.
NOTE:
Use a pry bar between the steering rack and front drive unit to help with bolt removal.
 Courtesy of TESLA, INC. Courtesy of TESLA, INC.
|
 Courtesy of TESLA, INC. Courtesy of TESLA, INC.
|
 Courtesy of TESLA, INC. Courtesy of TESLA, INC.
|
- Remove the bolts (x2) that attach the LH clevis mount to the LH isolator mount.
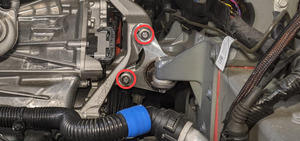 Courtesy of TESLA, INC. Courtesy of TESLA, INC.
|
- Remove the bolts (x3) that attach the LH isolator mount to the front drive unit, and then remove the isolator mount from the drive unit.
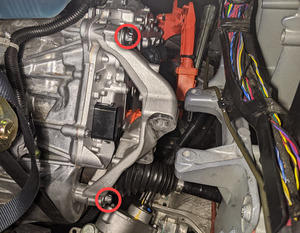 Courtesy of TESLA, INC. Courtesy of TESLA, INC.
|
 Courtesy of TESLA, INC. Courtesy of TESLA, INC.
|
- Move a coolant catcher under the LH front of the vehicle.
 Courtesy of TESLA, INC. Courtesy of TESLA, INC.
|
- Release the clip, disconnect the front drive unit inverter to heat exchanger hose from the front drive unit inverter outlet, and then immediately plug both fittings.
 Courtesy of TESLA, INC. Courtesy of TESLA, INC.
|
- Release the clip, disconnect the front drive unit inverter inlet hose from the front drive unit inverter, and then immediately plug both fittings.
 Courtesy of TESLA, INC. Courtesy of TESLA, INC.
|
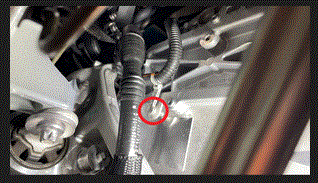
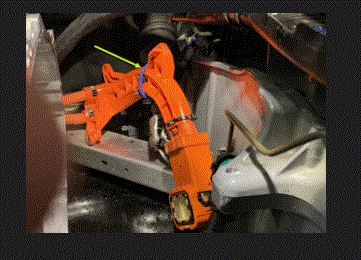
- Release the fir tree clip that attaches the front drive unit inverter inlet hose to the front drive unit inverter.
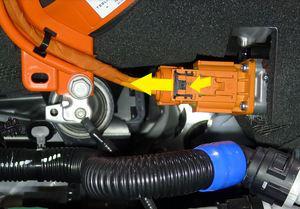
- Release the locking tab, push the handle downward, and then disconnect the front subframe electrical harness from the front drive unit inverter logic connector.
 Courtesy of TESLA, INC. Courtesy of TESLA, INC.
|
- Release the clip that attaches the front subframe electrical harness to the front drive unit inverter.
 Courtesy of TESLA, INC. Courtesy of TESLA, INC.
|
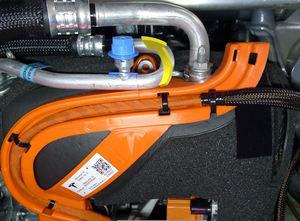
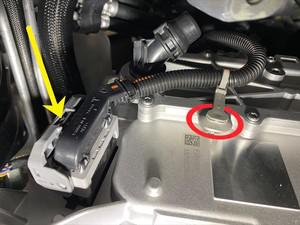
- Remove the bolt that attaches the front drive unit HV harness bracket to the front drive unit inverter.
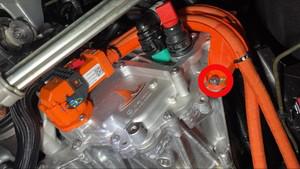 Courtesy of TESLA, INC. Courtesy of TESLA, INC.
|
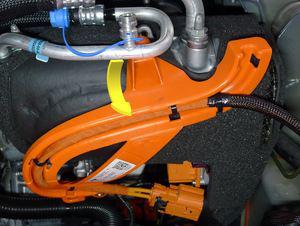
- Slide the red locking tab, raise the black handle, disconnect the front drive unit HV harness from the front drive unit inverter HV header, and then set the HV harness aside.
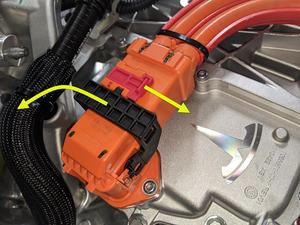 Courtesy of TESLA, INC. Courtesy of TESLA, INC.
|
 Courtesy of TESLA, INC. Courtesy of TESLA, INC.
|
- Remove the screw clips (x2) that attach the front drive unit inverter cover to the front drive unit inverter, and then remove the cover from the inverter.
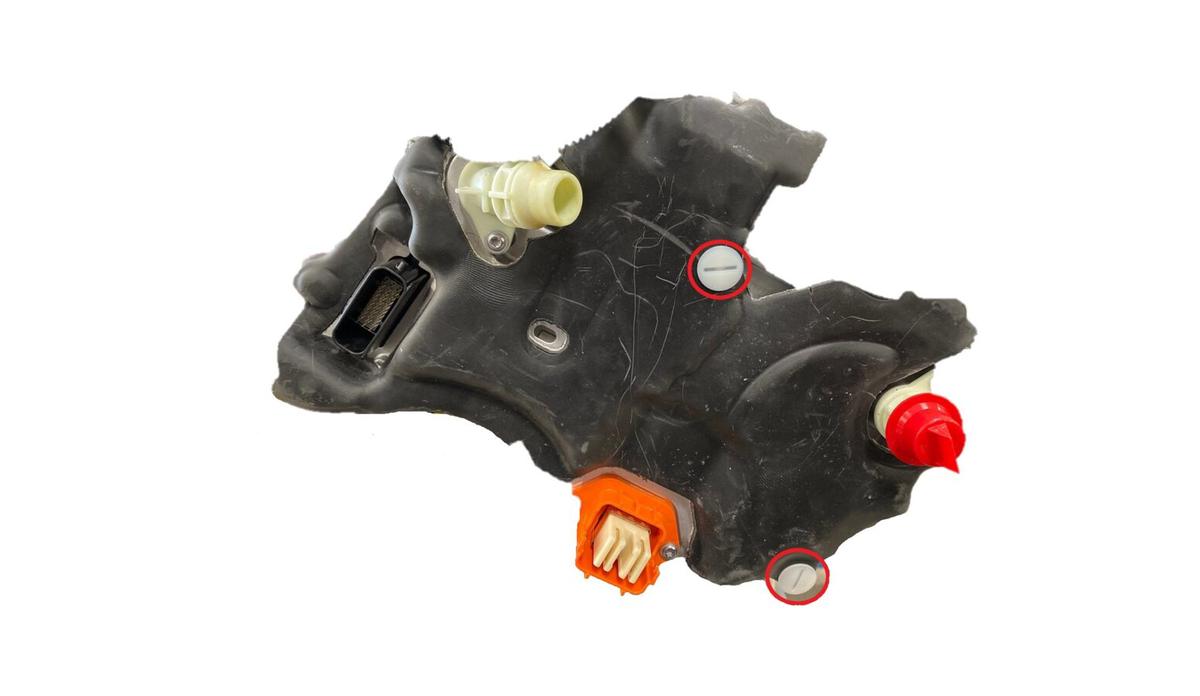 Courtesy of TESLA, INC. Courtesy of TESLA, INC.
|