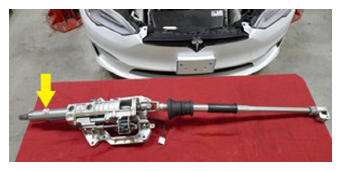
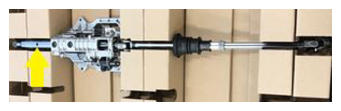
- Transfer the lower steering column shroud datum to the new steering column.
 Courtesy of TESLA, INC. Courtesy of TESLA, INC.
|
 Courtesy of TESLA, INC. Courtesy of TESLA, INC.
|
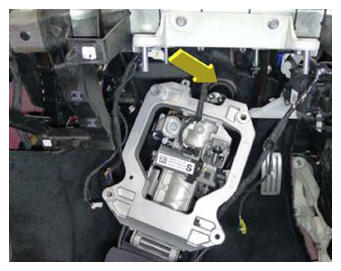
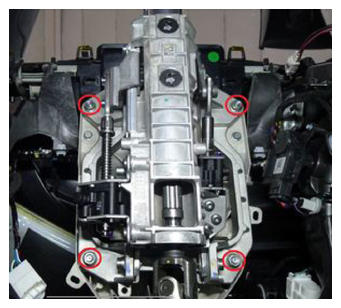
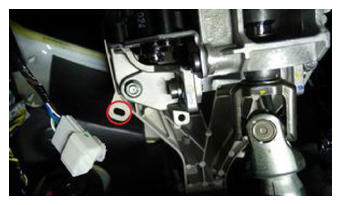
- Install the upper steering column to the IP carrier
NOTE:
4x nuts, 13 mm, 15 N.m
 Courtesy of TESLA, INC. Courtesy of TESLA, INC.
|
 Courtesy of TESLA, INC. Courtesy of TESLA, INC.
|
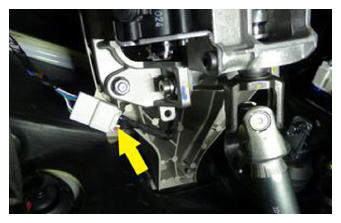
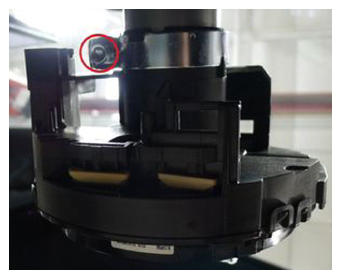
- Connect the steering column electrical connector and position the harness to the clip.
 Courtesy of TESLA, INC. Courtesy of TESLA, INC.
|
 Courtesy of TESLA, INC. Courtesy of TESLA, INC.
|
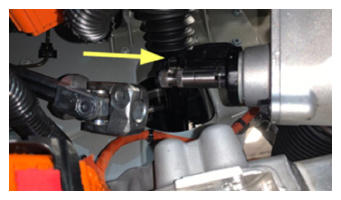
- Raise the vehicle fully.
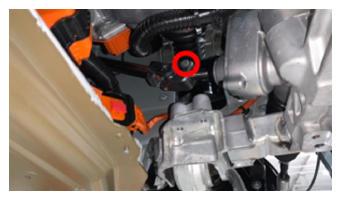
- Slide the steering column on to the steering gear and install the bolt that attaches the steering column to the steering gear.
NOTE:
1x bolt, 13 mm, 30 N.m
 Courtesy of TESLA, INC. Courtesy of TESLA, INC.
|
 Courtesy of TESLA, INC. Courtesy of TESLA, INC.
|
- Install the front skid plate. See Skidplate - Front (Remove and Replace)
.
- Install the front aero shield. See Panel - Aero Shield - Front (Remove and Replace)
.
- Lower the vehicle until the tires are touching the ground.
- Install the lower instrument panel assembly. See Instrument Panel - Lower (Remove and Replace)
.
- Install the SCCM to the steering column.
NOTE:
1x bolt, 5 mm Allen, 9 N.m
CAUTION:
Carefully slide the module on the steering column without rotating the module.
 Courtesy of TESLA, INC. Courtesy of TESLA, INC.
|
 Courtesy of TESLA, INC. Courtesy of TESLA, INC.
|
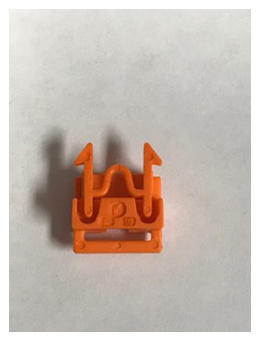
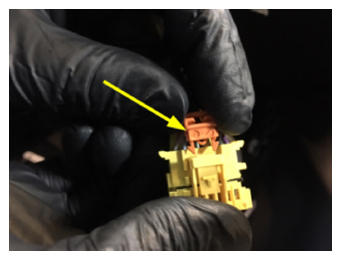
- Connect the SCCM electrical connector.
NOTE:
Install a new orange retaining clip to the connector, and then install the SCCM connector. Perform a push-pull-push test to make sure the connector is seated properly.
 Courtesy of TESLA, INC. Courtesy of TESLA, INC.
|
 Courtesy of TESLA, INC. Courtesy of TESLA, INC.
|
- Install the lower steering column shroud. See SHROUD - LOWER - STEERING COLUMN (REMOVE AND REPLACE) .
- Install the gap hider. See Gap Hider - Steering Column - Upper (Remove and Replace)
.
- Install the steering yoke. See STEERING YOKE/WHEEL (REMOVE AND REPLACE) .
- Install the LH knee air bag. See Knee Airbag - Driver (Remove and Replace)
.
- Install the LH footwell cover. See Cover - Footwell - Driver (Remove and Replace)
.
- Install the glove box. See Glove Box (Remove and Replace)
.
- Install the RH knee air bag. See Knee Airbag - Front Passenger (Remove and Replace)
.
- Install the RH footwell cover. See Cover - Footwell - Passenger (Remove and Replace)
.
- Install the RH IP trim. See Trim - Middle - Instrument Panel - RH (Remove and Replace)
.
- Install the LH IP trim. See Trim - Middle - Instrument Panel - LH (Remove and Replace)
.
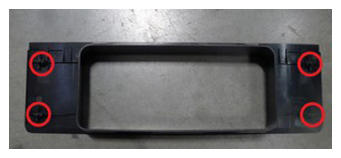
- Position the clips (x4) that attach the IP closeout panel to the vehicle.
NOTE:
4x tabs
 Courtesy of TESLA, INC. Courtesy of TESLA, INC.
|
- Install the IP decor. See Decor - Instrument Panel - Main (Remove and Replace)
.
- Install the touchscreen. See Touchscreen (Remove and Replace)
.
- Install the IP service panel. See Service Panel - Instrument Panel (Remove and Replace)
.
- Install the phone dock. See Phone Dock - Center Console (Remove and Replace)
.
- Connect LV power. See LV Power (Disconnect and Connect)
.
- Install the rear underhood apron. See Underhood Apron - Rear (Remove and Replace)
.
- Connect to the vehicle with a laptop equipped with Toolbox 3. See Toolbox 3 (Connect and Disconnect)
.
- Select 'Actions' and search for 'SCCM'.
- Select 'SCCM UDS ECU RESET', click 'Run', and allow the routine to complete. Select 'X' at the top of the window upon completion.
- Select 'Actions' and search for 'STEERING'.
- Select 'STEERING COLUMN CALIBRATION', click 'Run', and allow the routine to complete. Select 'X' at the top of the window upon completion.
- Disconnect Toolbox 3 from the vehicle. See Toolbox 3 (Connect and Disconnect)
.
- Install the LH and RH instrument panel end caps. See End Cap - Instrument Panel - LH (Remove and Replace)
.
- Install the LH and RH middle A-pillar trims. See Trim - A-Pillar - Middle - LH (Remove and Replace)
.
- Remove the vehicle from the lift.