Actuator - Pedestrian Protection - LH - Remove And Replace: Installation
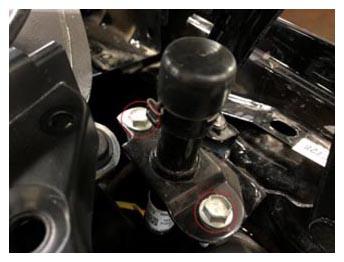
- Install the bolts (x2) that attach the LH pedestrian protection actuator to the body (torque 8 N.m).
 Courtesy of TESLA, INC. Courtesy of TESLA, INC.
|
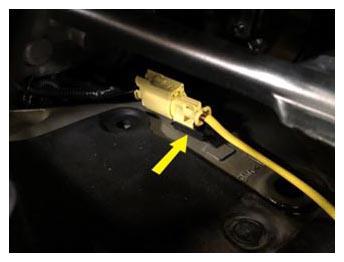
- Secure the fir tree clip that attaches the LH pedestrian protection connector to the body.
 Courtesy of TESLA, INC. Courtesy of TESLA, INC.
|
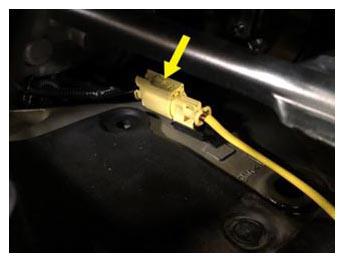
- Connect the LH pedestrian protection actuator connector.
 Courtesy of TESLA, INC. Courtesy of TESLA, INC.
|
- Install the cowl screen panel. See PANEL - COWL SCREEN (REMOVE AND REPLACE)
.
- Install the LH and RH wiper arms. See WIPER ARM - LH (REMOVE AND REPLACE)
.
- Reconnect 12V power. See DISCONNECT 12V POWER
.
- Install the HEPA filter. See FILTER - HEPA (REMOVE AND REPLACE)
.
- Install the underhood storage unit. See UNDERHOOD STORAGE UNIT (REMOVE AND REPLACE)
.
- Install the LH and RH underhood aprons. See UNDERHOOD APRON - LH (REMOVE AND REPLACE)
.
- Install the rear center underhood apron. See UNDERHOOD APRON - CENTER - REAR (REMOVE AND REPLACE)
.
- Calibrate the rear doors using the touchscreen.
- Turn on drive rails
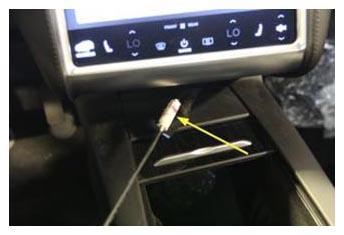
- Connect a laptop with Toolbox 3 to the vehicle.
- Unlock the gateway. See Gateway Unlock
.
- In Toolbox 3, click the Actions
tab, type "Airbag-Config" into the search field, click PROC_RCM_X_AIRBAG-CONFIG
, click Run
, and allow the routine to complete.
- In Toolbox 3, click the Actions
tab, type "ESP-CONFIG" into the search field, click PROC_ESP_X_ESP-CONFIG
, click Run
, and allow the routine to complete.
- Disconnect the laptop from the vehicle and reinstall storage cubby.
 Courtesy of TESLA, INC. Courtesy of TESLA, INC.
|
 Courtesy of TESLA, INC. Courtesy of TESLA, INC.
|
- Cycle the drive rails.