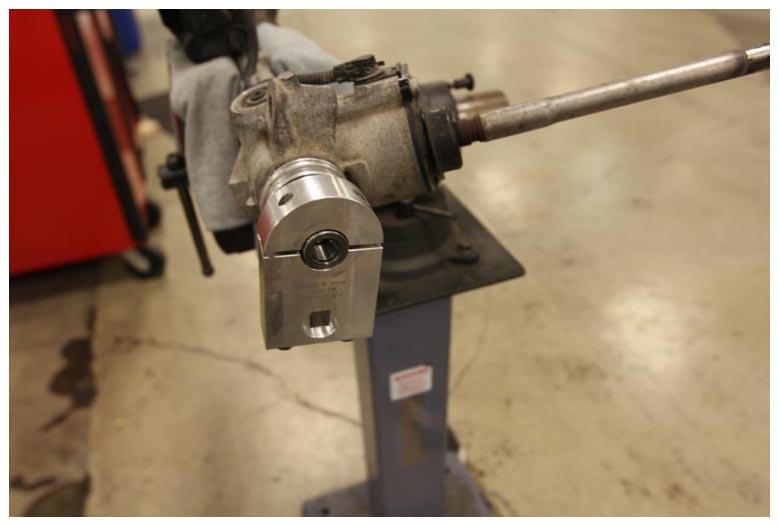
- Place the new steering rack on a bench vise and tighten the vise.
NOTE:
Use a shop towel between the steering rack and the bench vise to prevent marring.
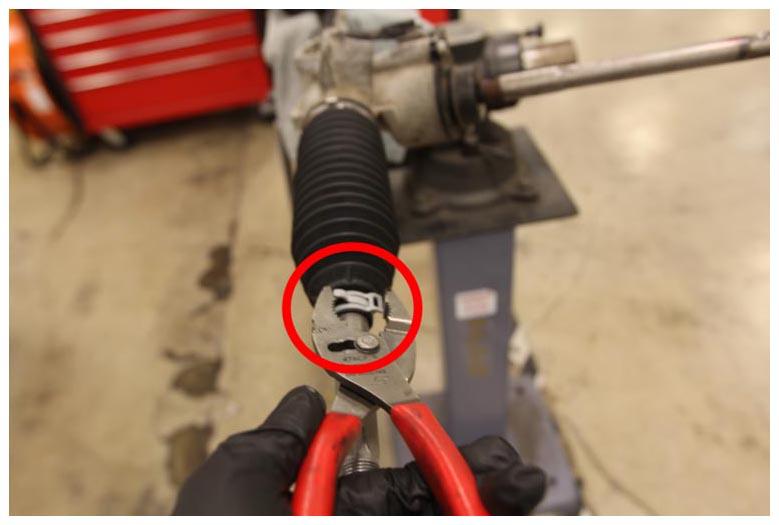
- Remove the LH inner tie rod outer bellows clamp on the new steering rack using combination slip joint pliers.
NOTE:
Note the clamp orientation for installation later in this section.
 Courtesy of TESLA, INC. Courtesy of TESLA, INC.
|
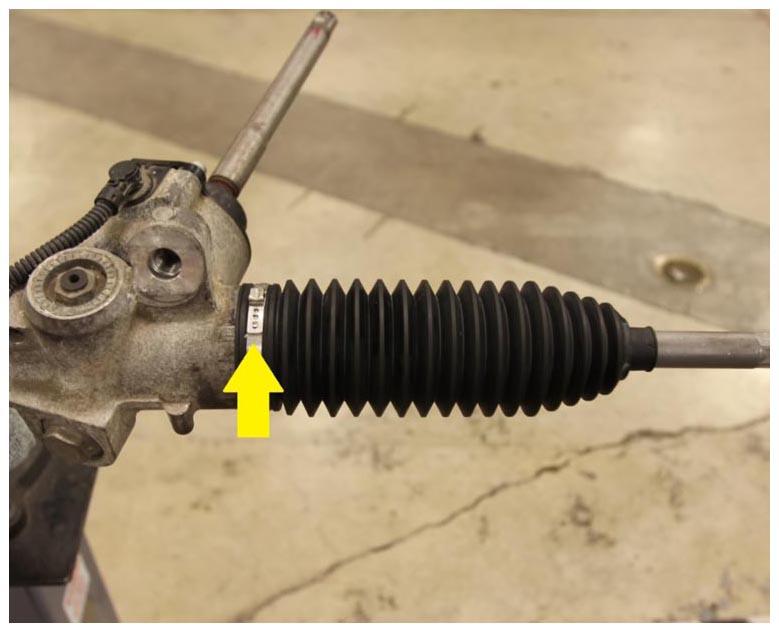
- Remove the clamp that attaches the inner side of the bellows to the LH inner tie rod on the new steering rack using a small flat head screwdriver.
NOTE:
Use a flat head screwdriver to remove the clamp off the retaining tab.
 Courtesy of TESLA, INC. Courtesy of TESLA, INC.
|
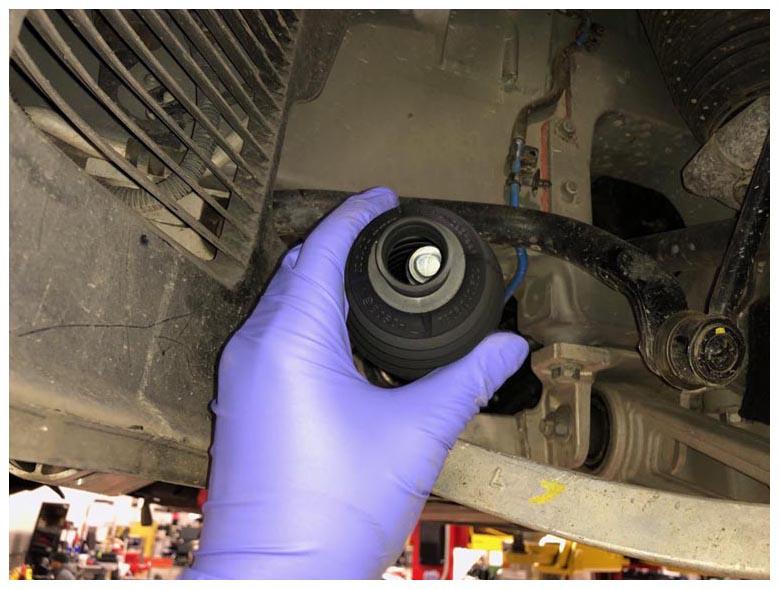
- Remove the bellows from the LH inner tie rod on the new steering rack.
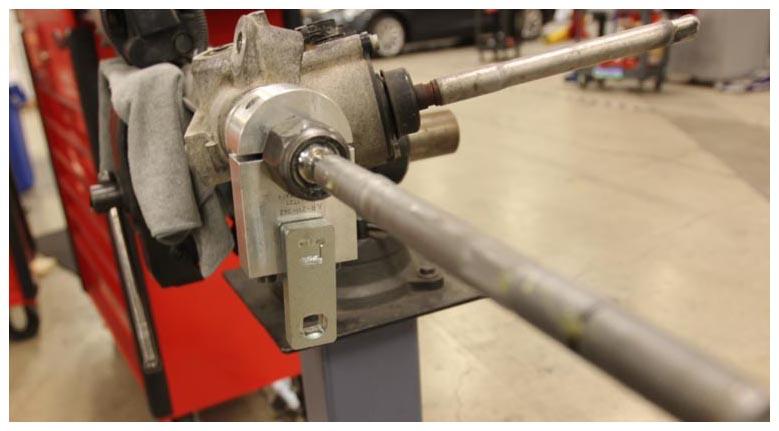
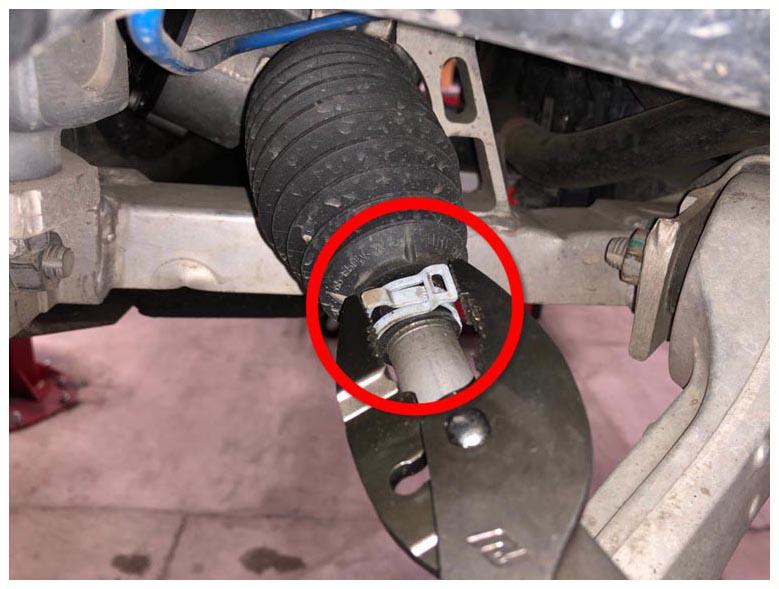
- Install the steering gear clamp tool, crowfoot socket, and the anti-rotation device tool on the LH inner tie rod of the new steering rack.
 Courtesy of TESLA, INC. Courtesy of TESLA, INC.
|
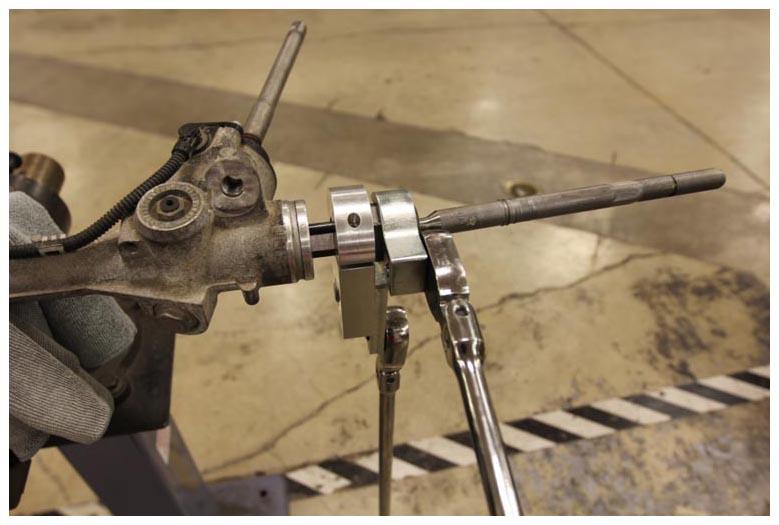
- Loosen the LH inner tie rod while holding the inner gear to prevent it from rotating.
CAUTION:
Failure to hold the inner gear may result in damage to the steering rack assembly.
 Courtesy of TESLA, INC. Courtesy of TESLA, INC.
|
- Remove the LH inner tie rod from the new steering rack.
 Courtesy of TESLA, INC. Courtesy of TESLA, INC.
|
- Remove the steering gear clamp tool, crowfoot socket, and the anti-rotation device tool from the new steering rack.
- Temporarily reinstall the LH bellow dust boot on the new steering rack to prevent contamination.
CAUTION:
Do not allow contaminants such as dirt or debris to enter the new steering rack, otherwise components will have to replaced.
 Courtesy of TESLA, INC. Courtesy of TESLA, INC.
|
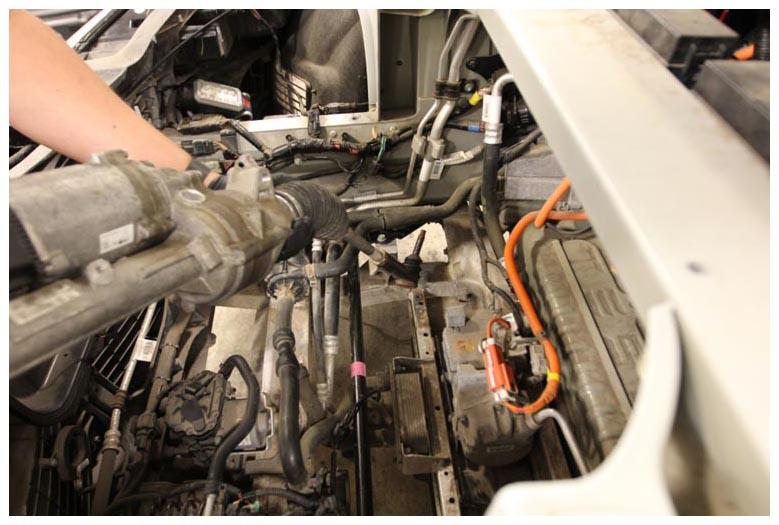
- Place the new steering rack into position for installation: Carefully place the RH side of the steering rack first, and then verify that the RH outer ball joint will be positioned correctly for installation before bolting the steering rack to the front subframe.
 Courtesy of TESLA, INC. Courtesy of TESLA, INC.
|
 Courtesy of TESLA, INC. Courtesy of TESLA, INC.
|
 Courtesy of TESLA, INC. Courtesy of TESLA, INC.
|
- Hand tighten a new bolt that attaches the RH side of the steering rack to the front subframe.
NOTE:
Install the washer between the steering rack and the front subframe, if equipped.
 Courtesy of TESLA, INC. Courtesy of TESLA, INC.
|
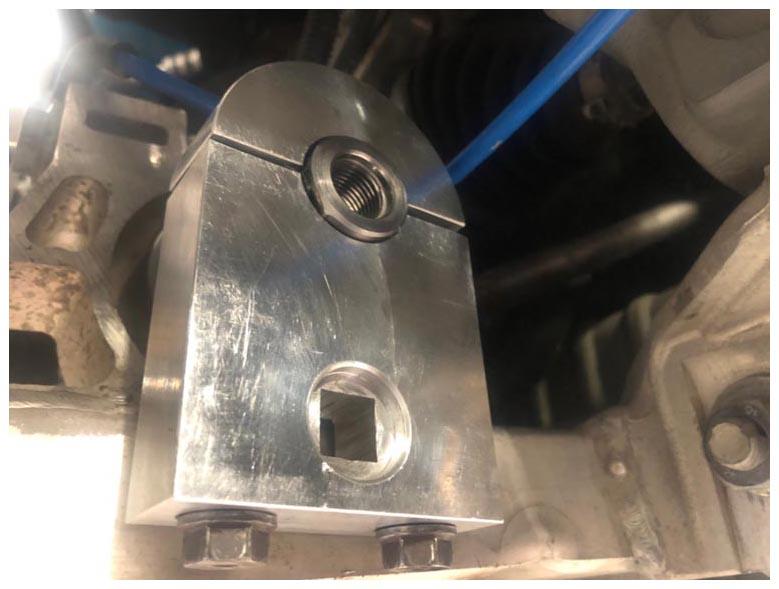
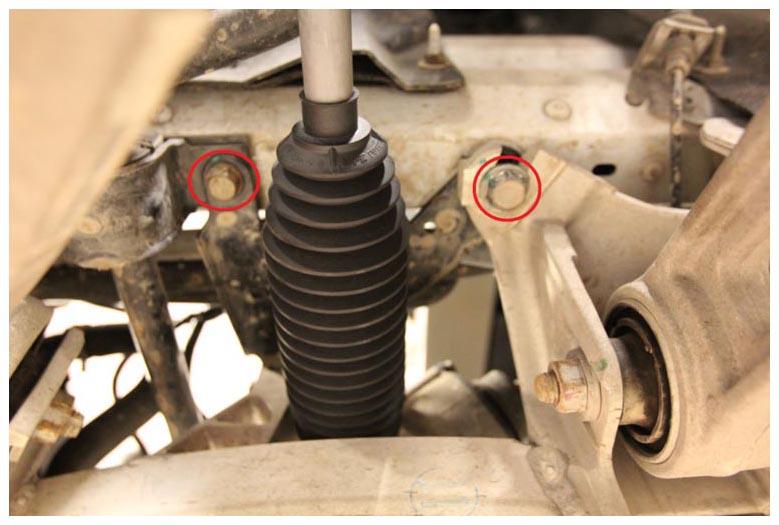
- Install a new bolt that attaches the LH of the steering rack to the front subframe (torque 175 N.m).
NOTE:
Install the washer between the steering rack and the front subframe, if equipped.
 Courtesy of TESLA, INC. Courtesy of TESLA, INC.
|
- Tighten the bolt that attaches the RH side of the steering rack to the front subframe (torque 175 N.m).
 Courtesy of TESLA, INC. Courtesy of TESLA, INC.
|
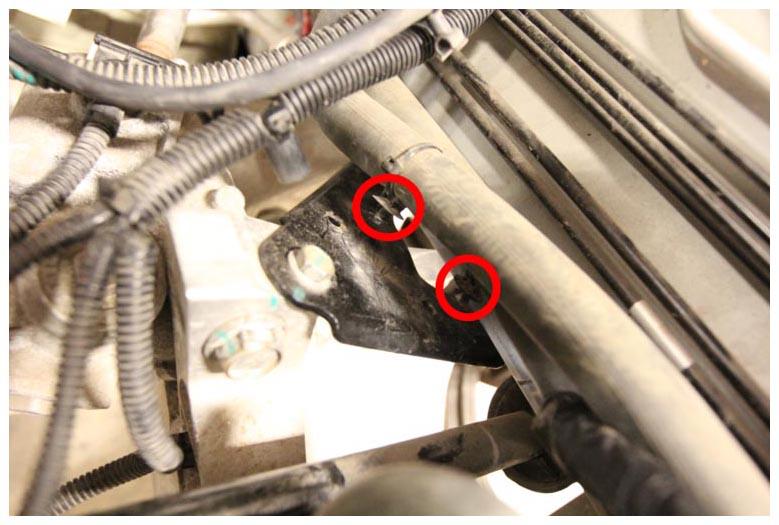
- Secure the clips (x2) that attach the front harness to the vehicle.
 Courtesy of TESLA, INC. Courtesy of TESLA, INC.
|
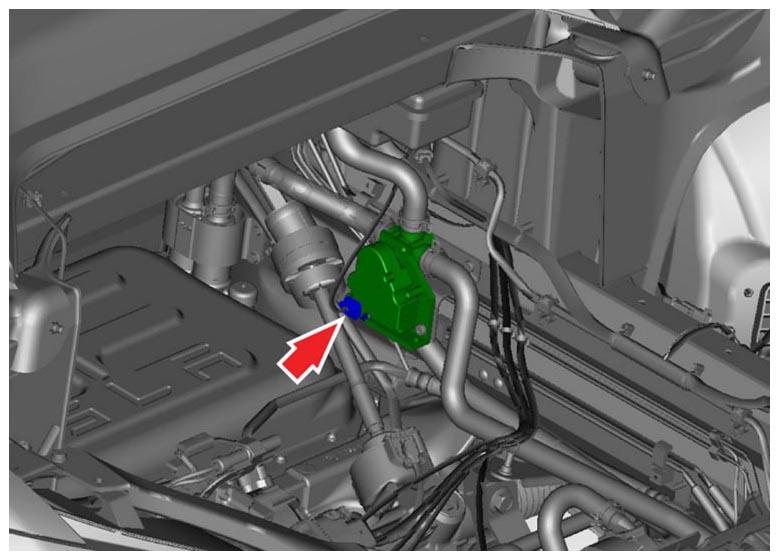
- Connect the chiller bypass 3-way coolant valve electrical connector.
 Courtesy of TESLA, INC. Courtesy of TESLA, INC.
|
 Courtesy of TESLA, INC. Courtesy of TESLA, INC.
|
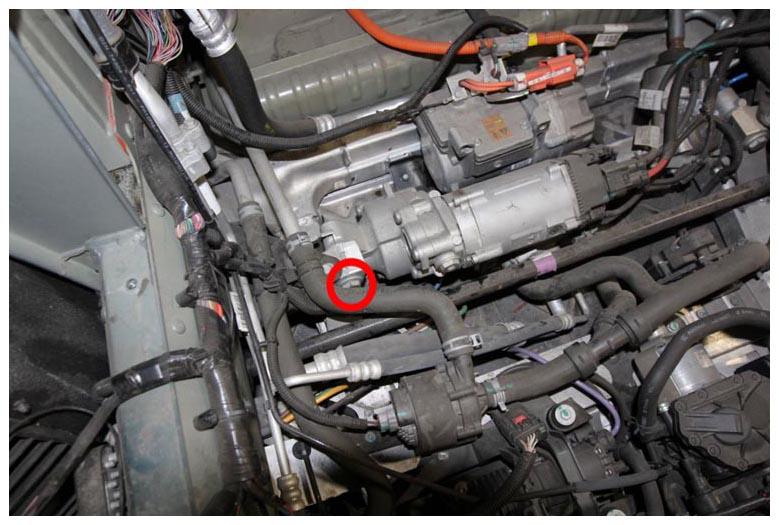
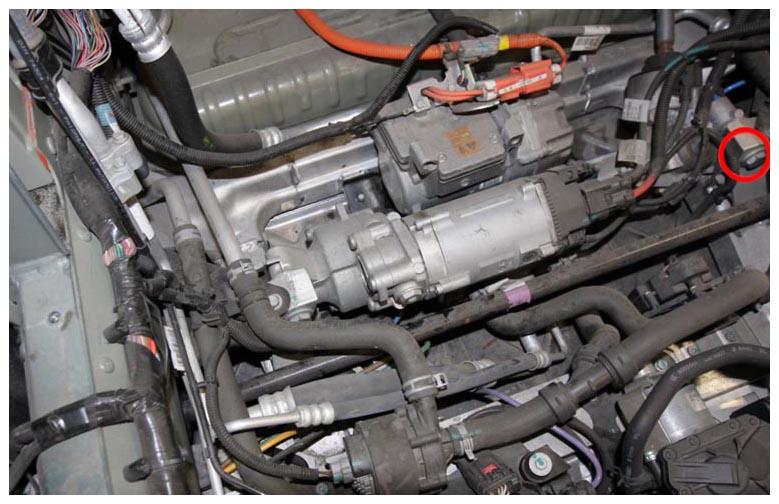
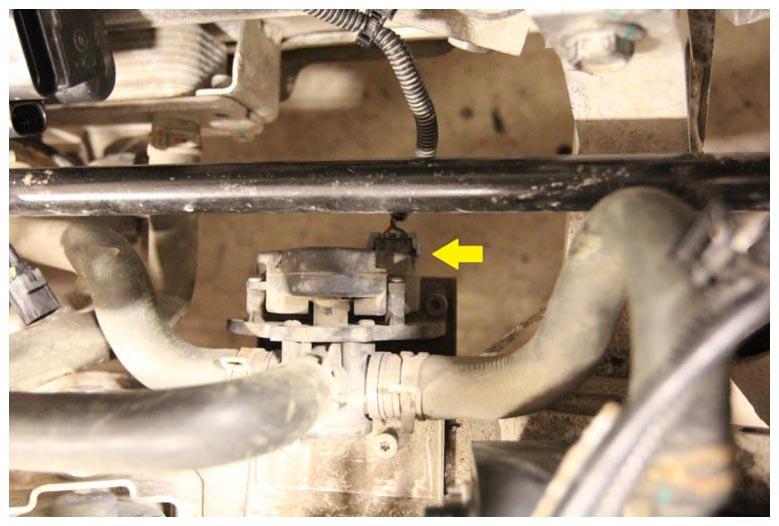
- Connect the steering rack electrical connector (x2).
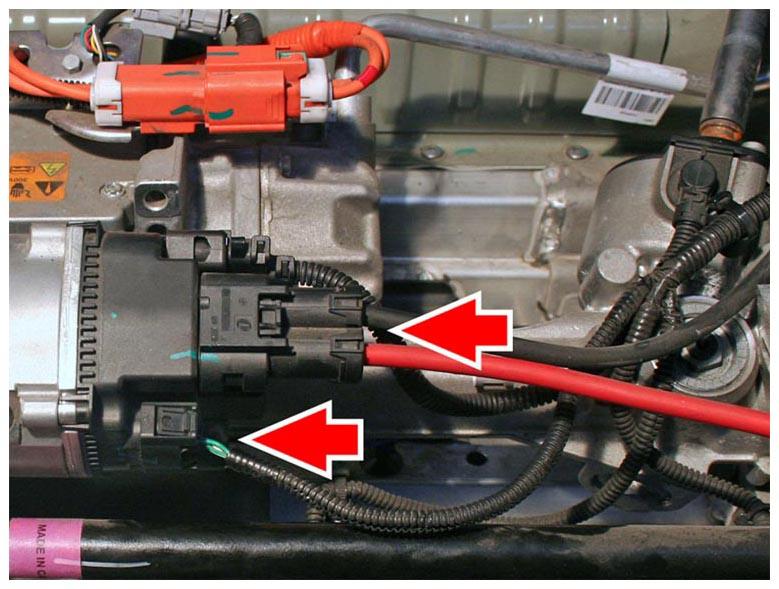 Courtesy of TESLA, INC. Courtesy of TESLA, INC.
|
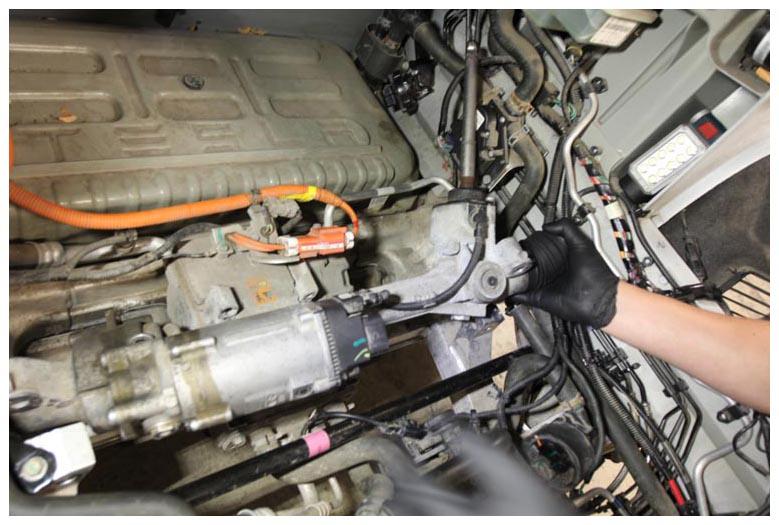
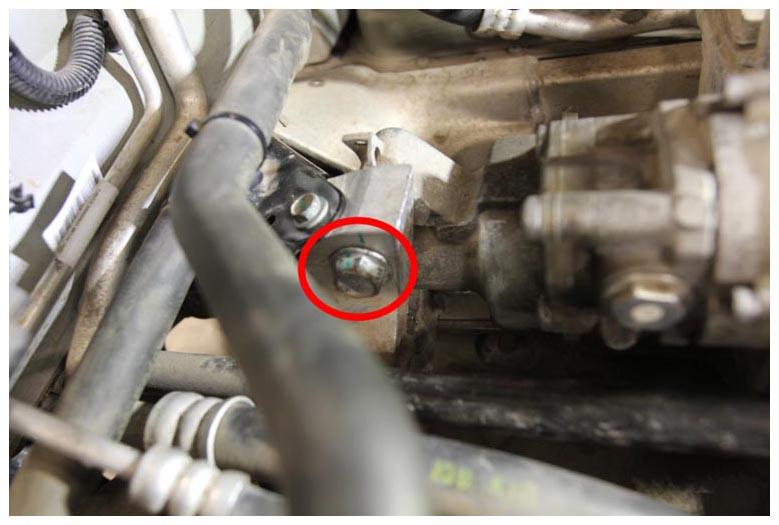
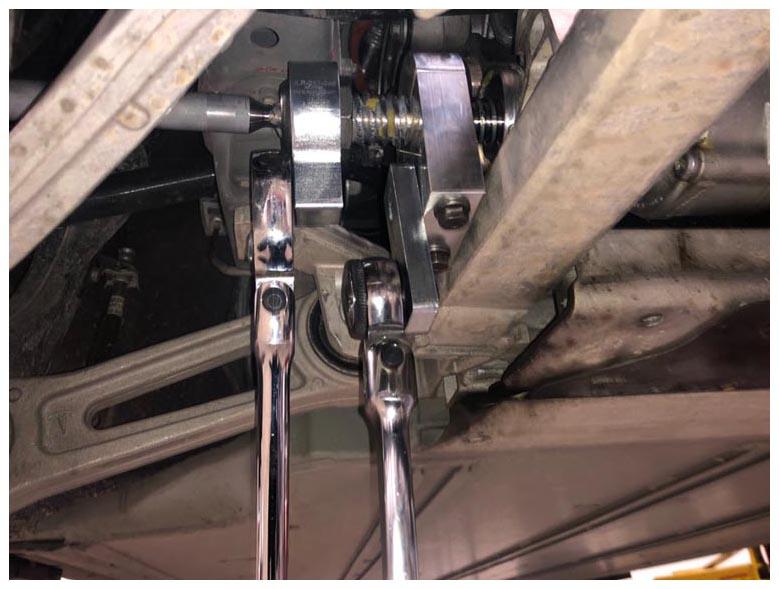
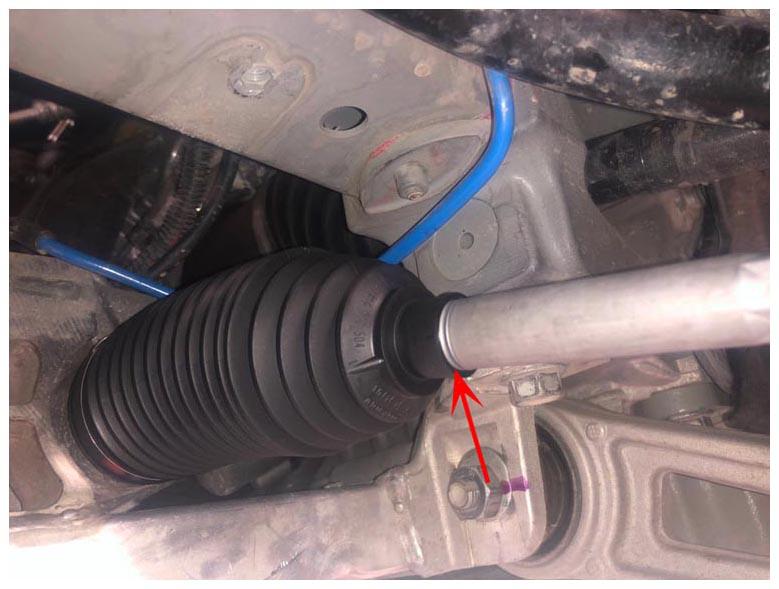
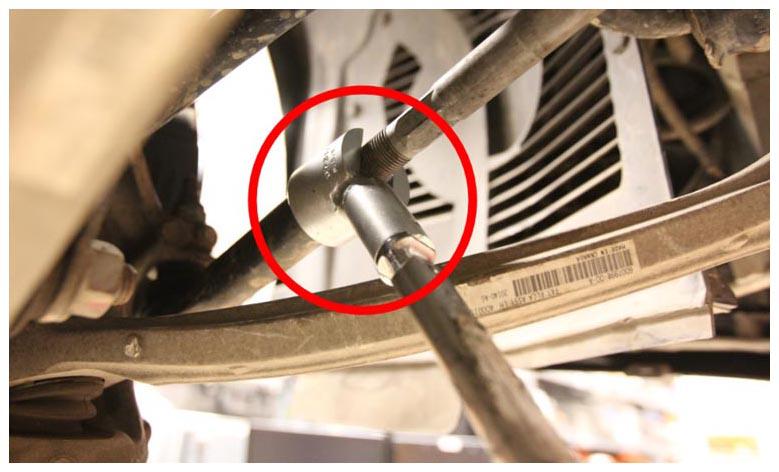
- Connect the lower steering column intermediate shaft to the steering rack input shaft, and then install a new bolt (torque 50 N.m).
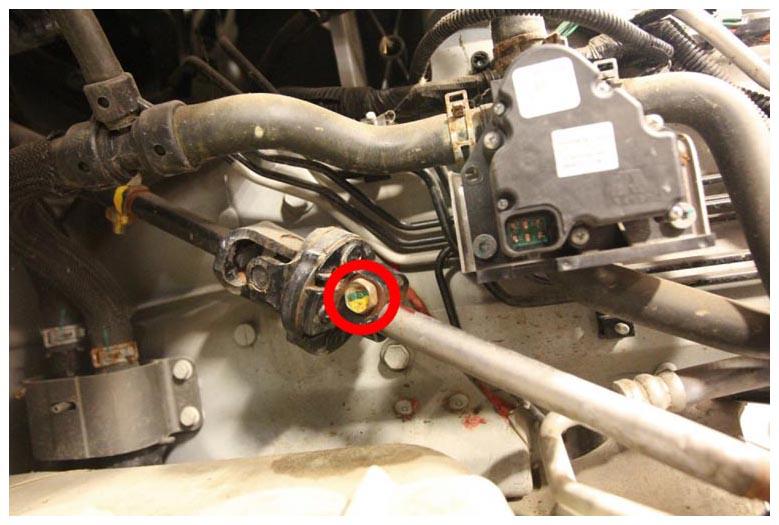 Courtesy of TESLA, INC. Courtesy of TESLA, INC.
|
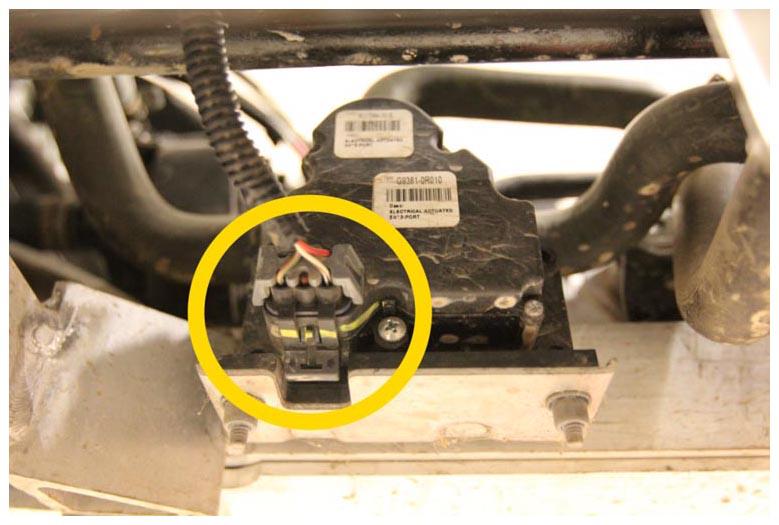
- Connect the 4 way coolant valve electrical connector.
 Courtesy of TESLA, INC. Courtesy of TESLA, INC.
|
- Partially raise the vehicle.
- Remove the LH inner tie rod bellows.
- Install the steering gear clamp tool, crowfoot socket, and the anti-rotation device tool on the LH inner tie rod (torque 10 N.m).
 Courtesy of TESLA, INC. Courtesy of TESLA, INC.
|
- Install the LH inner tie rod to the steering rack while holding the inner gear to prevent it from turning (torque 115 N.m).
CAUTION:
Failure to hold the inner gear might result in internal steering rack damage.
 Courtesy of TESLA, INC. Courtesy of TESLA, INC.
|
- Remove the steering gear clamp and the anti rotation device tools from the LH inner tie rod.
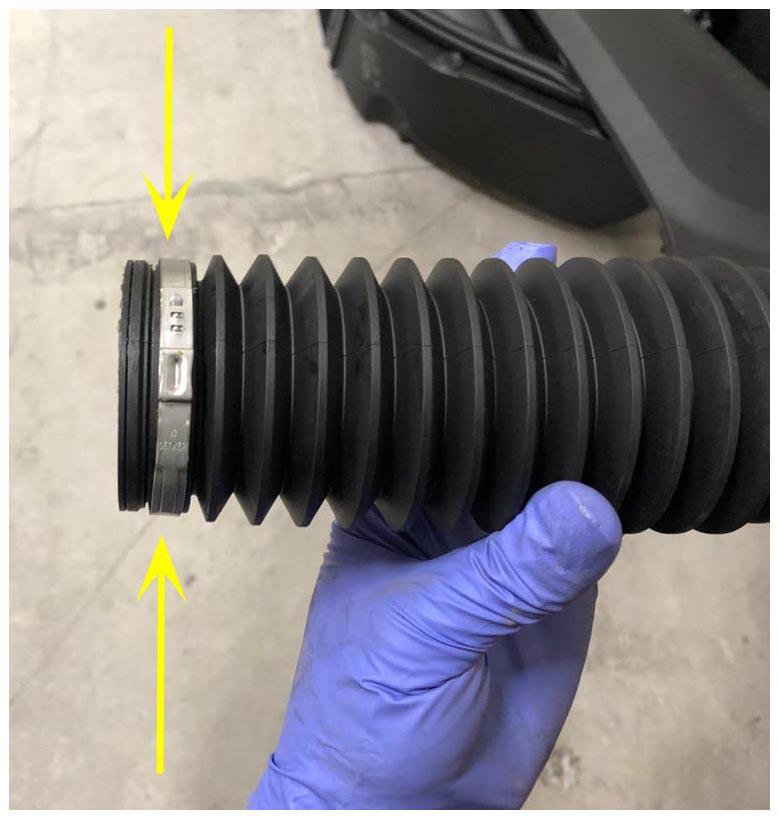
- Install a new inner band clip on the LH tie rod bellows, but do not clamp the clip at this time.
 Courtesy of TESLA, INC. Courtesy of TESLA, INC.
|
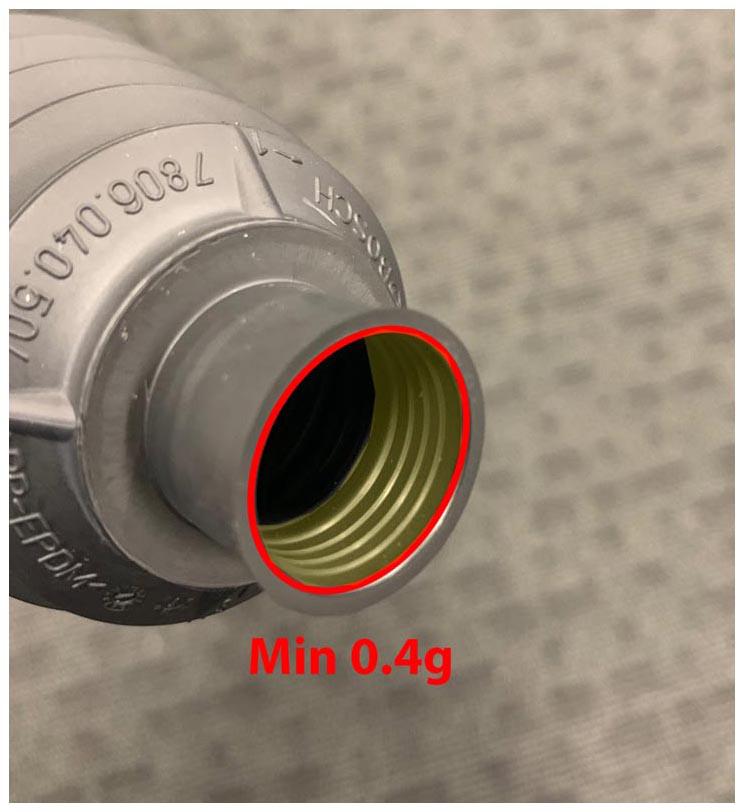
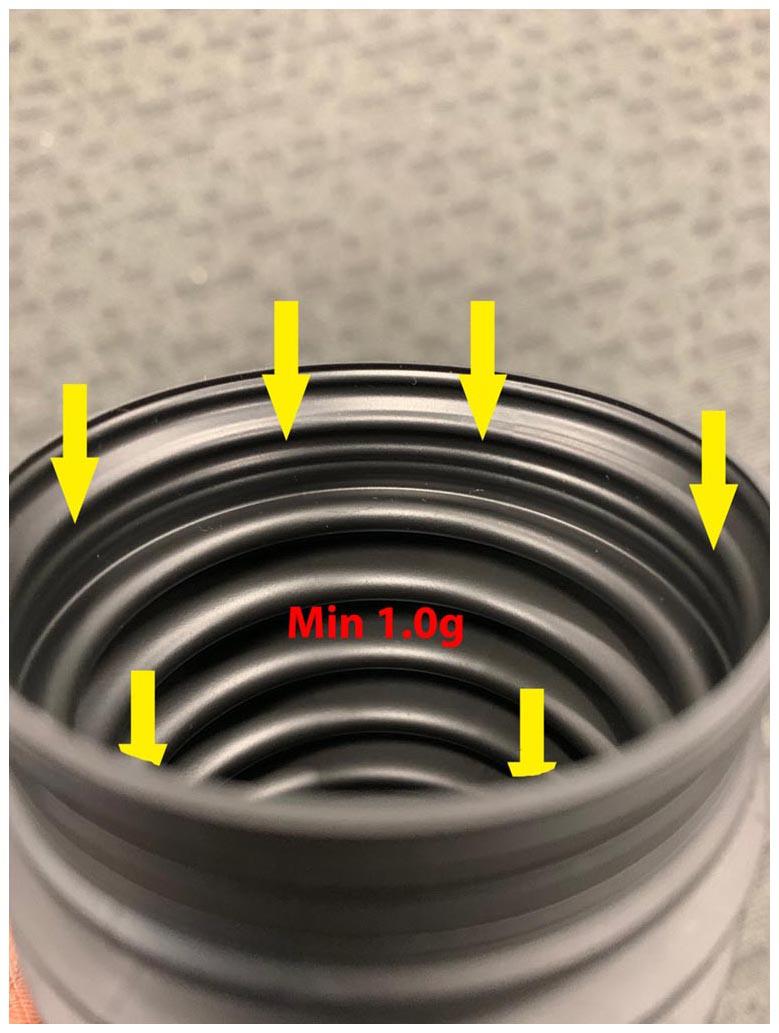
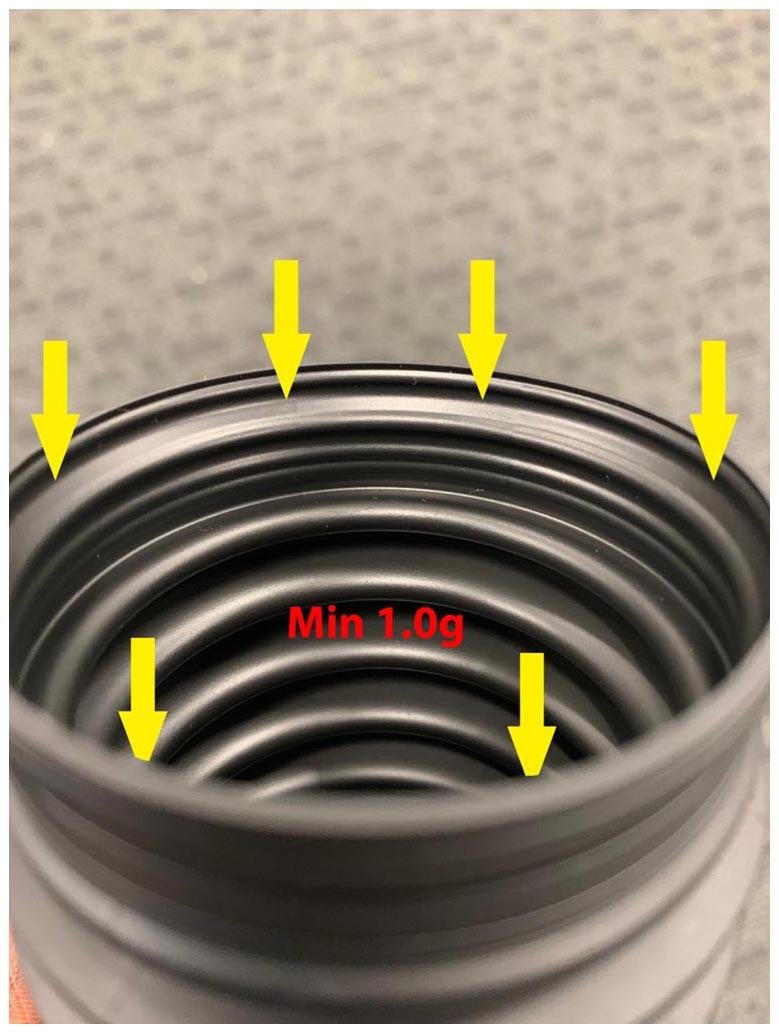
- Use the following amount of Renolit JP 1619 grease (included with the inner tie rod service kit) to lubricate the bellows before installation:
- At axial joint: 0.4 g
 Courtesy of TESLA, INC. Courtesy of TESLA, INC.
|
- At rack housing (two locations): 1.0 g
 Courtesy of TESLA, INC. Courtesy of TESLA, INC.
|
 Courtesy of TESLA, INC. Courtesy of TESLA, INC.
|
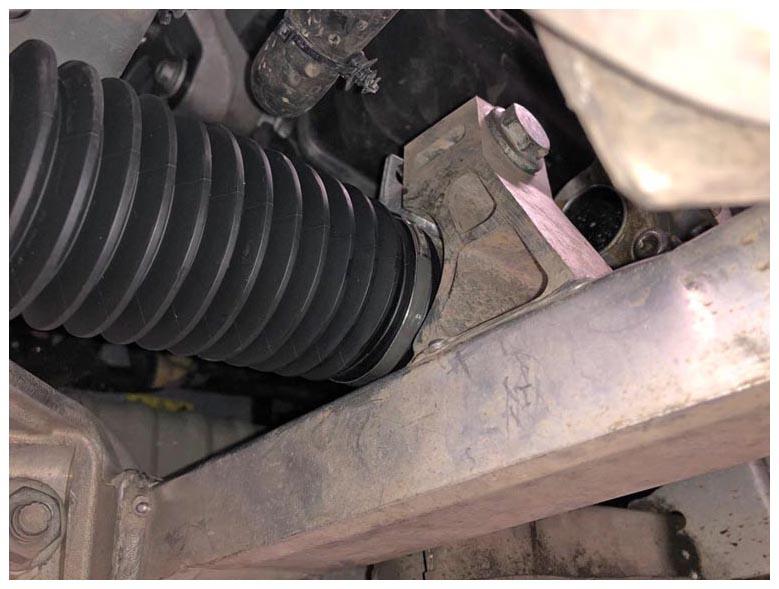
- Install the bellows into the LH inner tie rod.
 Courtesy of TESLA, INC. Courtesy of TESLA, INC.
|
 Courtesy of TESLA, INC. Courtesy of TESLA, INC.
|
 Courtesy of TESLA, INC. Courtesy of TESLA, INC.
|
- Lower the vehicle so that the tires are touching the ground.
- Attach the LH inner tie rod band clip by clamping the clip ear using the knipex ear clamp pliers.
NOTE:
The tie rod band clip can be secured from the underhood storage unit area.
NOTE:
Rotate the tie rod band to properly access the ear clip.
 Courtesy of TESLA, INC. Courtesy of TESLA, INC.
|
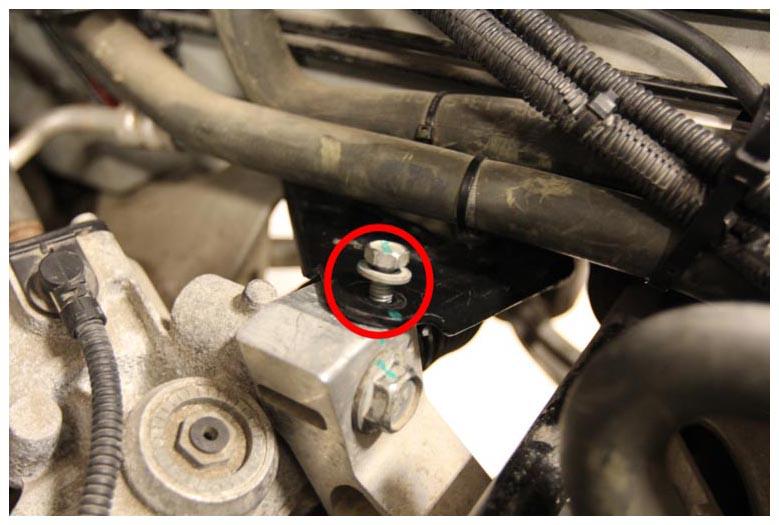
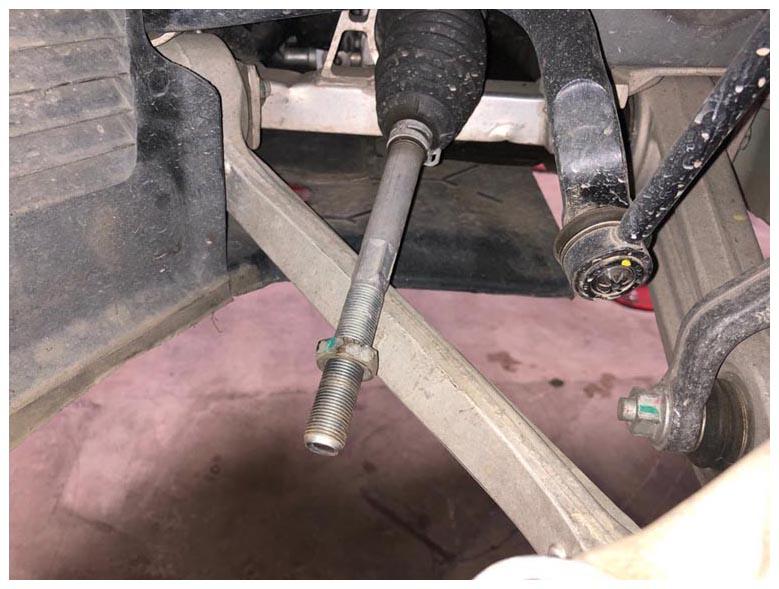
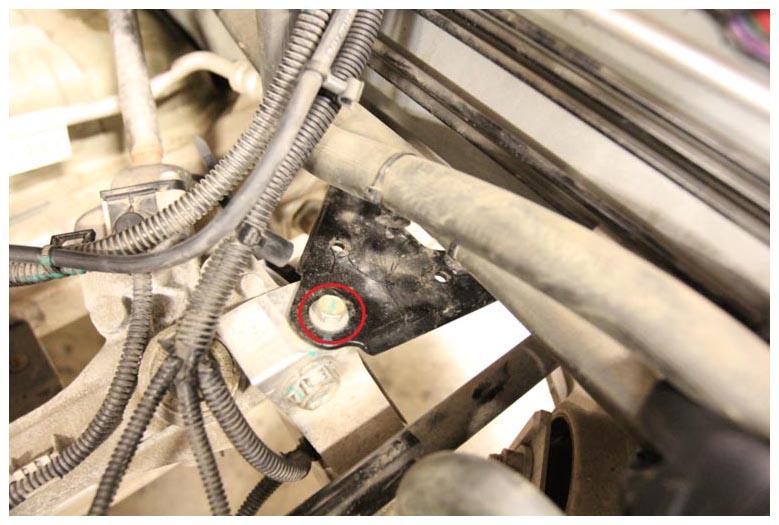
- Place the LH front subframe brace for installation, and then hand tighten bolt for now.
 Courtesy of TESLA, INC. Courtesy of TESLA, INC.
|
- Raise the vehicle fully.
- Install the lower bolts (x2) attach the LH subframe brace to the body (torque 15 mm bolt: 26 N.m, 18 mm bolt: 76 N.m).
NOTE:
Slide the LH subframe brace out from in between the LH subframe.
 Courtesy of TESLA, INC. Courtesy of TESLA, INC.
|
- Install the front aero shield panel. See Panel - Aero Shield - Front (Remove and Replace)
.
- Lower the vehicle partially to a comfortable working height.
- Install the outer hose clip on the LH inner tie rod bellows using the combination slip joint pliers.
NOTE:
Install the clip in the original orientation.
 Courtesy of TESLA, INC. Courtesy of TESLA, INC.
|
- Install the LH jam nut onto the inner tie rod.
 Courtesy of TESLA, INC. Courtesy of TESLA, INC.
|
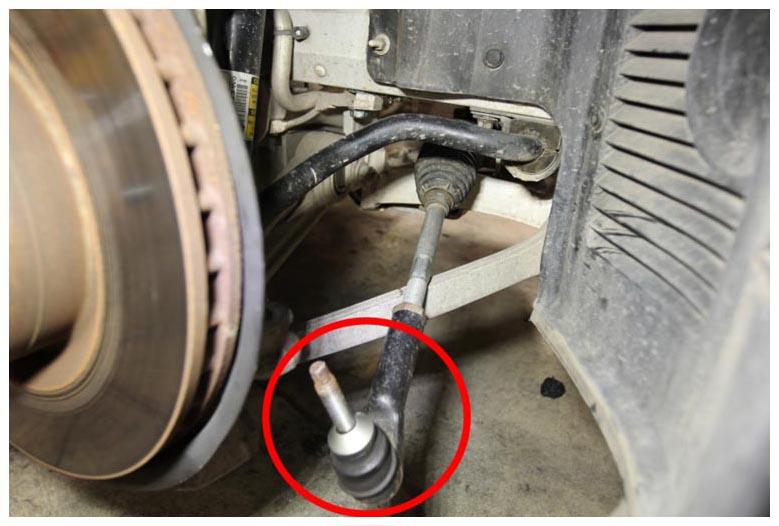
- Install the LH tie rod end, and then snug the jam nut. Repeat this step for the RH tie rod.
NOTE:
Use the recorded number of turns to put the tie rod end back on.
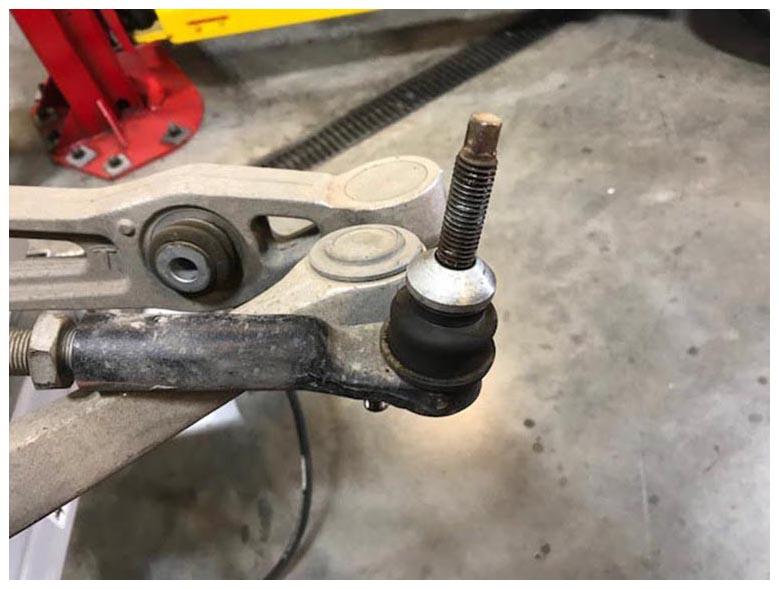 Courtesy of TESLA, INC. Courtesy of TESLA, INC.
|
- Install a new nut that attaches the LH tie rod end to the knuckle (torque 103 N.m). Repeat this step for the RH tie rod.
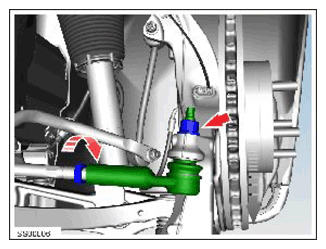 Courtesy of TESLA, INC. Courtesy of TESLA, INC.
|
- Tighten the LH tie rod end jam nut (torque 70 N.m). Repeat this step for the RH tie rod.
NOTE:
Set the Tohnichi torque wrench to 80 N.m with the adapter.
 Courtesy of TESLA, INC. Courtesy of TESLA, INC.
|
- Install the LH and RH front wheels. See Wheel (Remove and Install)
.
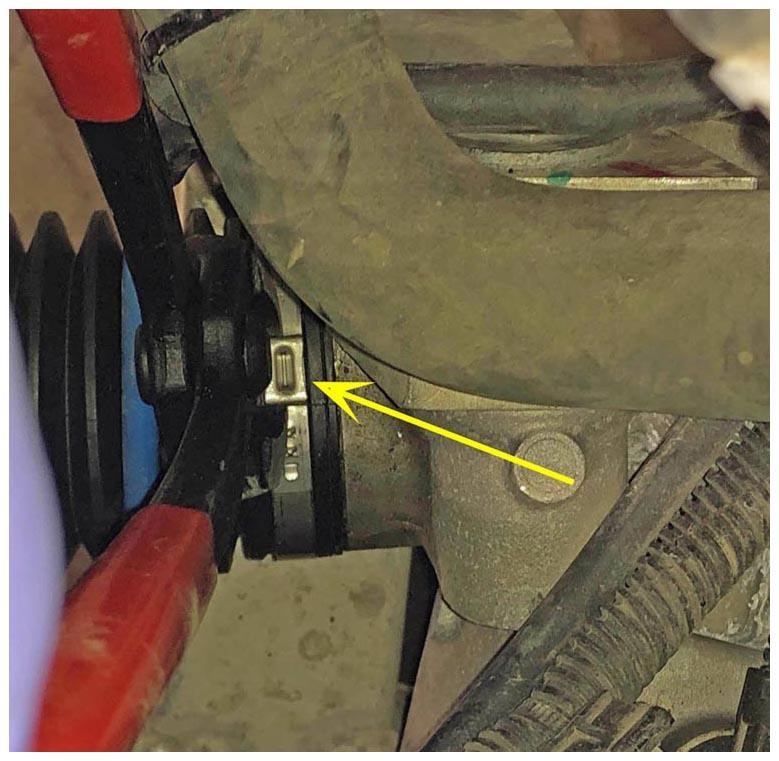
- Tighten the upper bolt for the LH front subframe brace (torque 26 N.m).
 Courtesy of TESLA, INC. Courtesy of TESLA, INC.
|
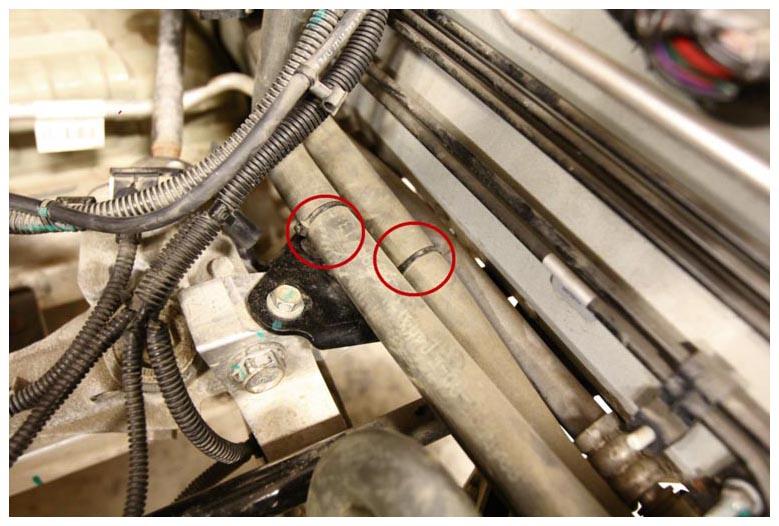
- Secure the clips (x2) that attach the coolant hoses to the LH front subframe brace.
 Courtesy of TESLA, INC. Courtesy of TESLA, INC.
|
 Courtesy of TESLA, INC. Courtesy of TESLA, INC.
|
- Reconnect 12V power. See Disconnect 12V Power
.
- Install the underhood storage unit. See Underhood Storage Unit (Remove and Install)
.
- Install the underhood storage carpet. See Carpet - Underhood Storage (Remove and Install)
.
- Install the LH and RH underhood aprons. See Underhood Apron - LH (Remove and Replace)
.
- Install the rear underhood apron. See Underhood Apron - Rear (Remove and Replace)
.
- Reinstall the firmware. See Firmware Reinstall - Touchscreen
.
- Connect a laptop with Toolbox 3 to the vehicle. See TOOLBOX 3 - CONNECT AND DISCONNECT
- Unlock the vehicle gateway. See GATEWAY UNLOCK
.
- Using Toolbox 3:
- Select the Actions tab and search for "EPAS Post Replacement"
- Select the ODIN routine PROC_EPAS_X_POST-REPLACEMENT, and then click the link of the routine.
- Click RUN
, and allow the routine to complete.
- Perform a Lock To Lock-Angle test. See Lock To Lock-Angle Test .
- Disconnect the laptop with Toolbox 3 from the vehicle. See TOOLBOX 3 - CONNECT AND DISCONNECT
.
- Refer to the Alignment Requirement tables to determine whether an EPAS alignment check (EC) or four wheel alignment check (AC) is necessary. If performed, add the alignment check/adjust as a separate activity. See