- Remove the LH and RH front seats, refer to Seat Assembly - 1st Row - LH - Remove and Install
, or Seat Assembly - 1st Row - RH - Remove And Replace
.
NOTE:
Do not disconnect 12V power until both front seats are mechanically detached from the vehicle floor panel.
- Remove the LH console closeout extension, refer to Assembly - Closeout Extension - LH - Center Console (Remove And Replace)
.
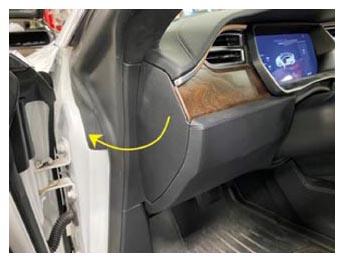
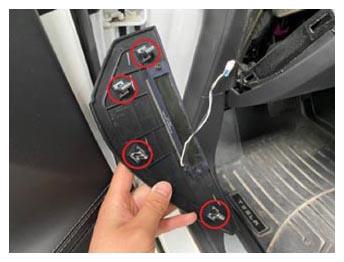
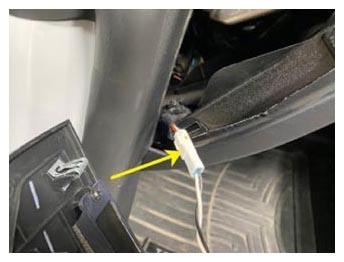
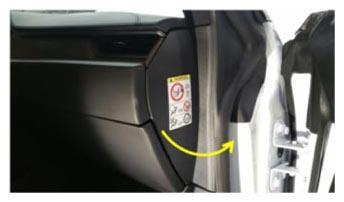
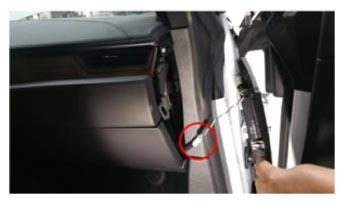
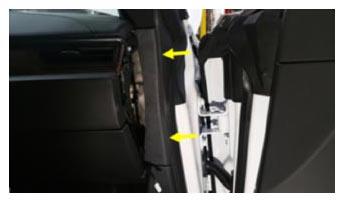
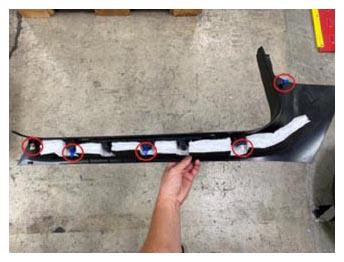
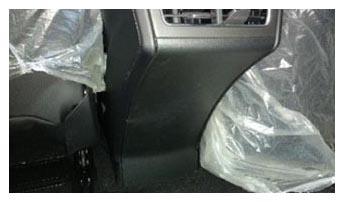
- Release the clips (x4) that attach the LH instrument panel side cover to the instrument panel, disconnect the electrical connector, and then remove the side cover.
 Courtesy of TESLA, INC. Courtesy of TESLA, INC.
|
 Courtesy of TESLA, INC. Courtesy of TESLA, INC.
|
 Courtesy of TESLA, INC. Courtesy of TESLA, INC.
|
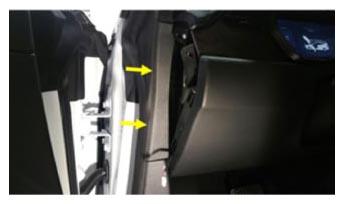
- Release the clips (x2) that attach the LH middle A-pillar trim to the vehicle, and then remove LH middle A-pillar trim.
 Courtesy of TESLA, INC. Courtesy of TESLA, INC.
|
- Release the clips (x4) that attach the LH lower A-pillar trim to the vehicle, and then remove LH lower A-pillar trim.
NOTE:
The number of clips that attach the A-pillar trim may vary, depending on vehicle production date. Replace any damaged or missing clips prior to reinstalling the trim.
 Courtesy of TESLA, INC. Courtesy of TESLA, INC.
|
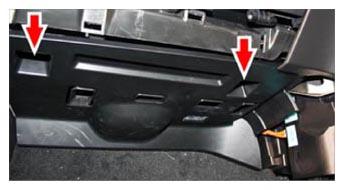
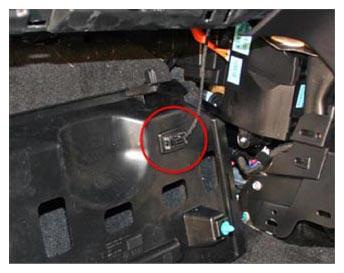
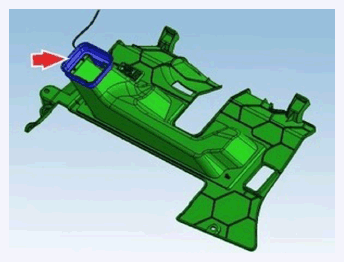
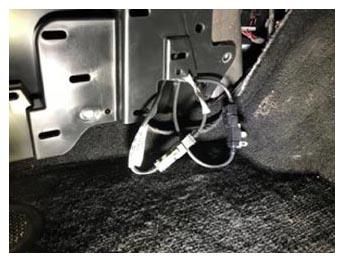
- Release the clips (x2) that attach the LH footwell cover, disconnect the electrical connector, and then remove the LH footwell from the vehicle.
 Courtesy of TESLA, INC. Courtesy of TESLA, INC.
|
 Courtesy of TESLA, INC. Courtesy of TESLA, INC.
|
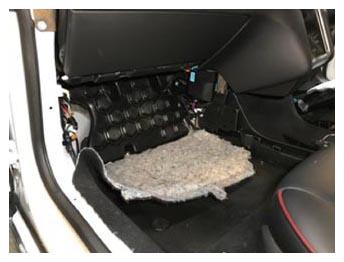
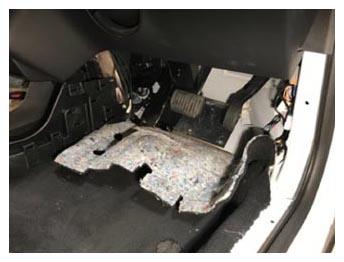
- Carefully fold back the front section of carpet at the LH footwell.
 Courtesy of TESLA, INC. Courtesy of TESLA, INC.
|
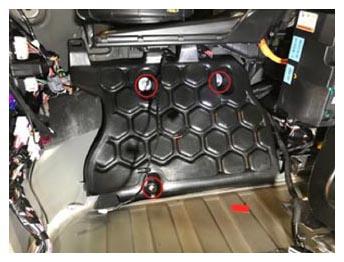
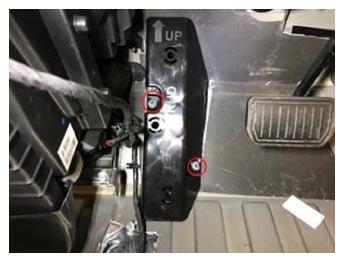
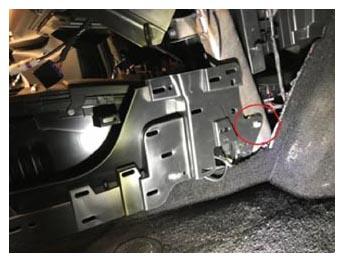
- Remove the bolts (x3) (torque 4 N.m) that attach the LH footwell harness cover to the vehicle, and then remove the LH footwell harness cover.
 Courtesy of TESLA, INC. Courtesy of TESLA, INC.
|
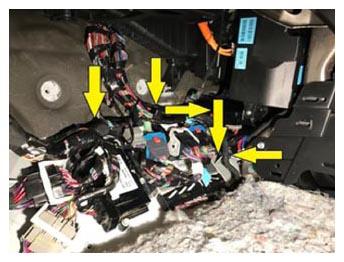
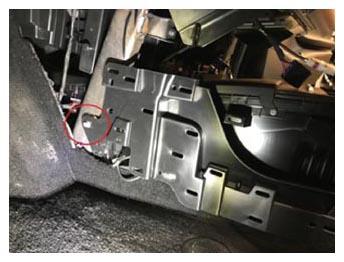
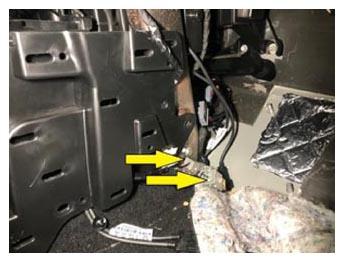
- Release the barrel clips (x2) and edge clips (x3) that attach the body harness to the bulkhead and the BCM bracket.
 Courtesy of TESLA, INC. Courtesy of TESLA, INC.
|
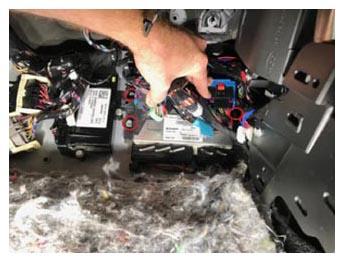
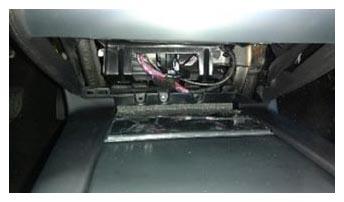
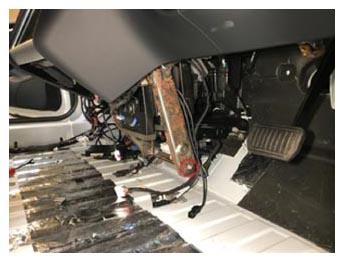
- Remove the bolts (x3) (torque 8 N.m) that connect the connector bracket and air suspension module to the bulkhead.
NOTE:
Move the electrical harness away from the fastener for better access.
 Courtesy of TESLA, INC. Courtesy of TESLA, INC.
|
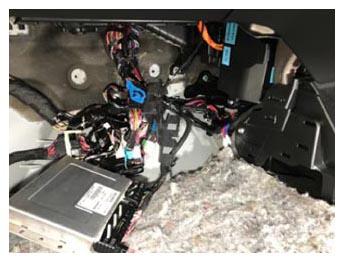
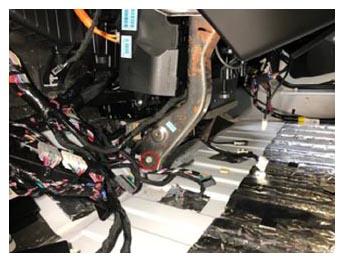
- Move the air suspension module, main harness, and associated connectors away for access to the BCM connections.
 Courtesy of TESLA, INC. Courtesy of TESLA, INC.
|
- Remove RH console closeout extension, refer to Assembly - Closeout Extension - LH - Center Console (Remove And Replace)
.
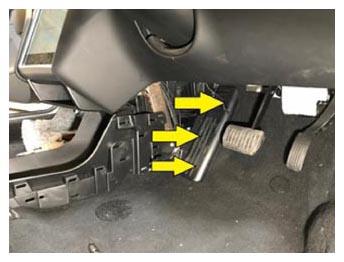
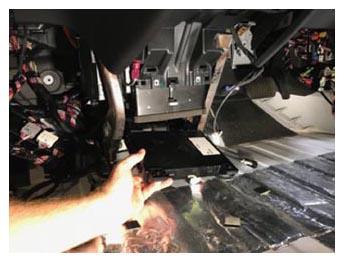
- Release the clips (x3) that attach the driver's footrest to the footrest dead pedal.
 Courtesy of TESLA, INC. Courtesy of TESLA, INC.
|
- Release the clips (x4) that attach the RH instrument panel side cover to the instrument panel, disconnect the electrical connector, and then remove the side cover.
 Courtesy of TESLA, INC. Courtesy of TESLA, INC.
|
 Courtesy of TESLA, INC. Courtesy of TESLA, INC.
|
- Release the clips (x2) that attach the RH middle A-pillar trim to the vehicle, and then remove RH middle A-pillar trim.
 Courtesy of TESLA, INC. Courtesy of TESLA, INC.
|
- Release the clips (x4) that attach the RH lower A-pillar trim to the vehicle, and then remove LH lower A-pillar trim.
NOTE:
The number of clips securing the trim may vary, depending on vehicle production date. Replace any damaged or missing clips prior to reinstalling the trim.
 Courtesy of TESLA, INC. Courtesy of TESLA, INC.
|
- Release the push clips (x2) that attach the RH footwell cover to the vehicle, disconnect the electrical connector, and then remove the RH footwell cover from the vehicle.
NOTE:
You may need to press the accelerator pedal down for additional clearance.
 Courtesy of TESLA, INC. Courtesy of TESLA, INC.
|
- Carefully fold back the front section of the carpet at the RH footwell.
 Courtesy of TESLA, INC. Courtesy of TESLA, INC.
|
- Remove the nuts (x2) (torque 5 N.m) that attach the dead pedal to the bulkhead, and then remove the dead pedal.
 Courtesy of TESLA, INC. Courtesy of TESLA, INC.
|
- Remove the bolt (torque 2.5 N.m) that attaches the LH front of the center console to the instrument panel.
 Courtesy of TESLA, INC. Courtesy of TESLA, INC.
|
- Remove the bolt (torque 2.5 N.m) that attaches the RH front of the center console to the instrument panel.
 Courtesy of TESLA, INC. Courtesy of TESLA, INC.
|
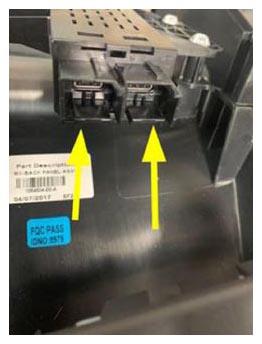
- Disconnect the two USB connectors at the RH front side of the console and release them from the console trim.
 Courtesy of TESLA, INC. Courtesy of TESLA, INC.
|
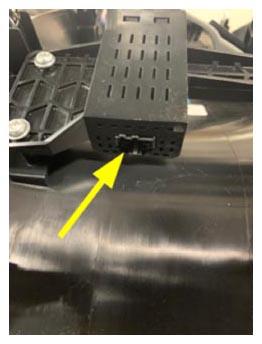
- Disconnect the two 12V connectors for the center console.
 Courtesy of TESLA, INC. Courtesy of TESLA, INC.
|
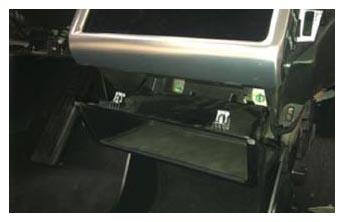
- Release the clips (x2) and tabs (x2) that attach the cubby under the MCU, and then remove the cubby.
 Courtesy of TESLA, INC. Courtesy of TESLA, INC.
|
- Remove the screw (torque 2 N.m) that attaches the front of the console to the instrument panel carrier.
 Courtesy of TESLA, INC. Courtesy of TESLA, INC.
|
- Remove the premium console mat.
NOTE:
Gently pry up from the rear edge to release the mat.
 Courtesy of TESLA, INC. Courtesy of TESLA, INC.
|
 Courtesy of TESLA, INC. Courtesy of TESLA, INC.
|
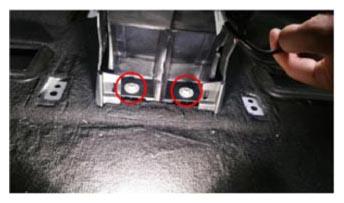
- Remove the bolts (x2) (torque 3 N.m) that attach the middle of the console to the body.
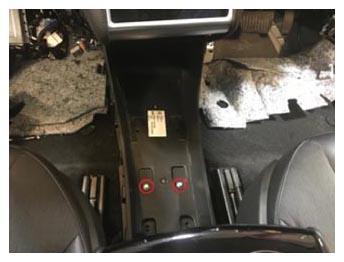 Courtesy of TESLA, INC. Courtesy of TESLA, INC.
|
- Release the clips (x6) that attach the rear panel to the console, disconnect the connectors (x3), and then remove the rear panel from the console.
 Courtesy of TESLA, INC. Courtesy of TESLA, INC.
|
 Courtesy of TESLA, INC. Courtesy of TESLA, INC.
|
 Courtesy of TESLA, INC. Courtesy of TESLA, INC.
|
- Remove the bolts (x2) (torque 7 N.m) that attach the rear of the center console to the body.
 Courtesy of TESLA, INC. Courtesy of TESLA, INC.
|
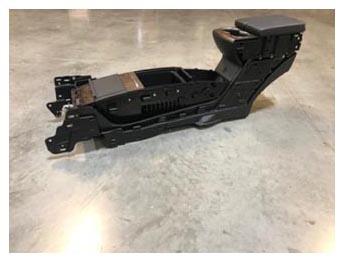
- Lift the rear of the center console upward, pull it backward, and then remove the center console from the vehicle.
 Courtesy of TESLA, INC. Courtesy of TESLA, INC.
|
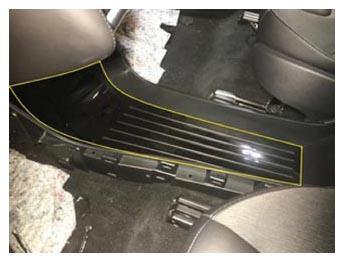
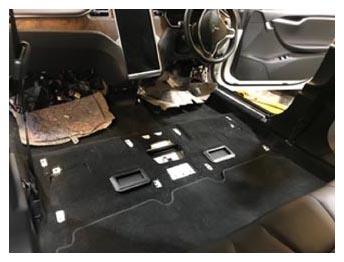
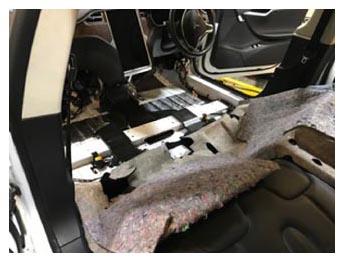
- Fold back the first row carpet to gain access to the floor ducts.
 Courtesy of TESLA, INC. Courtesy of TESLA, INC.
|
 Courtesy of TESLA, INC. Courtesy of TESLA, INC.
|
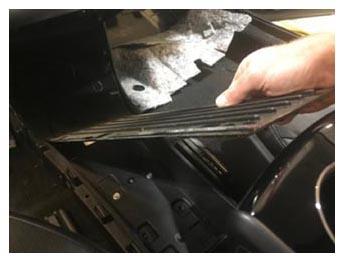
- Remove the two outer floor ducts and the center floor duct.
 Courtesy of TESLA, INC. Courtesy of TESLA, INC.
|
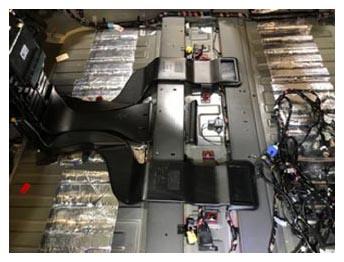
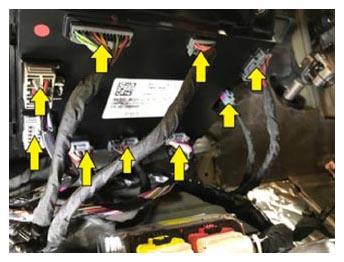
- Release the connectors (x9) from the BCM.
 Courtesy of TESLA, INC. Courtesy of TESLA, INC.
|
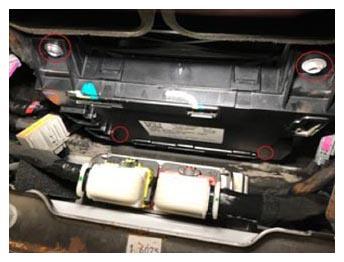
- Remove the screws (x4) (torque 1.8 N.m) that attach the BCM to the BCM bracket.
 Courtesy of TESLA, INC. Courtesy of TESLA, INC.
|
 Courtesy of TESLA, INC. Courtesy of TESLA, INC.
|
 Courtesy of TESLA, INC. Courtesy of TESLA, INC.
|
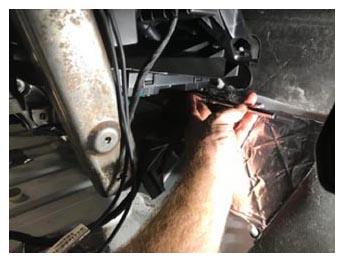
- Remove the bolts (x2) (torque 27 N.m) at the bottom center of the cross car beam assembly.
NOTE:
Releasing these bolts allows the cross car beam to move a little outward to provide clearance for removal of the BCM.
 Courtesy of TESLA, INC. Courtesy of TESLA, INC.
|
 Courtesy of TESLA, INC. Courtesy of TESLA, INC.
|
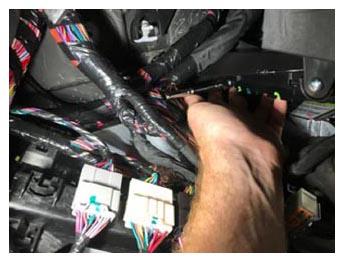
- Remove the BCM.
NOTE:
Slide the BCM out between the cross car beam towards the rear of the vehicle
 Courtesy of TESLA, INC. Courtesy of TESLA, INC.
|