- If the vehicle is equipped with air suspension, set the ride height to Standard.
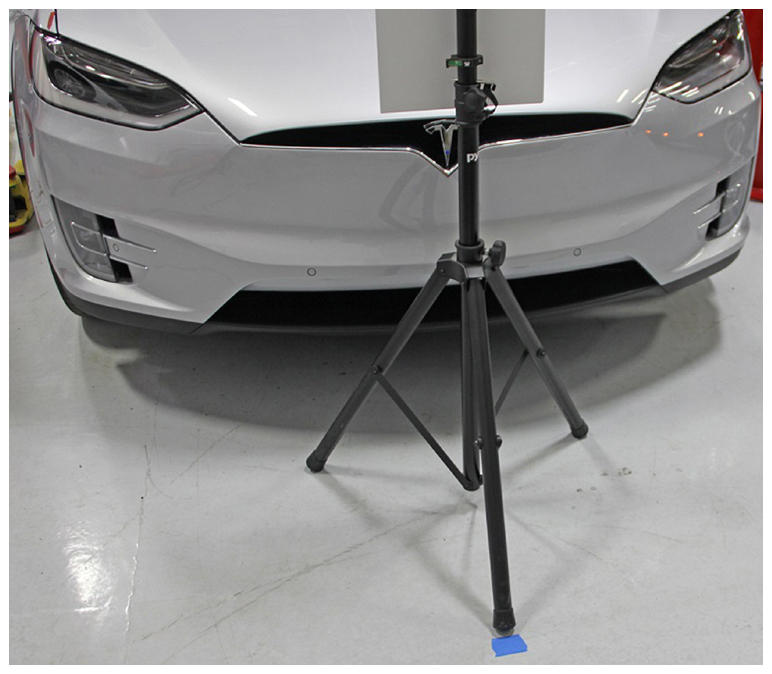
- Park the vehicle on a flat surface with at least 106 cm (3.5 ft) of space in front of the front fascia.
NOTE:
If the vehicle has air suspension, ensure that the suspension is level and set to "Standard".
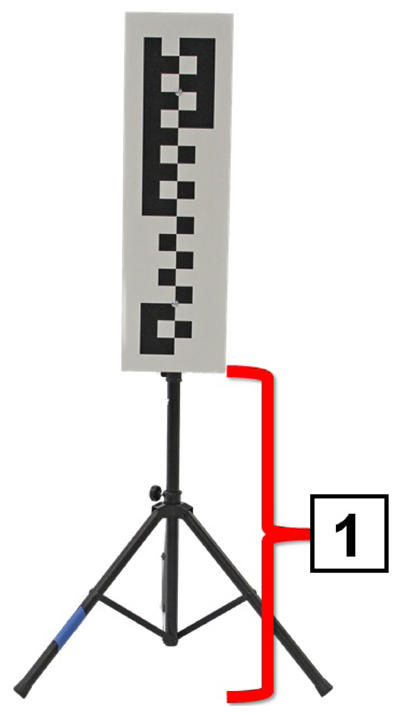
- Set up the target tripod so that the bottom of the target is 90 cm (3 ft) from the ground.
 Courtesy of TESLA, INC. Courtesy of TESLA, INC.
|
- Place the target in the appropriate starting position (this is "Location 1" in the Toolbox 3 procedure):
- The checkered portion of the target is facing towards the vehicle
- The target is centered with the Tesla "T" on the front fascia
- The target has 2 legs facing the vehicle and both are 10 cm from the chin spoiler
CAUTION:
Take care not to damage component(s).
 Courtesy of TESLA, INC. Courtesy of TESLA, INC.
|
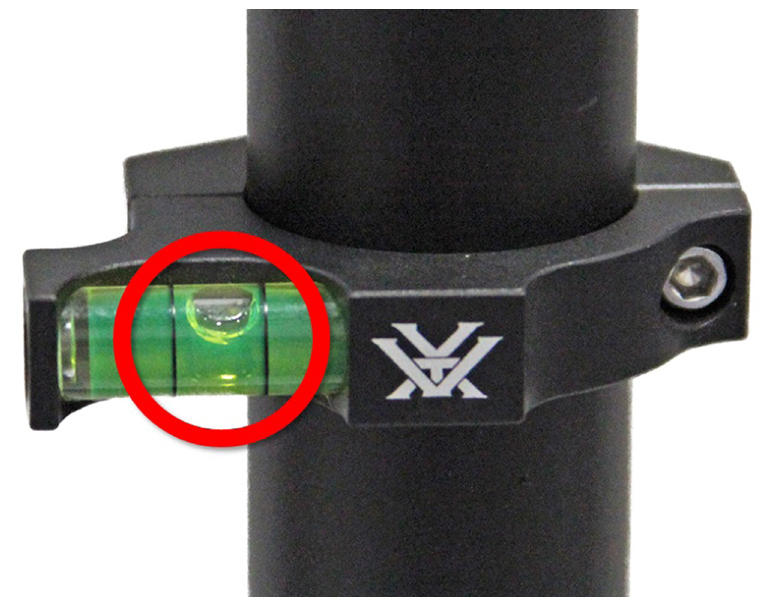
- Ensure that the target is on flat ground by examining the bubble level on the back of the target.
 Courtesy of TESLA, INC. Courtesy of TESLA, INC.
|
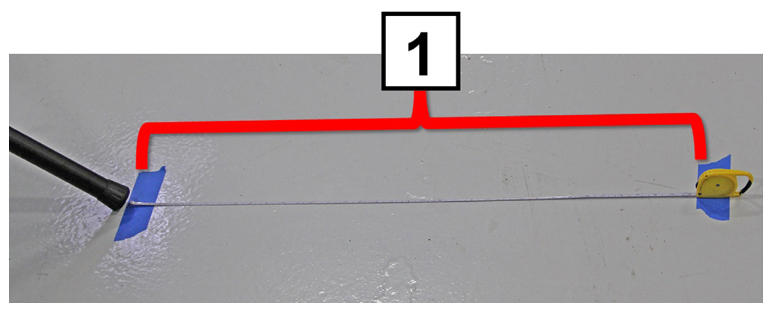
- Apply a piece of tape on the ground behind the tripod leg that is farthest from the vehicle.
 Courtesy of TESLA, INC. Courtesy of TESLA, INC.
|
- Apply another piece of tape 90 cm (3 ft) behind the tape that was applied in the previous step. This is "Location 2" in the Toolbox 3 procedure.
NOTE:
Do not move the target to Location 2 at this point.
 Courtesy of TESLA, INC. Courtesy of TESLA, INC.
|
- Connect a laptop to the diagnostic port of the vehicle, and then use Toolbox 3 to locally connect to the vehicle. See Toolbox 3 (Connect And Disconnect)
.