Suspension - Front - Check Torque: Procedure
- Remove the LH and RH front wheels. See WHEEL (REMOVE AND INSTALL)
.
- Remove the front aero shield panel. See PANEL - AERO SHIELD - FRONT (REMOVE AND REPLACE)
.
- Remove the clips (x2) that attach the valance to the front stabilizer bar brackets.
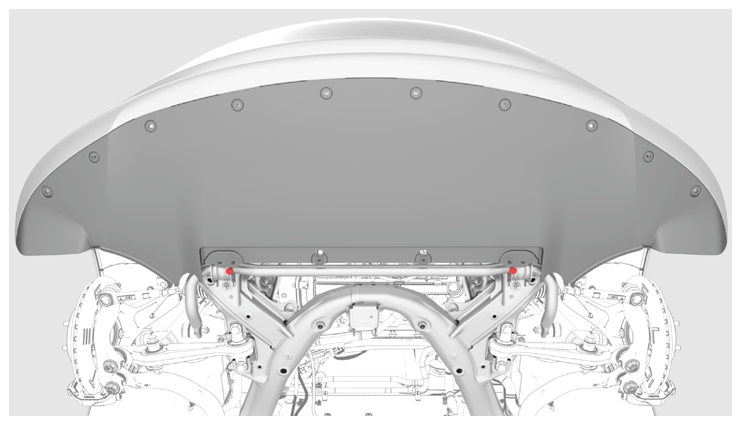 Courtesy of TESLA, INC.
|
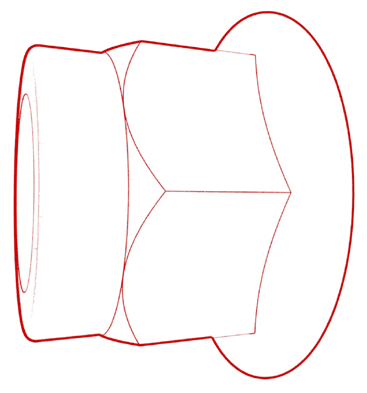
- Check the torque for the nuts that attach the front stabilizer bar to the front subframe, and then mark the nuts with a paint pen.
 35 N.m (25.8 ft-lbs)
 Courtesy of TESLA, INC.
|
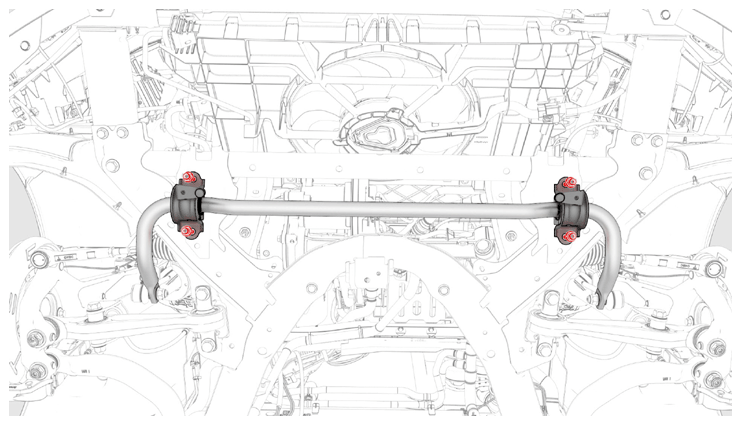 Courtesy of TESLA, INC.
|
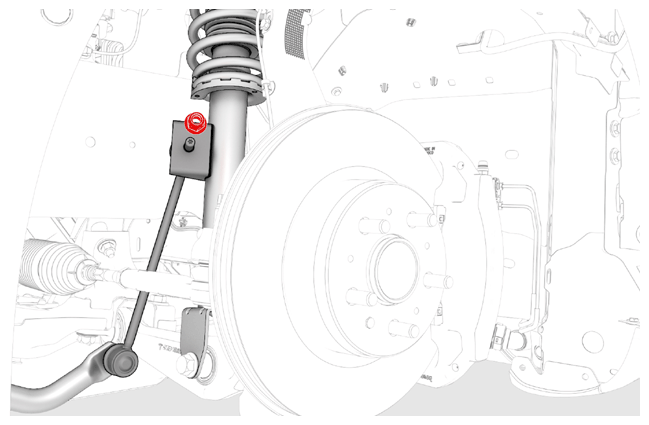
- Check the torque for the nut that attaches the LH front stabilizer bar link to the LH front spring and damper assembly, and then mark the nut with a paint pen.
 98 N.m (72.3 ft-lbs)
 Courtesy of TESLA, INC.
|
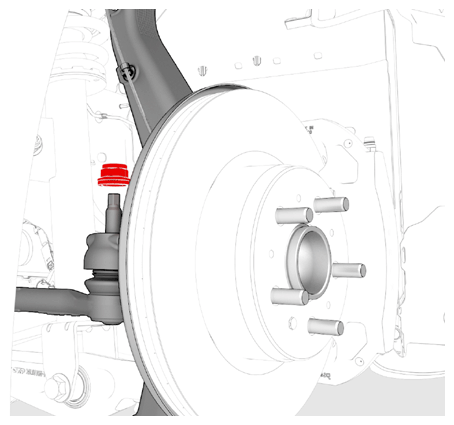
- Check the torque for the nut that attaches the LH tie rod end to the LH knuckle, and then mark the nut with a paint pen.
 180 N.m (132.7 ft-lbs)
 Courtesy of TESLA, INC.
|
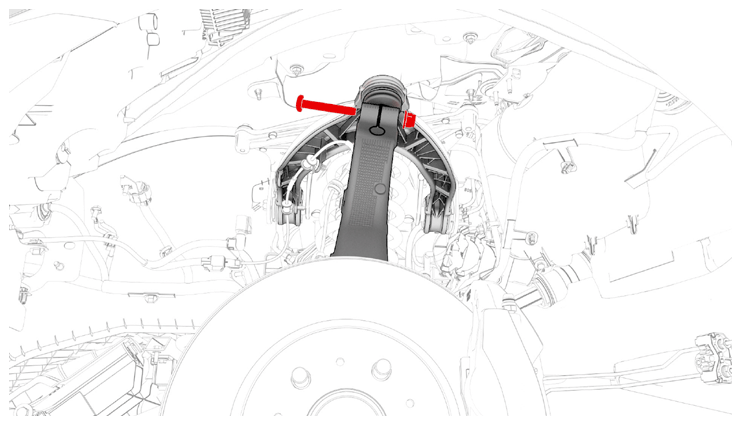
- Check the torque for the nut that attaches the LH upper control arm to the LH knuckle, and then mark the nut with a paint pen.
 56 N.m (41.3 ft-lbs)
 Courtesy of TESLA, INC.
|
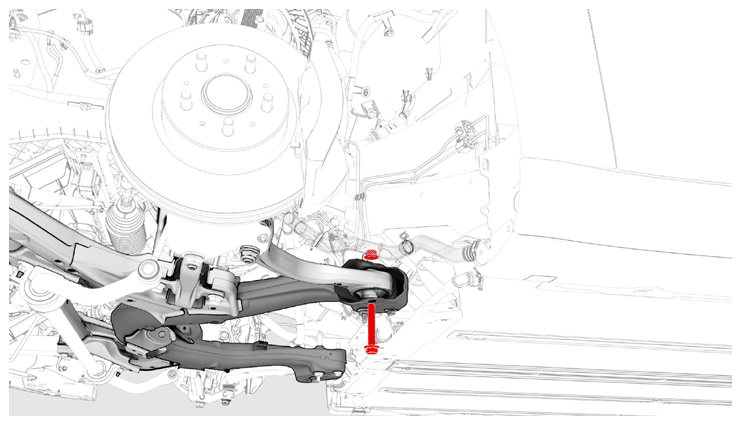
- Check the torque for the nut that attaches the LH front lower compliance link to the front subframe, and then mark the nut with a paint pen.
115 N.m (84.8 ft-lbs)
 Courtesy of TESLA, INC.
|
- Check the torque for the nuts that attach the LH front lower lateral link to the front subframe, and then mark the nuts with a paint pen.
115 N.m (84.8 ft-lbs)
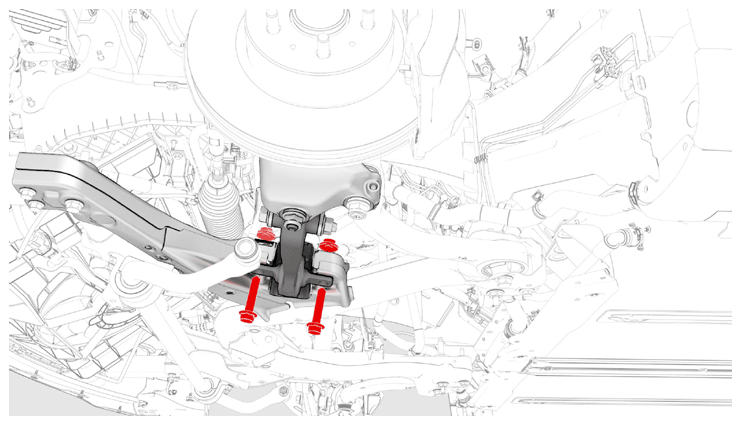 Courtesy of TESLA, INC.
|
- Check the torque for the nut that attaches the LH front lower compliance link to the LH knuckle, and then mark the nut with a paint pen.
180 N.m (132.7 ft-lbs)
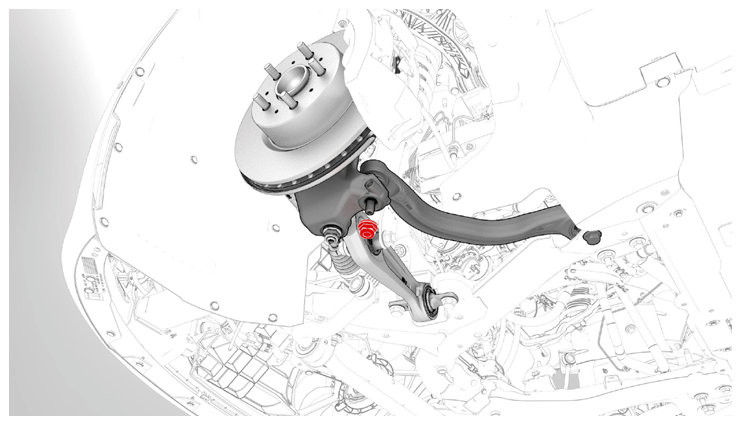 Courtesy of TESLA, INC.
|
- Check the torque for the nut that attaches the LH front lower lateral link to the LH knuckle, and then mark the nut with a paint pen.
180 N.m (132.7 ft-lbs)
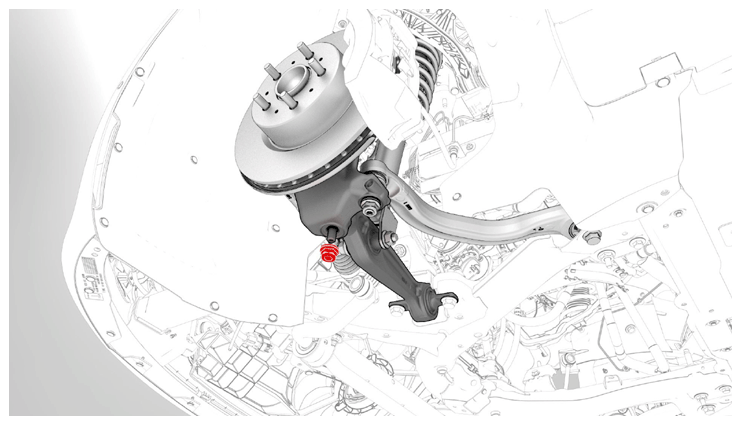 Courtesy of TESLA, INC.
|
- Check the torque for the nut that attaches the LH front stabilizer bar link to the front stabilizer bar, and then mark the nut with a paint pen.
98 N.m (72.3 ft-lbs)
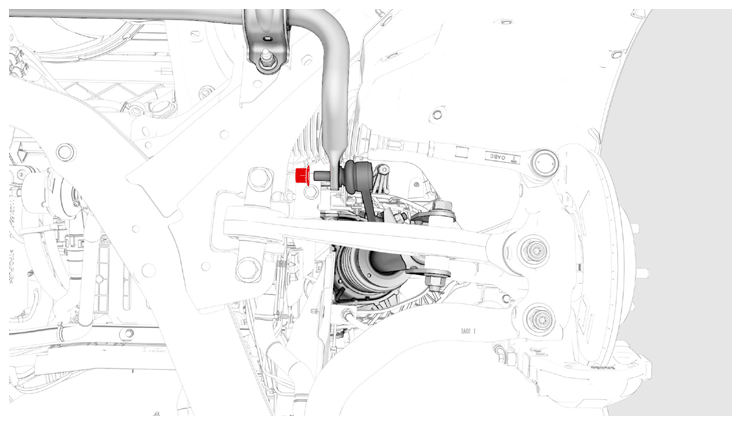 Courtesy of TESLA, INC.
|
- Repeat step 5 through step 12 on the RH side of the front suspension.
- Install the LH and RH front wheels. See WHEEL (REMOVE AND INSTALL)
.
- Raise the vehicle on a 4 post lift. See RAISE VEHICLE - 4 POST LIFT
.
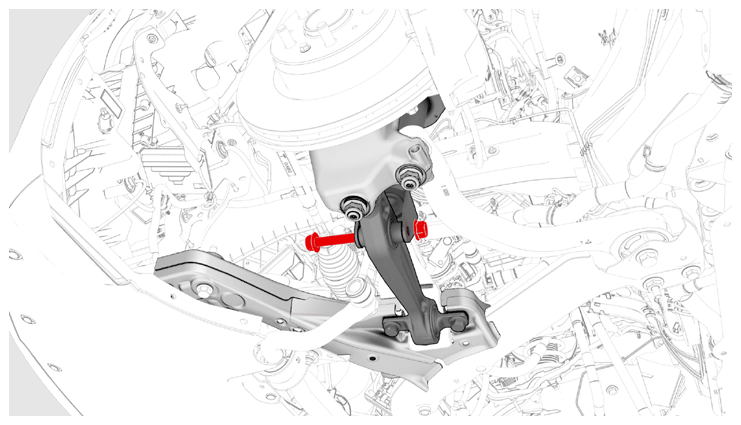
- Check the torque for the nut that attaches the LH front spring and damper assembly to the LH front lower lateral link, and then mark the nut with a paint pen.
106 N.m (78.2 ft-lbs)
 Courtesy of TESLA, INC.
|
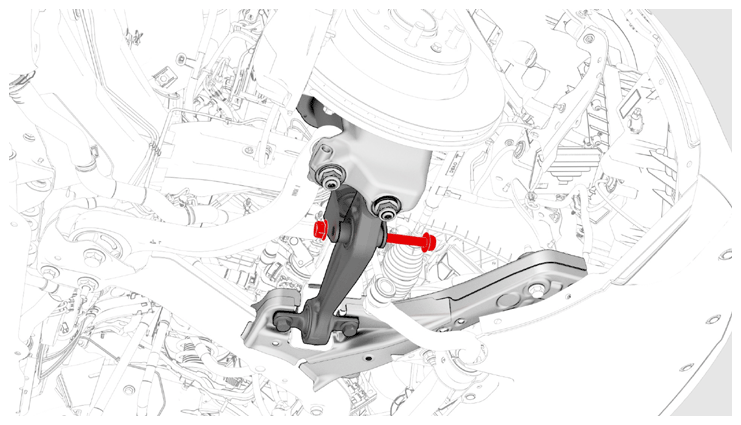
- Check the torque for the nut that attaches the RH front spring and damper assembly to the RH front lower lateral link, and then mark the nut with a paint pen.
106 N.m (78.2 ft-lbs)
 Courtesy of TESLA, INC.
|
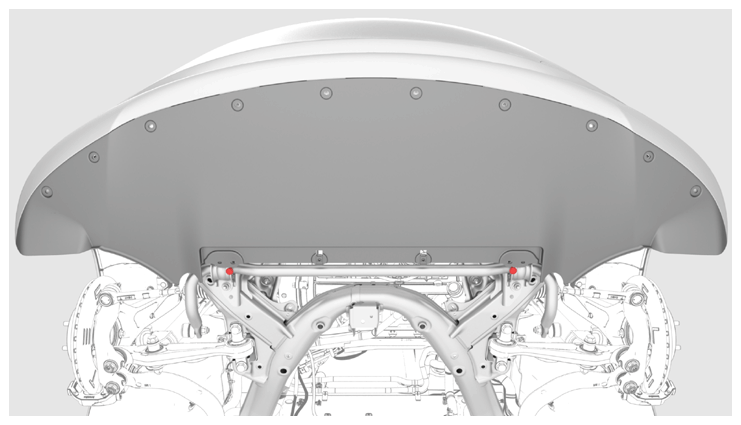
- Install the clips (x2) that attach the valance to the front stabilizer bar brackets.
 Courtesy of TESLA, INC.
|
- Install the front aero shield panel. See PANEL - AERO SHIELD - FRONT (REMOVE AND REPLACE)
.
- Remove the vehicle from the 4 post lift. See RAISE VEHICLE - 4 POST LIFT
.