Center Console - Remove and Install: Remove
- Open all the doors and lower all the windows.
- Move the driver seat rearward.
- Remove and attach the customer's belongings from the center console, if needed.
- Remove the phone tray. See PHONE TRAY - CENTER CONSOLE (REMOVE AND REPLACE) .
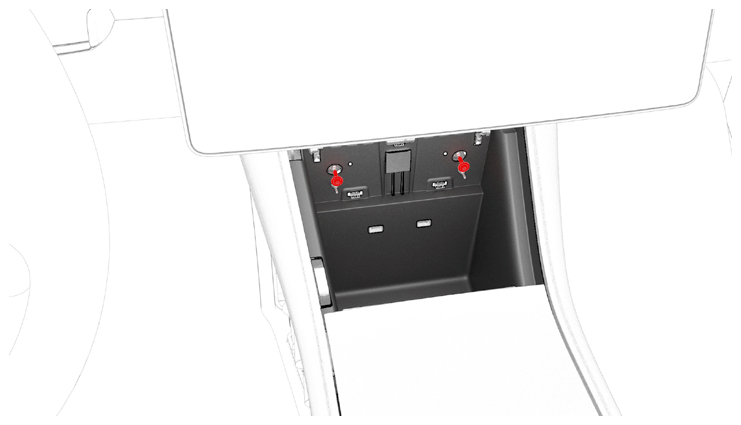
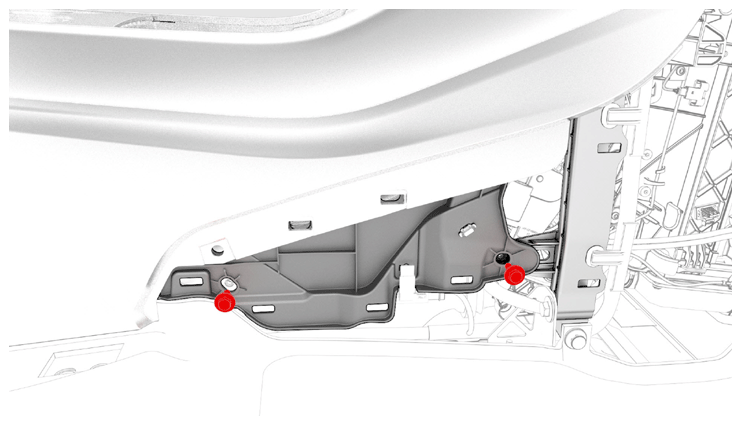
- Remove the bolts that attach the front of the center console to the body.
NOTE:
Use of the following tool(s) is recommended:
- Torx T20 socket
- 4 in extension
- 1/4 in std ratchet
- Wiha TorqueVario-S 0.8 N.m - 2.0 N.m screwdriver (installation only)
- Wiha 1/4 in bit holder adapter
- Wiha torque setter
 Courtesy of TESLA, INC. Courtesy of TESLA, INC.
|
- Close the front and rear console rotating lids.
- Remove the driver floormat.
- Remove the LH center console side panel carpet. See SIDE PANEL - CENTER CONSOLE - LH (REMOVE AND REPLACE) .
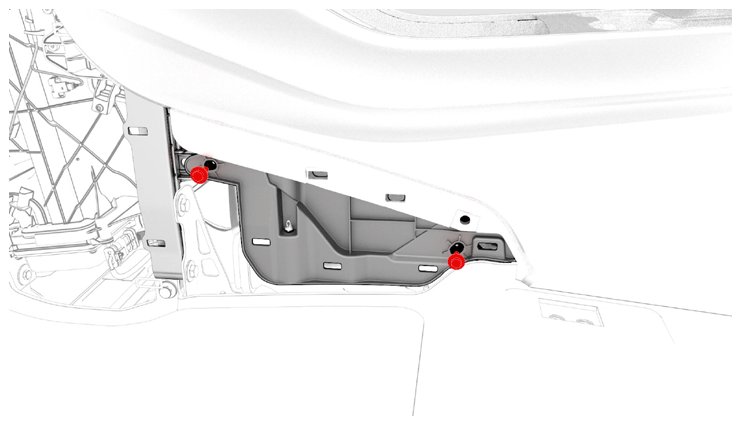
- Remove the bolts that attach the LH front of the center console to the body.
NOTE:
Use of the following tool(s) is recommended:
- 10 mm socket
- 4 in extension
- 1/4 in std ratchet
- 1/4 in torque wrench (installation only)
 Courtesy of TESLA, INC. Courtesy of TESLA, INC.
|
- Move the driver seat forward.
- Move the front passenger seat forward.
- Remove the center console lower rear panel. See PANEL - LOWER REAR - CENTER CONSOLE (REMOVE AND REPLACE) .
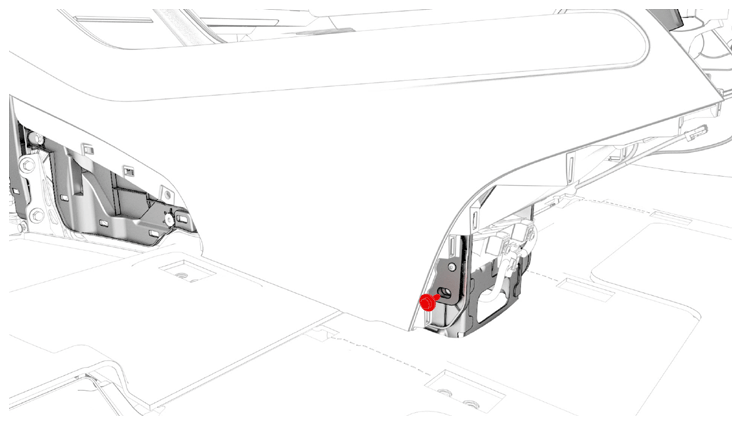
- Remove the bolt that attaches the LH rear of the center console to the body.
NOTE:
Use of the following tool(s) is recommended:
- 10 mm socket
- 4 in extension
- 1/4 in std ratchet
- 1/4 in torque wrench (installation only)
 Courtesy of TESLA, INC. Courtesy of TESLA, INC.
|
- Remove the bolt that attaches the RH rear of the center console to the body.
NOTE:
Use of the following tool(s) is recommended:
- 10 mm socket
- 4 in extension
- 1/4 in std ratchet
- 1/4 in torque wrench (installation only)
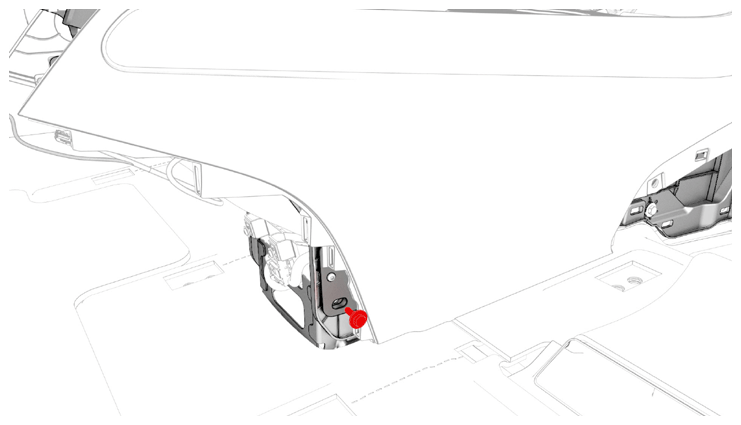 Courtesy of TESLA, INC. Courtesy of TESLA, INC.
|
- Move the front passenger seat rearward.
- Remove the front passenger floormat.
- Remove the RH center console side panel carpet. See SIDE PANEL - CENTER CONSOLE - LH (REMOVE AND REPLACE) .
- Remove the bolts that attach the RH front of the center console to the body.
NOTE:
Use of the following tool(s) is recommended:
- 10 mm socket
- 4 in extension
- 1/4 in std ratchet
- 1/4 in torque wrench (installation only)
 Courtesy of TESLA, INC. Courtesy of TESLA, INC.
|
- Disconnect the electrical connector that is located at the RH front of the center console.
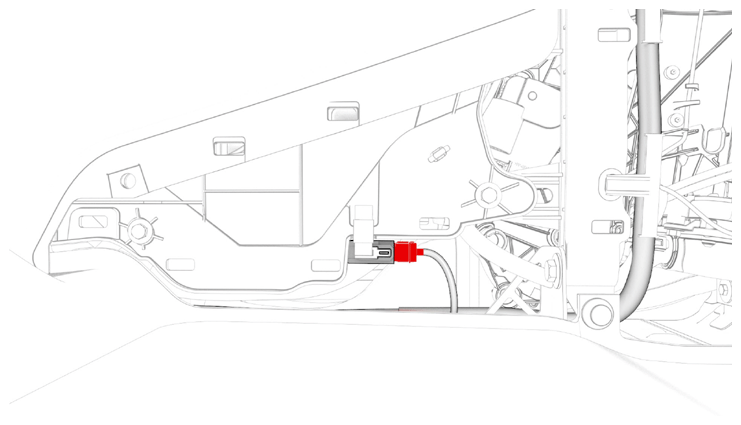 Courtesy of TESLA, INC. Courtesy of TESLA, INC.
|
- Disconnect the electrical connector from the rear of the center console.
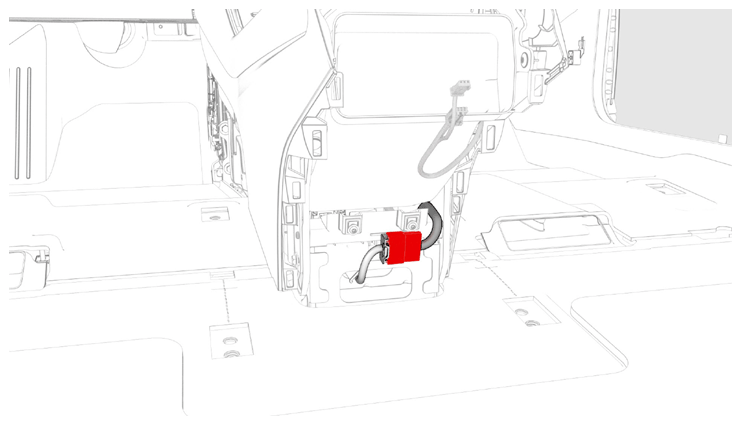 Courtesy of TESLA, INC. Courtesy of TESLA, INC.
|
- With an assistant, remove the center console from the vehicle as follows:
- Tilt the rear of the center console upwards.
- Pull the center console towards the rear of the vehicle.
- Tilt the front of the center console upwards.
- Remove the center console through the passenger front door.
 Courtesy of TESLA, INC. Courtesy of TESLA, INC.
|