- Raise and support the vehicle. See RAISE VEHICLE - 2 POST LIFT
.
- Loosen the LH and RH front wheels. Refer to WHEEL (REMOVE AND INSTALL)
.
- Set the steering wheel in the straight ahead position, and then use a steering wheel holder to lock the steering wheel into position.
- Remove the 2nd row lower seat cushion. See SEAT CUSHION - LOWER - 2ND ROW (REMOVE AND REPLACE)
.
- Remove the rear underhood apron. See UNDERHOOD APRON - REAR (REMOVE AND REPLACE)
.
- Disconnect 12V power. See 12V/LV POWER (DISCONNECT AND CONNECT)
.
- Remove the hood latch cover. See COVER - HOOD LATCH (REMOVE AND REPLACE)
.
- Remove the underhood storage unit. See UNDERHOOD STORAGE UNIT (REMOVE AND REPLACE)
.
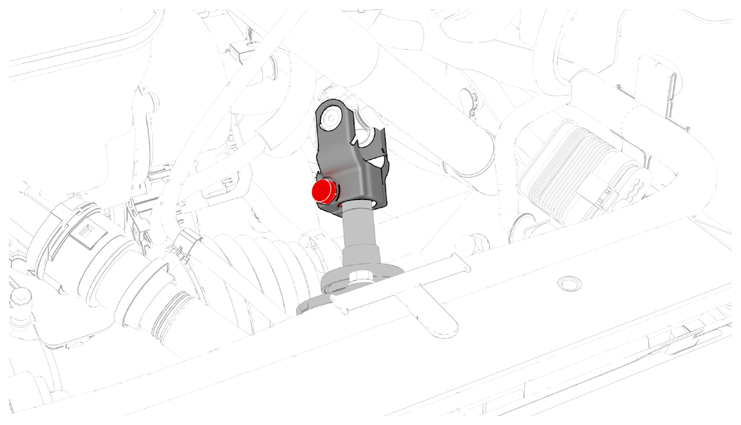
- Remove the bolt that attaches the intermediate shaft to the steering rack assembly, and then slide the intermediate shaft upwards.
 Courtesy of TESLA, INC. Courtesy of TESLA, INC.
|
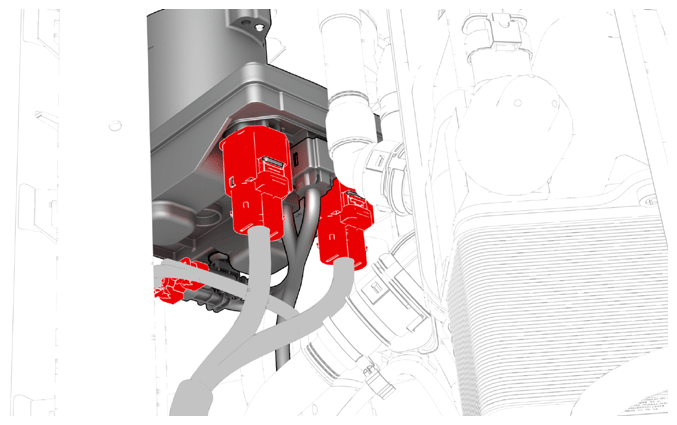
- Disconnect the electrical connectors from the steering rack assembly.
 Courtesy of TESLA, INC. Courtesy of TESLA, INC.
|
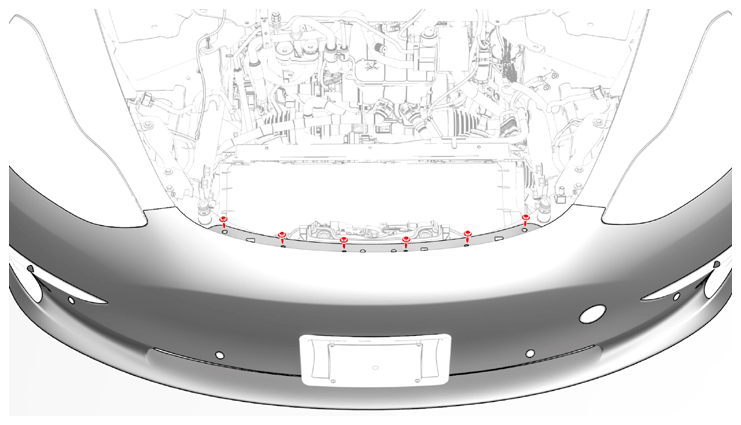
- Remove the bolts that attach the upper portion of the front fascia to the vehicle.
 Courtesy of TESLA, INC. Courtesy of TESLA, INC.
|
- Raise the vehicle partially.
- Remove the LH and RH front wheels. See WHEEL (REMOVE AND INSTALL)
.
- Remove the front aero shield panel. See PANEL - AERO SHIELD - FRONT (REMOVE AND REPLACE)
.
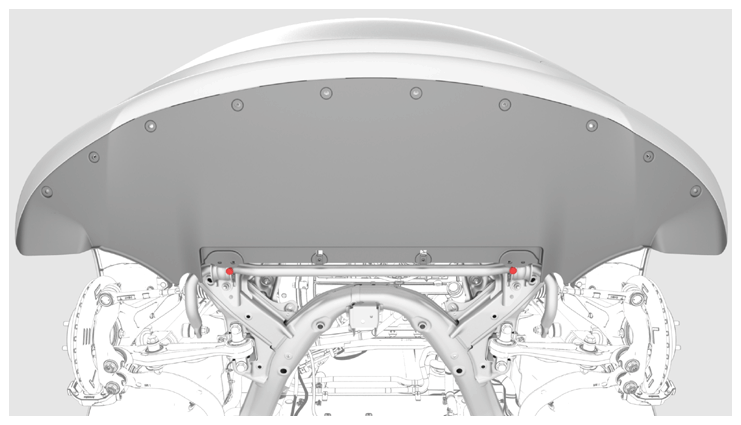
- Release the clips (x2) that attach the valance to the body.
 Courtesy of TESLA, INC. Courtesy of TESLA, INC.
|
- Remove the LH and RH front wheel arch liners. See WHEEL ARCH LINER - FRONT - LH (REMOVE AND REPLACE)
.
- Remove the front fascia. See FASCIA - FRONT (REMOVE AND INSTALL)
.
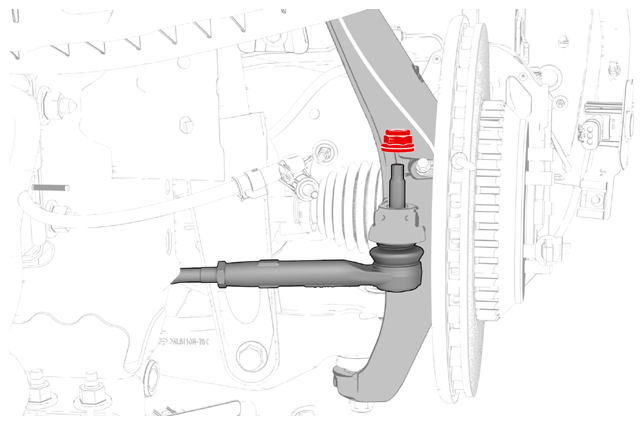
- Remove and discard the nut that attaches the LH tie rod end to the knuckle.
 Courtesy of TESLA, INC. Courtesy of TESLA, INC.
|
- Use a rubber hammer to remove the LH tie rod end from the vehicle.
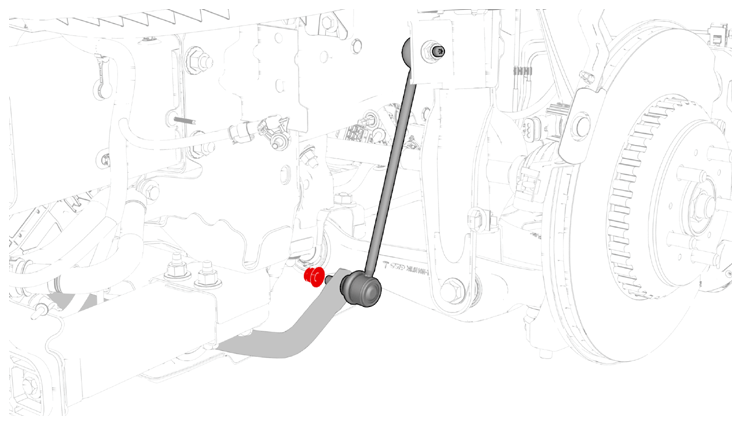
- Remove and discard the nut that attaches the LH front stabilizer bar to the front sway links, and then set the front sway links aside.
 Courtesy of TESLA, INC. Courtesy of TESLA, INC.
|
- Remove and discard the nut that attaches the RH tie rod end to the knuckle, and then set the tie rod end aside.
- Use a rubber hammer to remove the RH tie rod end from the vehicle.
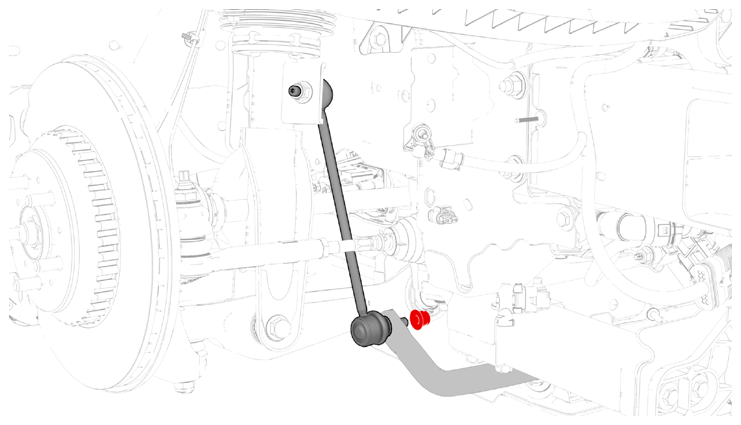
- Remove and discard the nut that attaches the RH front sway link to the front stabilizer bar, and then move the link aside.
 Courtesy of TESLA, INC. Courtesy of TESLA, INC.
|
- Raise the vehicle fully.
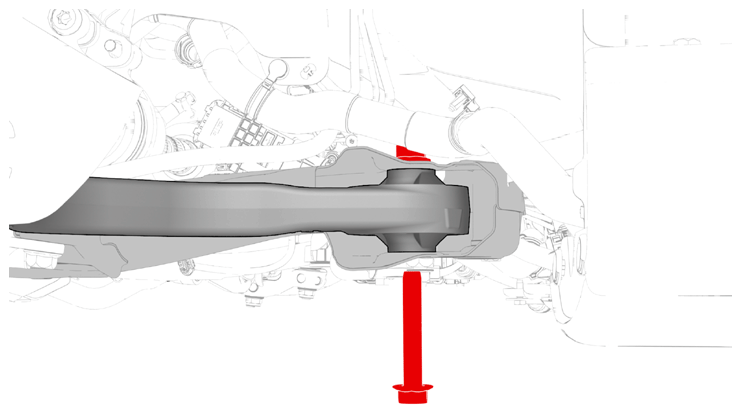
- Remove the bolt and nut that attach the LH front lower compliance link to the front subframe, and then move the link aside.
 Courtesy of TESLA, INC. Courtesy of TESLA, INC.
|
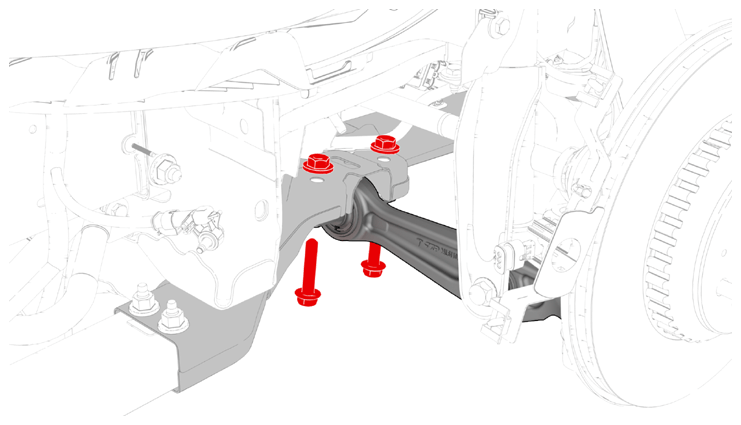
- Remove the bolt and nut that attach the LH front lower lateral link to the front subframe.
 Courtesy of TESLA, INC. Courtesy of TESLA, INC.
|
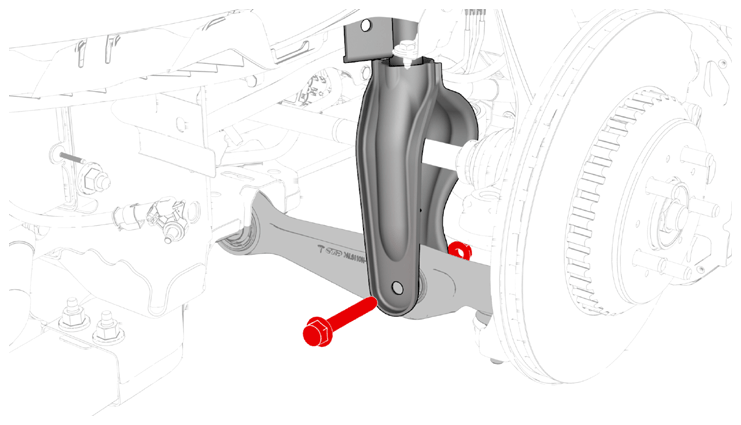
- Remove the bolt and nut that attach the LH front spring and damper assembly to the lower control arm, and then move the LH front lower lateral link aside.
 Courtesy of TESLA, INC. Courtesy of TESLA, INC.
|
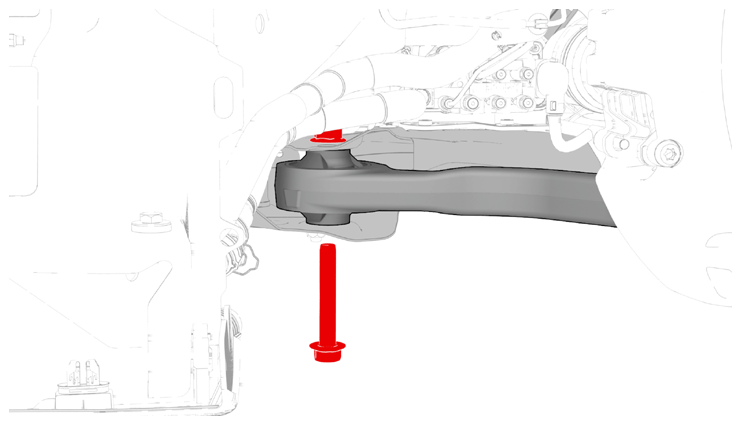
- Remove the bolt and nut that attach the RH front lower compliance link to the front subframe, and then move the link aside.
 Courtesy of TESLA, INC. Courtesy of TESLA, INC.
|
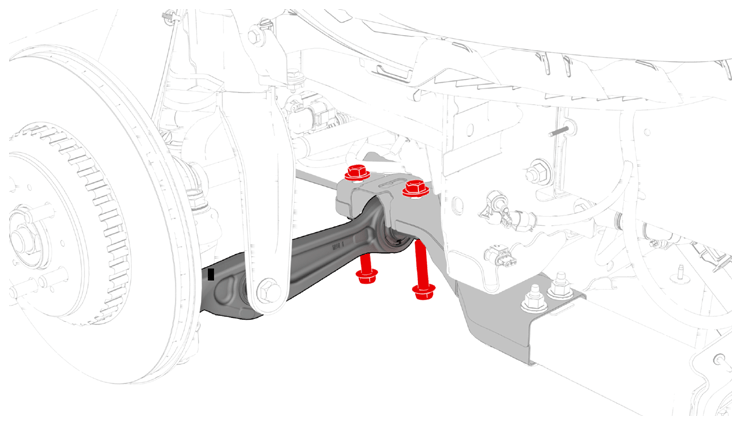
- Remove the bolt and nut that attach the RH front lower lateral link to the front subframe.
 Courtesy of TESLA, INC. Courtesy of TESLA, INC.
|
- Remove the bolt and nut that attach the RH front spring and damper assembly to the lower control arm, and then move the link aside.
- Put the subframe lifting tool (powertrain table and subframe fixture) underneath the front subframe area.
- Connect an air line to the subframe lifting tool.
- With an assistant, latch the front subframe to the subframe lifting tool.
NOTE:
Make sure to align the two guides.
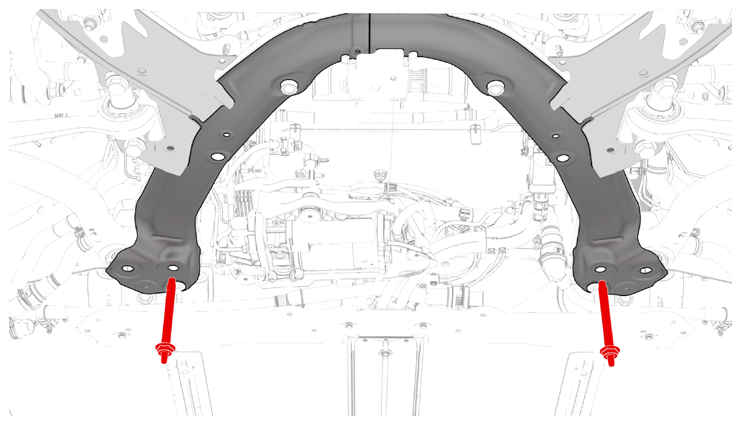
- Remove the bolts that attach the front end carrier to the LH and RH front subframe crash can assemblies.
NOTE:
LH shown, RH similar
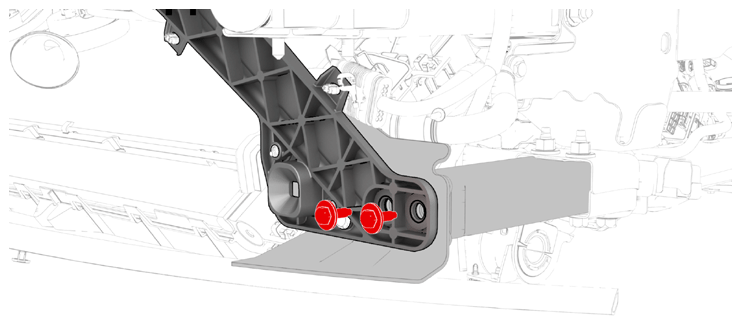 Courtesy of TESLA, INC. Courtesy of TESLA, INC.
|
- Remove the bolts that attach the LH and RH mid mount body kit to the body.
NOTE:
LH shown, RH similar
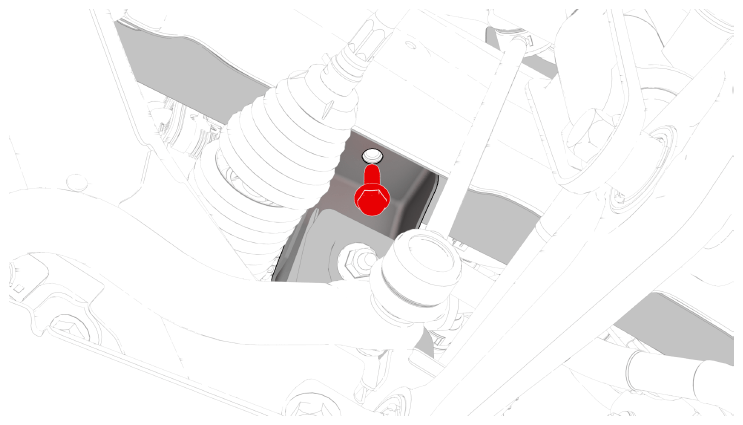 Courtesy of TESLA, INC. Courtesy of TESLA, INC.
|
- Remove the bolts that attach the front portion of the front subframe to the body.
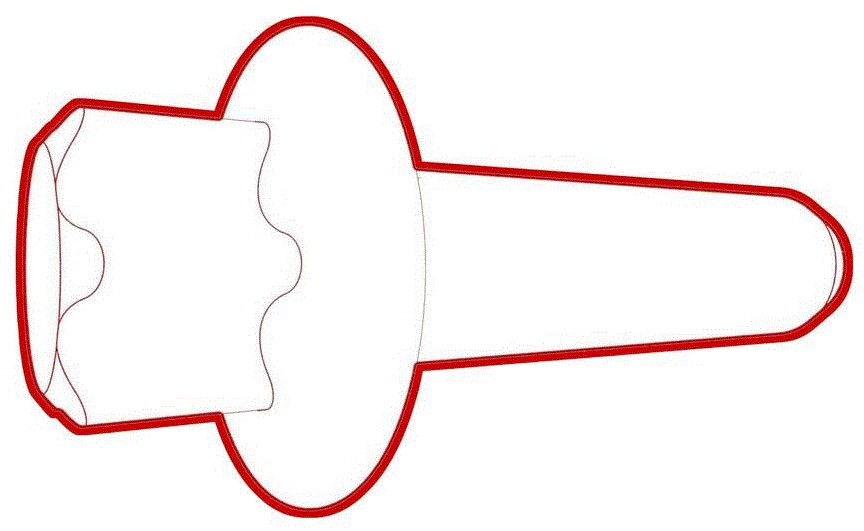 72 N.m (53.1 ft-lbs)
- Remove the smaller bolts that attach the rear portion of the front subframe to the body.
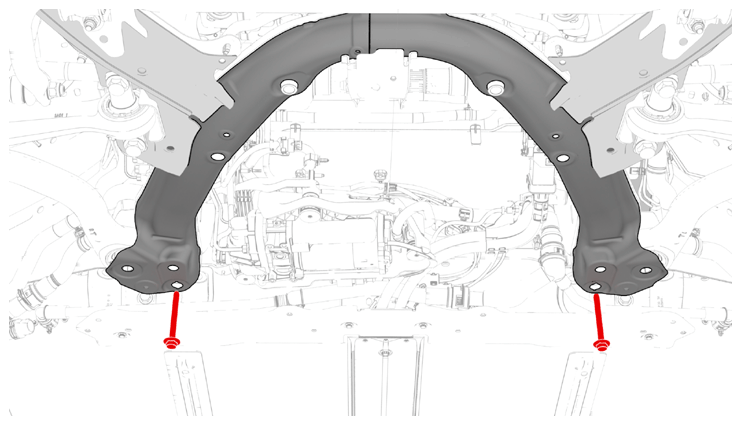 Courtesy of TESLA, INC. Courtesy of TESLA, INC.
|
- Remove and discard the larger bolts that attach the rear portion of the front subframe to the body.
 Courtesy of TESLA, INC. Courtesy of TESLA, INC.
|
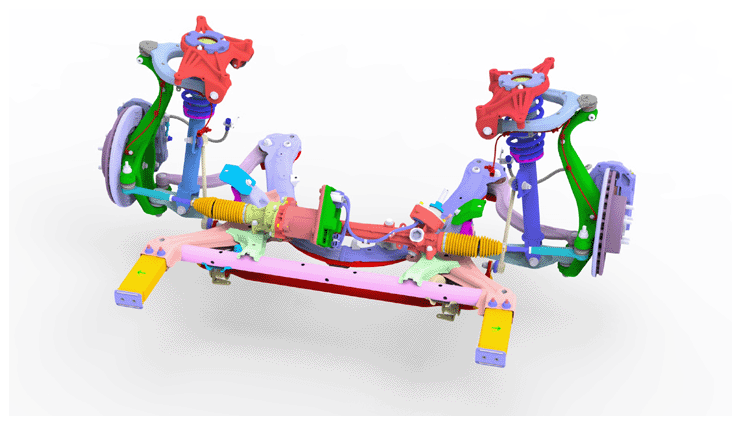
- With an assistant, lower the front subframe from the vehicle.
- Disconnect the air line from the subframe lifting tool.
- Move the subframe lifting tool from underneath the vehicle.
 Courtesy of TESLA, INC. Courtesy of TESLA, INC.
|