- Install the LH inner tie rod onto the steering rack by hand until the rod seats against the steering rack.
 Courtesy of TESLA, INC. Courtesy of TESLA, INC.
|
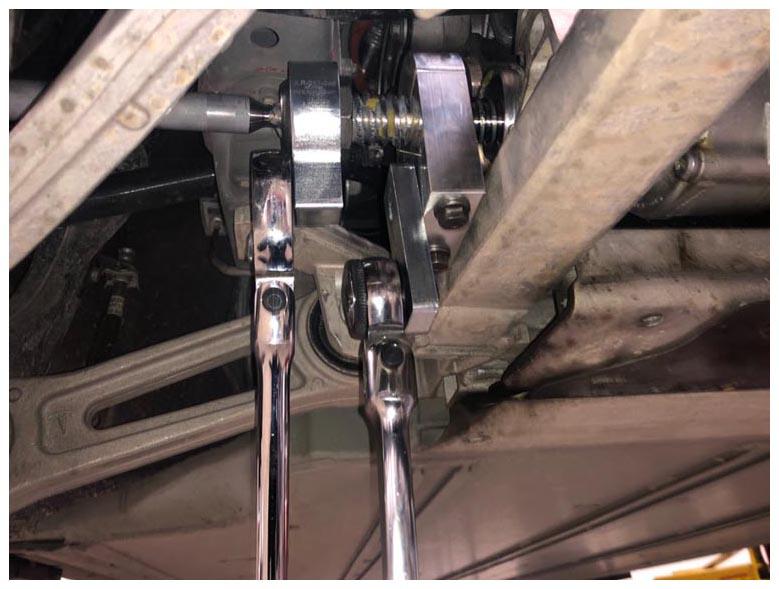
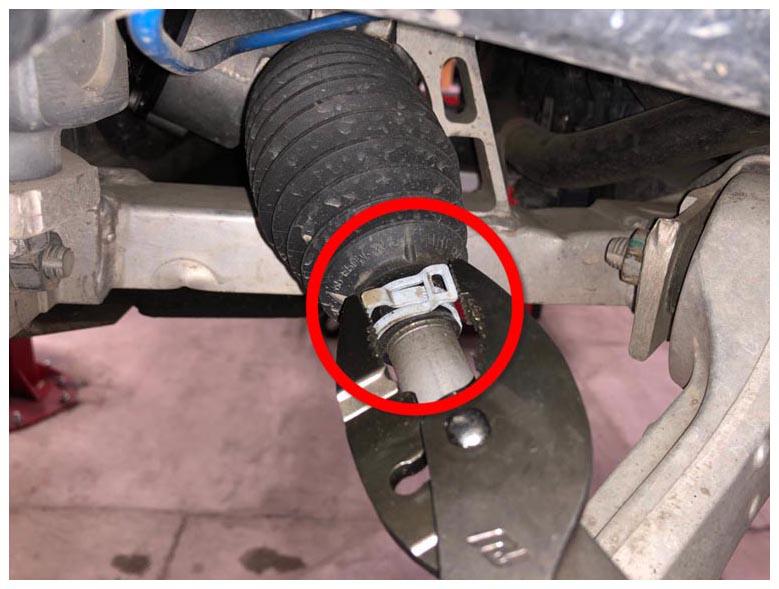
- Tighten the LH inner tie rod to the steering rack while holding the inner gear to prevent it from turning (torque 115 N.m).
CAUTION:
Failure to hold the inner gear might result in internal steering rack damage.
 Courtesy of TESLA, INC. Courtesy of TESLA, INC.
|
- Remove the steering gear clamp and the anti rotation device tools from the LH inner tie rod.
- Install the inner band clip on the LH tie rod bellows, but do not clamp the clip at this time.
 Courtesy of TESLA, INC. Courtesy of TESLA, INC.
|
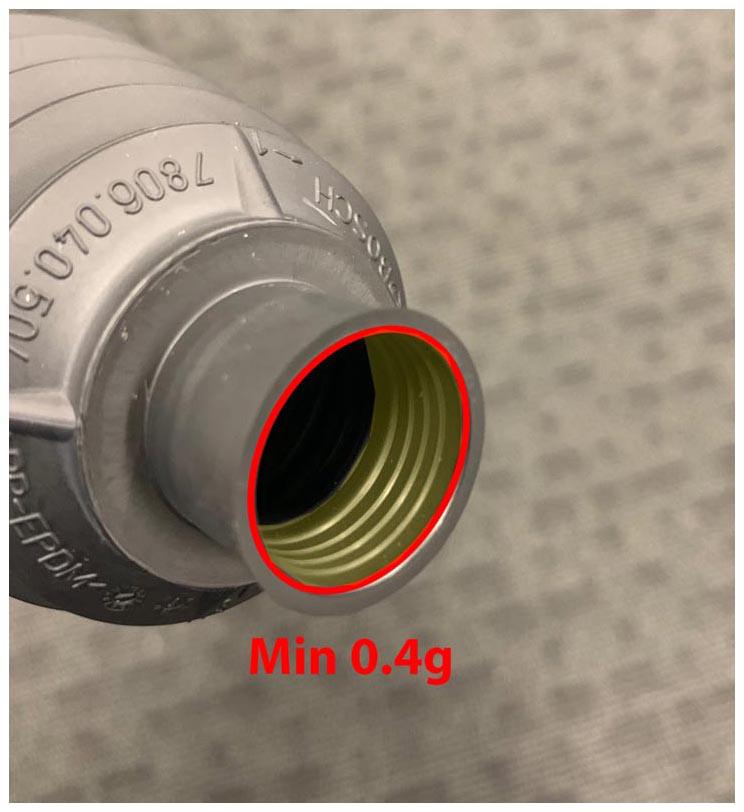
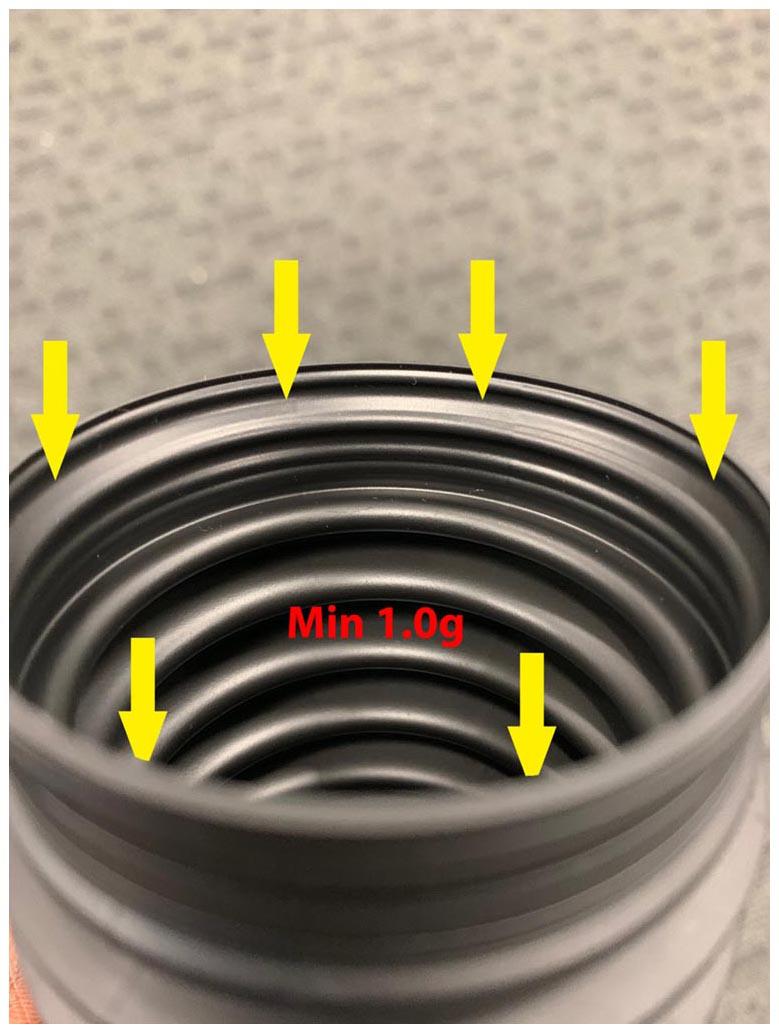
- Use the following amount of Renolit JP 1619 grease (included with the inner tie rod service kit) to lubricate the bellows before installation:
- At axial joint: 0.4 g
 Courtesy of TESLA, INC. Courtesy of TESLA, INC.
|
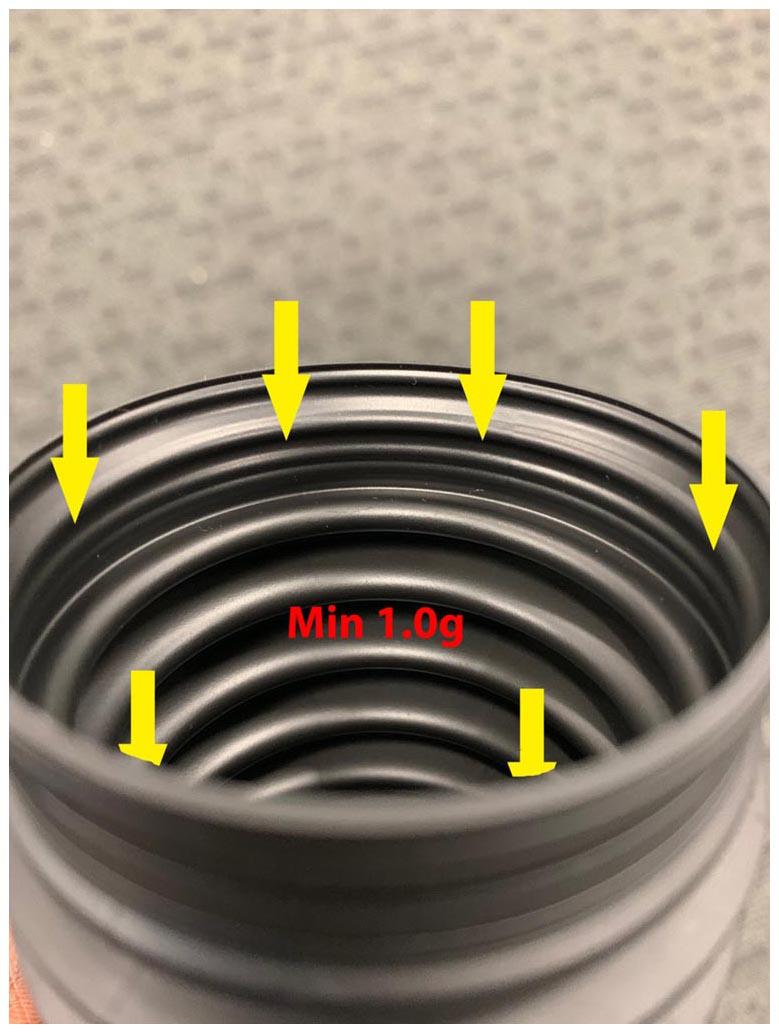
- At rack housing (two locations): 1.0 g
 Courtesy of TESLA, INC. Courtesy of TESLA, INC.
|
 Courtesy of TESLA, INC. Courtesy of TESLA, INC.
|
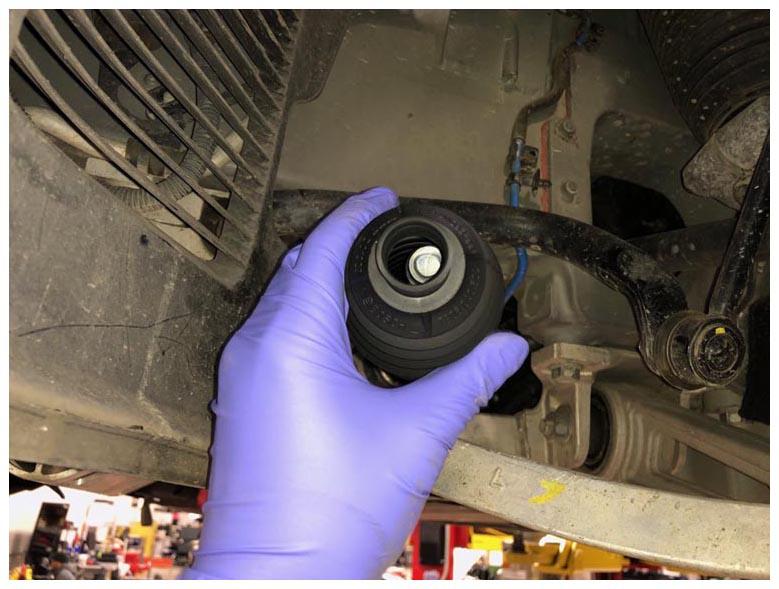
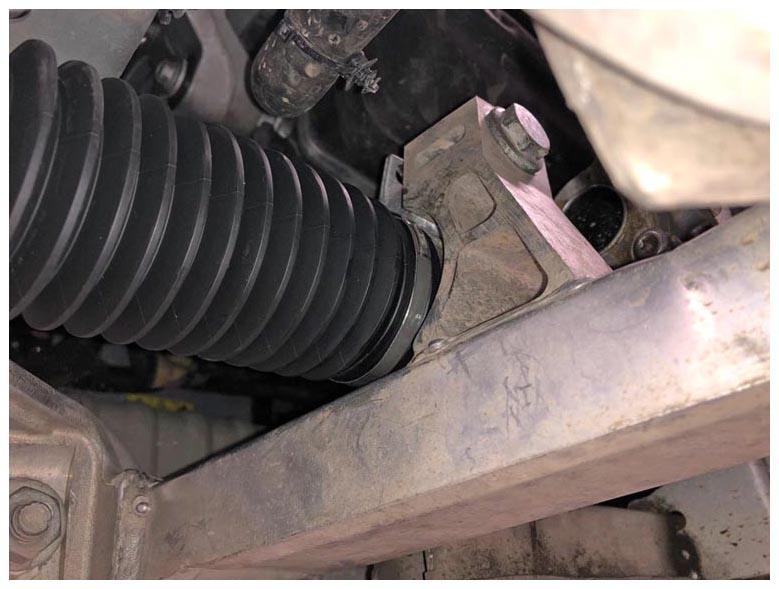
- Install the bellows into the LH inner tie rod.
 Courtesy of TESLA, INC. Courtesy of TESLA, INC.
|
 Courtesy of TESLA, INC. Courtesy of TESLA, INC.
|
 Courtesy of TESLA, INC. Courtesy of TESLA, INC.
|
- Lower the vehicle so that the tires are touching the ground.
- Attach the LH inner tie rod band clip by clamping the clip ear using the knipex ear clamp pliers.
 Courtesy of TESLA, INC. Courtesy of TESLA, INC.
|
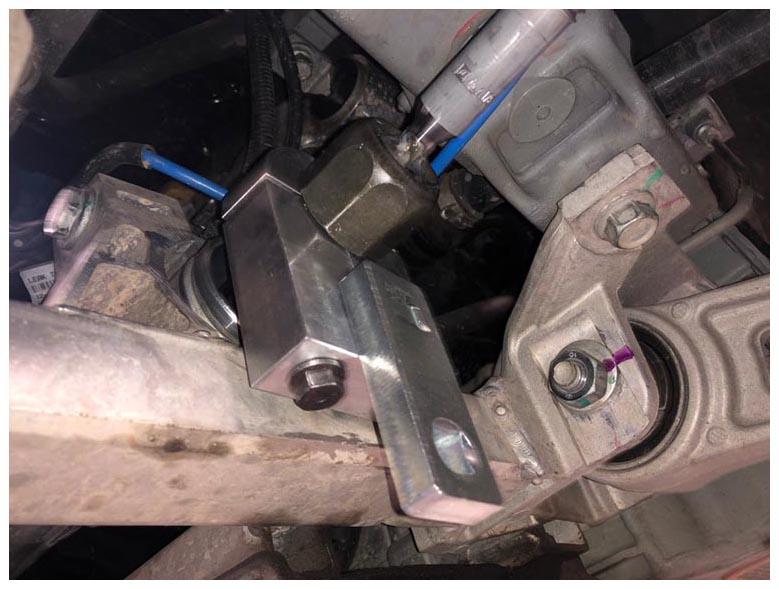
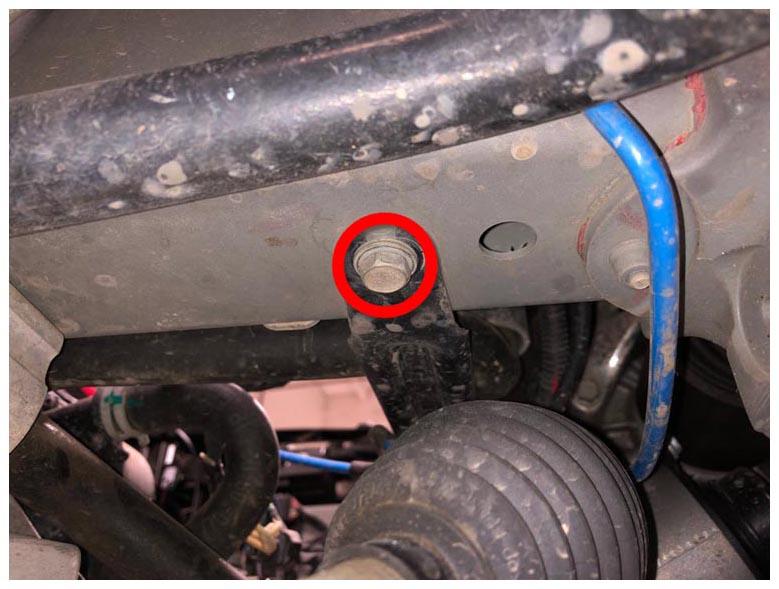
- Hand-tighten the upper bolt that attaches the LH front subframe brace.
NOTE:
The tightening of the bolt will be completed later in this procedure.
 Courtesy of TESLA, INC. Courtesy of TESLA, INC.
|
- Raise the vehicle fully.
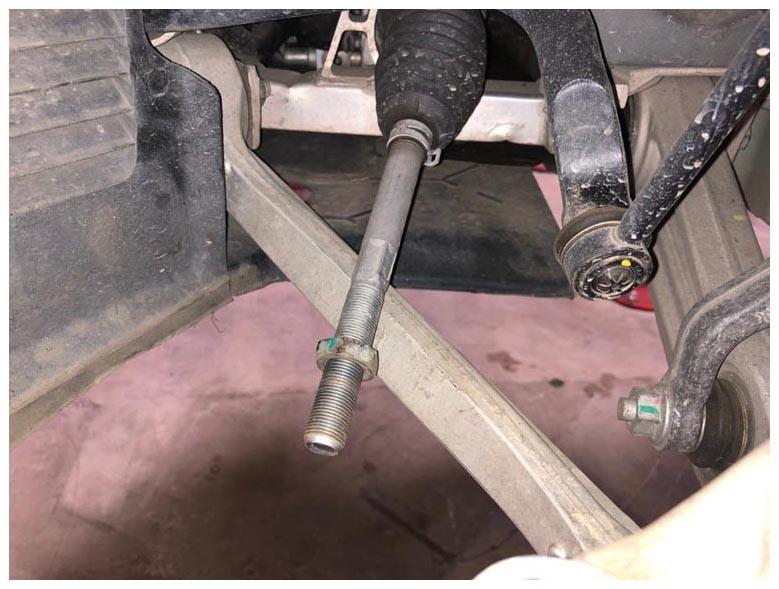
- Install the lower bolt that attaches the LH front subframe brace to the body (torque 26 N.m).
 Courtesy of TESLA, INC. Courtesy of TESLA, INC.
|
- Install the front aero shield. See Panel - Aero Shield - Front (Remove and Replace)
.
- Lower the vehicle partially to a comfortable working height.
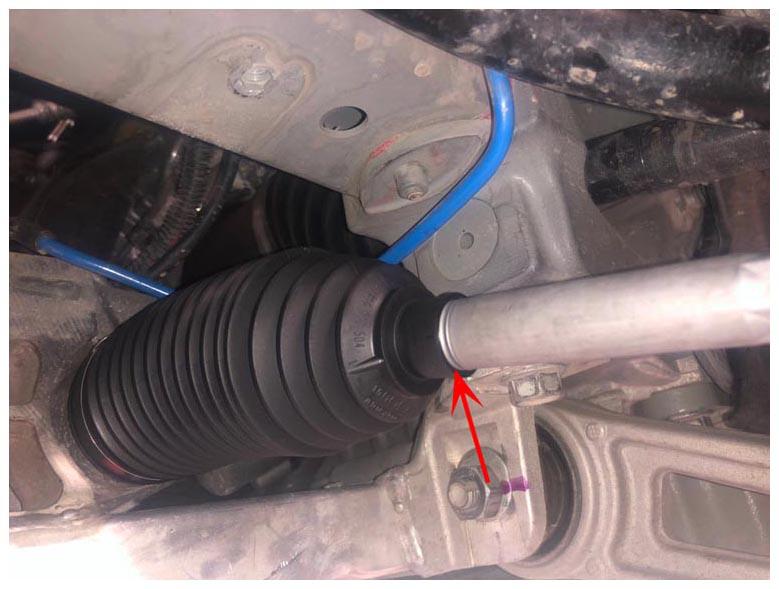
- Install the outer hose clip on the LH inner tie rod bellows using the combination slip joint pliers.
NOTE:
Install the clip in the original orientation.
 Courtesy of TESLA, INC. Courtesy of TESLA, INC.
|
- Install the LH jam nut onto the inner tie rod.
 Courtesy of TESLA, INC. Courtesy of TESLA, INC.
|
- Install the LH tie rod end, and then snug the jam nut.
NOTE:
Use the recorded number of turns to put the tie rod end back on.
 Courtesy of TESLA, INC. Courtesy of TESLA, INC.
|
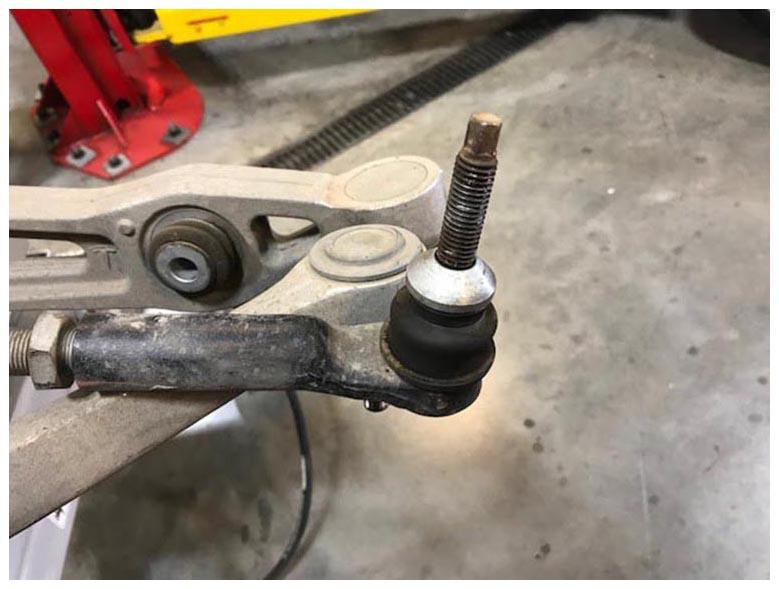
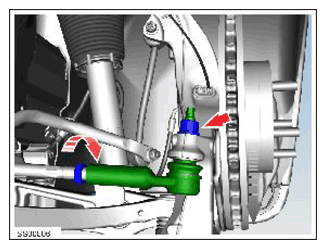
- Install a new nut that attaches the LH front tie rod end to the knuckle (torque 103 N.m).
 Courtesy of TESLA, INC. Courtesy of TESLA, INC.
|
- Install the LH front wheel. See Wheel (Remove and Install)
.
- Tighten the upper bolt that attaches the LH front subframe brace (torque 26 N.m).
 Courtesy of TESLA, INC. Courtesy of TESLA, INC.
|
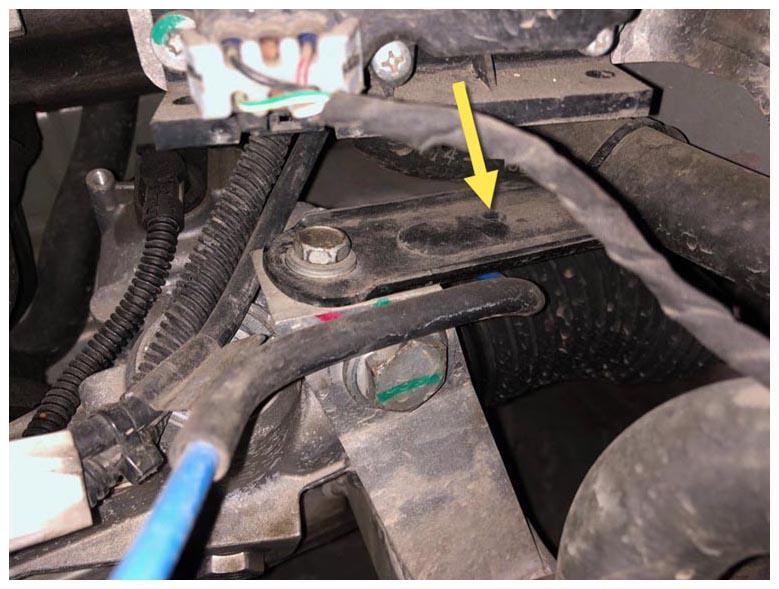
- Secure the fir tree clip that attaches the air suspension line to the LH subframe brace.
 Courtesy of TESLA, INC. Courtesy of TESLA, INC.
|
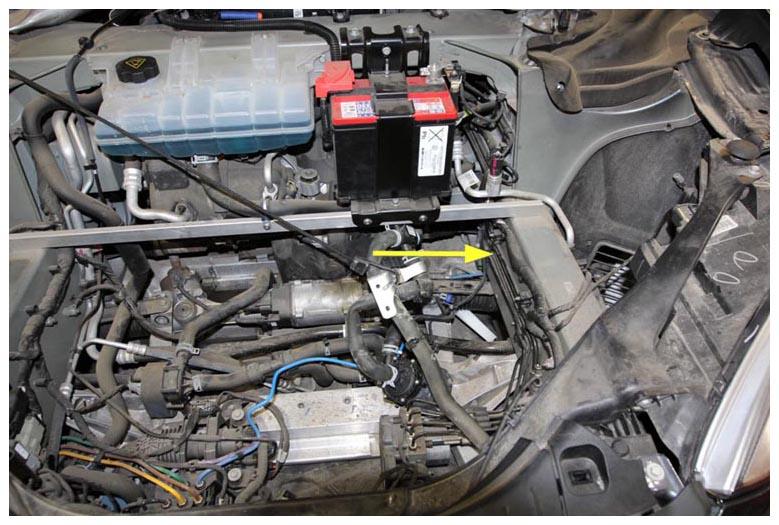
- Move the 4-way valve back into its installed position.
 Courtesy of TESLA, INC. Courtesy of TESLA, INC.
|
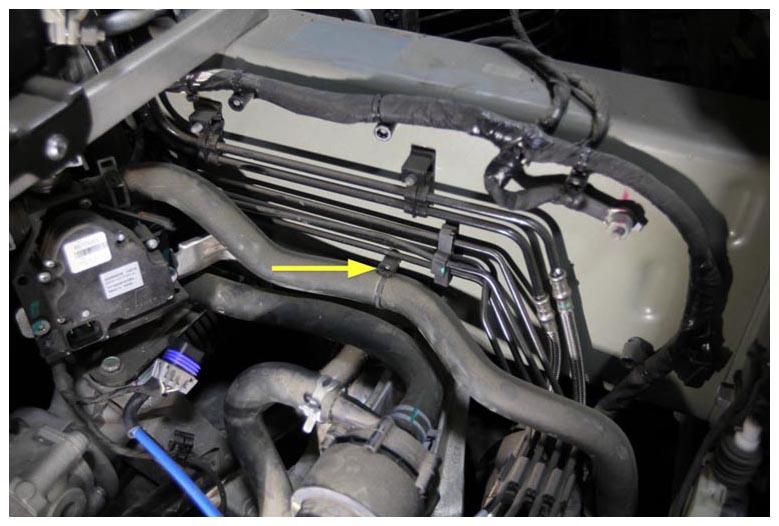
- Install the clip that attaches the coolant hose to the LH side of the frame rail.
 Courtesy of TESLA, INC. Courtesy of TESLA, INC.
|
- Install the bolts (x2) that attach the 4-way valve bracket to the frame rail (torque 5 N.m).
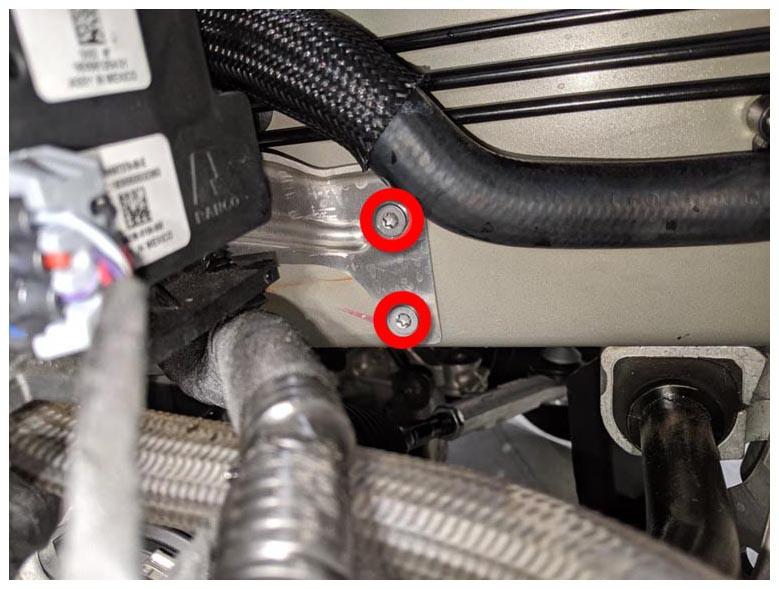 Courtesy of TESLA, INC. Courtesy of TESLA, INC.
|
- Install the fir tree clip that attaches the steering rack harness to the 4-way valve.
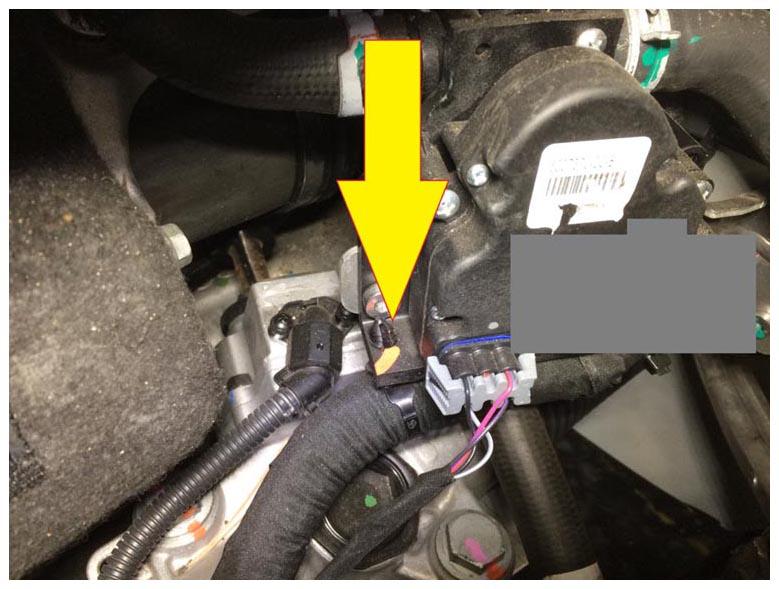 Courtesy of TESLA, INC. Courtesy of TESLA, INC.
|
- Install the underhood storage unit. See Underhood Storage Unit (Remove and Install)
.
- Install the underhood storage carpet. See Carpet - Underhood Storage (Remove and Install)
.
- Install the LH and RH underhood aprons. See Underhood Apron - LH (Remove and Replace)
.
- Install the rear underhood apron. See Underhood Apron - Rear (Remove and Replace)
.
- Refer to the Alignment Requirement tables to determine if an alignment check (AC) or full adjustment (FA) is necessary. See Alignment Requirement - Suspension
.