- Position the E-fuse module into the vehicle.
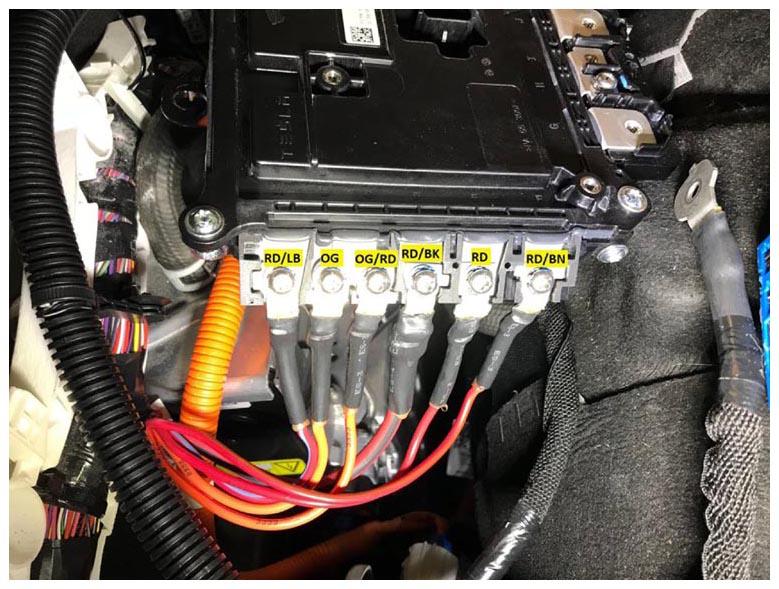
- Put each cable into the correct location on the side of the E-fuse module, and then install the screws (x6) that attach the cables to the module (torque 4 N.m).
 Courtesy of TESLA, INC. Courtesy of TESLA, INC.
|
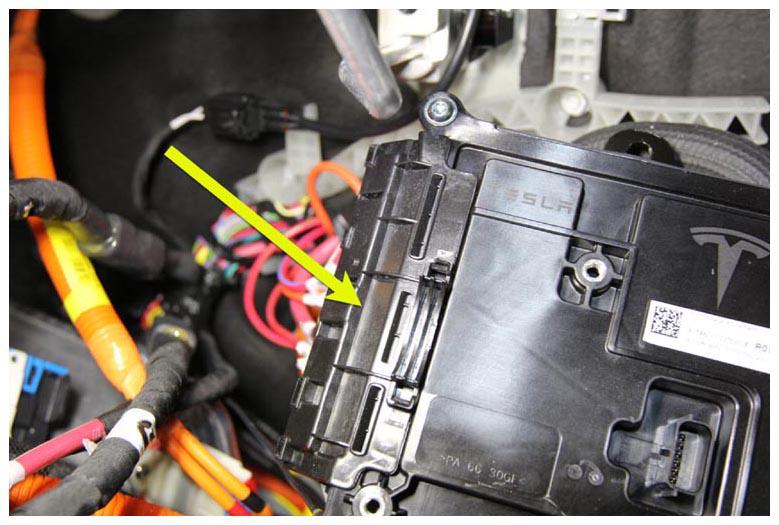
- Install the cover onto the RH side of the E-fuse module by aligning the cable cutouts, and then press the cover until an audible click is heard.
 Courtesy of TESLA, INC. Courtesy of TESLA, INC.
|
 Courtesy of TESLA, INC. Courtesy of TESLA, INC.
|
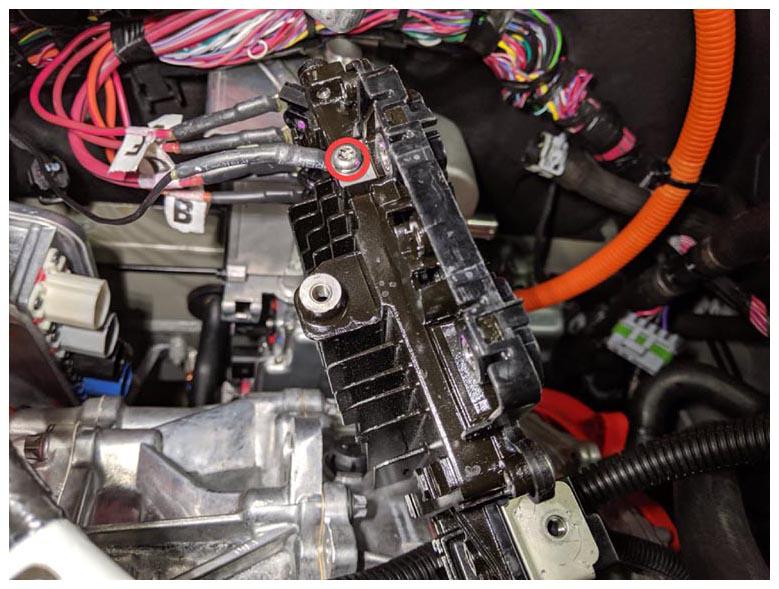
- Install new patch bolt that attaches the ground cable to the E-fuse module (torque 4 N.m).
 Courtesy of TESLA, INC. Courtesy of TESLA, INC.
|
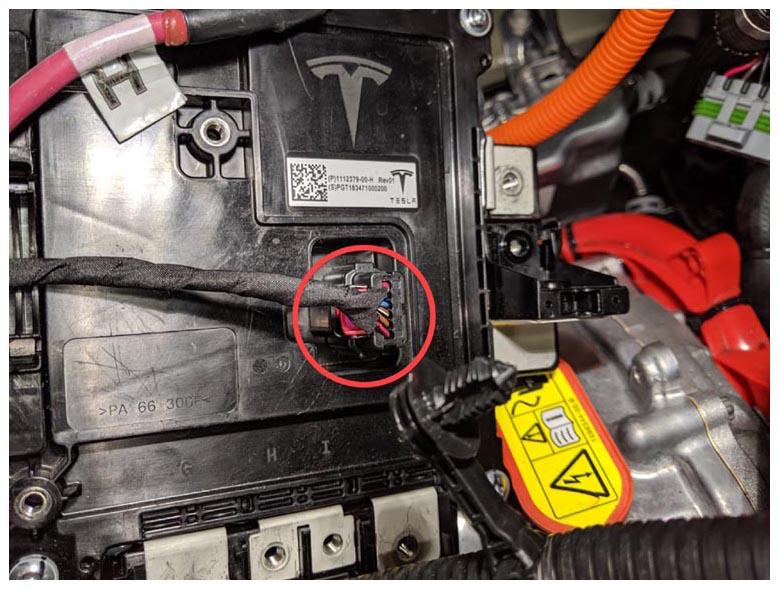
- Connect the logic electrical connector to the E-fuse module, and then secure it with the red locking tab.
 Courtesy of TESLA, INC. Courtesy of TESLA, INC.
|
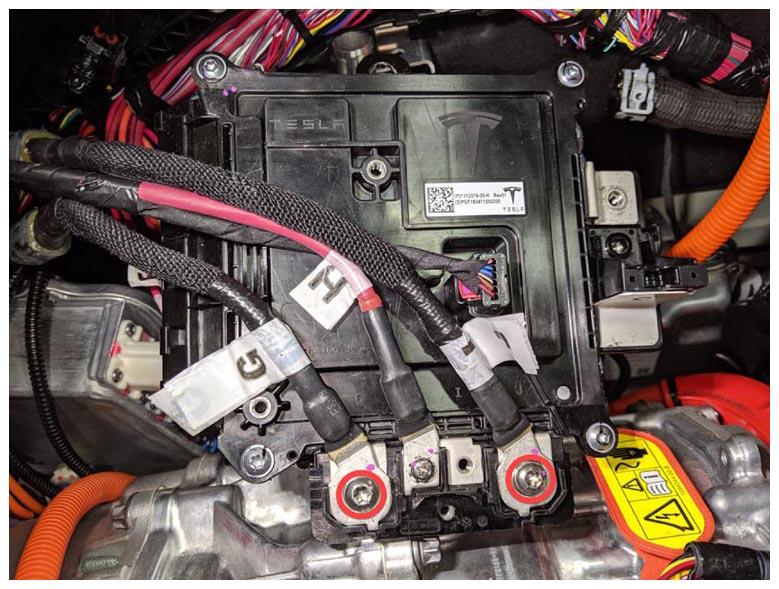
- Install the screw that attaches the smaller cable to the bottom of the E-fuse module (torque 5 N.m).
NOTE:
Make sure to install the cable in the correct position as shown.
 Courtesy of TESLA, INC. Courtesy of TESLA, INC.
|
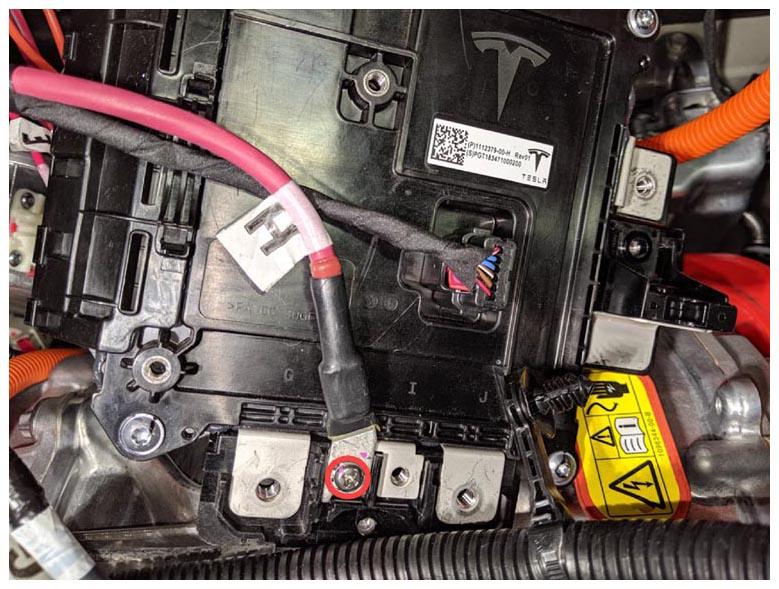
- Install new patch bolts (x2) that attach the large cables to the bottom of the E-fuse module (torque 5 N.m).
NOTE:
Make sure to install the cables in the correct position as shown.
 Courtesy of TESLA, INC. Courtesy of TESLA, INC.
|
- Install the cover onto the E-fuse module and secure it with tab.
 Courtesy of TESLA, INC. Courtesy of TESLA, INC.
|
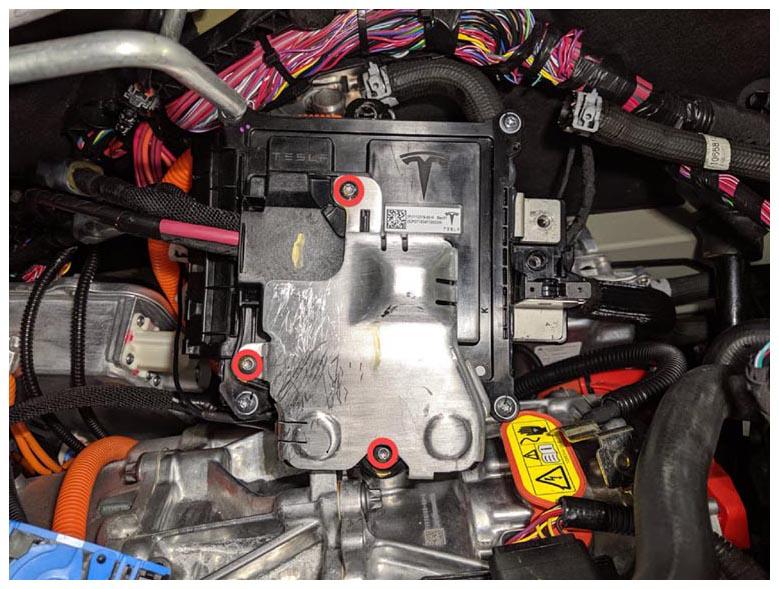
- Install the bolts (x3) that attach the cover to the E-fuse module (torque 2.7 N.m).
 Courtesy of TESLA, INC. Courtesy of TESLA, INC.
|
- Install new patch bolt that attaches the DCDC positive cable to the E-fuse module (torque 5 N.m).
 Courtesy of TESLA, INC. Courtesy of TESLA, INC.
|
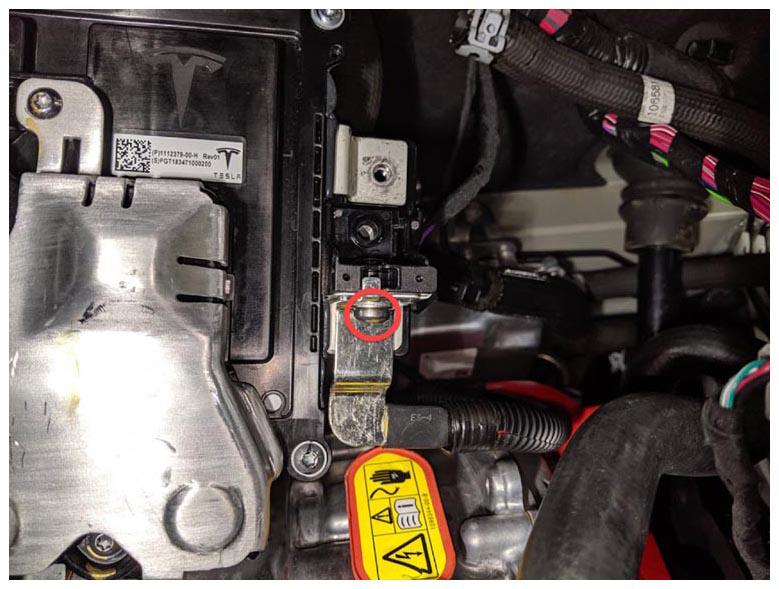
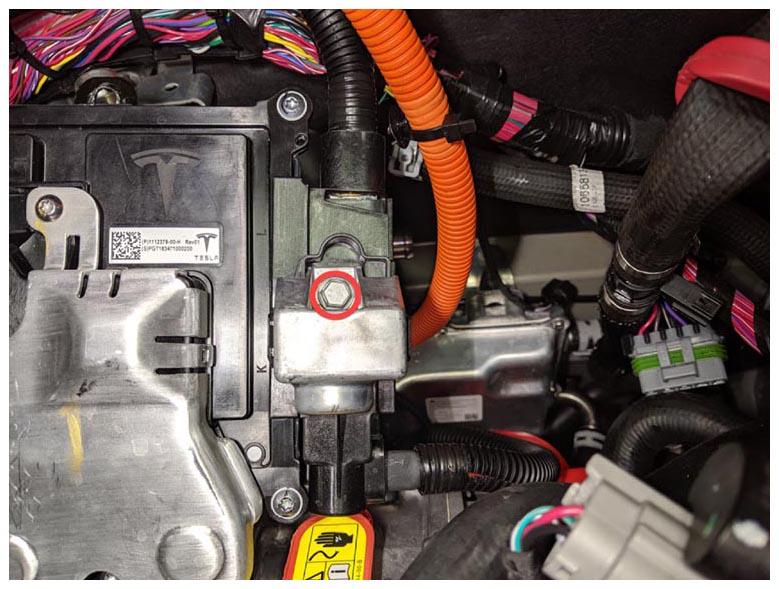
- Install new patch bolt that attaches the 12V power supply cable to the E-fuse module (torque 7 N.m).
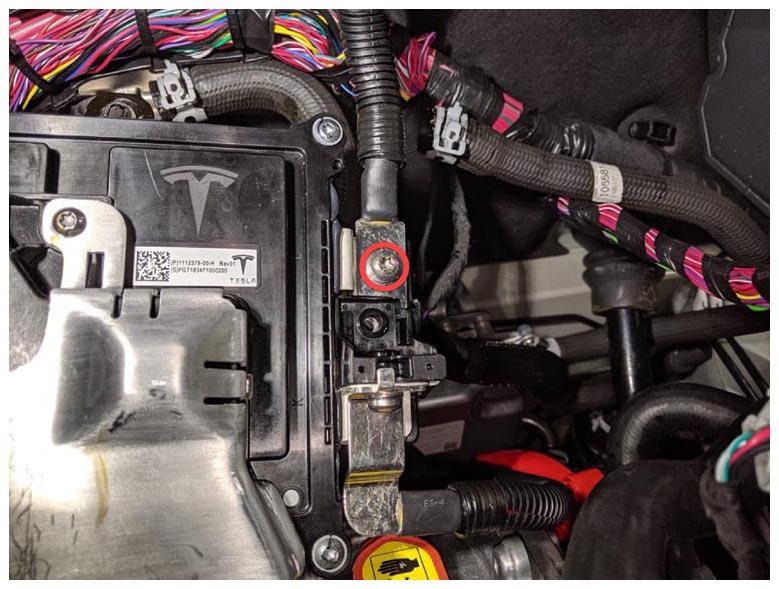 Courtesy of TESLA, INC. Courtesy of TESLA, INC.
|
- Position the E-fuse module so that the tabs (x2) align with the battery coolant heater bracket, and then slide the module downwards until the tabs engage with the bracket.
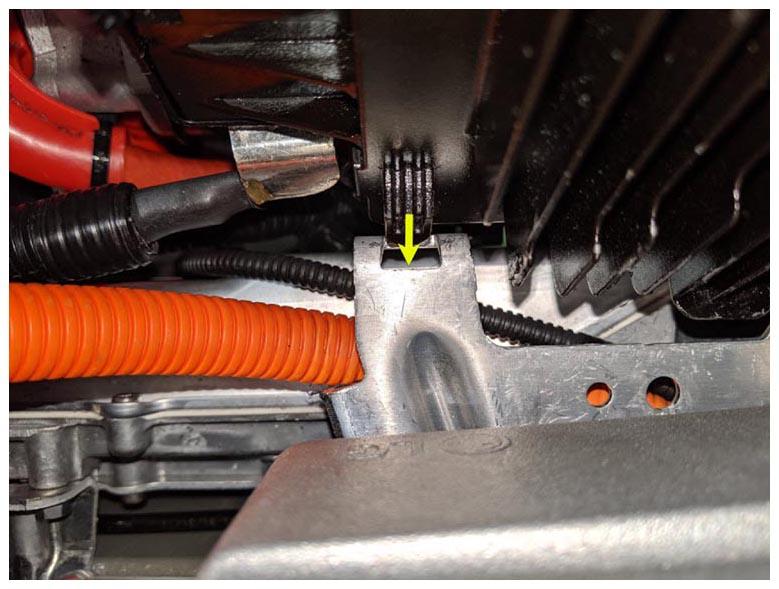 Courtesy of TESLA, INC. Courtesy of TESLA, INC.
|
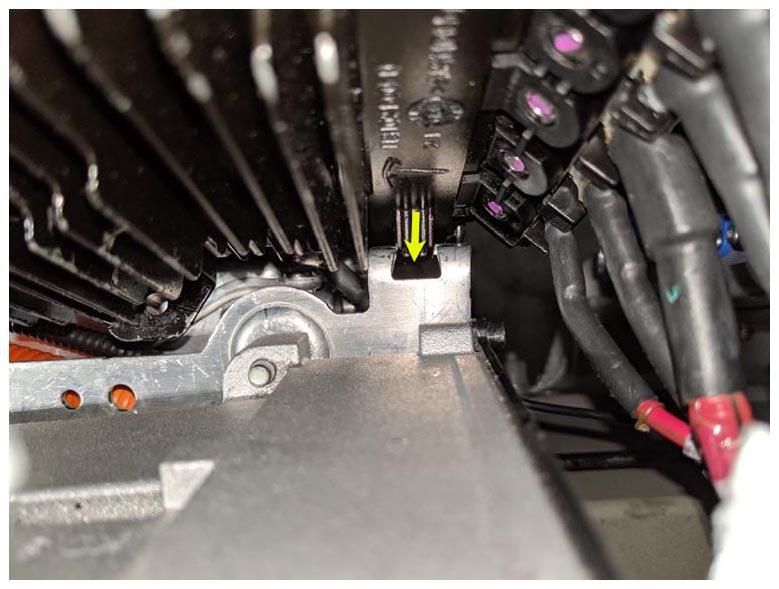 Courtesy of TESLA, INC. Courtesy of TESLA, INC.
|
- Install the nut that attaches the E-fuse module to the battery coolant heater bracket (torque 7 N.m).
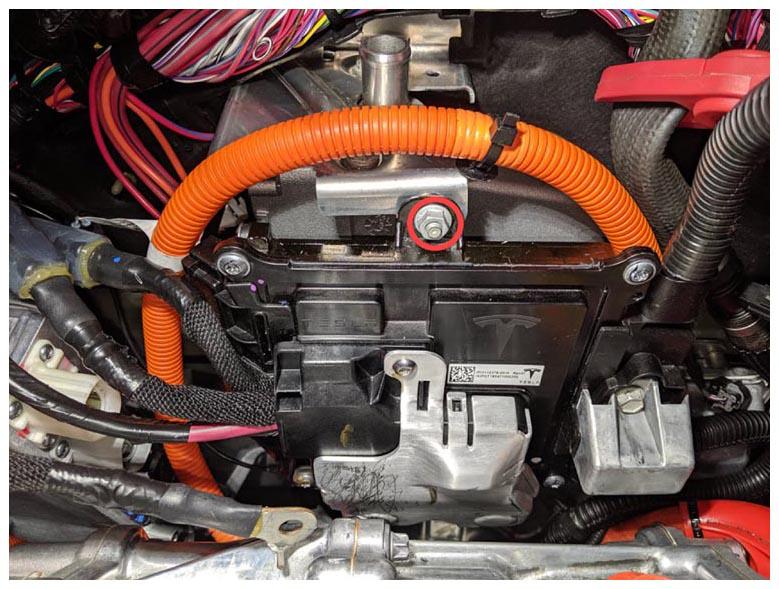 Courtesy of TESLA, INC. Courtesy of TESLA, INC.
|
- Position the cover, and then install the bolt that attaches the 12V cable cover to the E-fuse module (torque 3.5 N.m).
 Courtesy of TESLA, INC. Courtesy of TESLA, INC.
|
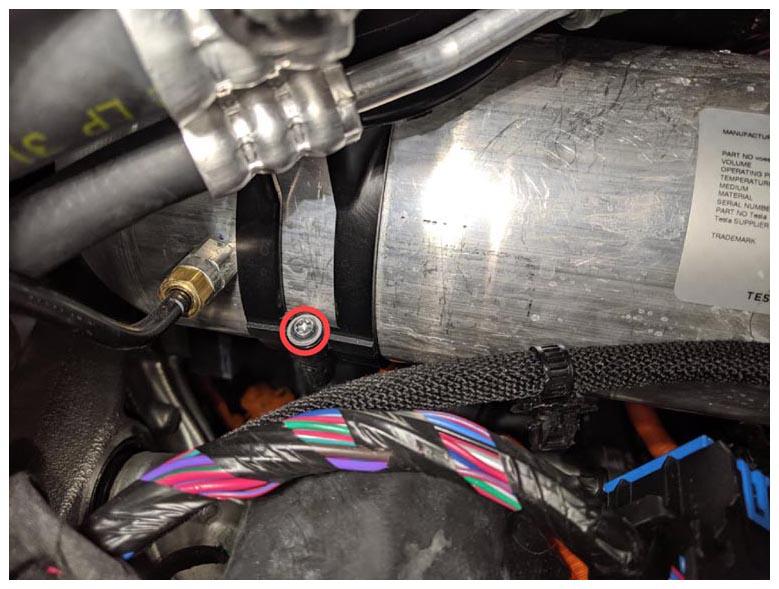
- Position the air suspension reservoir into position.
- Install the screw that attaches the air suspension reservoir to the bracket (torque 2.5 N.m).
 Courtesy of TESLA, INC. Courtesy of TESLA, INC.
|
- Install the wiper motor assembly. See Wiper Motor Assembly (Remove and Replace) .
- Install the cowl screen panel. See Panel - Cowl Screen (Remove and Replace)
.
- Install the underhood fusebox. See FUSEBOX - UNDERHOOD - 2ND GENERATION (REMOVE AND REPLACE) .
- Reconnect 12V power. See DISCONNECT 12V POWER .
- Install the HEPA filter outlet duct. See Duct - HEPA Filter - Outlet (Remove and Replace)
.
- Install the HEPA filter inlet duct. See Duct - HEPA Filter - Inlet (Remove and Replace)
.
- Install the LH and RH underhood aprons. See Underhood Apron - LH (Remove and Replace)
.
- Install the rear underhood apron. See Underhood Apron - Rear (Remove and Replace)
.
- Update the vehicle firmware. See Firmware Update
.