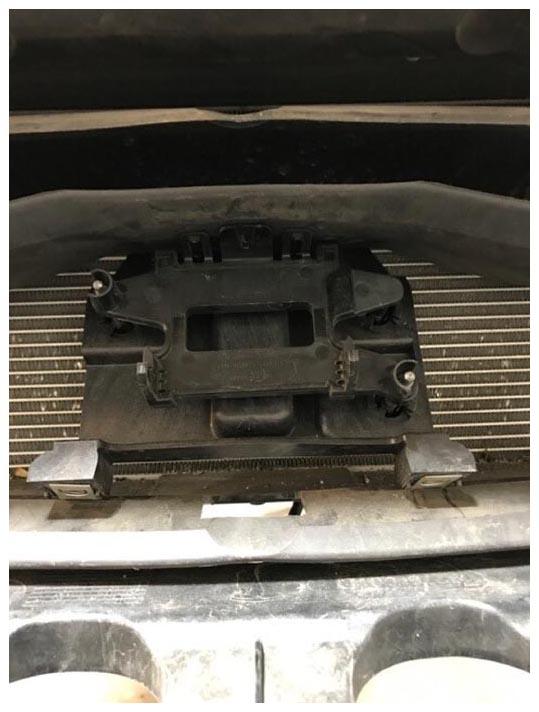
- Install radar bracket. Push up bracket, tilt bottom bracket about 20 degree and insert bracket into the mounting bracket.
 Courtesy of TESLA, INC. Courtesy of TESLA, INC.
|
- Install bolts (x4) securing radar sensor bracket.
NOTE:
No Torque spec available.
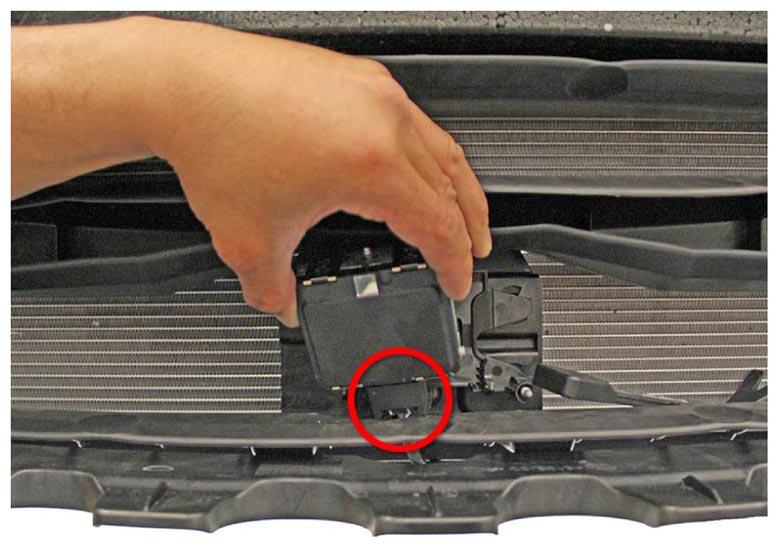
- Install the radar connector first onto the bottom of the radar sensor before mount the sensor.
 Courtesy of TESLA, INC. Courtesy of TESLA, INC.
|
- Install the fascia assembly.
NOTE:
With assistance, mount the fascia panel to the fascia carrier.
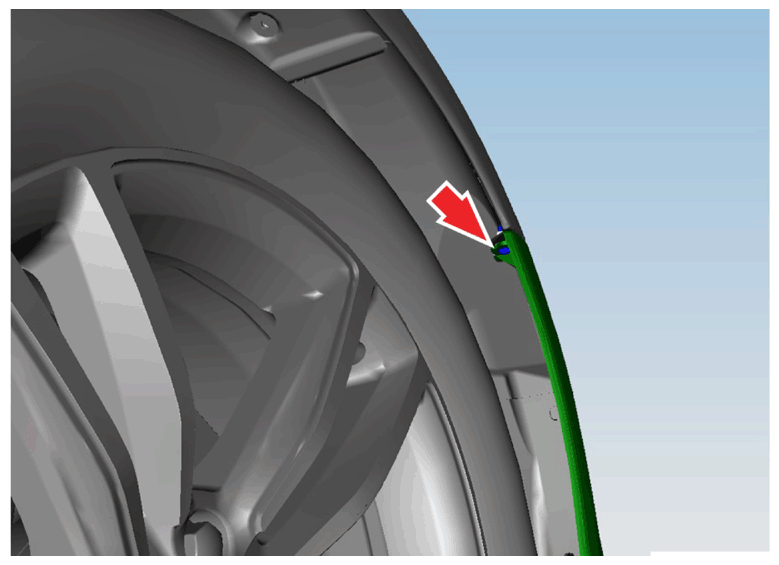
- Carefully install the fascia from the LH and RH fender bracket.
 Courtesy of TESLA, INC. Courtesy of TESLA, INC.
|
- Install the screw (x2) that secures the fascia panel to the LH front and RF fender.
NOTE:
T25 Screw (x2) Torque.
 Courtesy of TESLA, INC. Courtesy of TESLA, INC.
|
- Install the bolts (x2) that secure the fascia and applique to the fascia carrier.
NOTE:
10 mm Bolt (x2) Torque: 4 N.m.
 Courtesy of TESLA, INC. Courtesy of TESLA, INC.
|
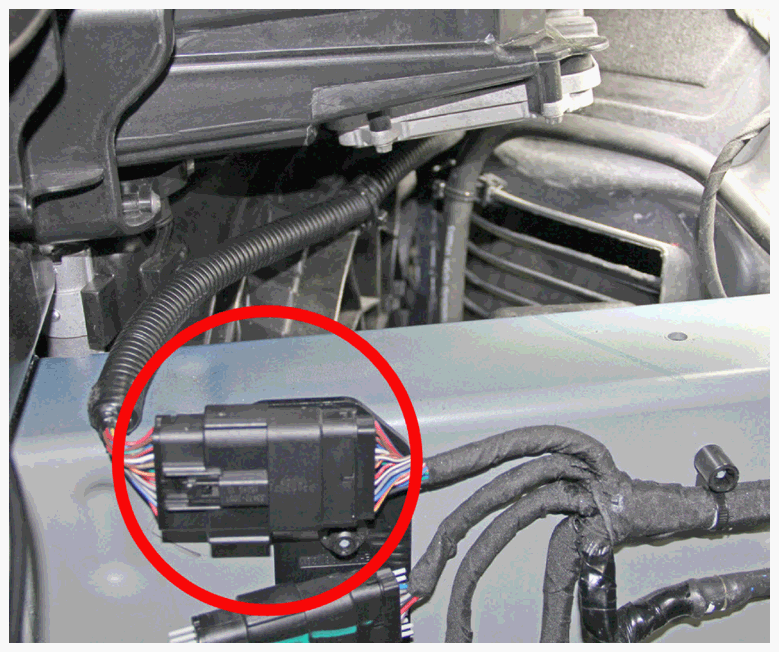
- Install On the RH side connect the front fascia harness connector.
NOTE:
Electrical Connector (x1).
 Courtesy of TESLA, INC. Courtesy of TESLA, INC.
|
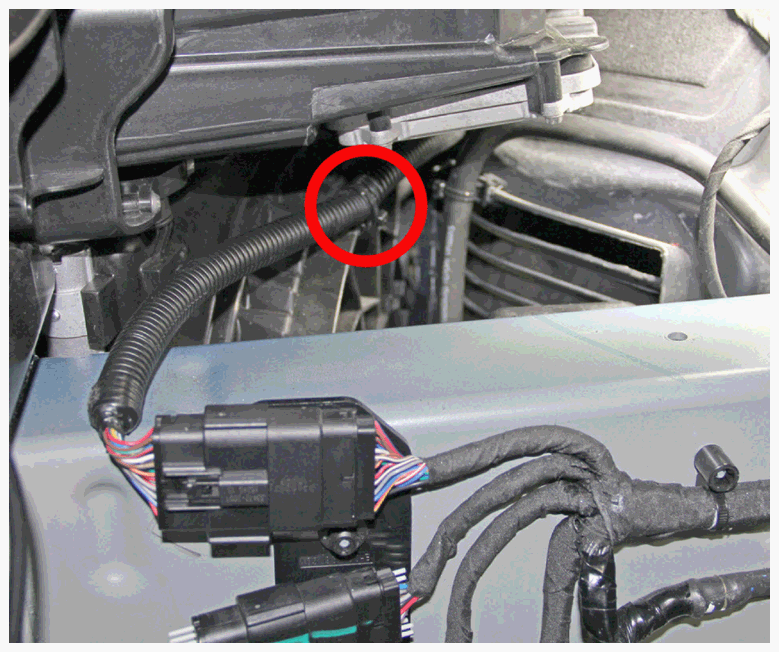
- Install the edge clip that secures the fascia harness to the RH active shutter.
NOTE:
Edge Clip (x1).
 Courtesy of TESLA, INC. Courtesy of TESLA, INC.
|
- Install the plastic rivets (x8) and bolts (x2) that secure the undershield to the lower valance.
NOTE:
Plastic Rivet (x8) 10 mm Bolt (x2) Torque: 4 N.m.
 Courtesy of TESLA, INC. Courtesy of TESLA, INC.
|
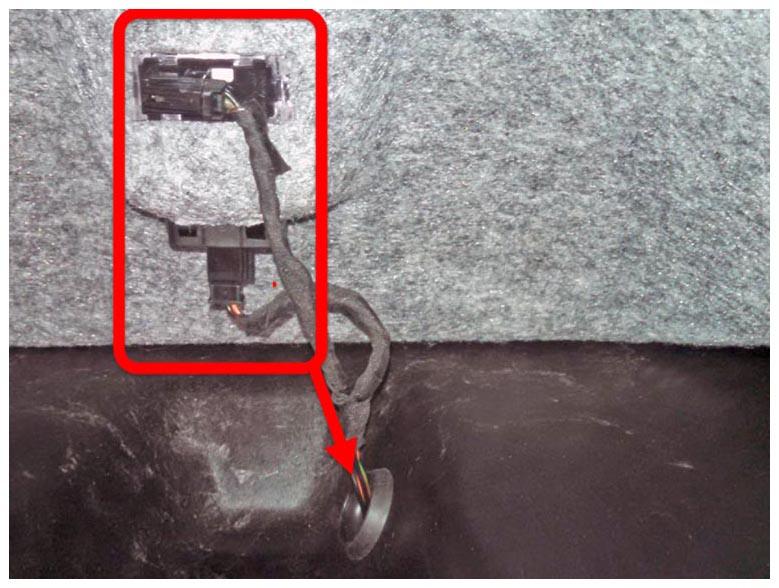
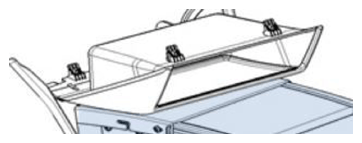
- Install the under hood storage unit in vehicle.
NOTE:
Push wiring harness grommet back through under hood storage unit.
- Connect emergency hood release and front light harness.
NOTE:
Electrical Connector (x2).
 Courtesy of TESLA, INC. Courtesy of TESLA, INC.
|
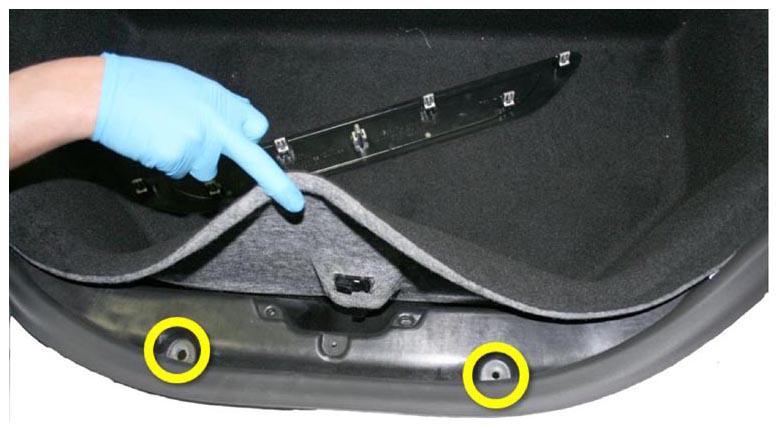
- Peel back the carpeting at the front and rear of the under hood storage unit. Install the (x4) bolts.
NOTE:
8 mm Nut (x2) Torque: 4 N.m, 13 mm Bolt (x2) Torque: 8 N.m.
 Courtesy of TESLA, INC. Courtesy of TESLA, INC.
|
 Courtesy of TESLA, INC. Courtesy of TESLA, INC.
|
- Install underhood storage carpet under seal.
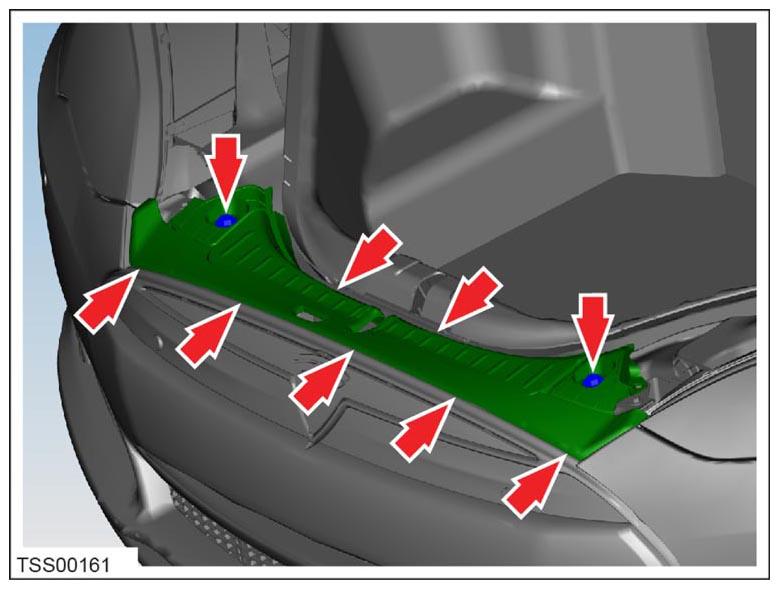
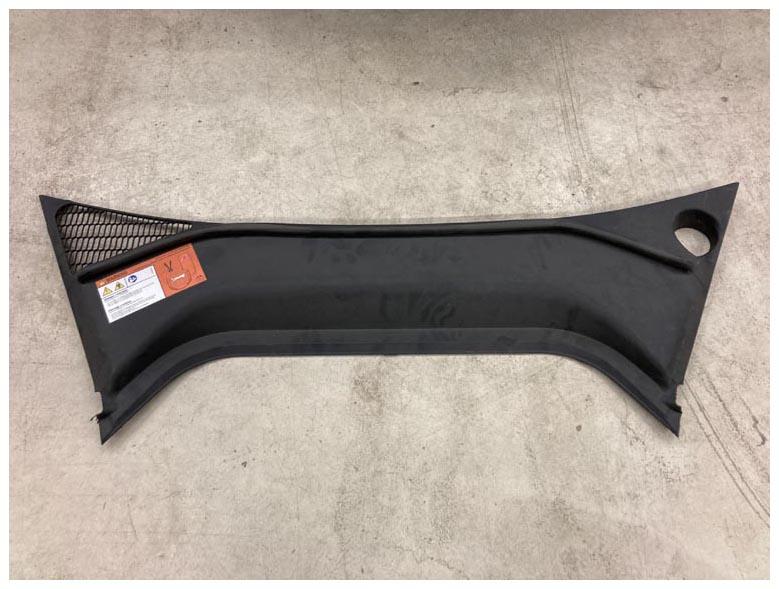
- Install front underhood apron.
NOTE:
2x push clips, 7x clips.
 Courtesy of TESLA, INC. Courtesy of TESLA, INC.
|
 Courtesy of TESLA, INC. Courtesy of TESLA, INC.
|
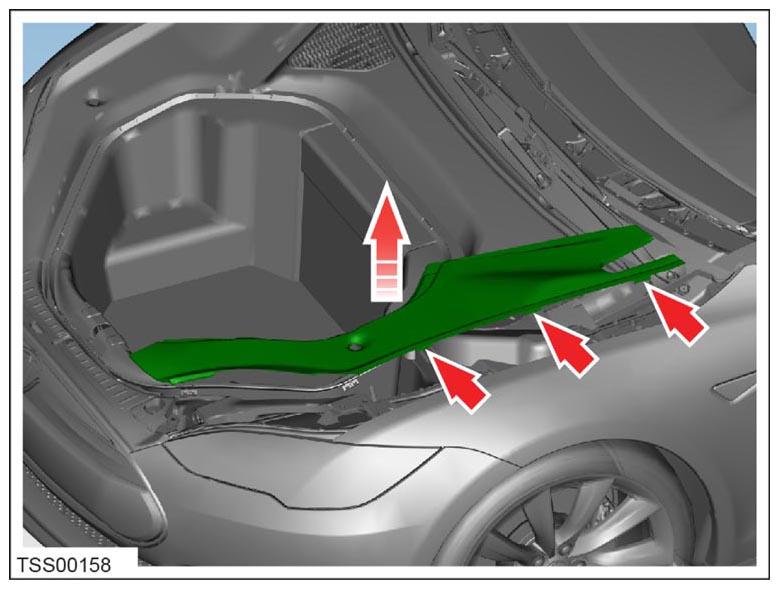
- Install LH and RH underhood side aprons.
 Courtesy of TESLA, INC. Courtesy of TESLA, INC.
|
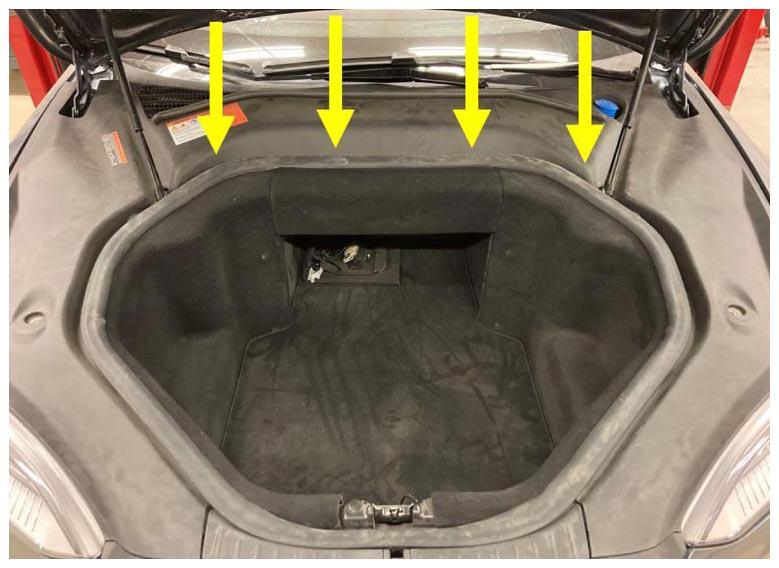
- Install rear underhood apron.
NOTE:
8x clips.
 Courtesy of TESLA, INC. Courtesy of TESLA, INC.
|
 Courtesy of TESLA, INC. Courtesy of TESLA, INC.
|
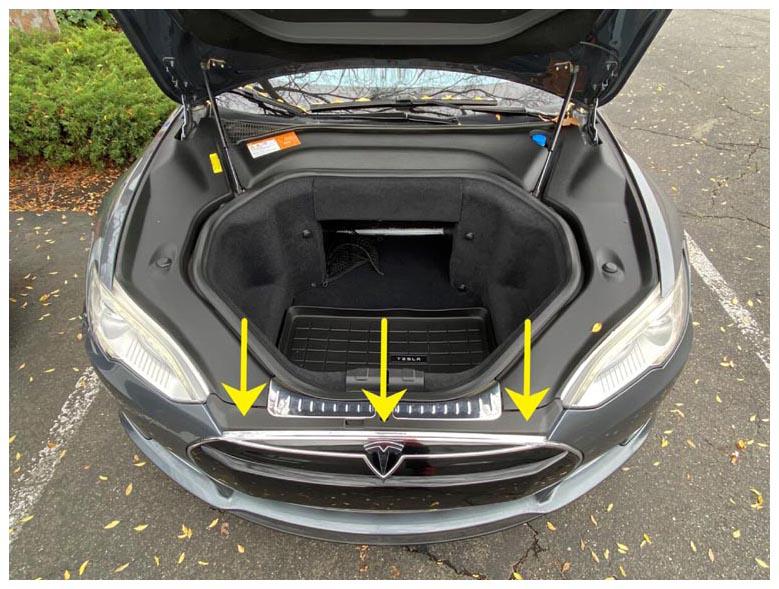
- Remove masking tape from both fenders.
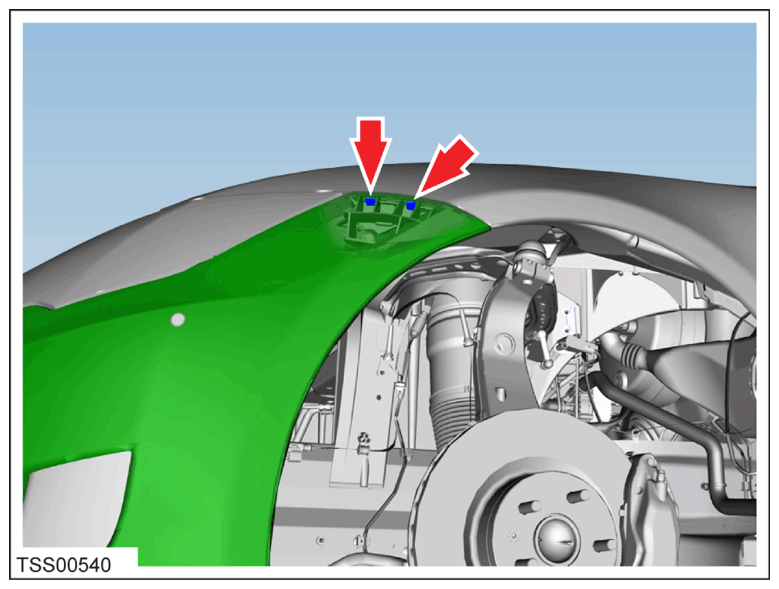
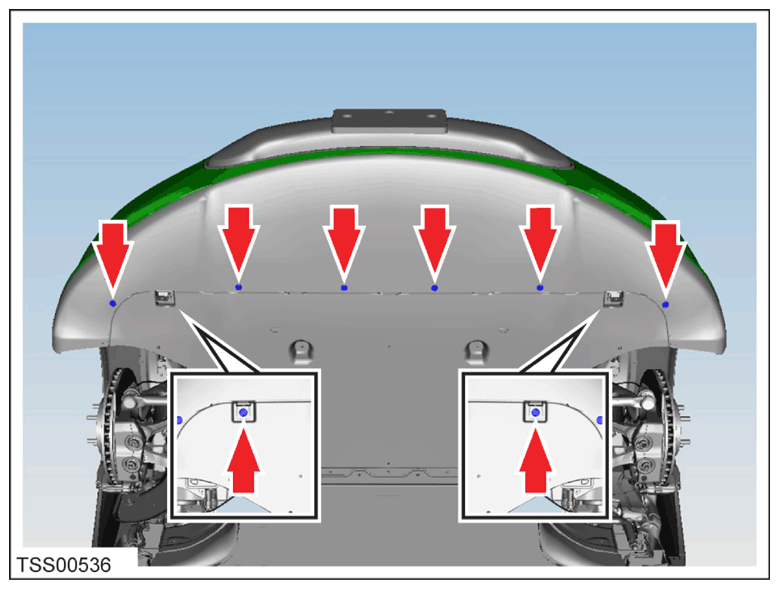
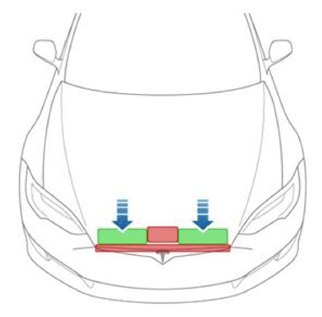
- Close hood.
NOTE:
Press firmly in green highlighted areas (see image), Damage may result from pressure elsewhere on hood.
 Courtesy of TESLA, INC. Courtesy of TESLA, INC.
|
- Enter vehicle and deactivate Jack Mode.
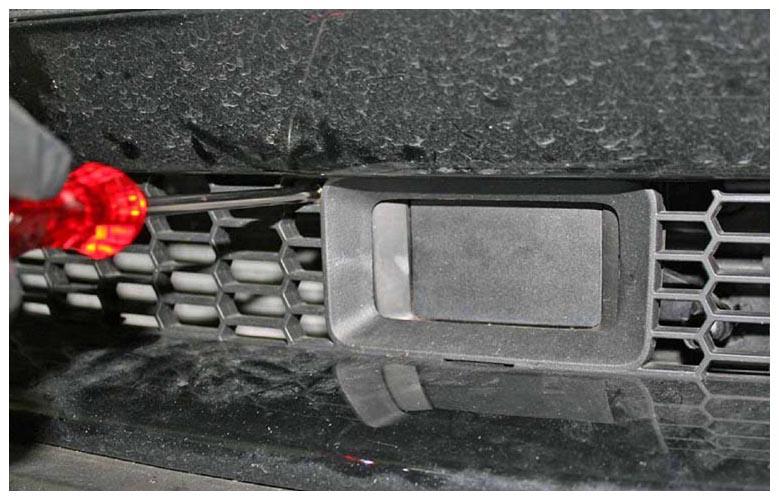
- Remove the under-screen cubby tray to access to Data Cable.
 Courtesy of TESLA, INC. Courtesy of TESLA, INC.
|
- Connect laptop to vehicle.
- Perform four wheel alignment.
NOTE:
- Per FRT 31000100.
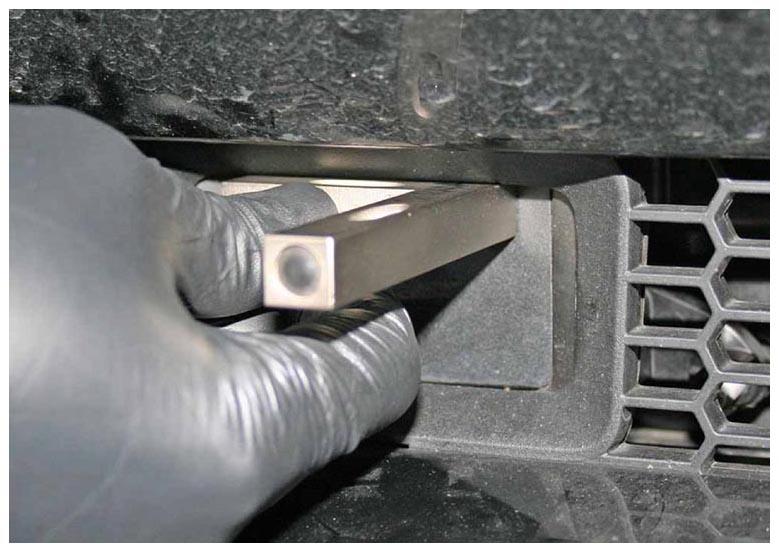
- Inspect vertical alignment of radar (while vehicle is still on alignment rack).
NOTE:
Gently hold the short side of the bubble tool flat against the upper center portion of the radar sensor face, Make sure that the bubble tool is against the sensor gasket, If the bubble is not centered between the lines on the long side of the bubble tool, adjust the vertical alignment screw until the bubble is centered.
 Courtesy of TESLA, INC. Courtesy of TESLA, INC.
|
 Courtesy of TESLA, INC. Courtesy of TESLA, INC.
|
 Courtesy of TESLA, INC. Courtesy of TESLA, INC.
|
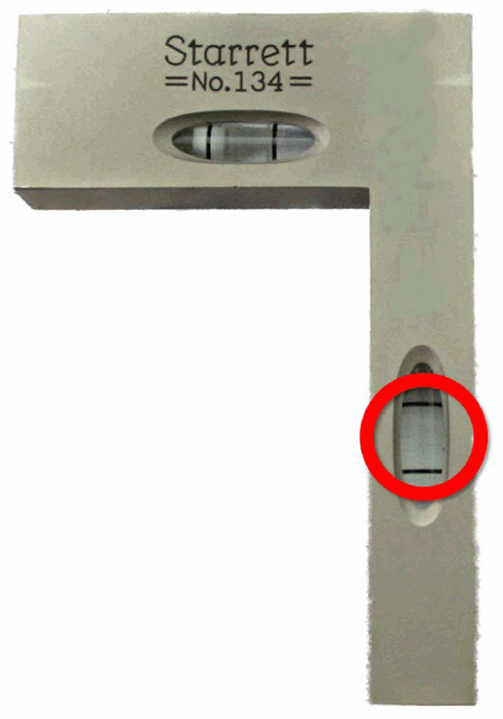
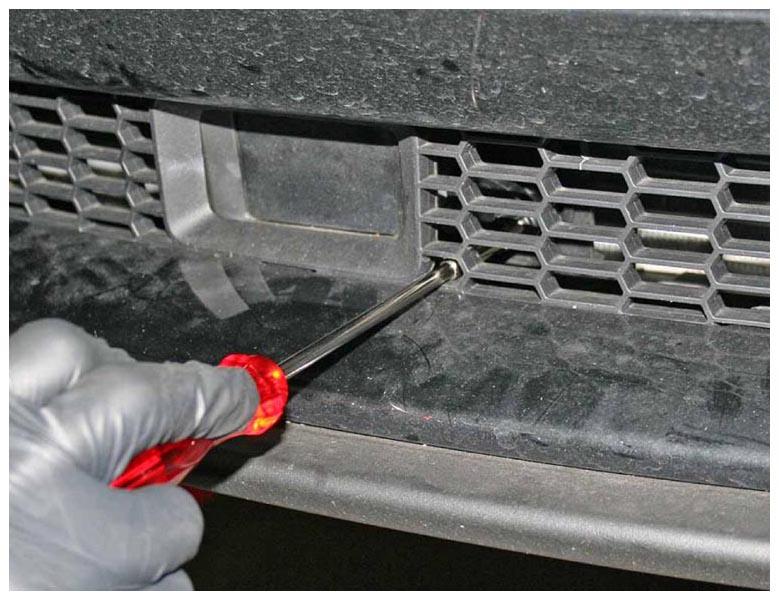
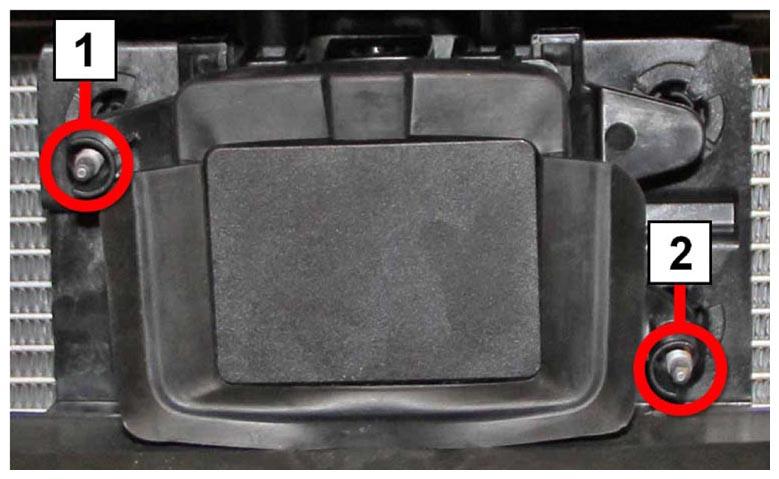
- Adjust vertical alignment. If necessary, adjust the vertical set screw.
NOTE:
Adjustment screw 1 = Horizontal alignment, Adjustment screw 2 = Vertical alignment, Radar calibration bubble level should be between the two lines.
 Courtesy of TESLA, INC. Courtesy of TESLA, INC.
|
 Courtesy of TESLA, INC. Courtesy of TESLA, INC.
|
- Go to Driver Assist panel and select Radar Service Drive Alignment. Perform the Radar Service Drive Alignment (SDA) procedure.
- Select Next and follow on screen instructions Adjust horizontal alignment if necessary. Perform Radar Service Drive alignment again if horizontal alignment necessary.
NOTE:
.
 Courtesy of TESLA, INC. Courtesy of TESLA, INC.
|
- Disconnect laptop.
- Reinstall under screen cubby storage.
- Exit vehicle.