Diagnosis & Repair Procedure
- If engine system check has been performed, go to next step. If engine system check has not been performed, go to A4: ENGINE SYSTEM CHECK under SYSTEM TESTS.
- Turn ignition off. Disconnect IAT sensor 2-pin harness connector. IAT sensor is located in air intake pipe. Check for poor terminal contact at IAT sensor connector. If poor terminal contact is found, repair as necessary. After repair, repeat DTC CONFIRMATION TEST . If terminal contact is okay, go to next step.
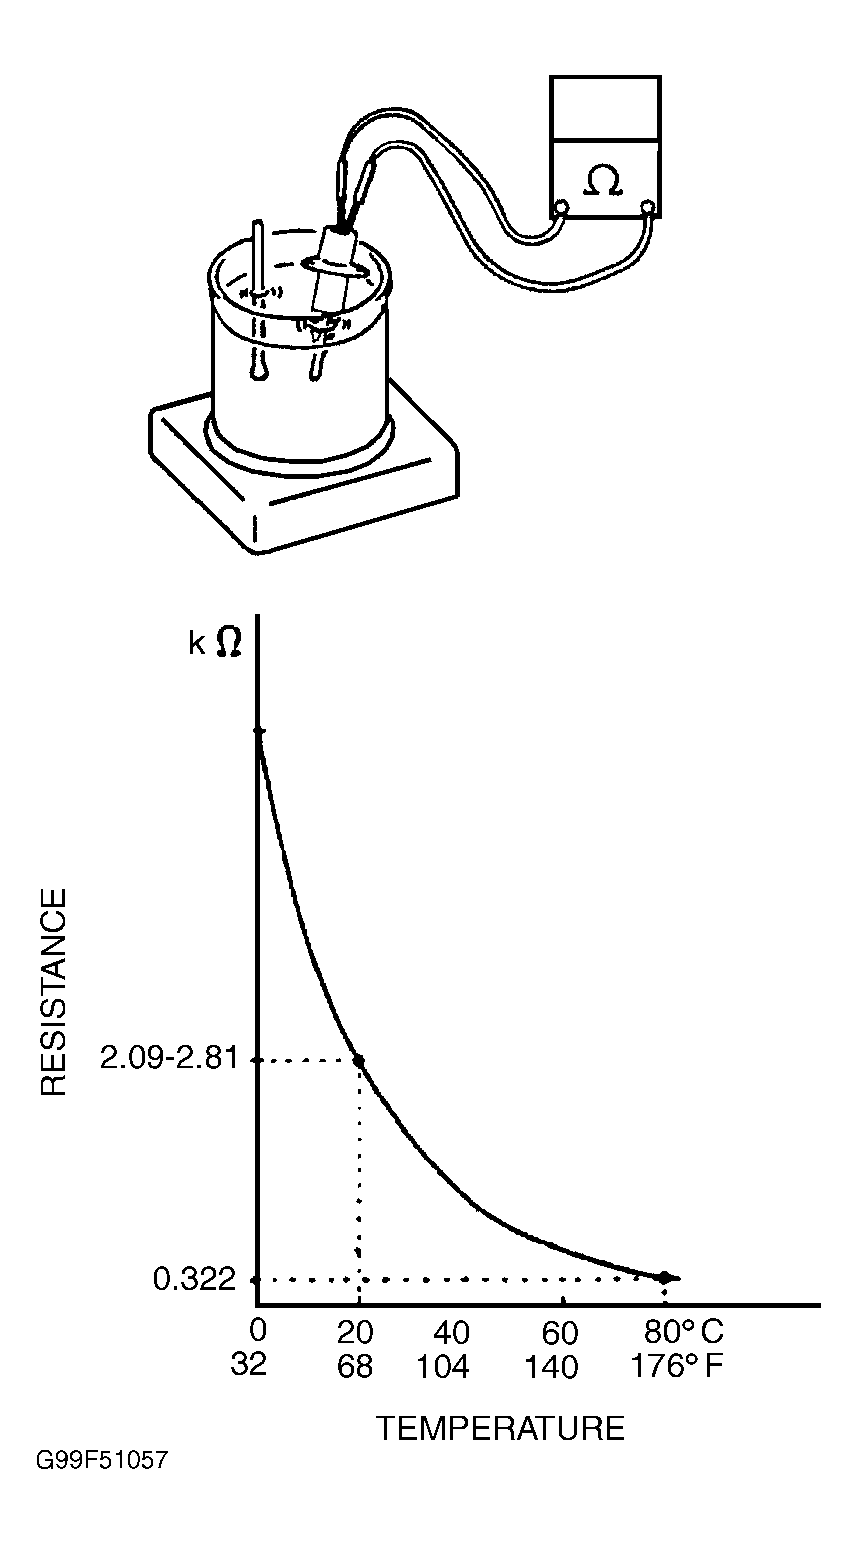
- Check operation of IAT sensor. Measure resistance between IAT sensor terminals while it is immersed in a container of water. Heat water slowly and ensure resistance changes as specified. See Fig 1. If IAT sensor operates as specified, go to next step. If IAT sensor does not operate as specified, replace IAT sensor. After repair, repeat DTC CONFIRMATION TEST .
- Turn ignition off. Disconnect ECM 26-pin harness connector C51-3. ECM is located under instrument panel, under glove box. See Figure. Check for poor terminal contact at ECM harness connector C51-3. If poor terminal contact is found, repair as necessary. After repair, repeat DTC CONFIRMATION TEST . If no problem is found, go to next step.
- Check Light Blue and Gray/Yellow wires between ECM harness connector C51-3 terminals No. 1 and No. 25, and IAT sensor for excessive resistance. See ENGINE PERFORMANCE
in SYSTEM WIRING DIAGRAMS article in ELECTRICAL. If problem is found, repair as necessary. If no problem is found, substitute a known-good ECM, and repeat DTC CONFIRMATION TEST . If DTC does not reset, testing is complete.
 Courtesy of SUZUKI OF AMERICA CORP.