- Remove the front tires.
- Disconnect the ground terminal from battery sensor. Refer to NOTE>NOTE>BATTERY
.
- Remove the collector cover. Refer to INTAKE (INDUCTION) (EXCEPT FOR STI)>COLLECTOR COVER>REMOVAL
.
- Remove the air intake duct. Refer to INTAKE (INDUCTION) (EXCEPT FOR STI)>AIR INTAKE DUCT>REMOVAL
.
- Remove the intercooler and the intercooler stay. Refer to INTAKE (INDUCTION) (EXCEPT FOR STI)>INTERCOOLER>REMOVAL
.
- Remove the air breather hose. Refer to CONTINUOUSLY VARIABLE TRANSMISSION (TR690)>AIR BREATHER HOSE>REMOVAL .
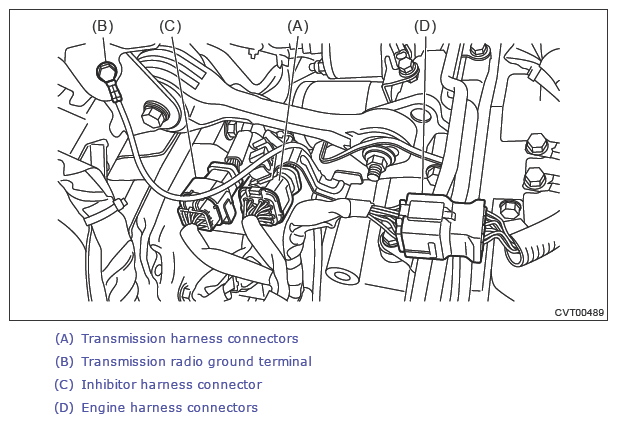
- Disconnect the following connectors.
- Transmission harness connectors
- Transmission radio ground terminal
- Inhibitor harness connector
- Engine harness connectors
 Courtesy of SUBARU OF AMERICA, INC. Courtesy of SUBARU OF AMERICA, INC.
|
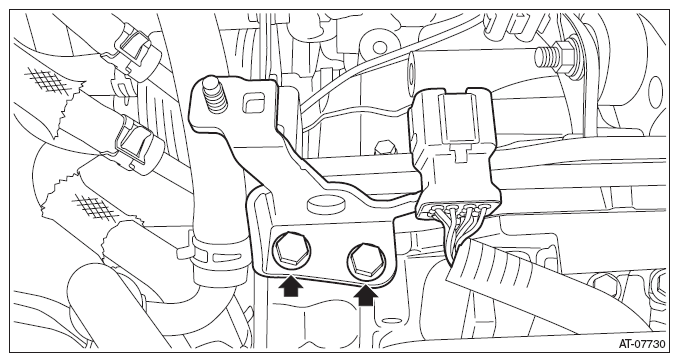
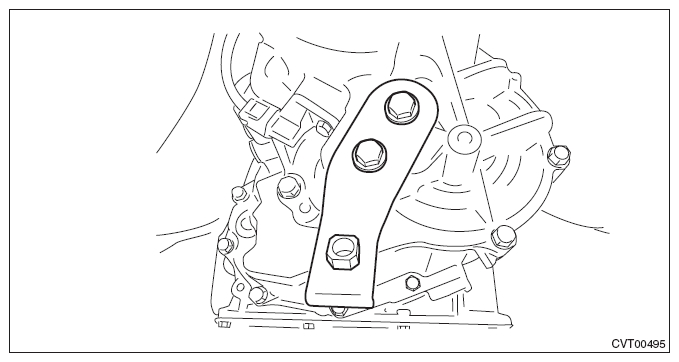
- Remove the engine hanger rear.
 Courtesy of SUBARU OF AMERICA, INC. Courtesy of SUBARU OF AMERICA, INC.
|
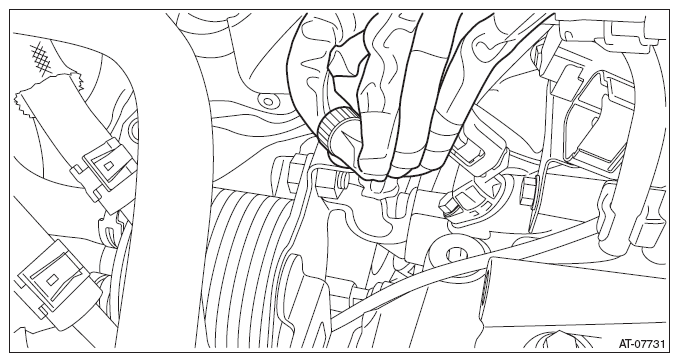
- Remove the harness clip.
 Courtesy of SUBARU OF AMERICA, INC. Courtesy of SUBARU OF AMERICA, INC.
|
- Remove the starter. Refer to STARTING/CHARGING SYSTEMS (EXCEPT FOR STI)>STARTER>REMOVAL
.
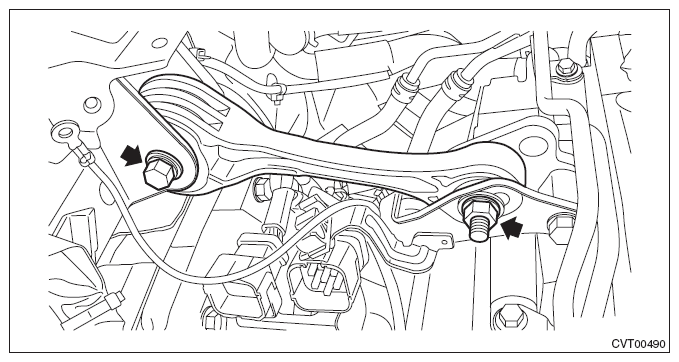
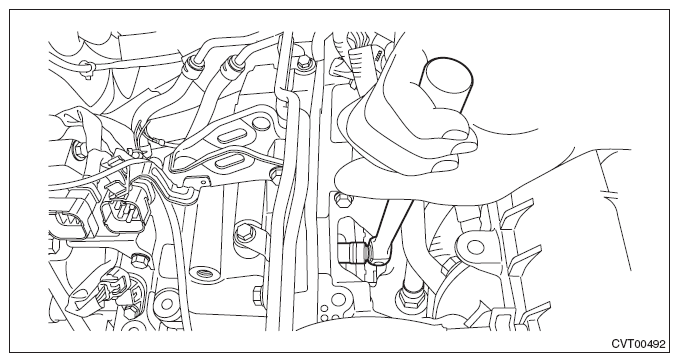
- Remove the pitching stopper.
 Courtesy of SUBARU OF AMERICA, INC. Courtesy of SUBARU OF AMERICA, INC.
|
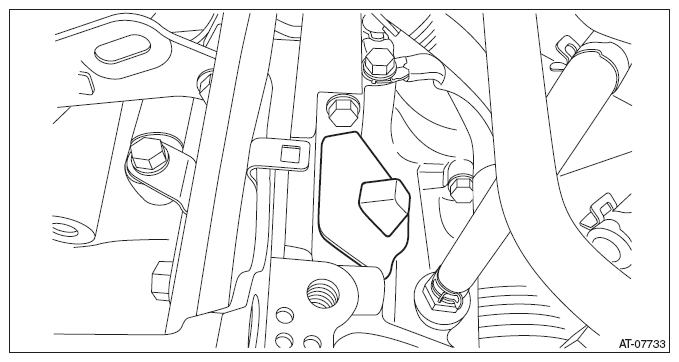
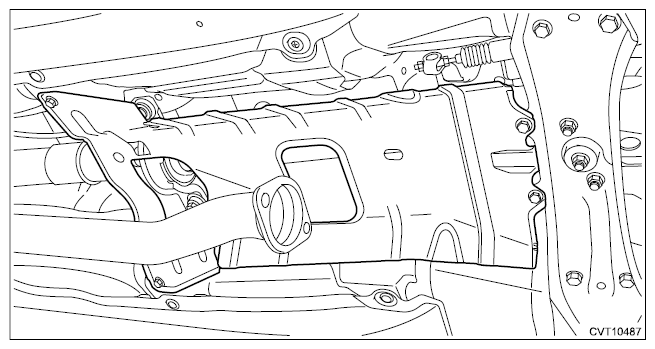
- Remove the service hole plug.
 Courtesy of SUBARU OF AMERICA, INC. Courtesy of SUBARU OF AMERICA, INC.
|
- Remove the four bolts combining the torque converter and drive plate while rotating the crank pulley a little at a time in the same direction as engine revolution.
CAUTION:
- Be careful not to drop bolts into the converter housing.
- Be careful not to damage the mounting bolts.
 Courtesy of SUBARU OF AMERICA, INC. Courtesy of SUBARU OF AMERICA, INC.
|
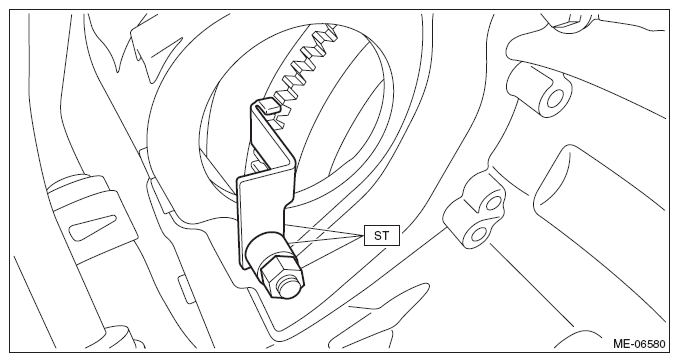
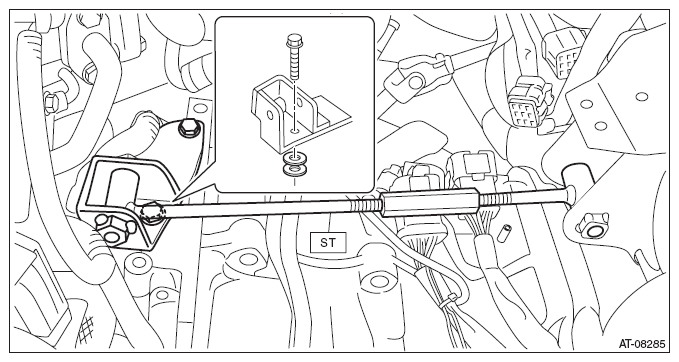
- Make sure the torque converter moves freely by rotating with finger through the starter installation hole.
- Attach the ST to the converter case.
 Courtesy of SUBARU OF AMERICA, INC. Courtesy of SUBARU OF AMERICA, INC.
|
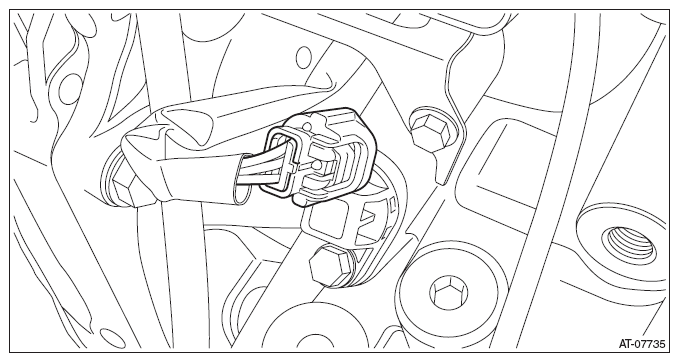
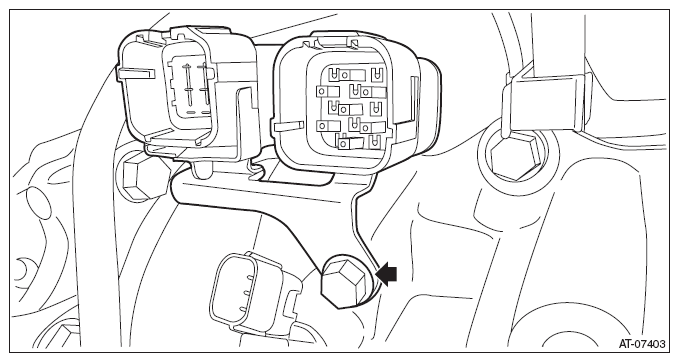
- Remove the primary speed sensor harness connector.
 Courtesy of SUBARU OF AMERICA, INC. Courtesy of SUBARU OF AMERICA, INC.
|
- Remove the transmission harness stay.
 Courtesy of SUBARU OF AMERICA, INC. Courtesy of SUBARU OF AMERICA, INC.
|
- Remove the CVTF cooler pipe COMPL mounting bolt.
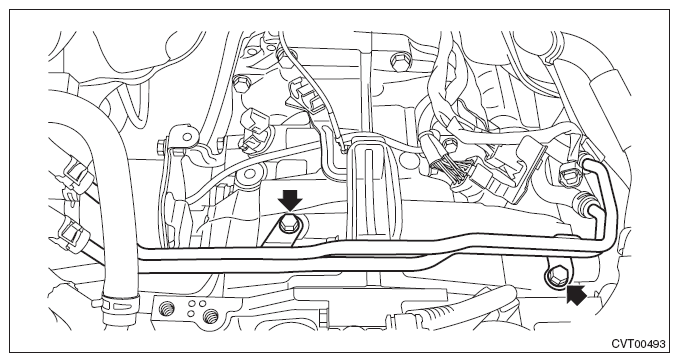 Courtesy of SUBARU OF AMERICA, INC. Courtesy of SUBARU OF AMERICA, INC.
|
- Remove the pitching stopper bracket and transmission radio ground cord.
 Courtesy of SUBARU OF AMERICA, INC. Courtesy of SUBARU OF AMERICA, INC.
|
- Remove the engine ground terminal.
 Courtesy of SUBARU OF AMERICA, INC. Courtesy of SUBARU OF AMERICA, INC.
|
- Lift up the vehicle.
- Remove the center exhaust pipe (rear). Refer to EXHAUST (EXCEPT FOR STI)>CENTER EXHAUST PIPE>REMOVAL
.
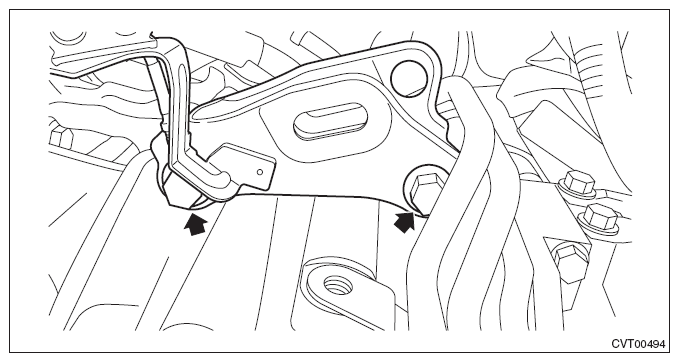
- Remove the exhaust hanger bracket.
 Courtesy of SUBARU OF AMERICA, INC. Courtesy of SUBARU OF AMERICA, INC.
|
- Remove the CVTF drain plug to drain CVTF. Refer to CONTINUOUSLY VARIABLE TRANSMISSION (TR690)>CVTF>REPLACEMENT .
- Remove the center exhaust cover.
 Courtesy of SUBARU OF AMERICA, INC. Courtesy of SUBARU OF AMERICA, INC.
|
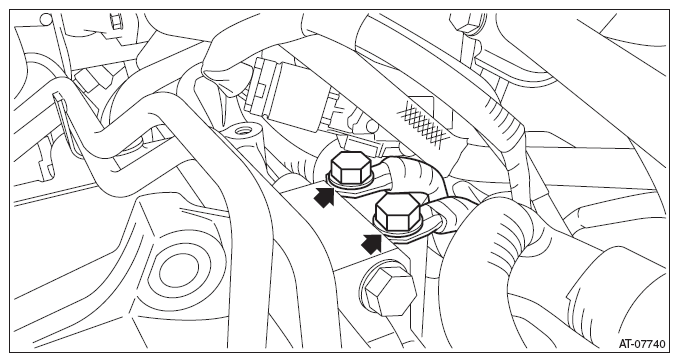
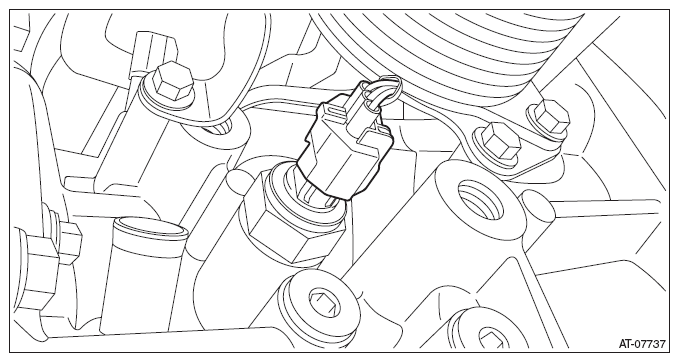
- Remove the secondary pressure sensor harness connector.
 Courtesy of SUBARU OF AMERICA, INC. Courtesy of SUBARU OF AMERICA, INC.
|
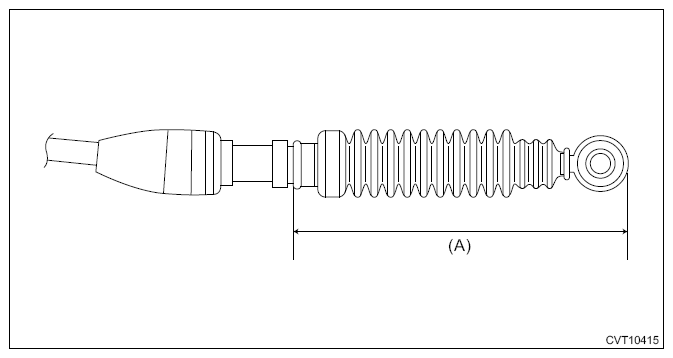
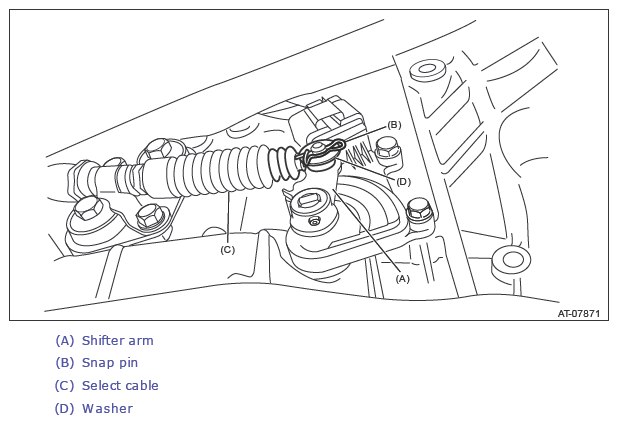
- Remove the snap pin and washer, and disconnect the select cable.
CAUTION:
Do not apply extra overload while holding the part (A).
 Courtesy of SUBARU OF AMERICA, INC. Courtesy of SUBARU OF AMERICA, INC.
|
 Courtesy of SUBARU OF AMERICA, INC. Courtesy of SUBARU OF AMERICA, INC.
|
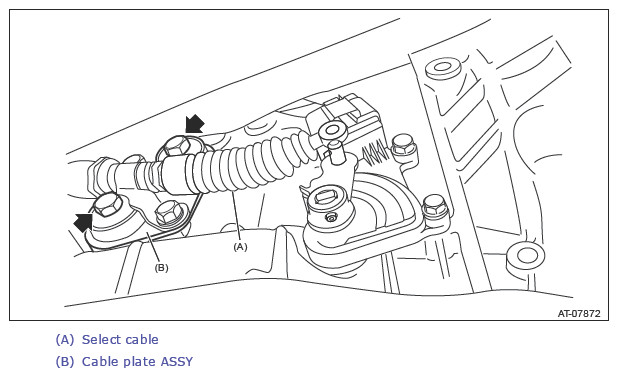
- Remove the cable plate assembly.
 Courtesy of SUBARU OF AMERICA, INC. Courtesy of SUBARU OF AMERICA, INC.
|
- Drain differential gear oil. Refer to CONTINUOUSLY VARIABLE TRANSMISSION (TR690)>DIFFERENTIAL GEAR OIL>REPLACEMENT .
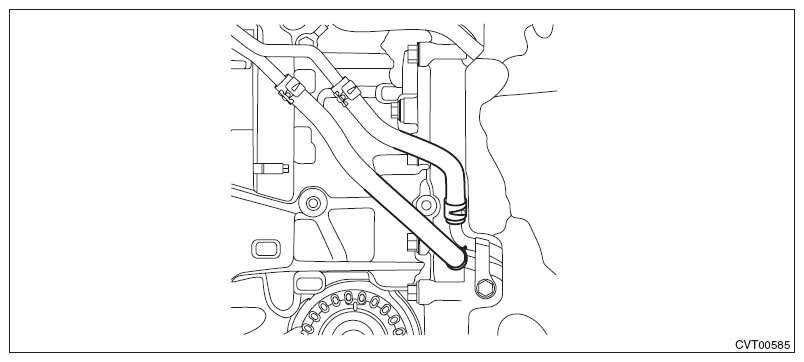
- Remove the CVTF inlet hose and outlet hose.
 Courtesy of SUBARU OF AMERICA, INC. Courtesy of SUBARU OF AMERICA, INC.
|
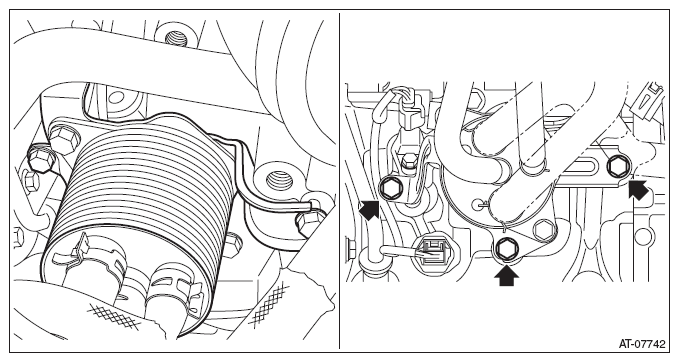
- Remove the CVTF cooler (with warmer feature), and using a piece of wire, affix to a location of the body where it will not interfere with the removal/installation of the transmission.
 Courtesy of SUBARU OF AMERICA, INC. Courtesy of SUBARU OF AMERICA, INC.
|
- Set the ST.
| ST |
41099AC000 |
ENGINE SUPPORT ASSY |
NOTE:
Place a washer with 4 mm (0.16 in) thickness into the gap between the engine block and ST.
 Courtesy of SUBARU OF AMERICA, INC. Courtesy of SUBARU OF AMERICA, INC.
|
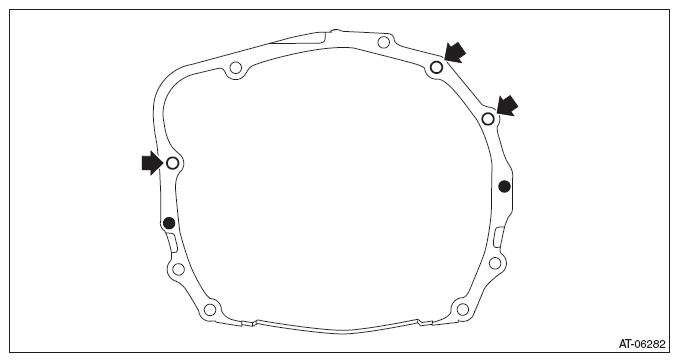
- Remove the three transmission connecting bolts.
 Courtesy of SUBARU OF AMERICA, INC. Courtesy of SUBARU OF AMERICA, INC.
|
- Lift up the vehicle.
- Remove the propeller shaft. Refer to DRIVE SHAFT SYSTEM>PROPELLER SHAFT>REMOVAL
.
- Remove the stabilizer link. Refer to FRONT SUSPENSION>FRONT STABILIZER>REMOVAL
.
- Disconnect the lower arm ball joint and housing.
- Pull out the front drive shaft from transmission using a crowbar.
NOTE:
Place cloth between the tire lever or bar and the transmission in order to avoid damaging the transmission side retainer.
- Holding the joint of front drive shaft from transmission side, pull out the drive shaft from transmission with care not to stretch the boot.
NOTE:
- Before pulling the front drive shaft RH, turn the steering wheel to the right hand at full lock.
- Before pulling the front drive shaft LH, turn the steering wheel to the left hand at full lock.
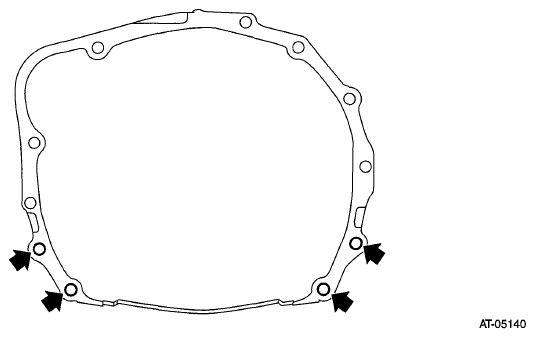
- Remove the two transmission connecting bolts and two nuts (lower side).
 Courtesy of SUBARU OF AMERICA, INC. Courtesy of SUBARU OF AMERICA, INC.
|
- Set the transmission jack under the transmission.
NOTE:
Make sure that the support plates of transmission jack do not touch the oil pan.
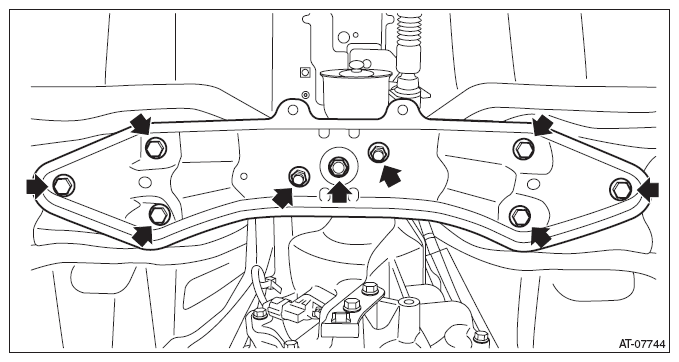
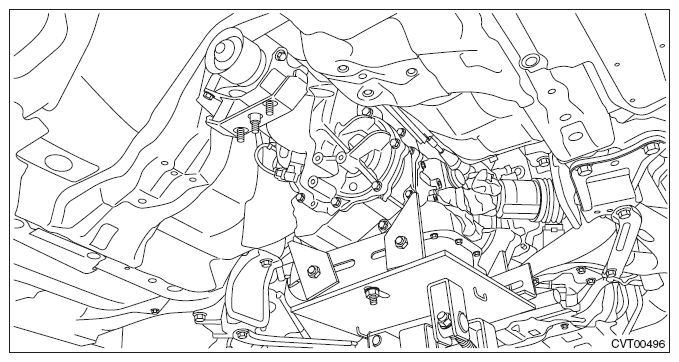
- Remove the transmission rear crossmember.
 Courtesy of SUBARU OF AMERICA, INC. Courtesy of SUBARU OF AMERICA, INC.
|
- While lowering the transmission jack gradually, fully retract the engine support, and then tilt the engine rearward.
- Remove the transmission assembly.
NOTE:
Remove it while moving the transmission jack up and down so that the engine and transmission remain directly aligned.
 Courtesy of SUBARU OF AMERICA, INC. Courtesy of SUBARU OF AMERICA, INC.
|
- Remove the rear cushion rubber.
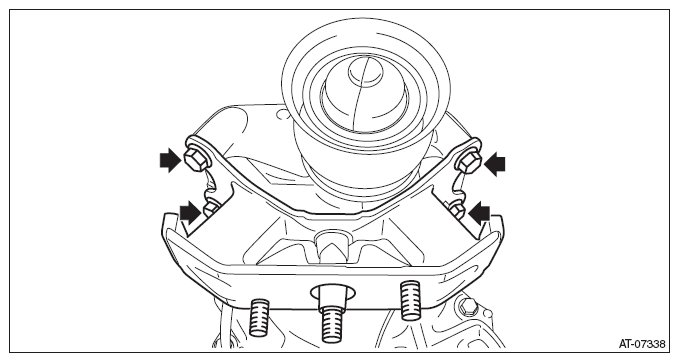 Courtesy of SUBARU OF AMERICA, INC. Courtesy of SUBARU OF AMERICA, INC.
|