Section 1 (Engine Starting System & Charging System (3.6L)): Generator: Disassembly
WARNING: This page is about a different variant/trim than selected.
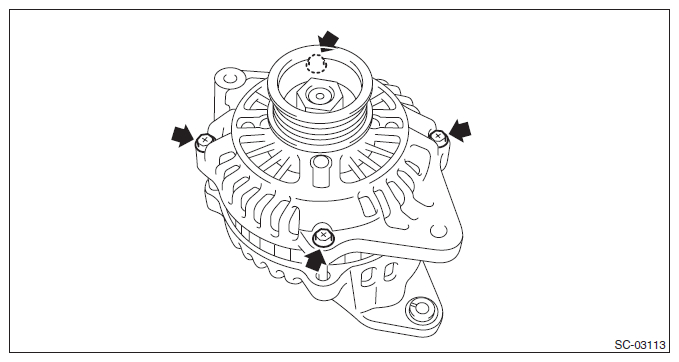
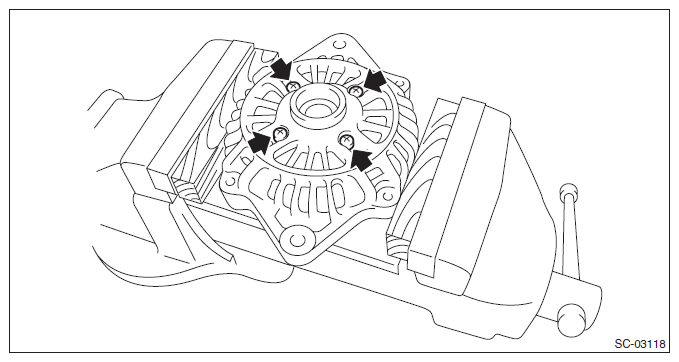
- Remove the through bolt.
 Courtesy of SUBARU OF AMERICA, INC. Courtesy of SUBARU OF AMERICA, INC.
|
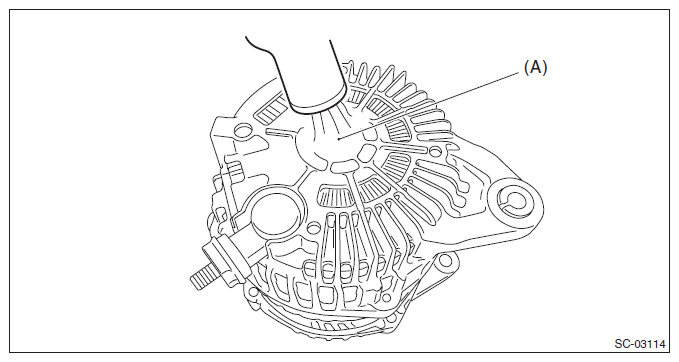
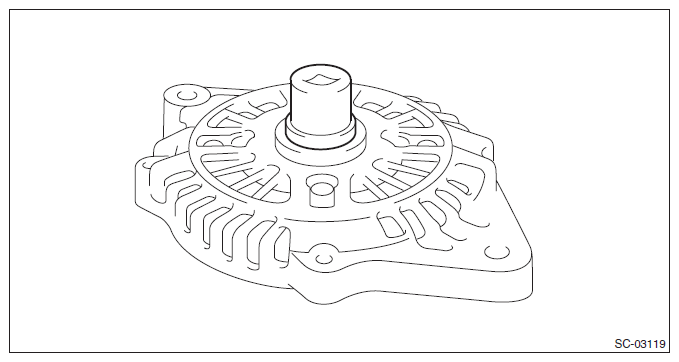
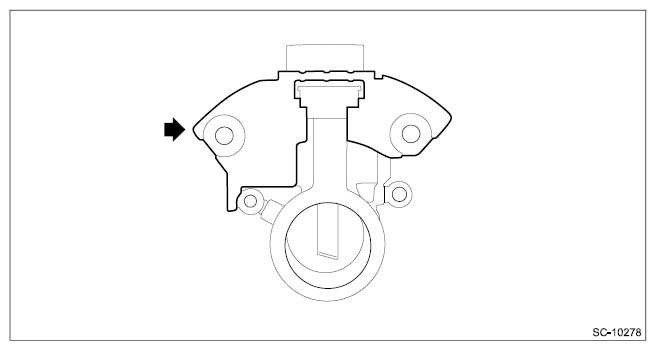
- Use a drier to heat the rear cover (A) portion to 50 - 60°C (122 - 140°F).
 Courtesy of SUBARU OF AMERICA, INC. Courtesy of SUBARU OF AMERICA, INC.
|
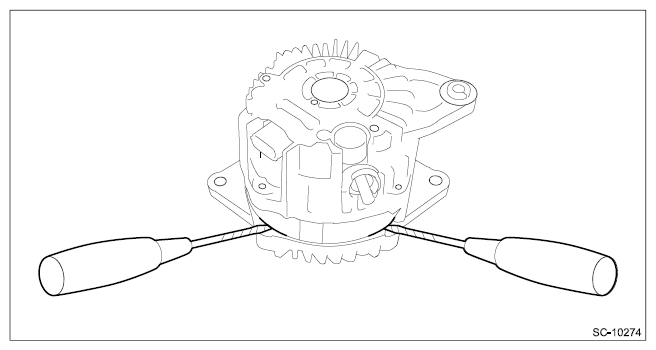
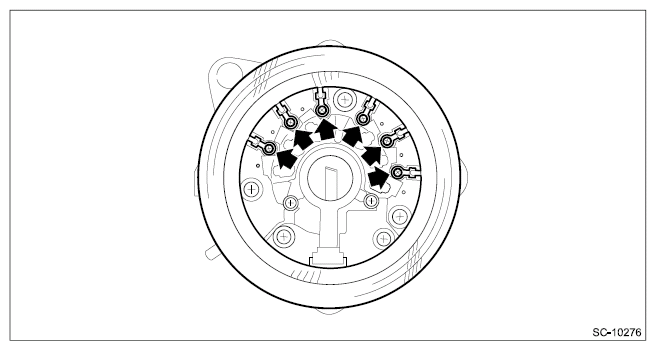
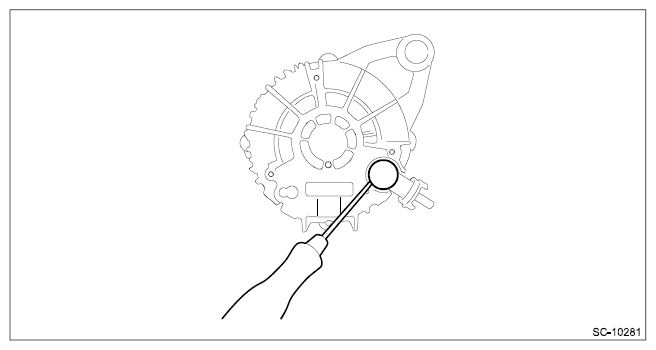
- Insert a flat tip screwdriver or similar tool wrapped with protective tape into the gap between stator core and the front cover to remove the rotor from the rear cover.
CAUTION:
- Be careful not to deform or damage each part during operation.
- Disassemble while lifting the entire part equally.
 Courtesy of SUBARU OF AMERICA, INC. Courtesy of SUBARU OF AMERICA, INC.
|
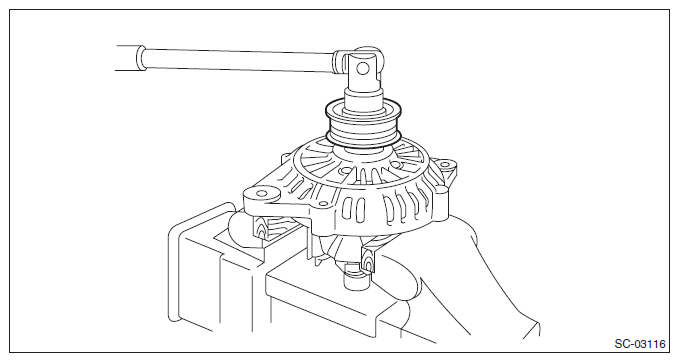
- Hold the rotor on a vise and remove the pulley.
CAUTION:
- Place aluminum plates or wooden pieces into the contacting surfaces between the vise and the rotor to prevent rotor damage.
- Do not tighten the vise more than necessary.
 Courtesy of SUBARU OF AMERICA, INC. Courtesy of SUBARU OF AMERICA, INC.
|
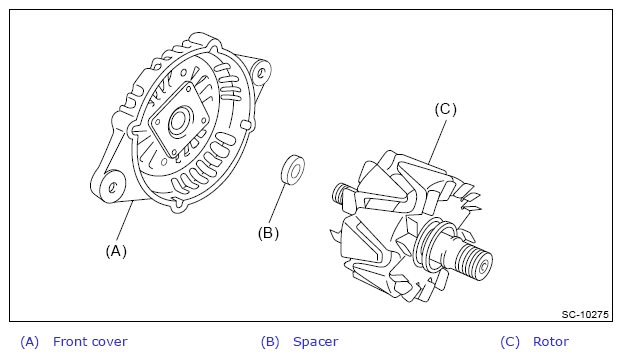
- Remove the rotor from the front cover.
 Courtesy of SUBARU OF AMERICA, INC. Courtesy of SUBARU OF AMERICA, INC.
|
- When removing the ball bearing
- Remove the bearing retainer.
NOTE:
If necessary, use a vise to secure the front cover.
 Courtesy of SUBARU OF AMERICA, INC. Courtesy of SUBARU OF AMERICA, INC.
|
- Set an appropriate tool (such as a socket wrench of proper size) for the bearing inner race.
 Courtesy of SUBARU OF AMERICA, INC. Courtesy of SUBARU OF AMERICA, INC.
|
- Use the press to remove the ball bearings from the front cover.
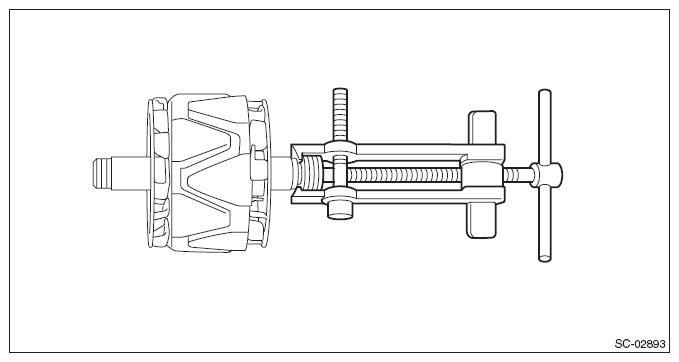
- Using the bearing puller, remove the bearings from the rotor.
NOTE:
This operation is required when replacing the bearings.
 Courtesy of SUBARU OF AMERICA, INC. Courtesy of SUBARU OF AMERICA, INC.
|
- Remove the stator coil.
 Courtesy of SUBARU OF AMERICA, INC. Courtesy of SUBARU OF AMERICA, INC.
|
- Remove the IC regulator.
 Courtesy of SUBARU OF AMERICA, INC. Courtesy of SUBARU OF AMERICA, INC.
|
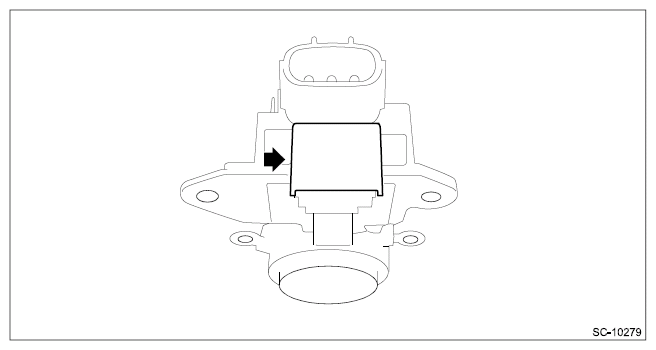
- When removing the brush
- Remove the cover A.
 Courtesy of SUBARU OF AMERICA, INC. Courtesy of SUBARU OF AMERICA, INC.
|
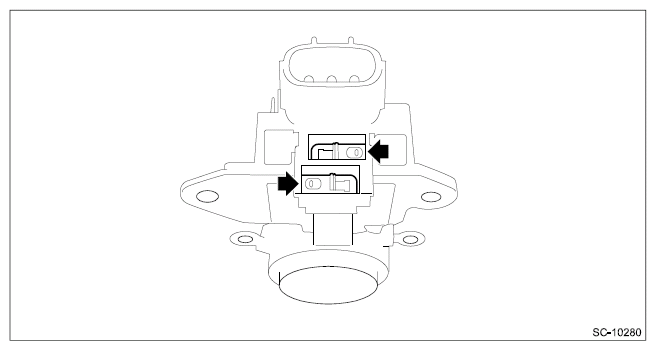
- Remove the cover B.
 Courtesy of SUBARU OF AMERICA, INC. Courtesy of SUBARU OF AMERICA, INC.
|
- Use a soldering iron to separate the connecting portion and remove the brush.
 Courtesy of SUBARU OF AMERICA, INC. Courtesy of SUBARU OF AMERICA, INC.
|
- When removing the rectifier
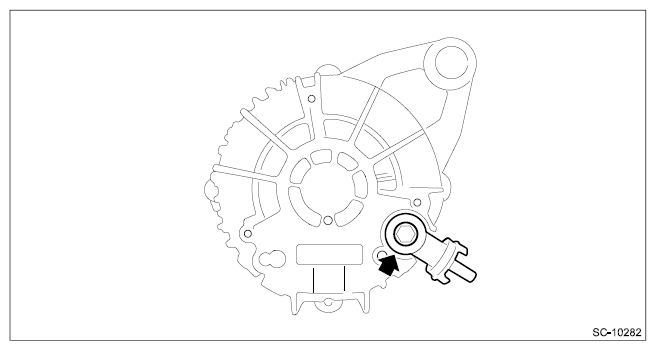
- Remove the cap from the terminal B.
 Courtesy of SUBARU OF AMERICA, INC. Courtesy of SUBARU OF AMERICA, INC.
|
- Remove the terminal B.
 Courtesy of SUBARU OF AMERICA, INC. Courtesy of SUBARU OF AMERICA, INC.
|
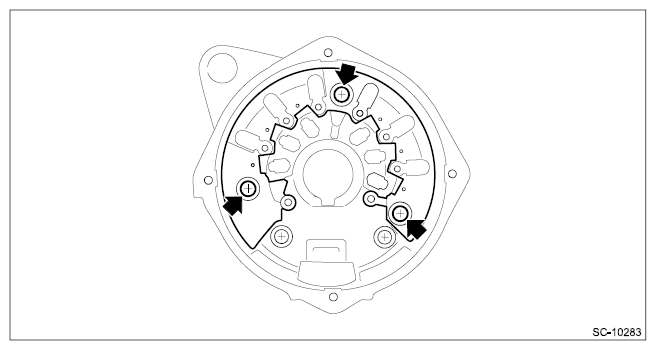
- Remove the rectifier.
 Courtesy of SUBARU OF AMERICA, INC. Courtesy of SUBARU OF AMERICA, INC.
|
- Remove any grease completely from the rear cover and the rectifier.