- Removal of separate type rear seat cushion assembly RH (Refer to
DISASSEMBLY
)
- Removal of separate type rear seat cushion assembly LH
NOTE:
Remove the part in the same manner as RH side.
- Removal of the front door scuff plate RH (Refer to
DISASSEMBLY
)
- Removal of front door scuff plate LH
NOTE:
Remove the part in the same manner as RH side.
- Removal of front door opening trim weather strip RH (Refer to
DISASSEMBLY
)
- Removal of front door opening trim weather strip LH
NOTE:
Remove the part in the same manner as RH side.
- Disconnection of trunk trim cover inner RH (Refer to
DISASSEMBLY
)
- Disconnection of trunk trim cover inner LH
NOTE:
Disconnect in the same manner as RH side.
- Removal of quarter lower trim RH (Refer to
DISASSEMBLY
)
- Removal of quarter lower trim LH
NOTE:
Remove the part in the same manner as RH side.
- Removal of quarter trim lid RH (Refer to
DISASSEMBLY
)
- Removal of quarter trim lid sub-assembly LH
NOTE:
Remove the part in the same manner as RH side.
- Removal of the rear window side garnish RH (Refer to
DISASSEMBLY
)
- Removal of the rear window side garnish LH
NOTE:
Remove the part in the same manner as RH side.
- Removal of package tray trim panel assembly
- Disconnect the connector.
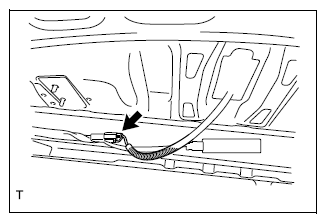 Courtesy of SUBARU OF AMERICA, INC.
- Remove the 4 clips.
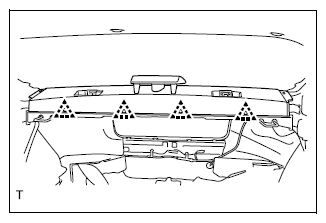 Courtesy of SUBARU OF AMERICA, INC.
- Release the four clips and remove the package tray trim panel assembly and center stop light assembly as a single unit by pulling them toward you.
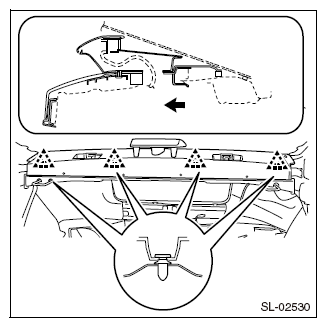 Courtesy of SUBARU OF AMERICA, INC.
- Removal of door control receiver
- Disconnect the connector.
- Remove the bolt.
- Remove the guide and remove the door control receiver.
CAUTION:
Do not drop or apply strong impact to the door control receiver.
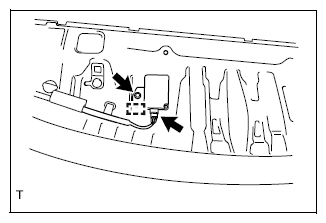 Courtesy of SUBARU OF AMERICA, INC.