- Prepare the Subaru Select Monitor kit. < Refer to
SPECIAL TOOL , PREPARATION TOOL, General Description. >
 Courtesy of SUBARU OF AMERICA, INC.
- Prepare PC with Subaru Select Monitor installed.
- Connect the USB cable to SDI (Subaru Diagnosis Interface) and USB port on the personal computer (dedicated port for the Subaru Select Monitor).
NOTE:
The dedicated port for the Subaru Select Monitor means the USB port which was used to install the Subaru Select Monitor.
- Connect the diagnosis cable to SDI.
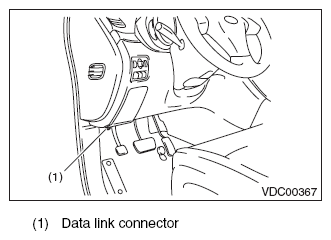
- Connect SDI to data link connector located in the lower portion of the instrument panel (on the driver's side).
 Courtesy of SUBARU OF AMERICA, INC.
CAUTION:
Do not connect the scan tools other than the Subaru Select Monitor.
- Start the PC.
- Turn the ignition switch to ON (engine OFF) and run the "PC application for Subaru Select Monitor".
NOTE:
For detailed operation procedures, refer to
"PC application help for Subaru Select Monitor".
- If VDC and Subaru Select Monitor cannot communicate, check the communication circuit. < Refer to
COMMUNICATION FOR INITIALIZING IMPOSSIBLE , INSPECTION, Subaru Select Monitor. >
- Record the DTC and data.