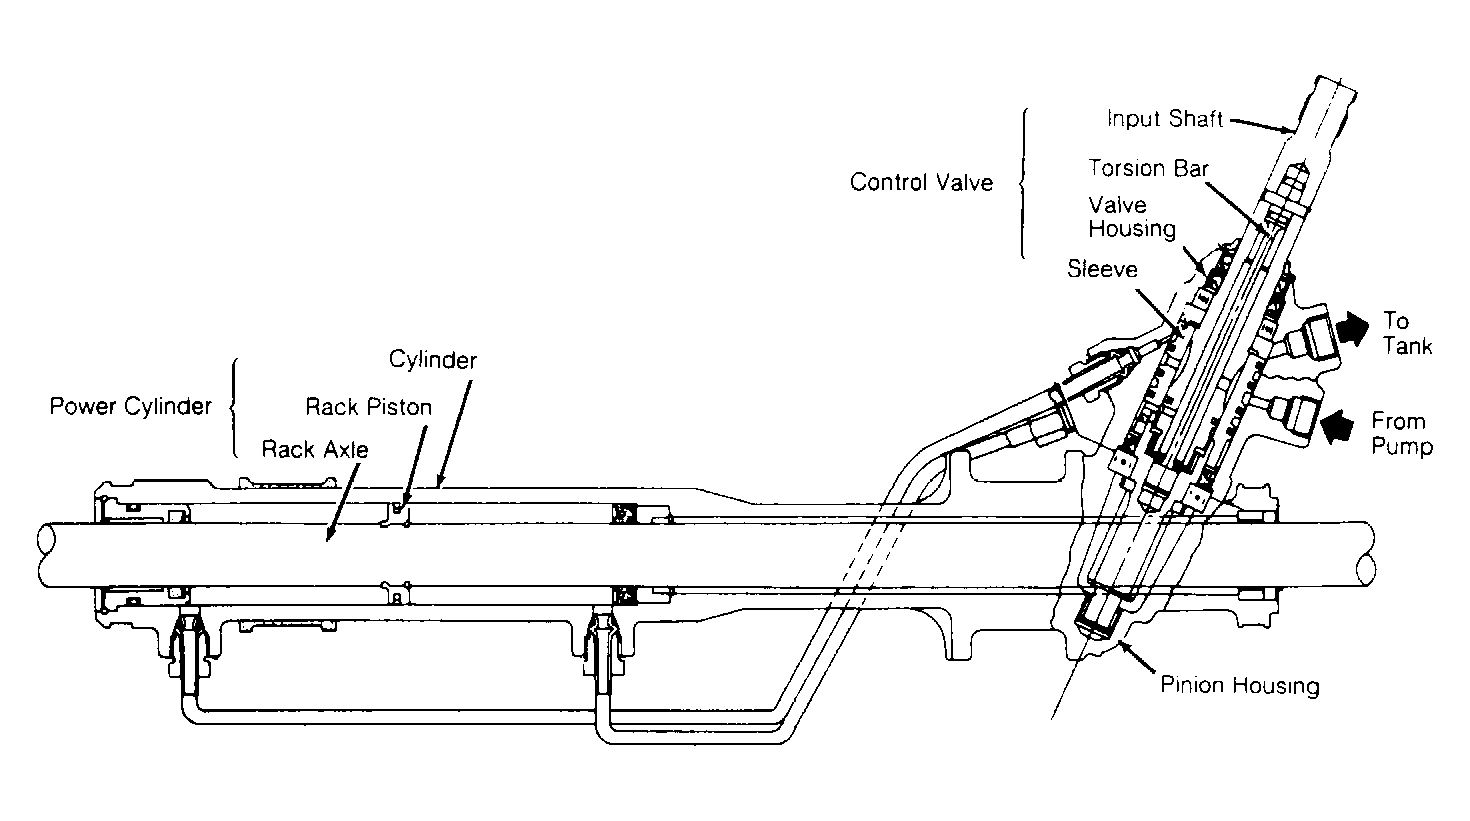
Valve Assembly: Reassembly
- Fit pinion and valve assembly onto valve housing. Apply Dexron-II ATF to seal and Installer Set (926360000
). Put valve assembly on Installer "A" of Installer Set (926370000
). Place installer "A" of Installer Set (926360000
) over pinion shaft, and place oil seal over installer "A". Place installer "B" on oil seal, and tap seal into place.
- Remove installer set. Put backing washer on top of oil seal. Use installer "B" of Installer Set (926370000
) to tap bearing into place. Install snap ring. Apply Dexron-II ATF to pinion housing oil seal, and press in housing using Installer (926350000
).
- Install snap ring and dust cover. Apply Dexron-II ATF to outer surface of pinion shaft and valve body "O" ring.
 Courtesy of SUBARU OF AMERICA, INC.
- Apply grease to inside of valve housing, back-up ring and "Y" packing. Apply grease to mating surface of Installer (926300000
). Drive dust seal into place. Ensure seal faces proper direction. Drive in "Y" packing and back-up ring. Ensure "Y" packing faces proper direction.
- Use Remover (926290000
) to press bearing into place. Fill dust seal with grease. Apply grease to Guide (926310000
) and input shaft. Install guide over end of input shaft. Insert pinion and valve assembly into valve housing until lip of pinion oil seal touches valve housing. Push valve housing in until pinion and valve assembly fits.
- Apply grease to lip of dust cover. Install cover until it butts up against graded section of input shaft. Ensure no more than 0-.02"(0-.5 mm) clearance exists between dust cover lip and end of housing.