Park/Neutral Position Switch ASSY (ATM): Replacement
- REMOVE BATTERY
- SEPARATE TRANSMISSION CONTROL CABLE ASSY
- Remove the nut and disconnect the control cable from the control shaft lever.
- Remove the clip and disconnect the control cable from the control cable bracket.
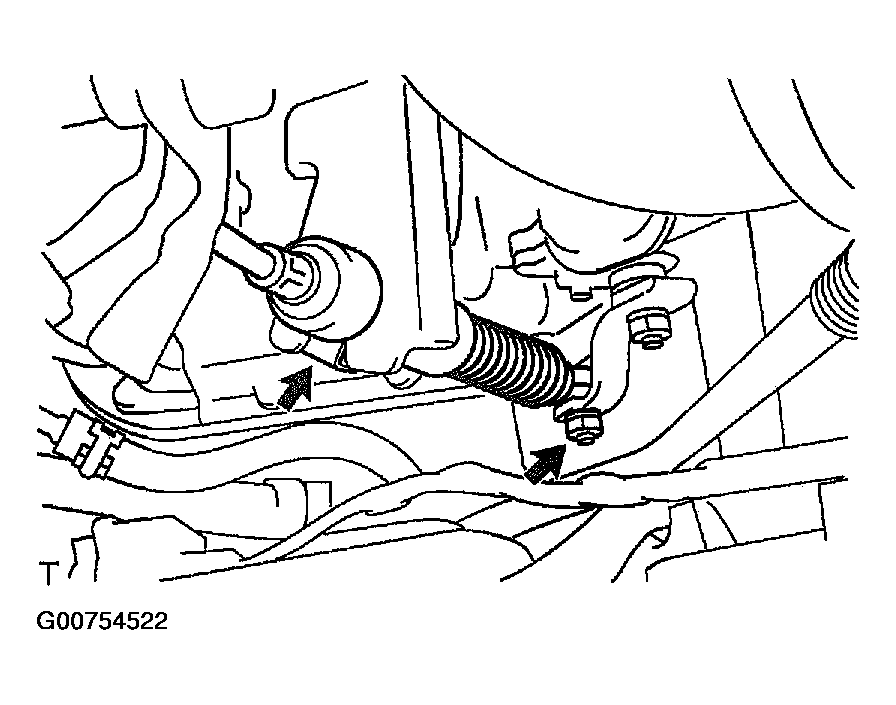 Courtesy of © TOYOTA, LICENSE AGREEMENT TMS1002
- REMOVE PARK/NEUTRAL POSITION SWITCH ASSY
- Disconnect the connector from the park/neutral position switch assy.
- Remove the nut, washer and control shaft lever.
- Pry out the lock plate and remove the manual valve shaft nut.
- Remove the 2 bolts and pull out the park/neutral position switch assy.
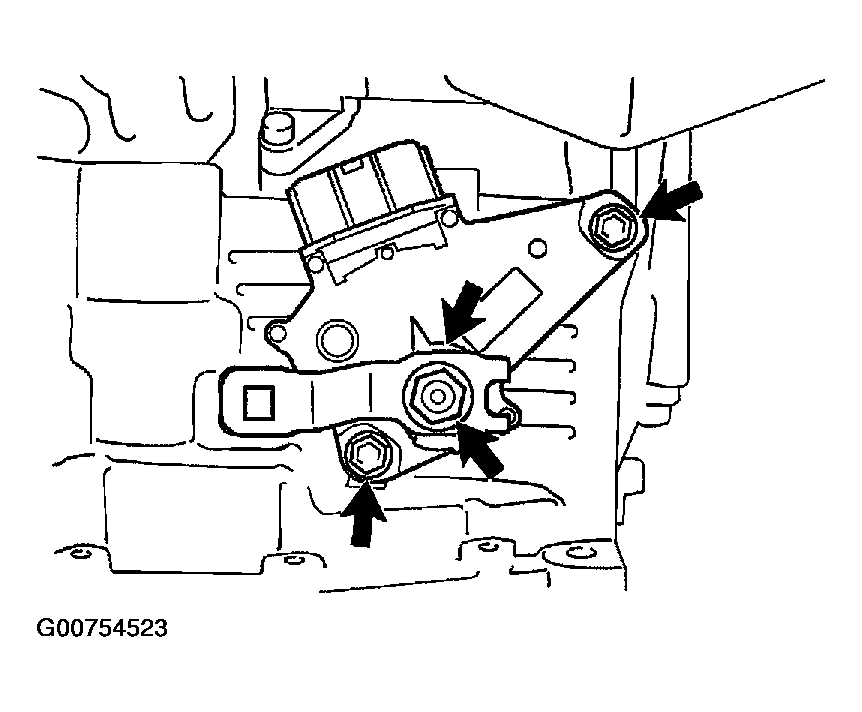 Courtesy of © TOYOTA, LICENSE AGREEMENT TMS1002
- INSTALL PARK/NEUTRAL POSITION SWITCH ASSY
- Install the park/neutral position switch assy to the manual valve shaft.
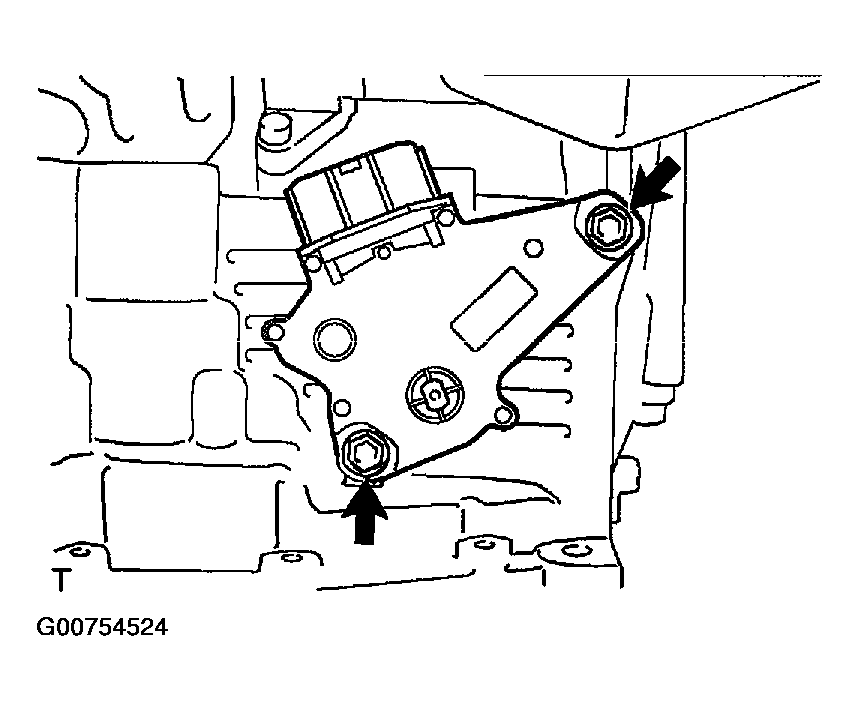 Courtesy of © TOYOTA, LICENSE AGREEMENT TMS1002
- Place the lock plate with a new one and tighten the manual valve shaft nut.
- Torque: 6.9 N.m (70 kgf.cm, 61 in.lbf)
- Temporarily install the 2 bolts.
- Temporarily install the control shaft lever.
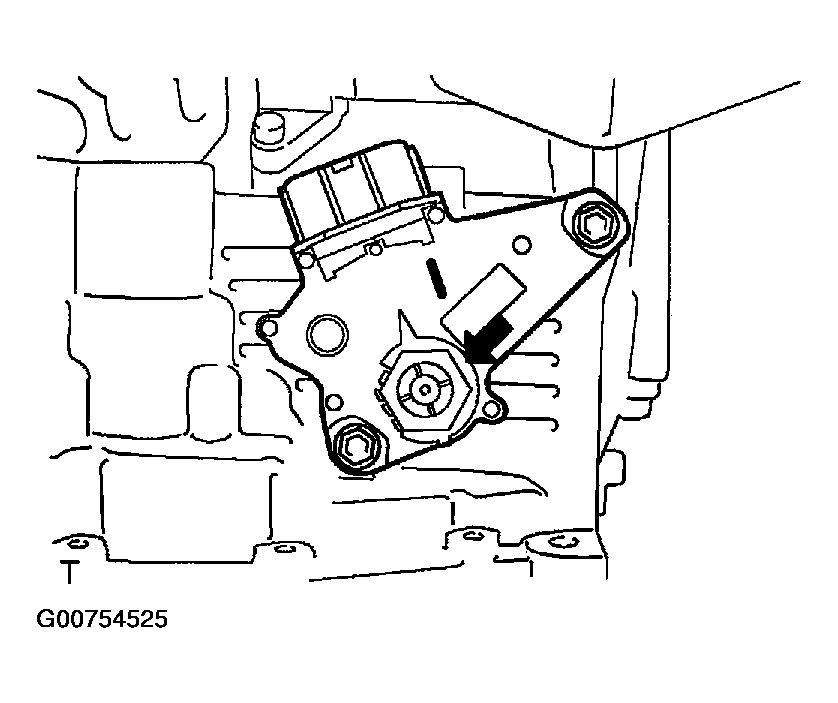 Courtesy of © TOYOTA, LICENSE AGREEMENT TMS1002
- Turn the lever counterclockwise until it stops, then turn it clockwise 2 notches.
- Remove the control shaft lever.
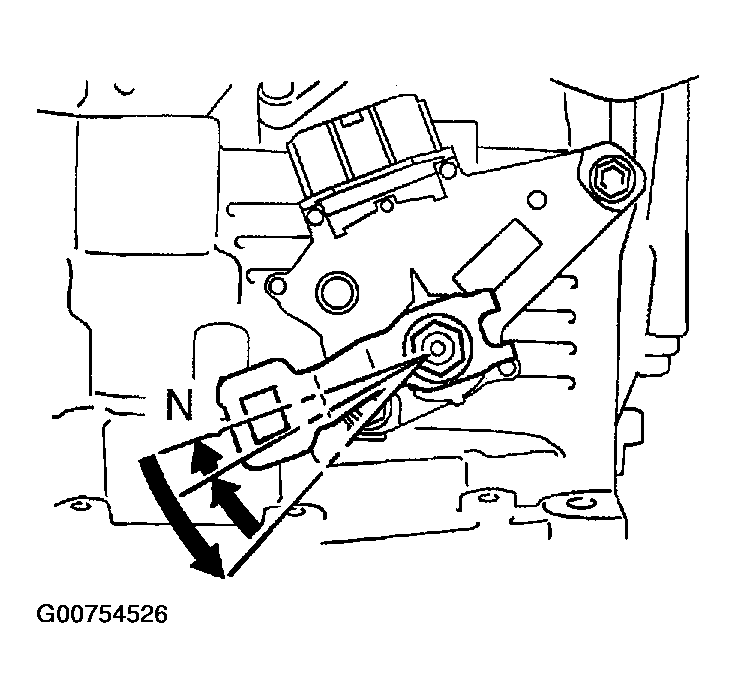 Courtesy of © TOYOTA, LICENSE AGREEMENT TMS1002
- Align the groove with neutral basic line.
- Hold the switch in this position and tighten the 2 bolts.
- Torque: 5.4 N.m (55 kgf.cm, 48 in.lbf)
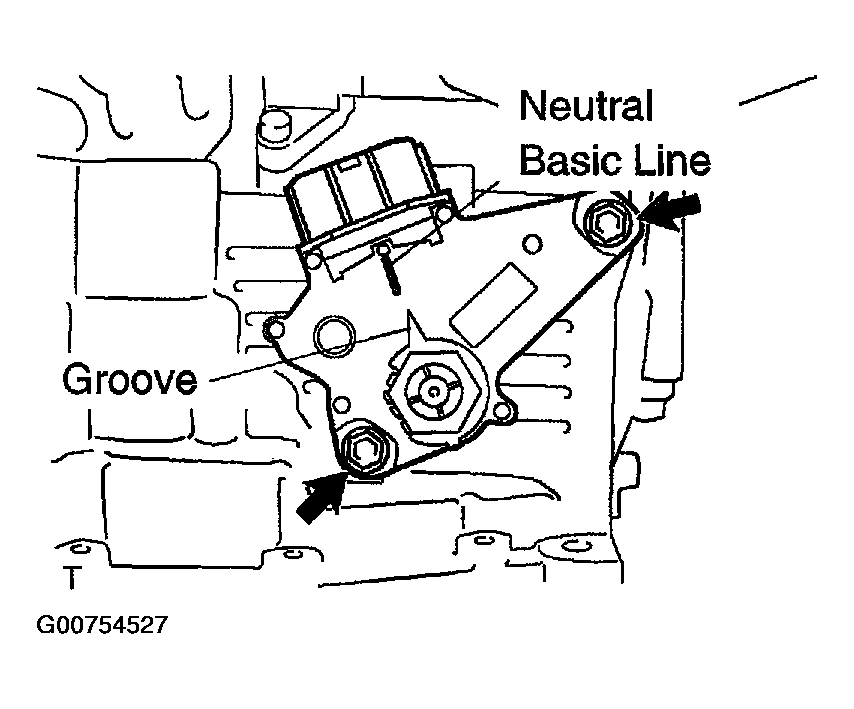 Courtesy of © TOYOTA, LICENSE AGREEMENT TMS1002
- Using a screwdriver, stake the nut with the lock plate.
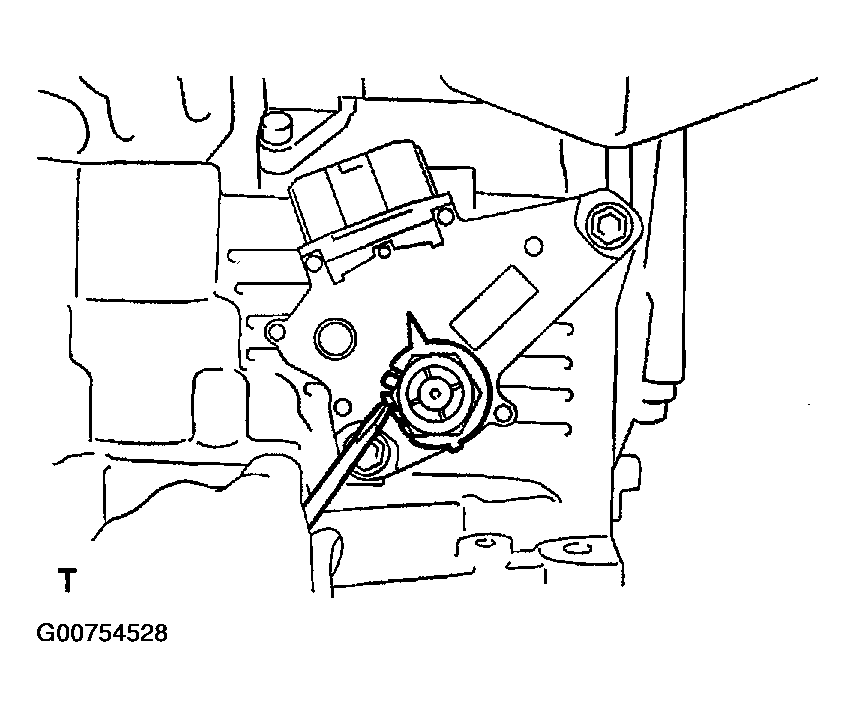 Courtesy of © TOYOTA, LICENSE AGREEMENT TMS1002
- Install the control shaft lever, washer, and nut.
- Torque: 13 N.m (130 kgf.cm, 9 ft.lbf)
- Connect the connector to the park/neutral position switch assy.
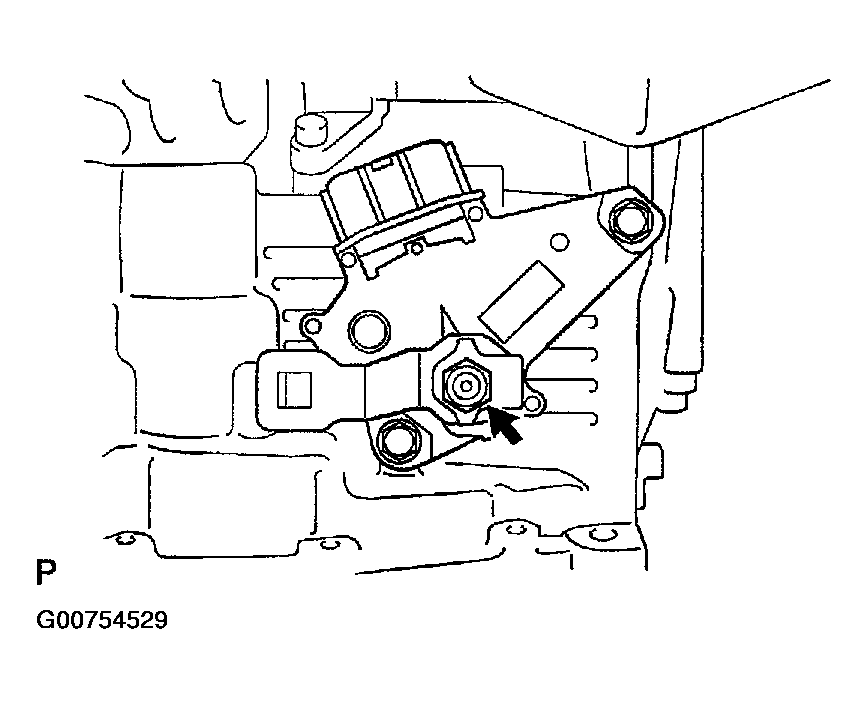 Courtesy of © TOYOTA, LICENSE AGREEMENT TMS1002
- INSTALL TRANSMISSION CONTROL CABLE ASSY
- Temporarily install the control cable to the control shaft lever with the nut.
- Install the control cable to the bracket with the new clip.
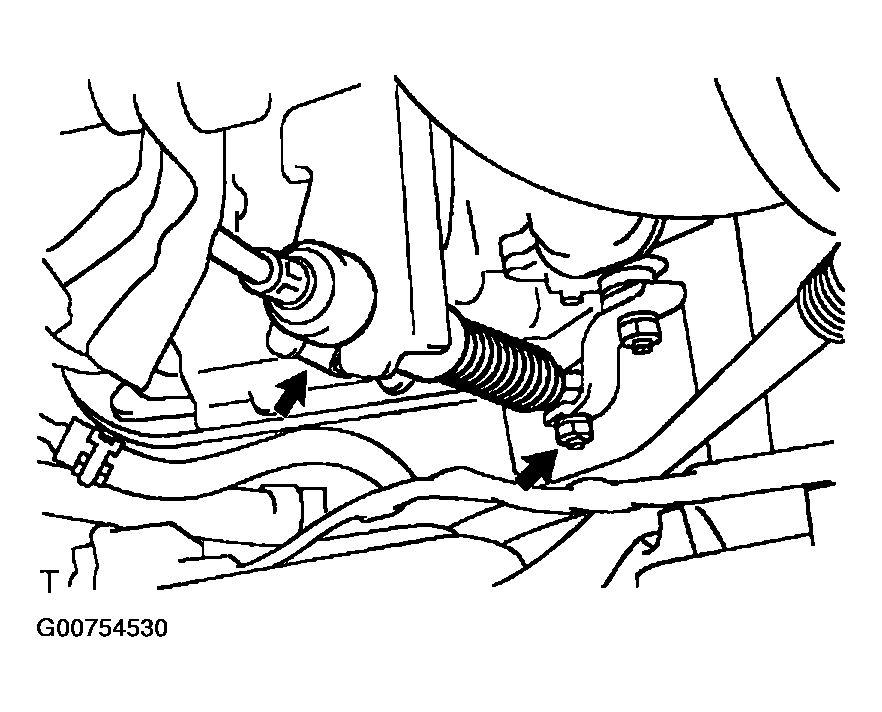 Courtesy of © TOYOTA, LICENSE AGREEMENT TMS1002
- ADJUST SHIFT LEVER POSITION (See ADJUSTMENT )
- INSPECT SHIFT LEVER POSITION (See ADJUSTMENT )
- INSPECT PARK/NEUTRAL POSITION SWITCH ASSY (See ADJUSTMENT )