Installation Procedure
 Courtesy of GENERAL MOTORS CORP.
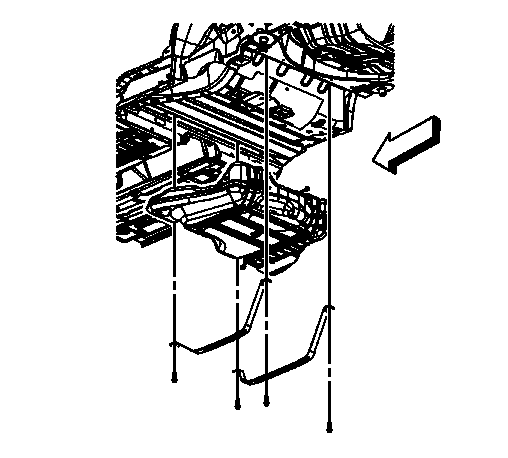
- Have assistants support either side of the fuel tank.
- If applicable, begin to install the right side of the fuel tank over the muffler assembly.
- If applicable, raise the right side of the fuel tank into position inboard of the right frame rail. Use care in feeding the fuel feed, EVAP line wiring harness over the muffler assembly.
- If applicable and the muffler assembly was removed, have assistants raise the fuel tank into position.
- Install fuel tank straps and bolts and tighten the bolts to 20 N.m (15 lb ft).
 Courtesy of GENERAL MOTORS CORP.
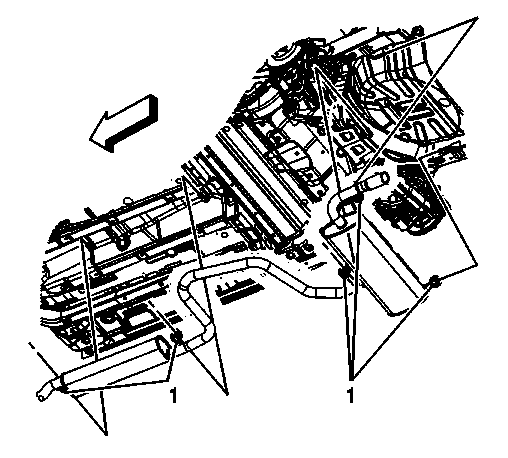
- Raise the muffler assembly into position if applicable, otherwise install the muffler assembly. Refer to Exhaust Muffler Replacement (LAT and LZ4)
or Exhaust Muffler Replacement (LE5 With MH8)
.
- With the aid of an assistant, install the muffler insulators (1) to the underbody hangers.
- Remove the jackstand from under the muffler assembly.
 Courtesy of GENERAL MOTORS CORP.
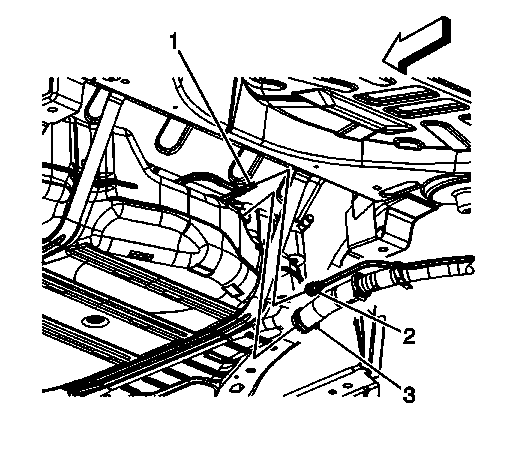
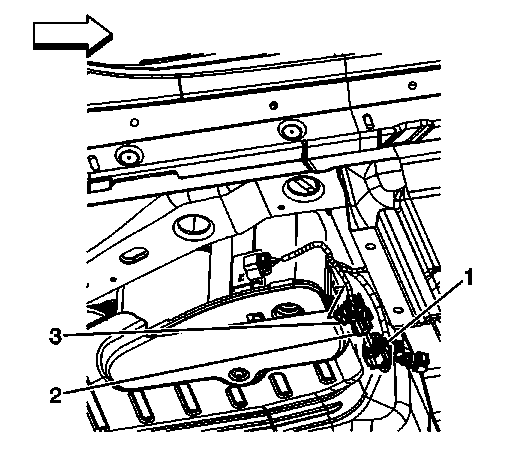
- Install the fuel fill pipe hose to the fuel tank.
- Connect the fuel tank fill EVAP emission pipe quick connect fitting (2) to the fuel tank vent pipe (1). Refer to Plastic Collar Quick Connect Fitting Service .
- Tighten the fuel fill pipe hose clamp (3) at the fuel tank and tighten the clamp to 4 N.m (35 lb in).
 Courtesy of GENERAL MOTORS CORP.
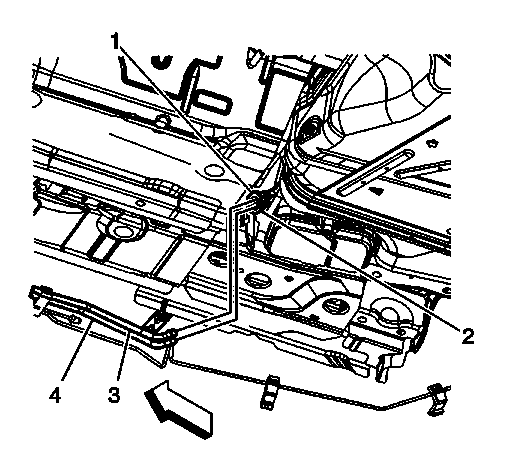
- Remove the caps from the fuel and EVAP pipes.
- Connect the fuel tank EVAP pipe quick connect fitting (2) to the chassis EVAP pipe (4). Refer to Plastic Collar Quick Connect Fitting Service .
- Connect the fuel tank fuel feed pipe quick connect fitting (1) to the chassis fuel feed pipe (3). Refer to Plastic Collar Quick Connect Fitting Service .
 Courtesy of GENERAL MOTORS CORP.
- Install the rear ABS wiring harness electrical connector (2) clip to the EVAP canister.
- Connect the body wiring harness electrical connector (1) to the rear ABS wiring harness electrical connector (2).
 Courtesy of GENERAL MOTORS CORP.
- Install the body wiring harness electrical connector clip (3) to the underbody.
- Connect the fuel pressure sensor connector if equipped.
- Connect the fuel tank fuel pump module wiring harness electrical connector (1) to the body wiring harness electrical connector (2).
- Lower the vehicle.
- Refill the fuel tank.
- Tighten the fuel fill cap.
- Inspect for leaks.
- Turn ON the ignition, with the engine OFF for 10 seconds.
- Turn OFF the ignition for 10 seconds.
- Turn ON the ignition, with the engine OFF.
- Inspect for fuel leaks.