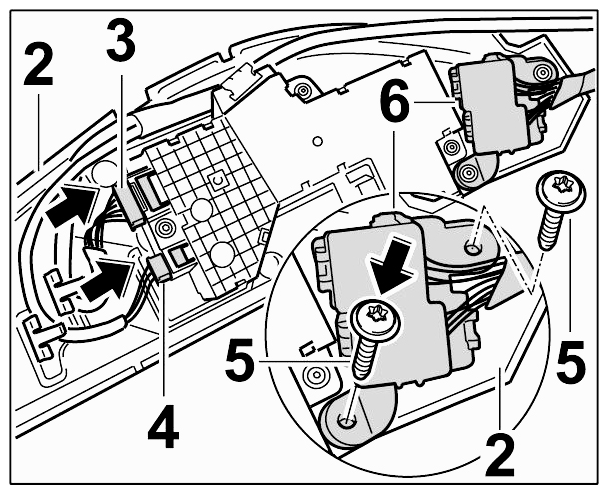
Installing Control Part Trim Panel
- Position tip switch 6
on the control part trim panel 2
and screw down with the fastening screws 5
. Plug in electrical plug connection 3 and 4
.
 Courtesy of PORSCHE CARS NORTH AMERICA, INC.
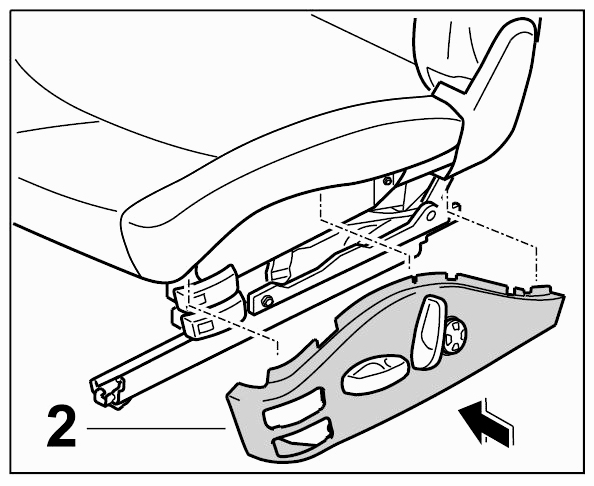
- Insert control part trim panel 2
into the cushion in direction of arrow.
 Courtesy of PORSCHE CARS NORTH AMERICA, INC.
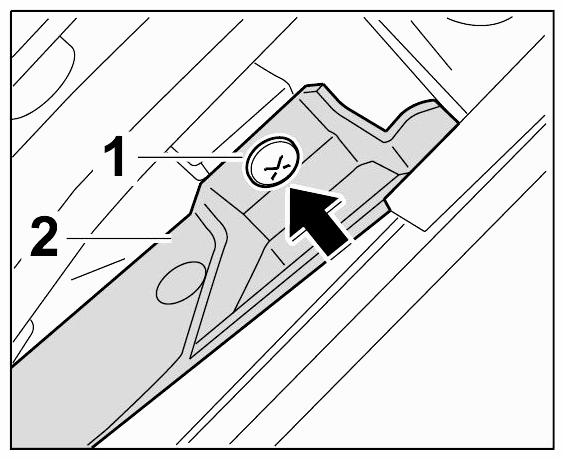
- Screw down rear control part trim panel 2
with the fastening screws 1
. → Tightening torque: 2 ftlb.
 Courtesy of PORSCHE CARS NORTH AMERICA, INC.
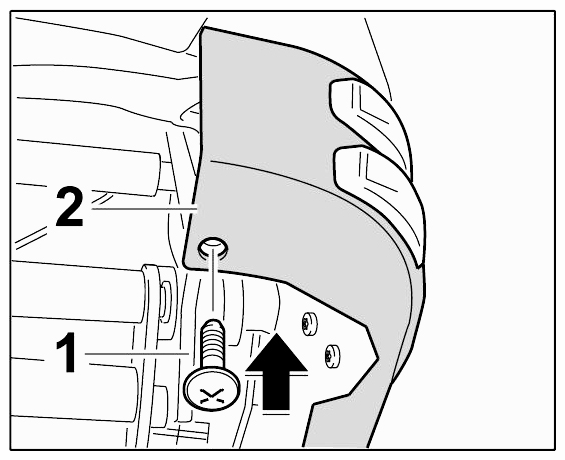
- Screw down front control part trim panel 2
with the fastening screws 1
. → Tightening torque: 2 ftlb.
 Courtesy of PORSCHE CARS NORTH AMERICA, INC.