Removal Procedure
 Courtesy of GENERAL MOTORS CORP.
- Relieve the fuel system pressure. Refer to Fuel Pressure Relief Procedure .
- Drain the fuel tank. Refer to Fuel Tank Draining Procedure .
- Raise and support the vehicle. Refer to Lifting and Jacking the Vehicle
.
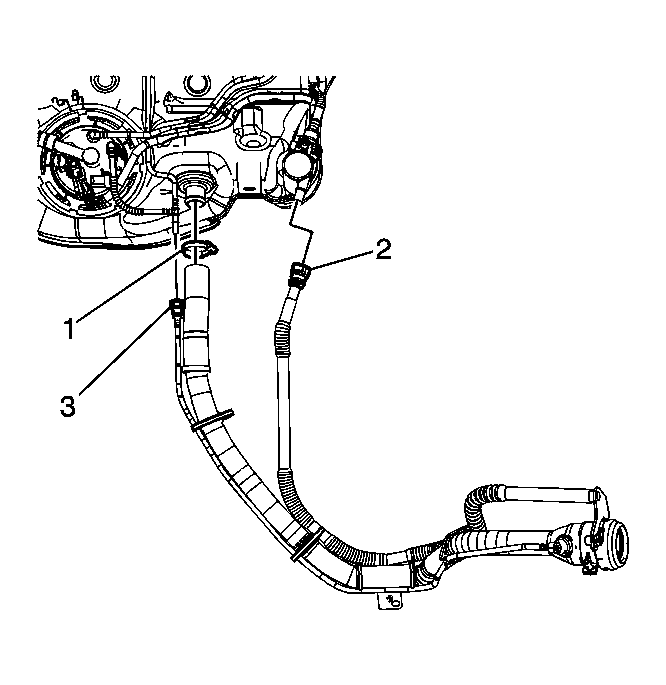
- Loosen the fuel fill pipe hose clamp (1) at the fuel tank.
- Disconnect the evaporative emission (EVAP) canister vent solenoid tube quick connect fitting (2). Refer to Quick Connect Fitting(s) Service (Plastic Collar) .
- Disconnect the vapor recirculation line quick connect fitting (3). Refer to Quick Connect Fitting(s) Service (Plastic Collar) .
- Disconnect the fuel fill pipe hose from the fuel tank.
 Courtesy of GENERAL MOTORS CORP.
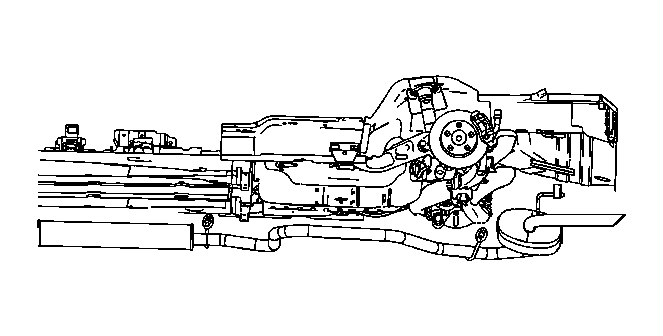
- Release the exhaust pipe insulators from the underbody hangers.
- Release the muffler insulator from the underbody hanger and slowly lower the exhaust to rest on a tall jackstand. If this is not possible, remove the rear half of the exhaust system at the take down flange.
 Courtesy of GENERAL MOTORS CORP.
- If applicable, disengage the rear antilock brake system (ABS) wiring harness connector clip from the side of the EVAP canister bracket.
 Courtesy of GENERAL MOTORS CORP.
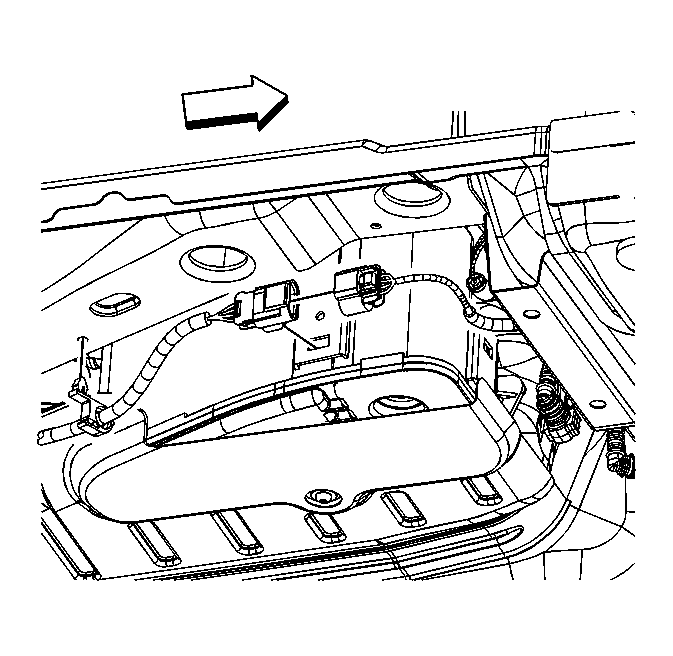
- Disconnect the fuel tank jumper electrical connector from the underbody wiring harness.
- Disengage the underbody wiring harness connector clip from the EVAP canister bracket.
- Use an appropriate adjustable jack to support the fuel tank during removal.
 Courtesy of GENERAL MOTORS CORP.
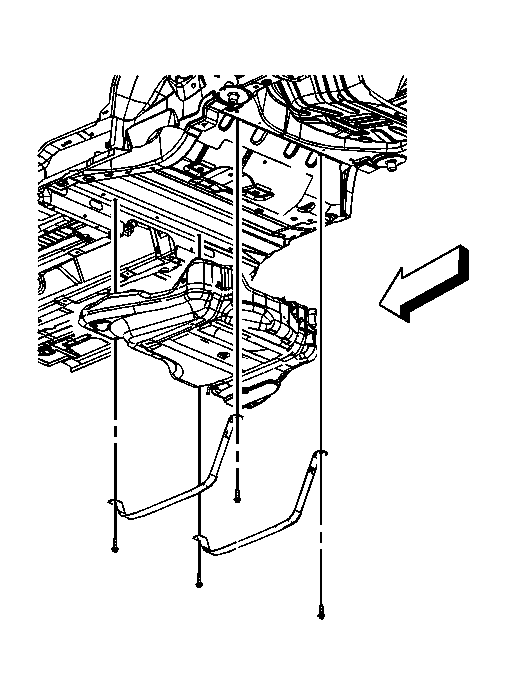
- Remove the fuel tank strap bolts.
- Remove the fuel tank straps.
- Using the adjustable jack, lower the fuel tank slightly in order to access the fuel line connections.
 Courtesy of GENERAL MOTORS CORP.
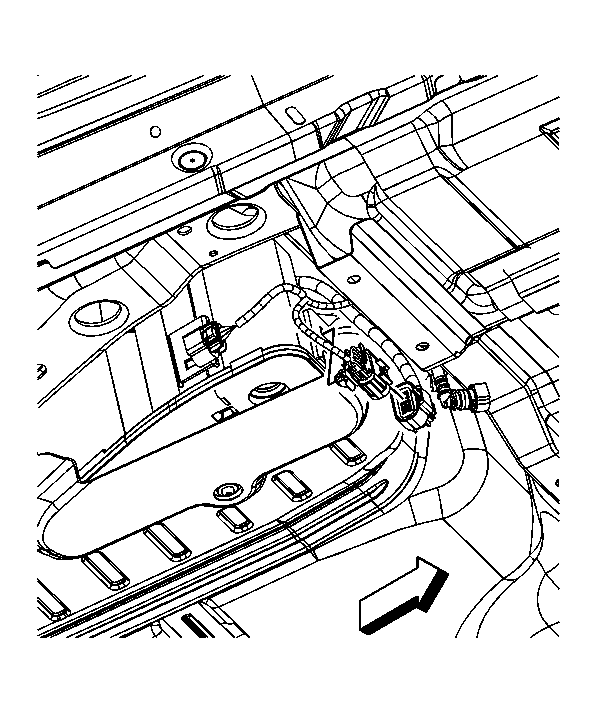
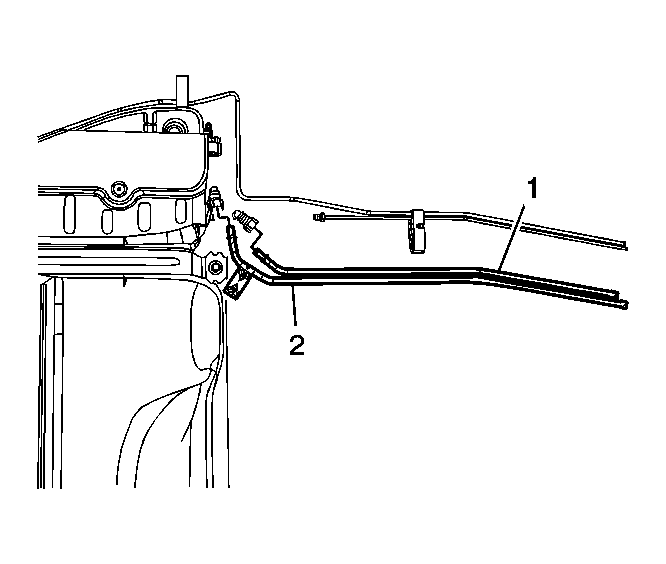
- Disconnect the fuel feed (2) and vapor (1) line quick connect fittings. Refer to Quick Connect Fitting(s) Service (Plastic Collar) .
- Cap or plug the fuel feed and vapor lines in order to prevent fuel loss and/or system contamination.
- In order to clear the exhaust pipe, slowly lower the right side of the fuel tank.
- Once the tank is clear of the right frame rail, remove the fuel tank down and forward toward the right side of the vehicle.
 Courtesy of GENERAL MOTORS CORP.
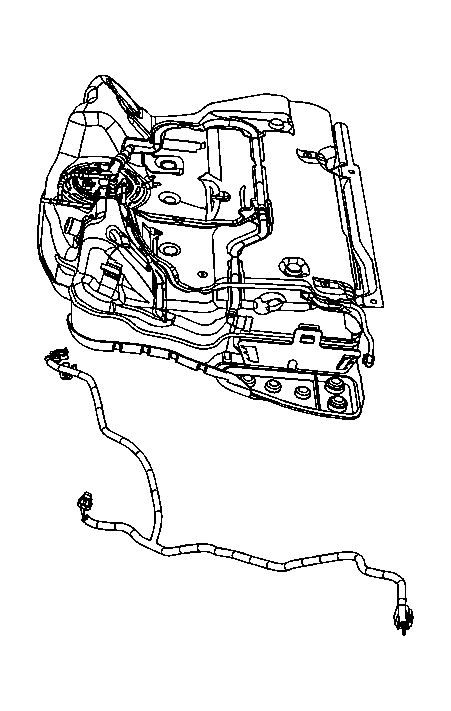
- If the fuel tank is being replaced, disconnect and remove the fuel tank electrical harness.
 Courtesy of GENERAL MOTORS CORP.
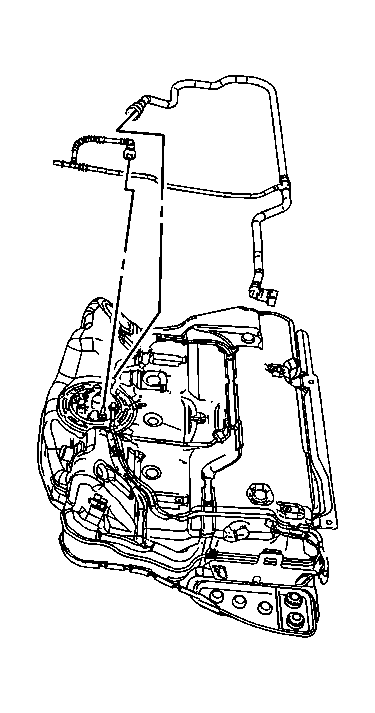
- If the fuel tank is being replaced, perform the following:
- Disconnect and remove the fuel tank vapor line. Refer to Quick Connect Fitting(s) Service (Plastic Collar) .
- Remove the EVAP canister. Refer to Evaporative Emission (EVAP) Canister Replacement .
- Remove the EVAP canister vent solenoid valve. Refer to Evaporative Emission (EVAP) Canister Vent Solenoid Valve Replacement .
- Remove the fuel sender. Refer to Fuel Sender Assembly Replacement .