Installation Procedure
 Courtesy of GENERAL MOTORS CORP.
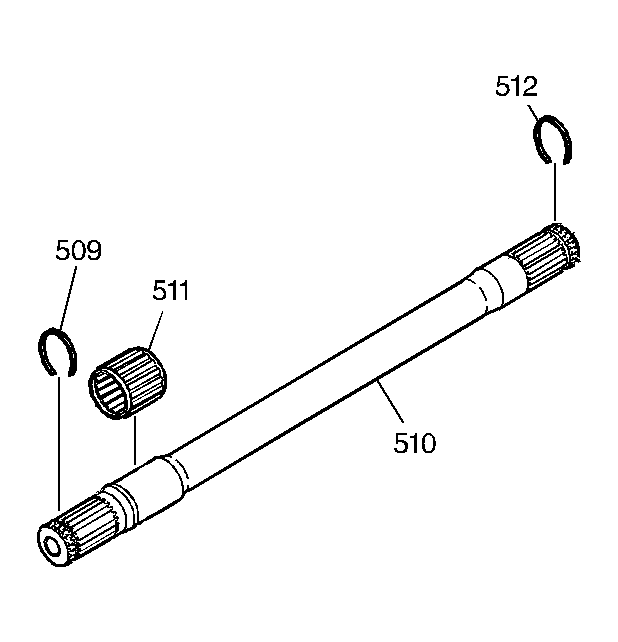
- Install the drive axle retaining ring (509) and the output shaft differential inboard snap ring (512) onto the output shaft (510).
- Install the fourth clutch bearing (511) onto the output shaft (510).
 Courtesy of GENERAL MOTORS CORP.
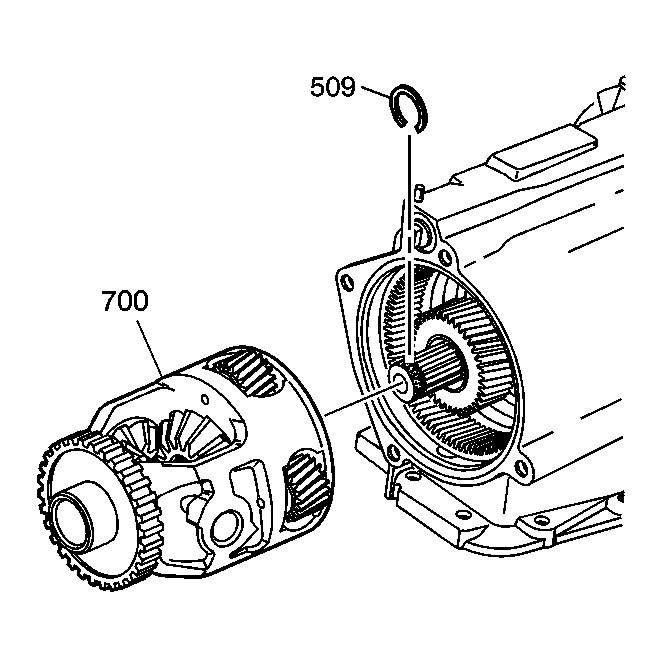
- Hold the final drive differential (700) in place and carefully install the output shaft (510) into the transmission through the left wheel opening and into the differential side gear.
- Install the case extension housing. Refer to Case Extension Housing Replacement .
- Connect the left and right drive axles to the transaxle. Refer to Wheel Drive Shaft Replacement - Front
in Wheel Drive Shafts.