Removal Procedure
- Drain the cooling system. Refer to DRAINING AND FILLING COOLING SYSTEM
.
- Remove the battery. Refer to BATTERY REPLACEMENT
in Engine Electrical.
- Remove the engine cooling fans. Refer to COOLING FAN REPLACEMENT - ELECTRIC
.
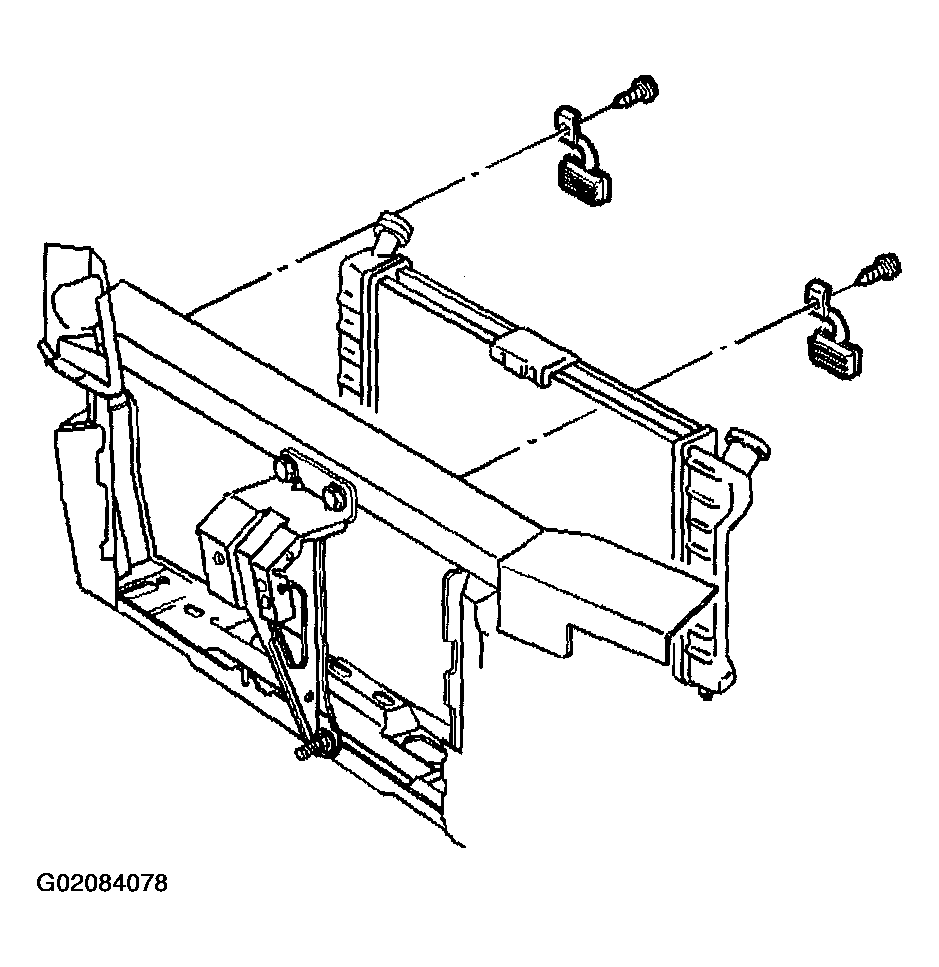
- Remove the upper radiator brackets and bolts.
 Courtesy of GENERAL MOTORS CORP.
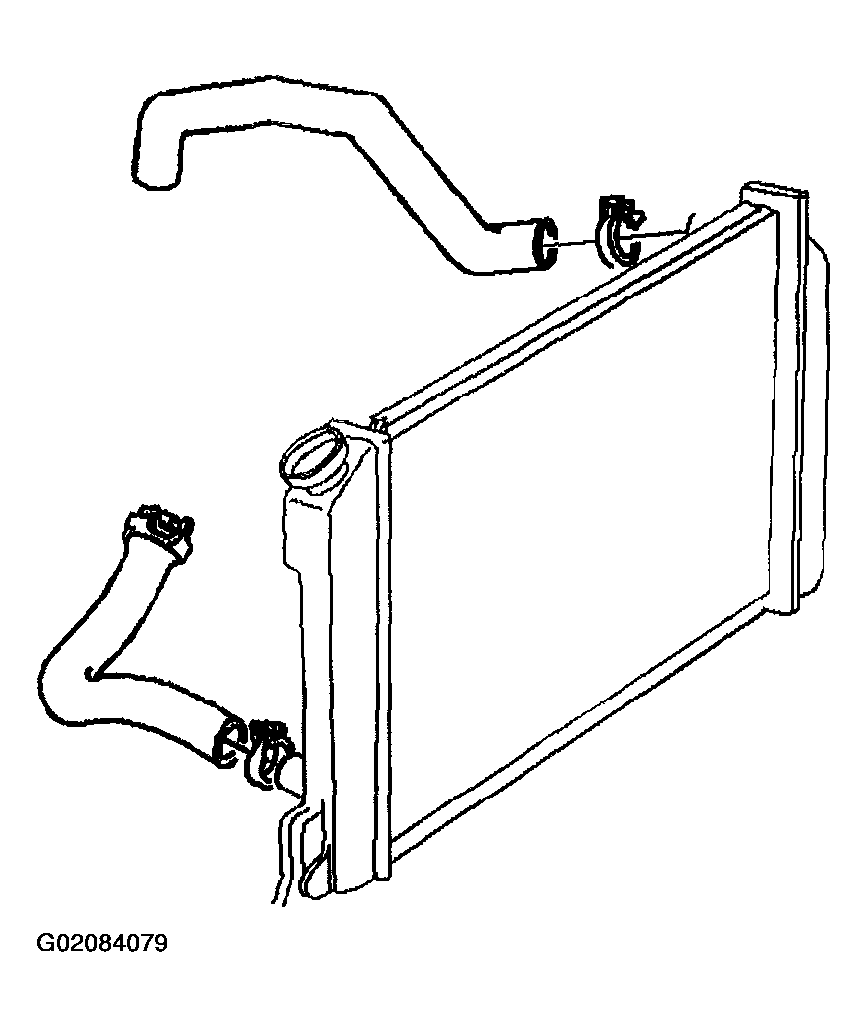
- Use the J 38185
in order to reposition the hose clamp from the radiator inlet hose.
- Remove the radiator inlet hose from the radiator.
- Raise and support the vehicle. Refer to JACKING AND LIFTING
in General Information.
- Remove the lower air deflector. Refer to RADIATOR AIR BAFFLE AND DEFLECTOR REPLACEMENT - LOWER
.
- Use the J 38185
in order to reposition the hose clamp from the radiator outlet hose.
- Remove the radiator outlet hose from the radiator.
- Lower the vehicle.
 Courtesy of GENERAL MOTORS CORP.
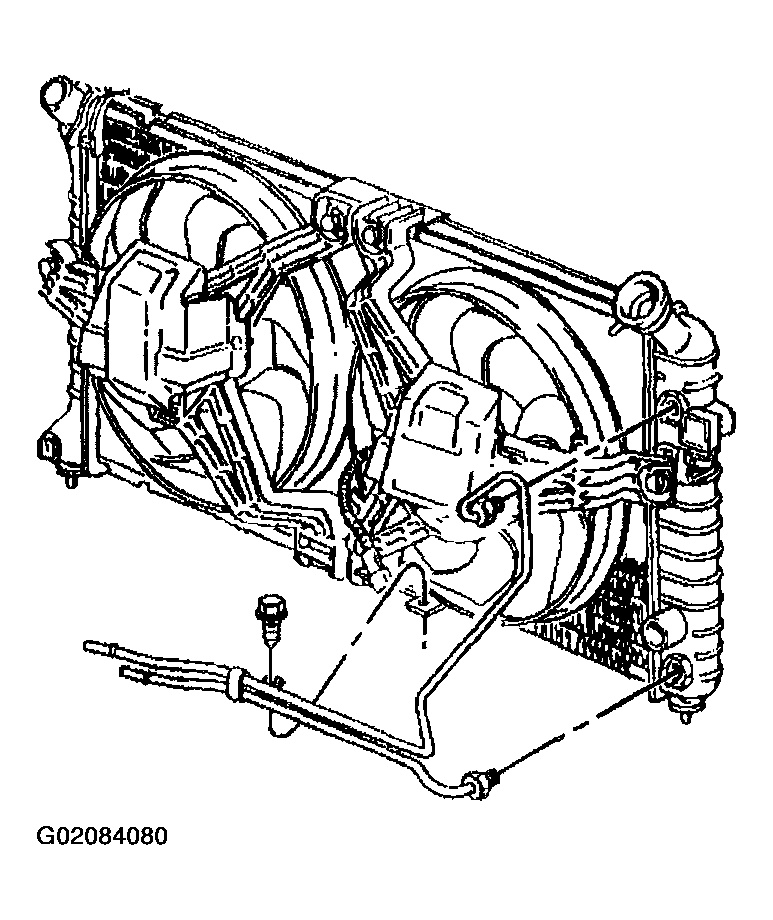
- Disconnect the transaxle oil cooler pipes from the radiator.
- Pull the plastic cap back from the quick connect fitting and down along the transaxle oil cooler pipe.
 Courtesy of GENERAL MOTORS CORP.
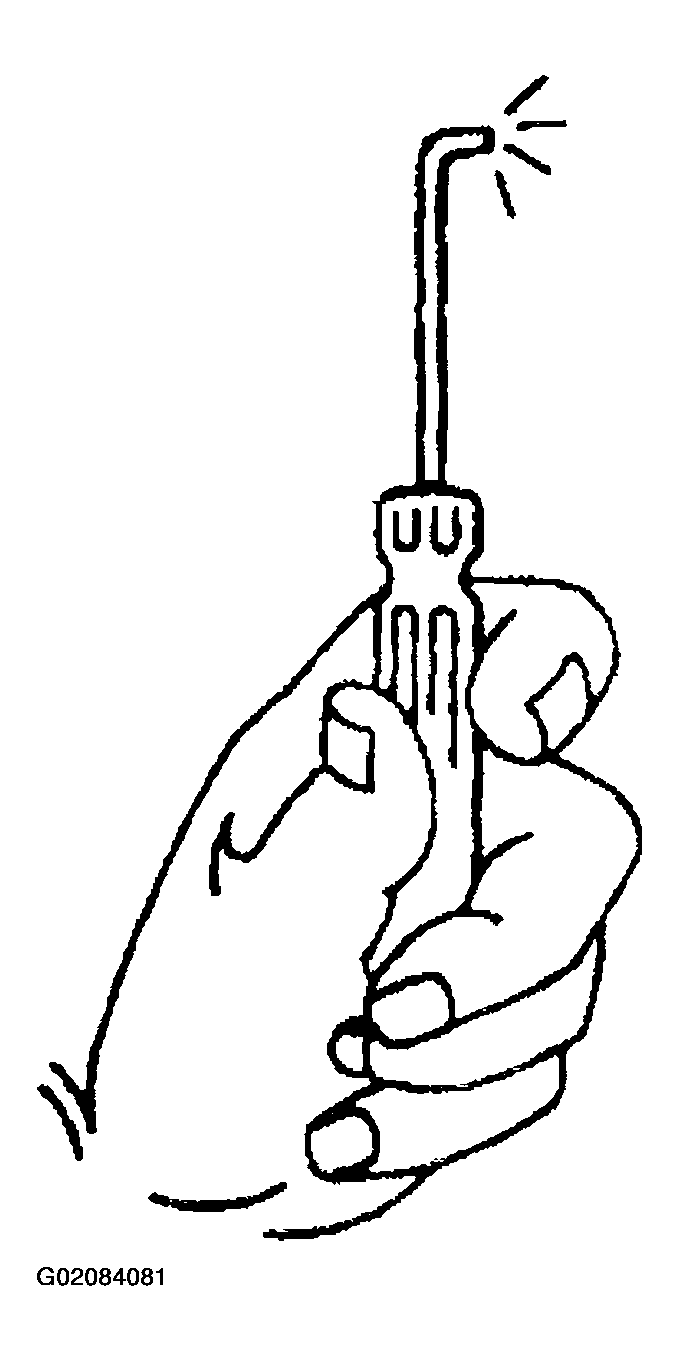
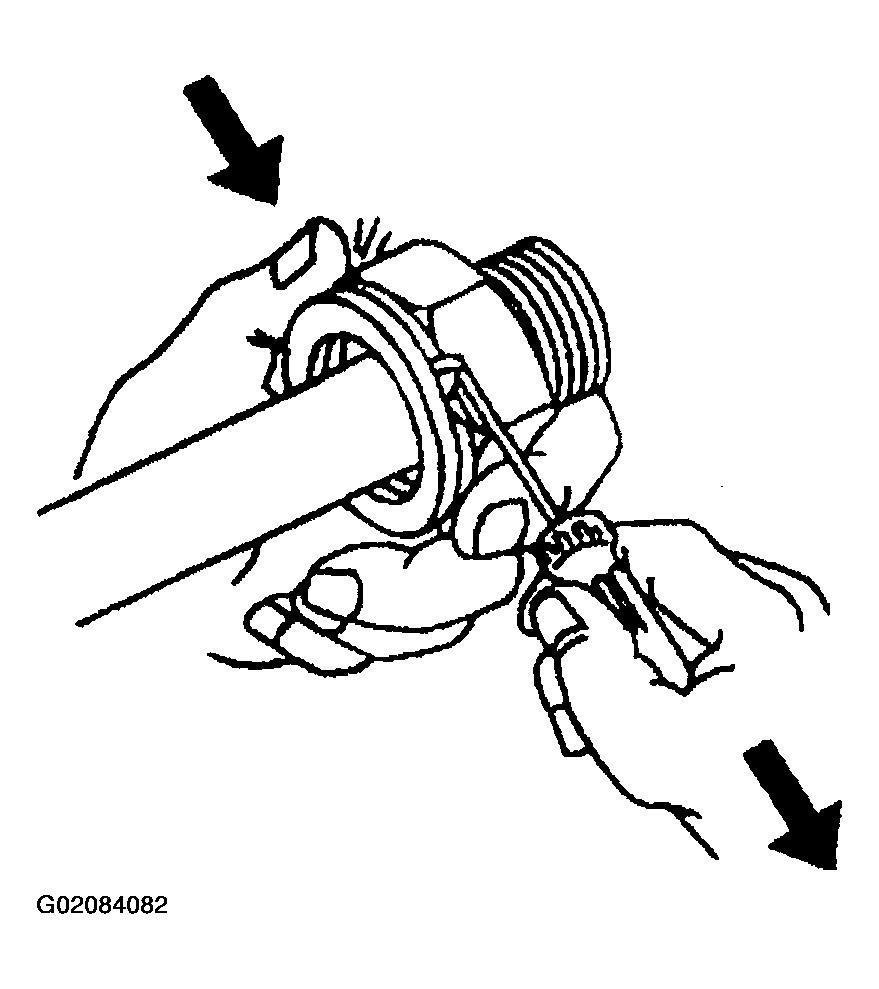
- Using a bent-tip screwdriver, pull on one of the open ends of the retaining ring in order to rotate the retaining ring around the quick connect fitting until the retaining ring is out of position and can be completely removed.
 Courtesy of GENERAL MOTORS CORP.
- Remove the retaining ring from the quick connect fitting.
- Discard the retaining ring.
 Courtesy of GENERAL MOTORS CORP.
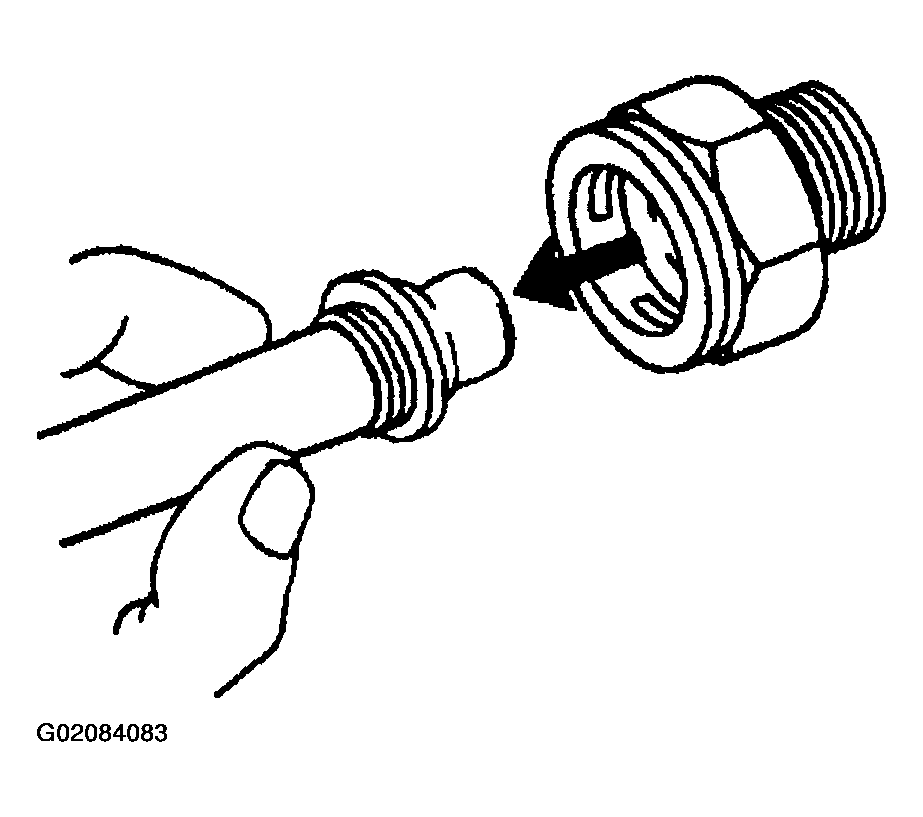
- Pull the transaxle oil cooler pipe straight out from the quick connect fitting.
- Lower the vehicle.
- Remove the radiator.
 Courtesy of GENERAL MOTORS CORP.