Ignition System: Distributor: Installation
- Ensure distributor "O" ring is in good condition. If crankshaft has been rotated after distributor was removed, go to next step. If crankshaft has not been rotated, go to step 5).
- Rotate crankshaft until cylinder No. 1 is at TDC on compression stroke. Check timing pointer on crankshaft damper to ensure TDC alignment. Position distributor rotor just ahead of terminal No. 1 on distributor cap. See SPECIFICATIONS - 3.0L
article in the ENGINE PERFORMANCE section for terminal identification.
- Install distributor and hold-down bolt. Connect distributor wiring. Start engine and warm to operating temperature. If engine will not start, distributor may be 180 degrees out of synch. Set crankshaft to TDC. Remove distributor cap and mark location of rotor. Remove distributor and rotate crankshaft one full turn (360 degrees).
- Disconnect coolant temperature sensor. Set ignition timing using a timing light. Refer to underhood label for ignition timing specification. Reconnect coolant temperature sensor.
- Insert distributor in engine with rotor pointing toward engine block. Ensure distributor drive engages properly with auxiliary shaft. Install hold-down clamp and bolt. Connect distributor wiring. Start engine and warm to operating temperature. Disconnect coolant temperature sensor. Set ignition timing using a timing light. Refer to underhood label for ignition timing specification. Reconnect coolant temperature sensor.
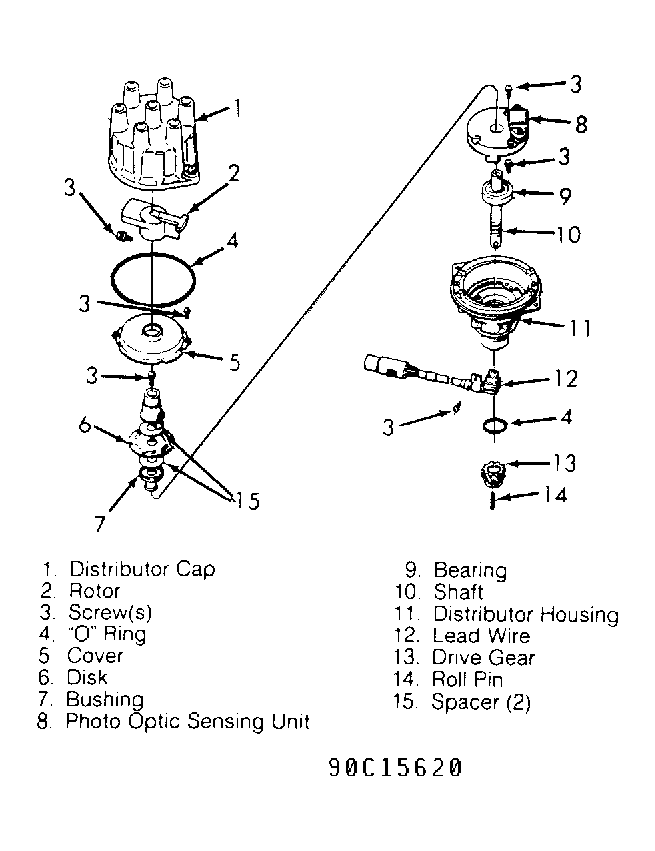 Courtesy of CHRYSLER CORP.