Carburetor - MIKUNI 2-Bbl: Overhaul: Disassembly
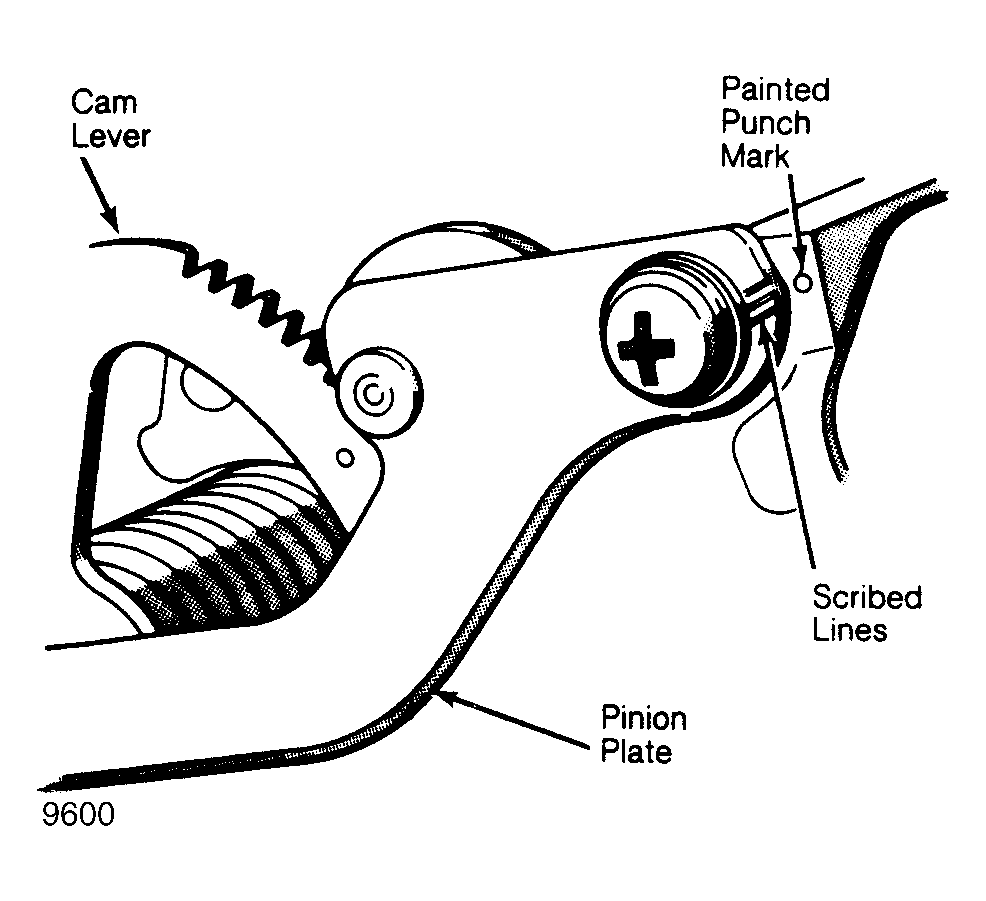
- Remove water hoses from choke assembly. Drill out staked portion or grind off heads of choke cover retaining screws. Using a small hammer and pointed punch, tap remaining choke cover screw counterclockwise to remove. Note position of scribe marks on choke pinion plate relative to punch mark. See Fig 1
.
- Remove "E" clip from throttle opener link, then remove screws and throttle opener. Disconnect fuel cut-off solenoid ground wire and remove solenoid. Disconnect throttle return and damper springs. Remove "E" clips and choke unloader link.
- Disconnect vacuum hose and vacuum chamber link. Remove screws and vacuum chamber. Disconnect throttle operating rod link. remove 6 air horn screws and lift air horn off carburetor body.
 Courtesy of CHRYSLER MOTORS.
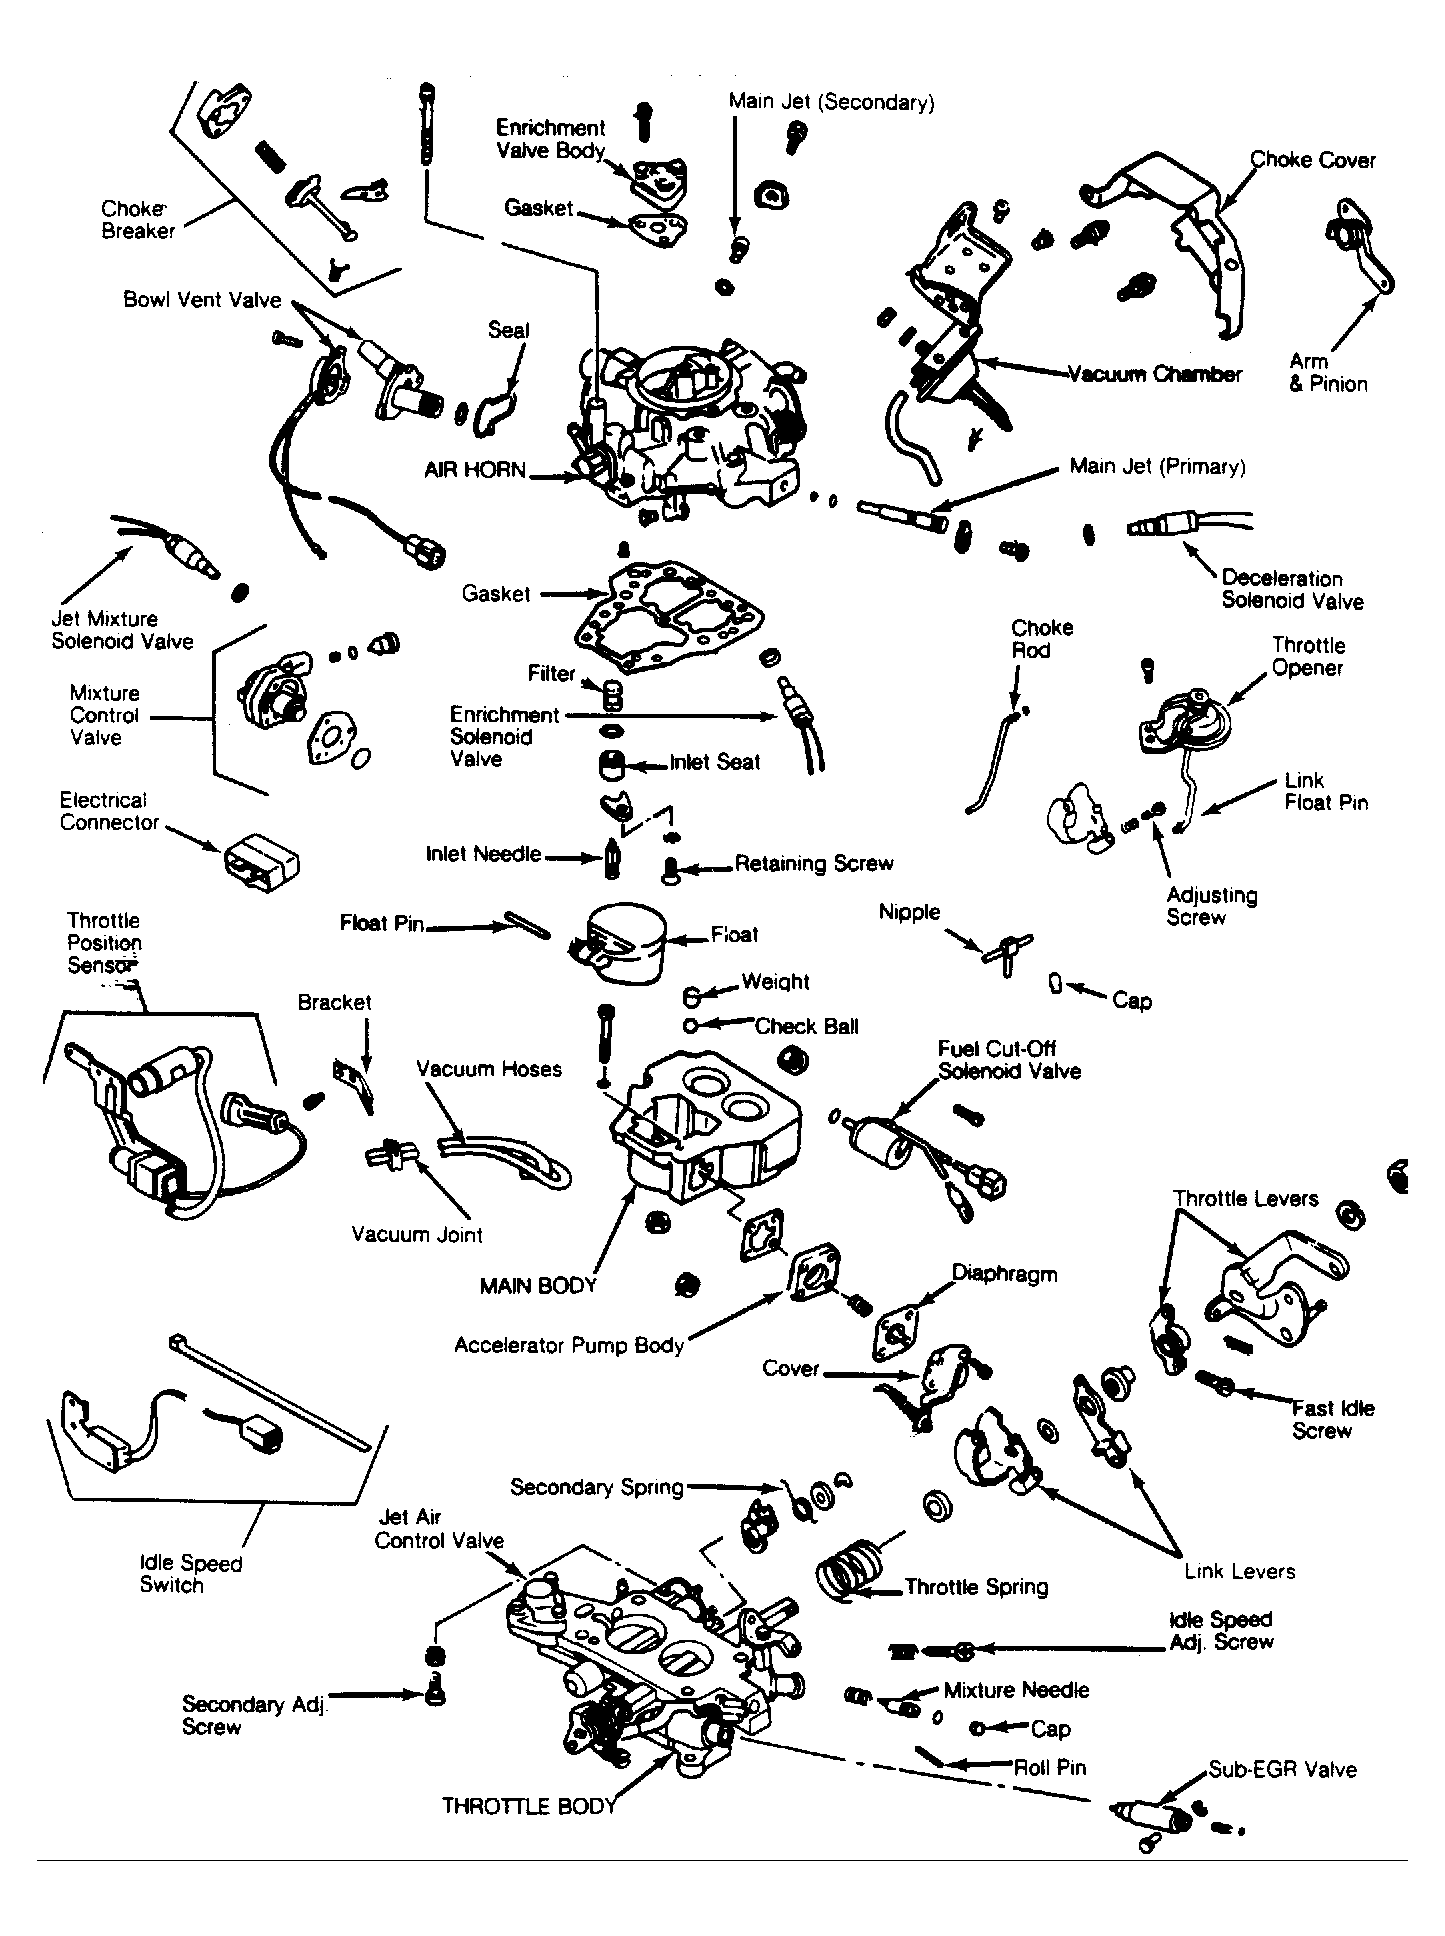
- Remove vacuum hose connector retaining screws (2), then remove hoses and connector. Slide float pivot pin out. Remove float and inlet needle. Remove and discard air horn gasket. Remove screw and retainer, and then remove needle seat and screen assembly. Be sure not to lose shim from under needle seat.
- Remove primary and secondary venturi retainers, venturi, and "O" rings. Mark each venturi for reassembly reference. Remove primary and secondary main jets from pedestals and note jet numbers for correct installation. Remove screws and pedestals.
- Remove bowl vent solenoid screws. Separate solenoid from owl vent and remove spring. Remove bowl vent, "O" ring, and seal rom air horn. Discard "O" ring and seal. On California and High ltitude models, remove 3 coasting air valve screws, cover, retainer leeve, spring, spring retainer, diaphragm and seal.
- On all models, remove 3 enrichment valve screws, valve cover, valve, gasket, and jet. Remove 2 air switching valve screws nd valve assembly. Take out spring retainer sleeve, spring, etainer, and diaphragm seal. Remove screw, lock plate, and primary et set. Repeat procedure for secondary jet set.
- From top of air horn, remove primary and secondary air bleed jets. Note locations of jets for proper installation. Invert air horn to remove pump weight, check ball, and hex nut. Remove 4 accelerator pump screws, cover, diaphragm, spring, pump body, check ball, and gasket.
- On California and High Altitude models, remove 3 jet air control valve screws, cover, spring, spring retainer, and diaphragm. remove "E" clip from sub-EGR valve lever. Carefully slide pin from sub-EGR valve. Spring tension on lever is caused by steel ball and spring in sub-EGR valve. Use care when removing pin so as not to lose spring and check ball. Remove valve and boot seal.
 Courtesy of CHRYSLER MOTORS.