Diagnostic Procedures
- If alternative fuels engine controls diagnostic system check has been performed, go to next step. If alternative fuels engine controls diagnostic system check has not been performed, go to POWERTRAIN DIAGNOSTIC SYSTEM CHECK (CNG) under SELF-DIAGNOSTIC SYSTEM in SELF-DIAGNOSTICS - 2.2L & 2.4L "J" & "N" BODIES - GASOLINE & CNG article. After performing alternative fuels engine controls diagnostic system check, go to next step.
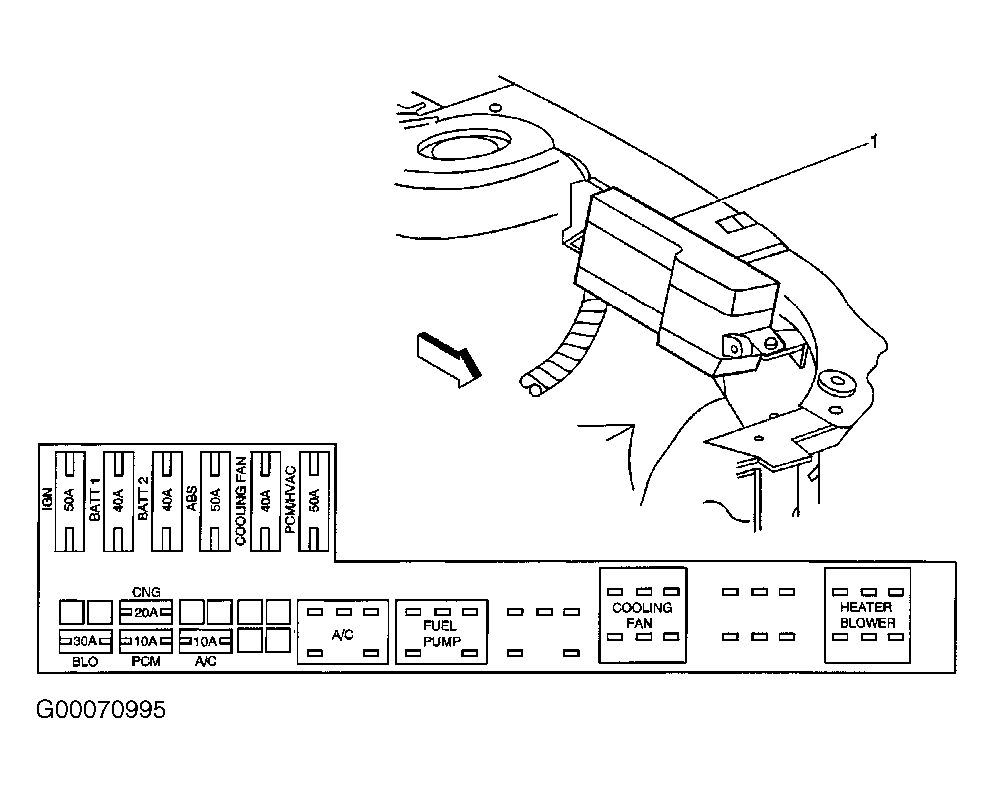
- Ensure both alternate fuel and gasoline fuel systems have 1/4 tank of fuel. Add fuel to ensure this criteria is reached. If CNG 20-amp fuse has been removed, replace fuse in underhood fuse block. See Fig 1. Crank and attempt to start engine. If engine starts and runs at all, go to step 4. If engine does not start and run at all, go to next step.
- Turn ignition off and wait 30 seconds. Disconnect Black fuel pump connector C019 located at top left of engine (26). See Figure. Connect test light between ground and relay side of fuel pump connector C019 terminal "A" (Gray wire). Turn ignition on. If test light illuminates for 2 seconds and turns off, go to step 14. If test light does not illuminate for 2 seconds or does not turn off, go to step 13.
- If vehicle operates on CNG but not gasoline, go to next step. If does not operate on CNG or gasoline, or only operates on gasoline, go to POWERTRAIN DIAGNOSTIC SYSTEM CHECK (CNG) under SELF-DIAGNOSTIC SYSTEM in SELF-DIAGNOSTICS - 2.2L & 2.4L "J" & "N" BODIES - GASOLINE & CNG article.
- Turn ignition off and wait 30 seconds. Locate AF fuel pump relay. See Figure. Using a test light connected to ground, backprobe AF fuel pump relay connector terminal No. 30 (Gray wire). Turn ignition on. If test light illuminates for 2 seconds and turns off, go to next step. If test light does not illuminate for 2 seconds or does not turn off, go to step 16.
- Start engine and allow to idle. Ensure vehicle is operating on CNG. Using a test light connected to ground, backprobe AF fuel pump relay connector terminal 87A (Gray/Black wire). If test light illuminates, go to step 8. If test light does not illuminate, go to next step.
- Using scan tool, attempt to communicate with AF ECU. With test light still connected, command AF fuel pump relay on and off. If test light illuminates when AF fuel pump relay is commanded off, go to step 10. If test light does not illuminate when AF fuel pump relay is commanded off, go to step 17.
- Ensure engine is idling. Using a test light connected to battery voltage, backprobe AF fuel pump relay connector terminal No. 85 (Black wire). If test light illuminates, go to next step. If test light does not illuminate, go to step 18.
- Ensure engine is idling. Using a test light connected to ground, backprobe AF fuel pump relay connector terminal No. 86 (Brown wire). If test light illuminates, go to step 21. If test light does not illuminate, go to step 19.
- Ensure ignition is off. Remove CNG fuse (20-amp) from underhood fuse block to force a switchover to gasoline operation. Crank engine. If engine starts and runs on gasoline, go to step 23. If engine does not start and run on gasoline, go to next step.
- Turn ignition off and wait 30 seconds. Disconnect Black fuel pump connector C019 located at top left of engine (26). See Figure. Connect jumper wire between underhood relay side of AF fuel pump connector terminals "A" (Gray wire) and "B" (Gray wire). Crank engine. If engine starts and runs on gasoline, go to step 20. If engine does not start and run on gasoline, go to next step.
- A failure exists in gasoline fuel pump circuit between gasoline fuel pump and connector C019 or poor ground connection for fuel pump. Diagnose and repair as necessary. After repairs, go to step 23.
- A failure exists in gasoline fuel pump relay circuit. If a blown gasoline fuel pump fuse is diagnosed, check for short to ground in CNG harness. Diagnose and repair as necessary. After repairs, go to step 23.
- Monitor test light while cranking engine. If test light illuminates while engine is cranking, go to next step. If test light does not illuminate while engine is cranking, go to NO START - ENGINE CRANKS OKAY (2.2L - CAVALIER & SUNFIRE) under NO-START DIAGNOSIS in BASIC DIAGNOSTIC PROCEDURES - CARS - EXCEPT METRO & PRIZM article.
- Check for open or poor connections in Gray wire between connector C019 terminal "A" and splice S004. Repair as necessary. After repairs, go to step 23. If circuit is okay, go to POWERTRAIN DIAGNOSTIC SYSTEM CHECK (CNG) under SELF-DIAGNOSTIC SYSTEM in SELF-DIAGNOSTICS - 2.2L & 2.4L "J" & "N" BODIES - GASOLINE & CNG article.
- Repair open in Gray wire between AF fuel pump relay connector terminal No. 30 and splice S004. After repairs, go to step 23.
- Check for poor connections at AF fuel pump relay. Check for short to voltage in Brown wire between AF fuel pump relay connector terminal No. 86 and AF ECU Blue connector C001 terminal No. 30. See Figure. Repair as necessary. After repairs, go to step 23. If circuit and connections are okay, go to step 21.
- Repair open in Black wire between AF fuel pump relay connector terminal No. 85 and splice S006 located approximately 18" (40 cm) from ground connection on left side of engine. After repairs, go to step 23.
- Check for poor connections at AF fuel pump relay. Using DVOM, check continuity of Brown wire between AF fuel pump relay connector terminal No. 86 and AF ECU Blue connector C001 terminal No. 30. See Figure. Also check for short to ground in Brown wire. Repair as necessary. After repairs, go to step 23. If circuit and connections are okay, go to step 22.
- Repair open in Gray/Black wire between AF fuel pump relay connector terminal 87A and connector C019 terminal "B". After repairs, go to step 23.
- Replace AF fuel pump relay. After repairs, go to step 23.
- Replace AF ECU. See ALTERNATE FUEL ENGINE CONTROL UNIT under COMPUTERIZED ENGINE CONTROLS in REMOVAL, OVERHAUL & INSTALLATION - CARS article. Program (flash) AF ECU with correct vehicle software and calibration. See ALTERNATE FUEL ENGINE CONTROL UNIT under PROGRAMMING in SELF-DIAGNOSTICS - 2.2L & 2.4L "J" & "N" BODIES - GASOLINE & CNG article. After performing repairs and procedures, go to next step.
- Turn ignition off. Remove all test equipment. Reconnect any disconnected components and/or connectors. Using scan tool, clear DTCs from AF ECU and PCM. Turn ignition off for 30 seconds. Start engine and allow to idle. Start engine and operate vehicle noting operation of Fuel Indicator Light (FIL) and Malfunction Indicator Light (MIL). Observe vehicle performance and driveability in gasoline and alternate fuel modes. If FIL or MIL do not illuminate and vehicle performs normally, system is okay at this time. If FIL or MIL illuminate or vehicle does not performs normally, go to POWERTRAIN DIAGNOSTIC SYSTEM CHECK (CNG) under SELF-DIAGNOSTIC SYSTEM in SELF-DIAGNOSTICS - 2.2L & 2.4L "J" & "N" BODIES - GASOLINE & CNG article.
 Courtesy of GENERAL MOTORS CORP.