Connect test equipment to starter. See Fig 1. Close switch and compare RPM, amperage and voltage readings with specifications.
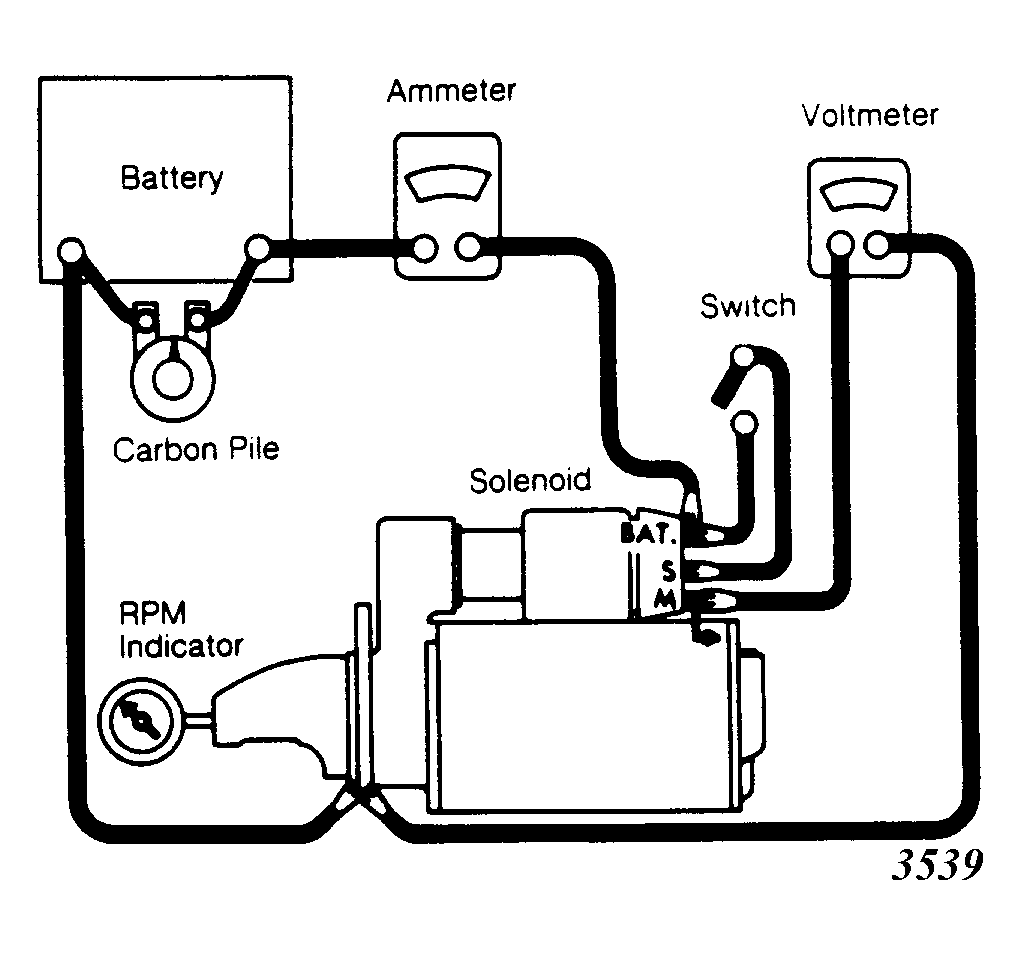 Courtesy of GENERAL MOTORS CORP.
 DELCO-REMY STARTER NO-LOAD TEST SPECIFICATIONS
| Part Number |
Amps @ 10 Volts |
RPM |
| 199548 |
50-75 |
6000-11,900 |
| 1998579 |
70-110 |
6500-10,700 |
| 1998580 |
70-110 |
6500-10,700 |
| 1998591 |
70-110 |
6500-10,700 |
| 10455004 |
50-75 |
6000-11,900 |
| 10455006 |
45-74 |
8600-12,900 |
| 10455007 |
50-75 |
6000-11,900 |
| 10455010 |
50-75 |
6000-11,900 |
| 10455016 |
50-75 |
6000-11,900 |
| 10455019 |
50-75 |
6000-11,900 |
| 10455021 |
55-85 |
6000-12,000 |
| 10455022 |
55-85 |
6000-12,000 |
| 10455024 |
45-74 |
8600-12,900 |
| 10455044 |
52-76 |
6000-12,000 |
| 10455702 |
45-90 |
3500-5000 |
| 10455704 |
45-90 |
3500-5000 |
CAUTION:
DO NOT
apply more voltage than specified. Excessive voltage may cause armature to throw windings due to excessive speed.