- Remove the drain plug and filler plug.
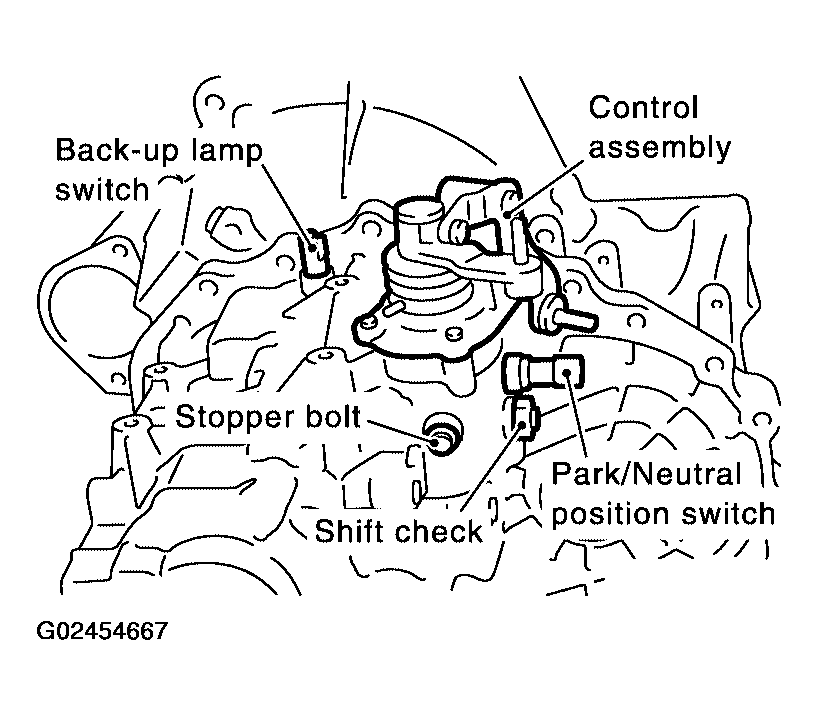
- Remove the park/neutral position switch and back-up lamp switch.
- After removing the shift check and stopper bolt, remove the control assembly.
 Courtesy of NISSAN MOTOR CO., U.S.A.
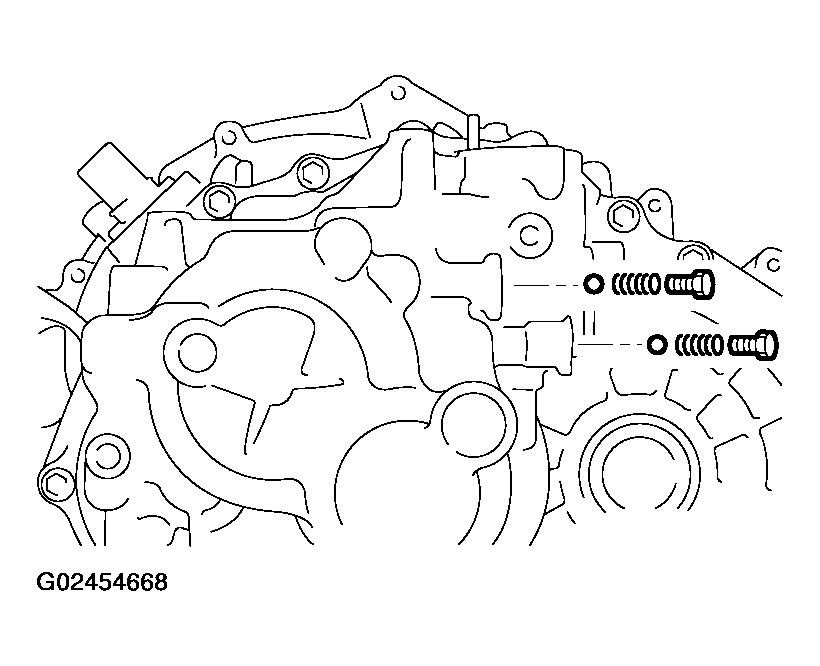
- Remove the 2 check ball plugs, 2 check springs, and 2 check balls as shown. Discard the check ball plug.
CAUTION:
Check ball plugs are not reusable.
 Courtesy of NISSAN MOTOR CO., U.S.A.
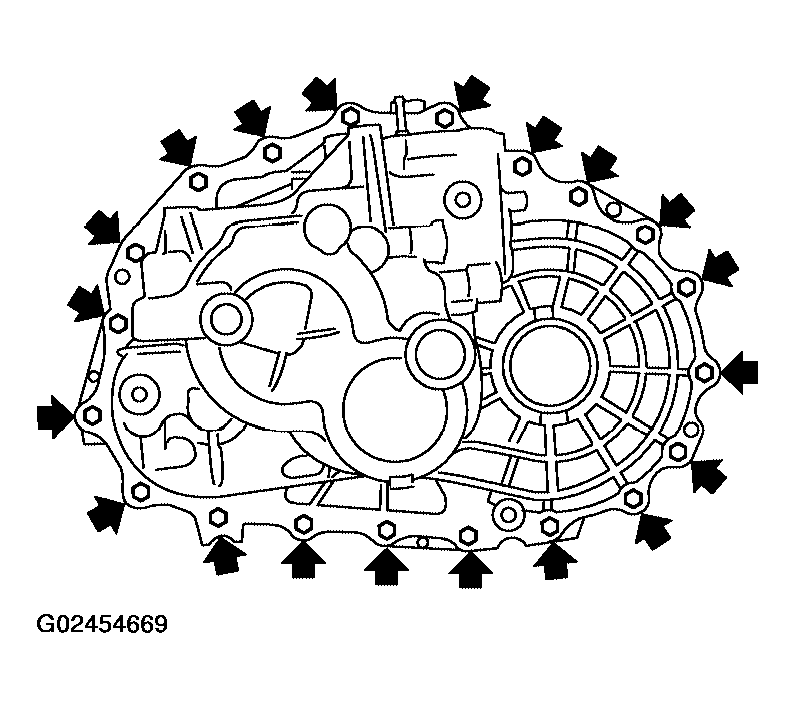
- Remove the transaxle case bolts as shown.
 Courtesy of NISSAN MOTOR CO., U.S.A.
- Remove the bore plug.
CAUTION:
Be careful not to damage transaxle case.
- While spreading the snap ring of the mainshaft rear bearing located at bore plug hole, remove the transaxle case.
- Remove the oil gutter and baffle plate.
- Remove the snap ring, mainshaft rear bearing adjusting shim, and input shaft rear bearing adjusting shim from the transaxle case.
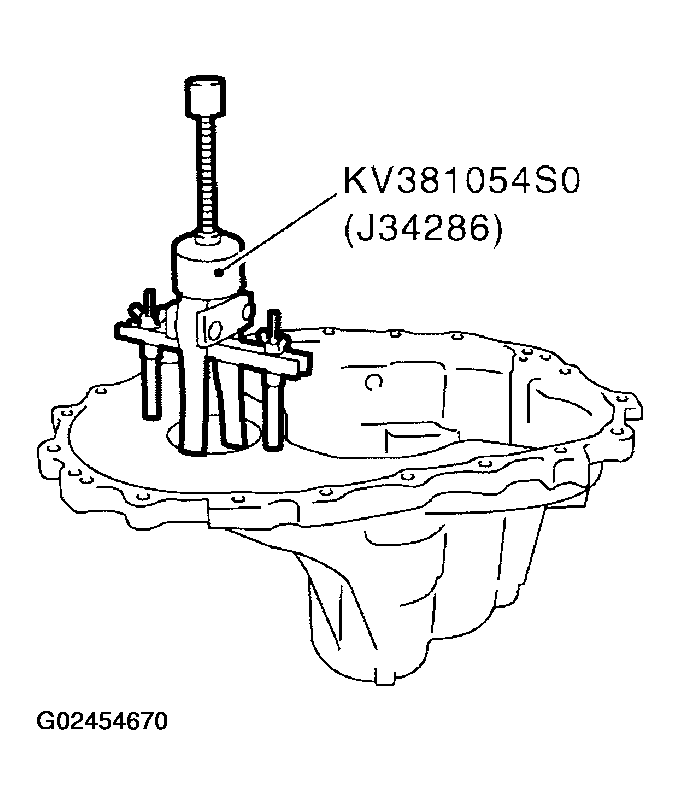
- Remove the differential side bearing outer race (transaxle case side) using Tool as shown, and then remove the adjusting shim.
 Courtesy of NISSAN MOTOR CO., U.S.A.
- Remove the welch plug with a suitable punch and hammer as shown.
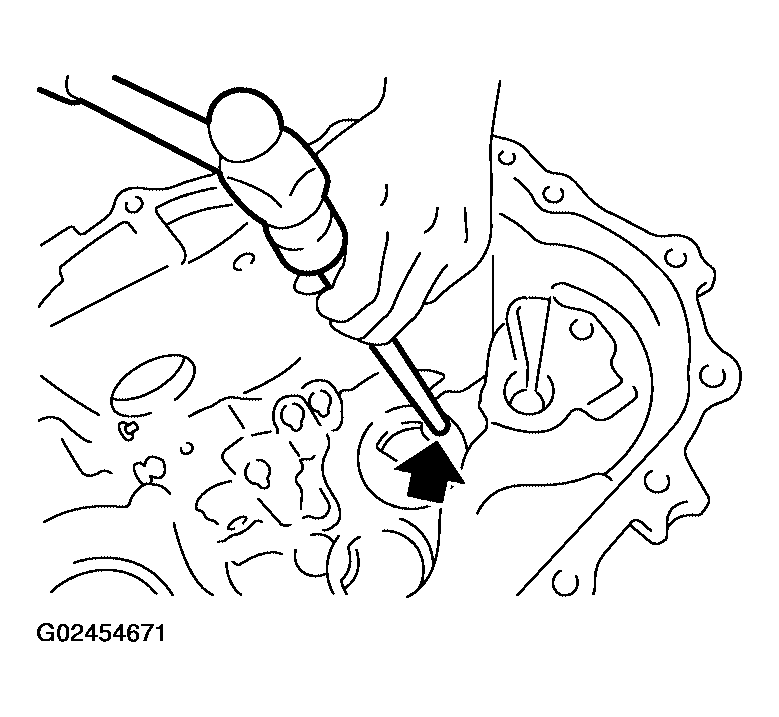 Courtesy of NISSAN MOTOR CO., U.S.A.
- Remove the differential oil seal with a suitable tool as shown.
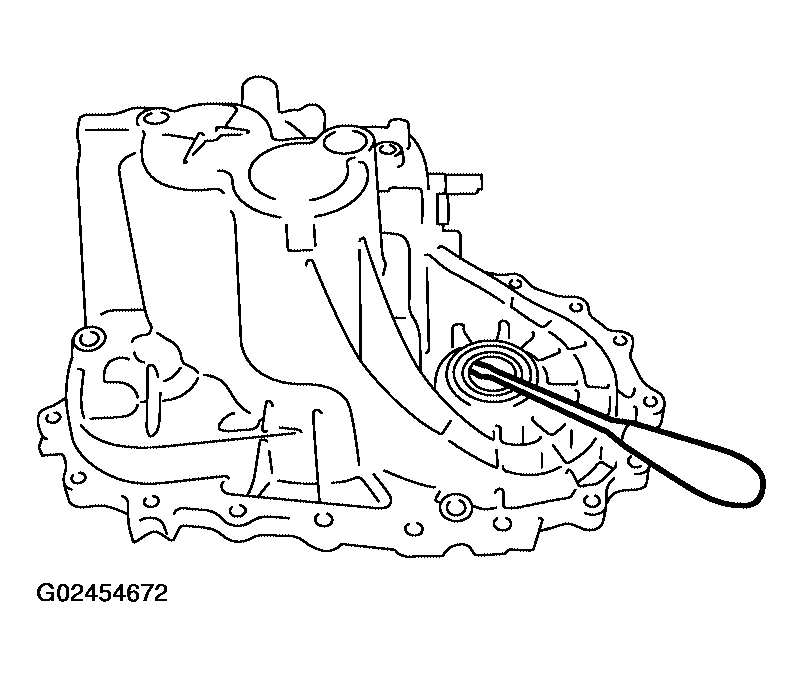 Courtesy of NISSAN MOTOR CO., U.S.A.
- Remove the magnet from the clutch housing.
- Remove the reverse check ball plug, reverse check spring, reverse shift check sleeve, and check ball. Discard the check ball plug.
CAUTION:
- Do not reuse the check ball plug.
- Do not drop the check ball.
- With the shift lever in 5th position, remove the bracket bolts from the reverse lever assembly as shown. Lift the reverse lever assembly to remove.
CAUTION:
Retain the shifter cap for installation.
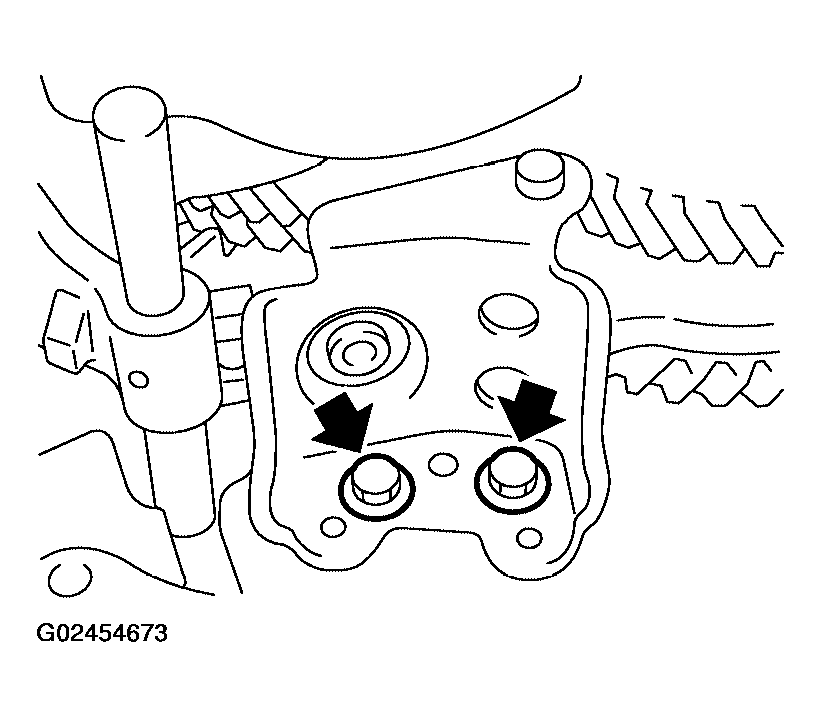 Courtesy of NISSAN MOTOR CO., U.S.A.
- Pull out the reverse fork rod then remove the reverse shift fork.
- Remove the retaining pin of the reverse bracket.
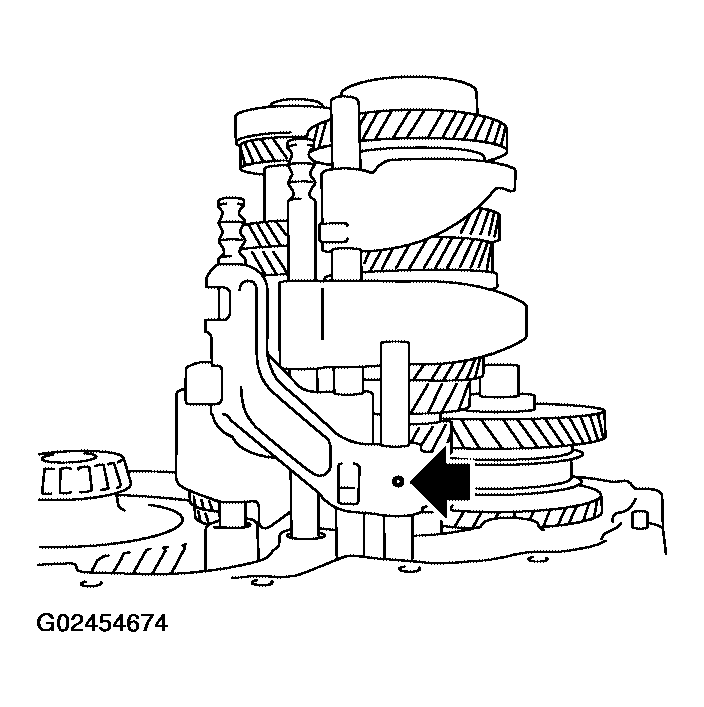 Courtesy of NISSAN MOTOR CO., U.S.A.
- Pull out the reverse lever and the reverse bracket fork rod.
- Remove the two check balls and the interlock pin.
- Shift the 3rd-4th fork rod to the 3rd position. Remove the retaining pin of the 5th-6th shift fork using a pin punch.
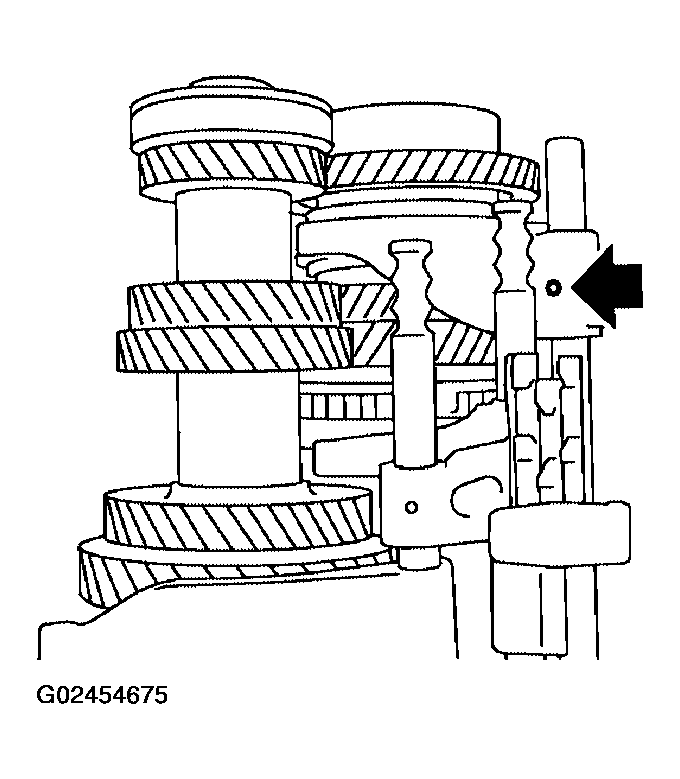 Courtesy of NISSAN MOTOR CO., U.S.A.
- Remove the stopper rings for the 5th-6th bracket.
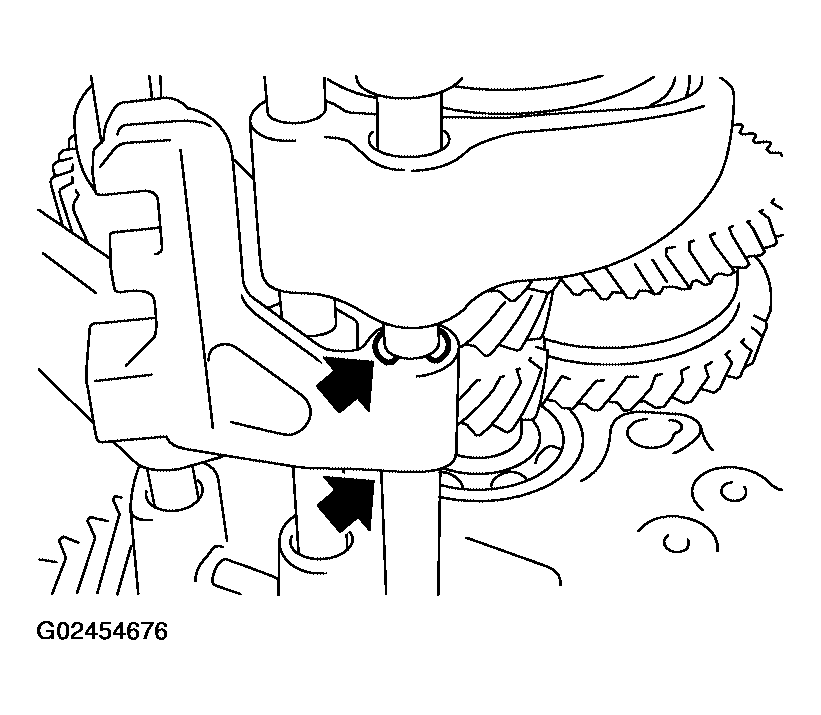 Courtesy of NISSAN MOTOR CO., U.S.A.
- Pull out the 5th-6th fork rod and remove the 5th-6th shift fork and the 5th- 6th bracket.
- Remove the check balls (2 pieces) and interlock pin.
- Remove the retaining pin of 3rd-4th bracket using pin punch.
- Remove the stopper rings for 3rd-4th shift fork.
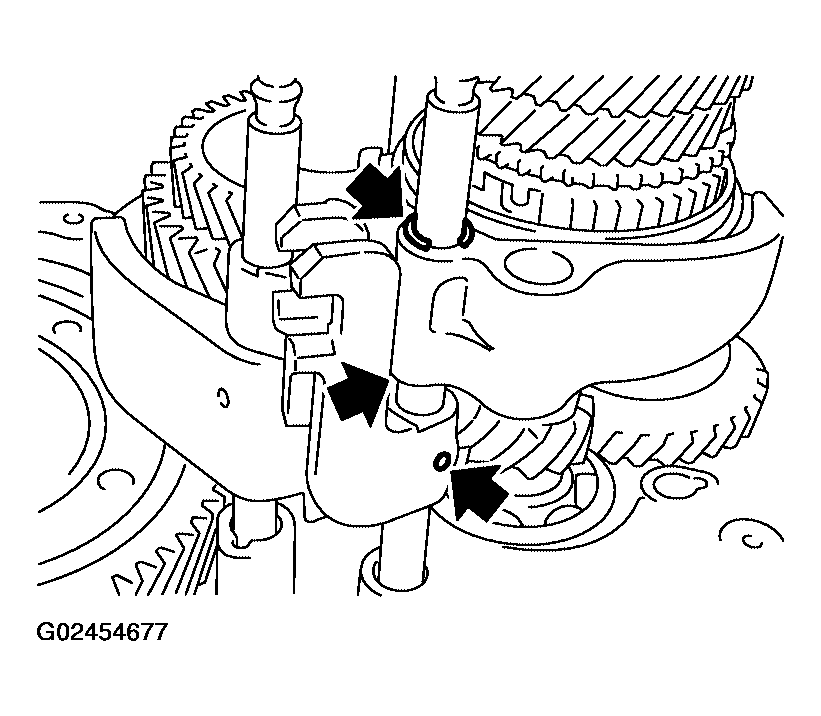 Courtesy of NISSAN MOTOR CO., U.S.A.
- Pull out the 3rd-4th fork rod and remove 3rd-4th shift fork and bracket.
- Remove the shift check sleeve from the clutch housing.
- Remove the retaining pin of 1st-2nd shift fork using a suitable pin punch.
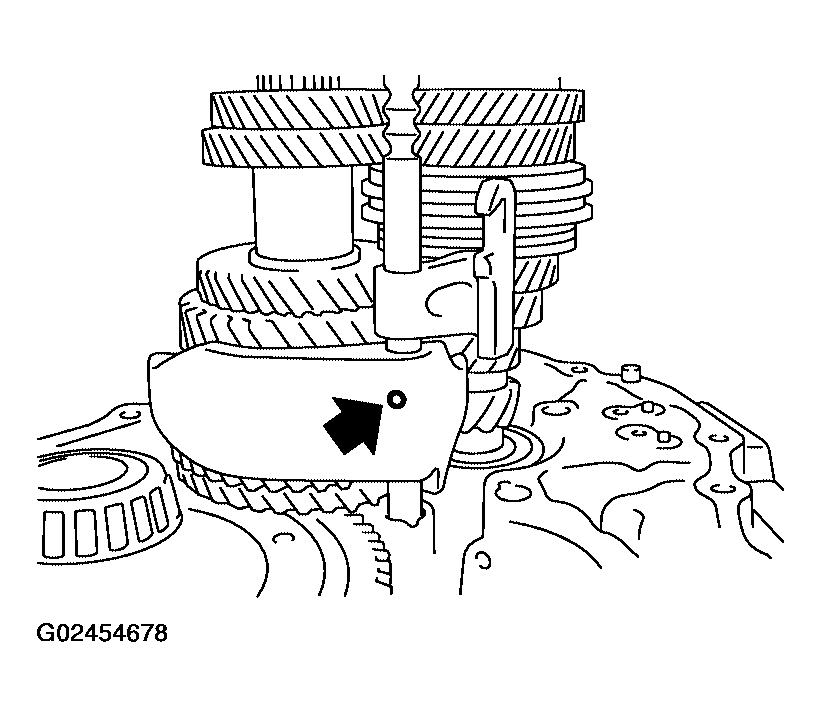 Courtesy of NISSAN MOTOR CO., U.S.A.
- Pull out the 1st-2nd fork rod with bracket.
- Remove the 1st-2nd shift fork.
- Remove the retaining pin of 1st-2nd bracket using a suitable pin punch and separate the fork rod and bracket.
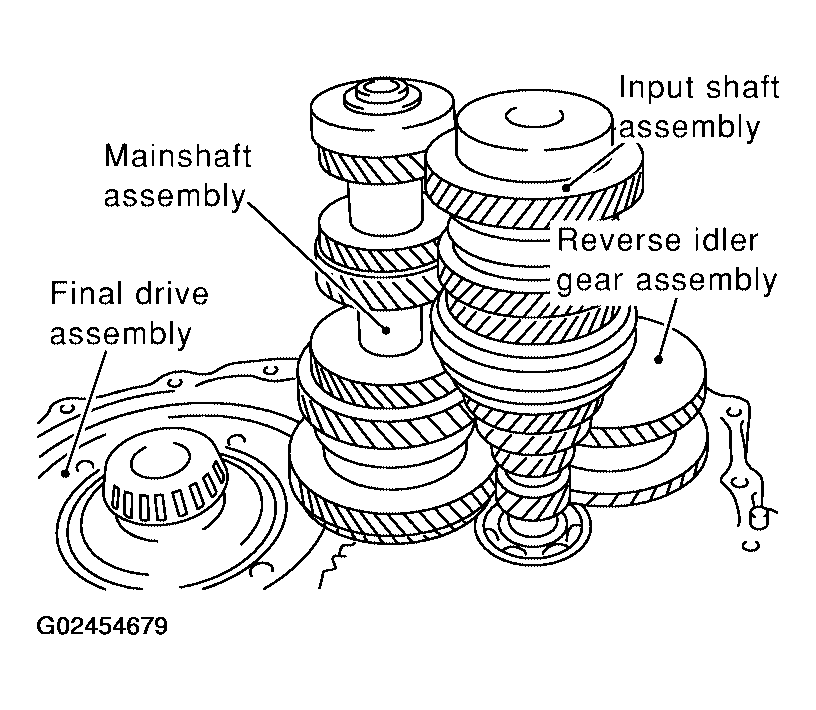
- Remove the gear components from the clutch housing.
- While tapping the input shaft with a plastic hammer, remove the input shaft assembly, mainshaft assembly, and reverse idler gear assembly as a set.
CAUTION:
Always withdraw the mainshaft straight out. Failure to do so can damage the resin oil channel on the clutch housing side.
- Remove the final drive assembly.
 Courtesy of NISSAN MOTOR CO., U.S.A.
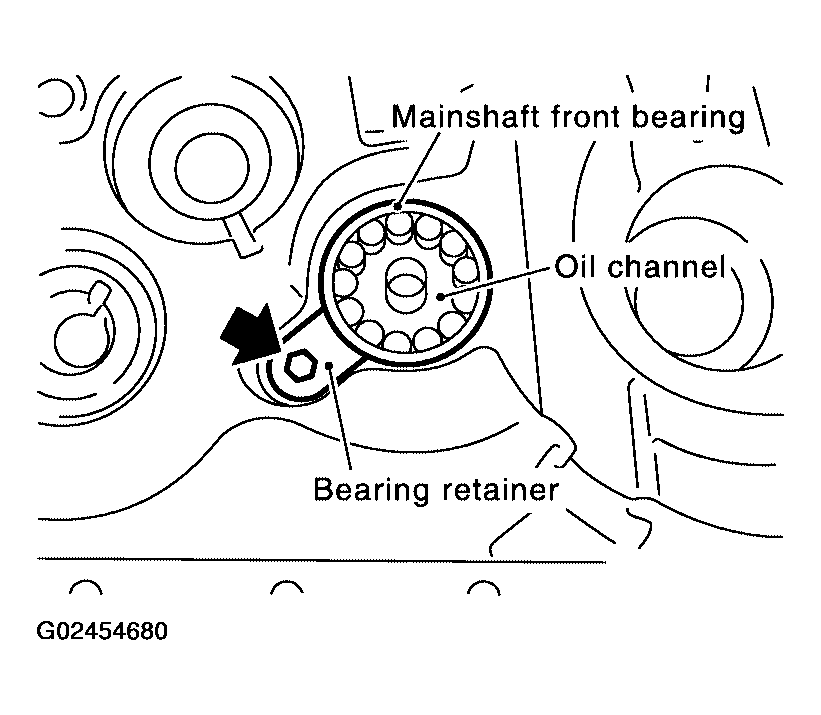
- Remove the bearing retainer and then the mainshaft front bearing as shown.
- Remove the oil channel on the mainshaft side.
 Courtesy of NISSAN MOTOR CO., U.S.A.
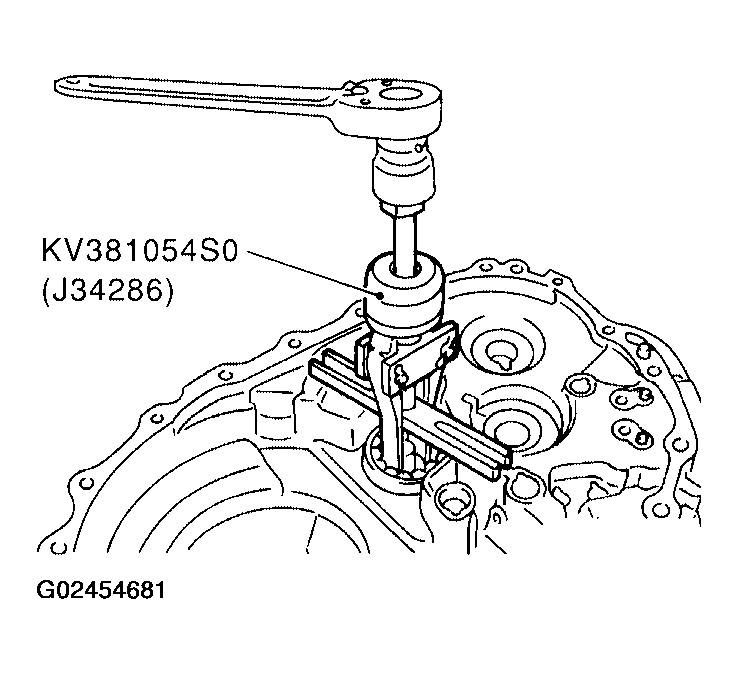
- Remove the differential oil seal (clutch housing side) using Tool as shown.
 Courtesy of NISSAN MOTOR CO., U.S.A.
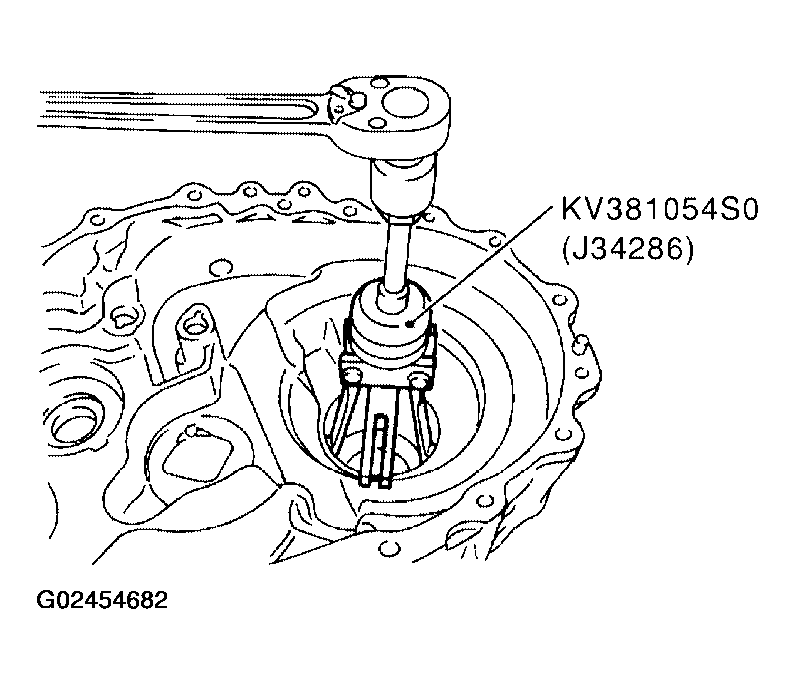
- Remove the differential side bearing outer race (clutch housing side) using Tool as shown.
 Courtesy of NISSAN MOTOR CO., U.S.A.
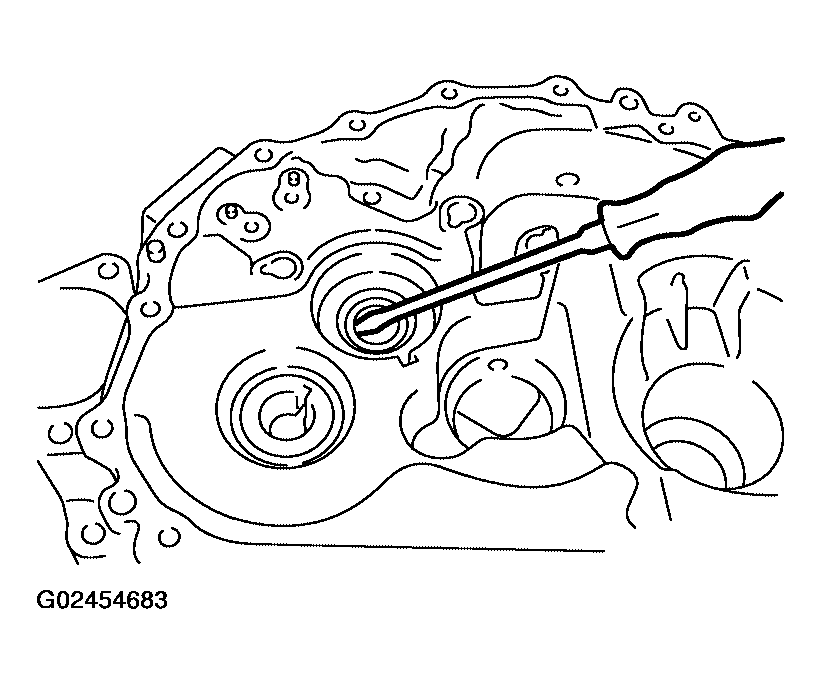
- Remove the input shaft oil seal using a suitable tool as shown.
CAUTION:
Do not damage the clutch housing sealing surface.
 Courtesy of NISSAN MOTOR CO., U.S.A.